1. Introduction
This manual provides detailed instructions for the installation, operation, and maintenance of your ASRock B760M Steel Legend WiFi Micro ATX Motherboard. Please read this manual thoroughly before beginning installation to ensure proper setup and functionality. The ASRock B760M Steel Legend WiFi motherboard supports 13th and 12th Gen Intel Core Processors (LGA1700) and DDR5 memory, offering robust performance and connectivity for personal computer systems.
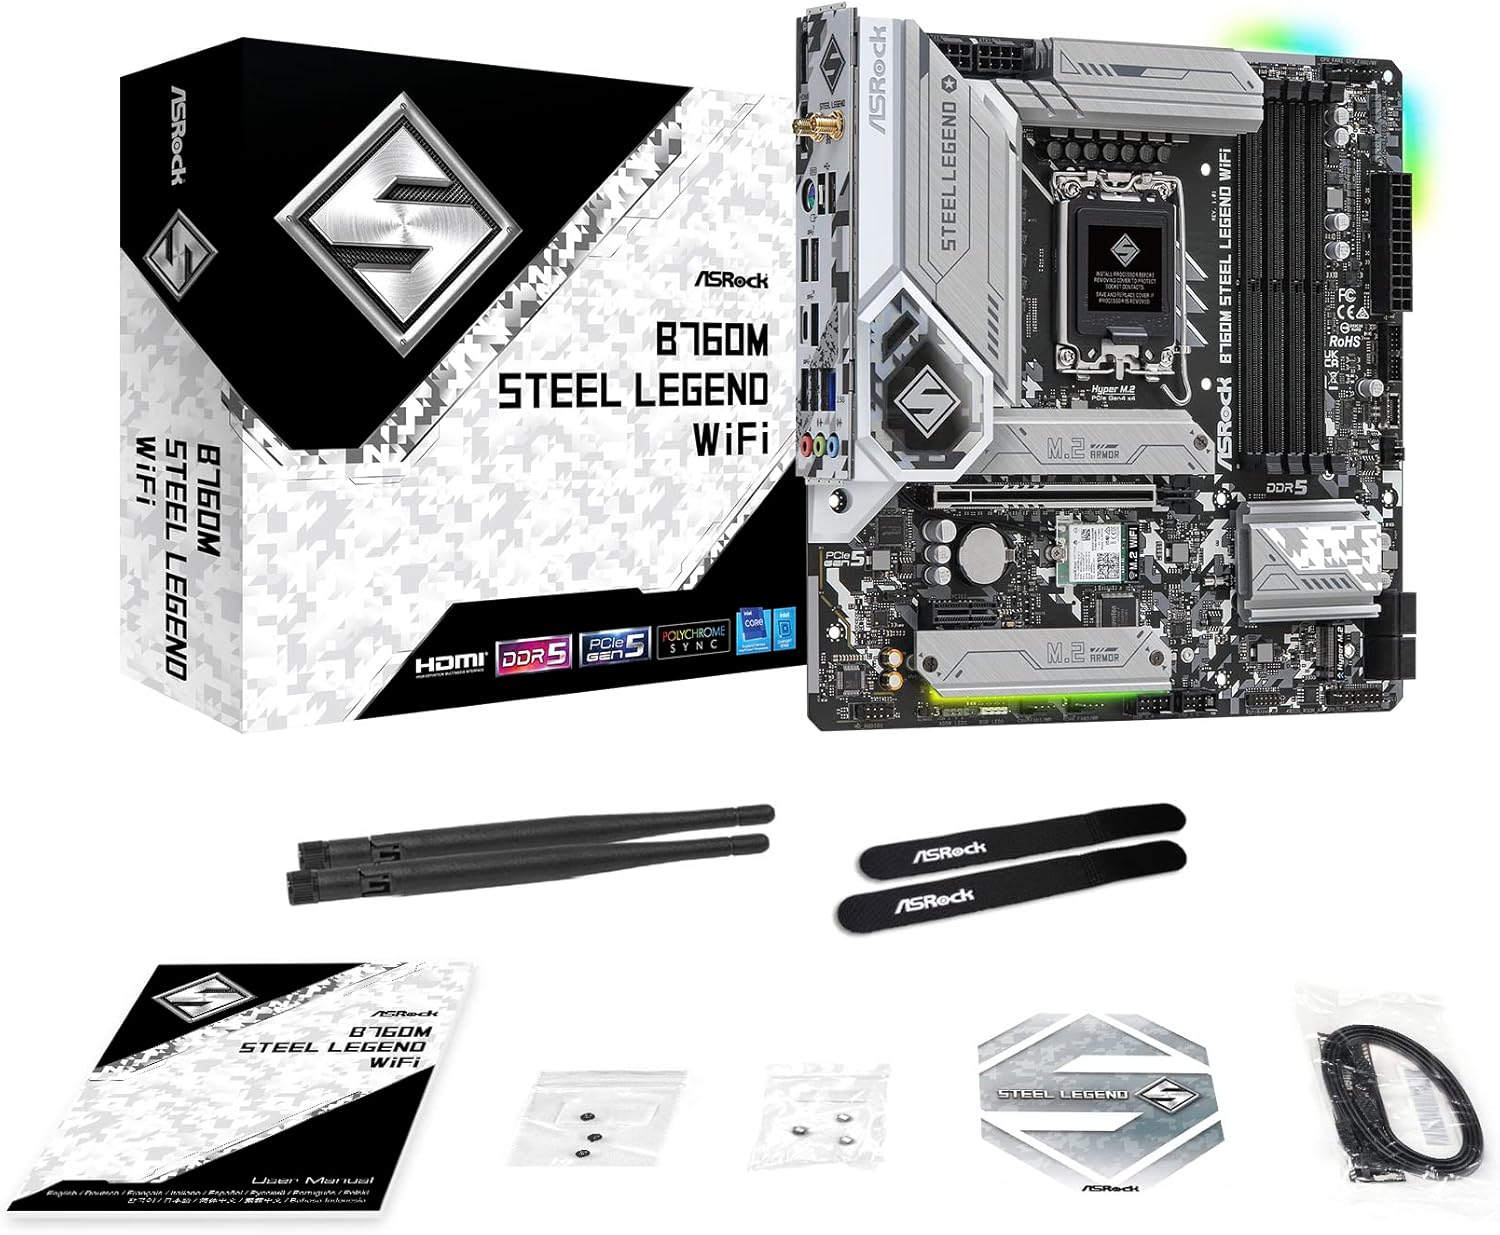
2. Package Contents
Before installation, please verify that all components listed below are present in your package. If any items are missing or damaged, contact your retailer.
- ASRock B760M Steel Legend WiFi Motherboard
- WiFi Antennas (2x)
- SATA Data Cables
- M.2 Screws and Standoffs
- User Manual and Support Documentation
3. Physical Overview and Dimensions
The ASRock B760M Steel Legend WiFi is a Micro ATX form factor motherboard, designed for compact yet powerful system builds. It features a pre-installed I/O shield for ease of installation and enhanced protection.


4. Setup and Installation
Follow these steps for proper installation of your motherboard and components.
4.1 Component Layout

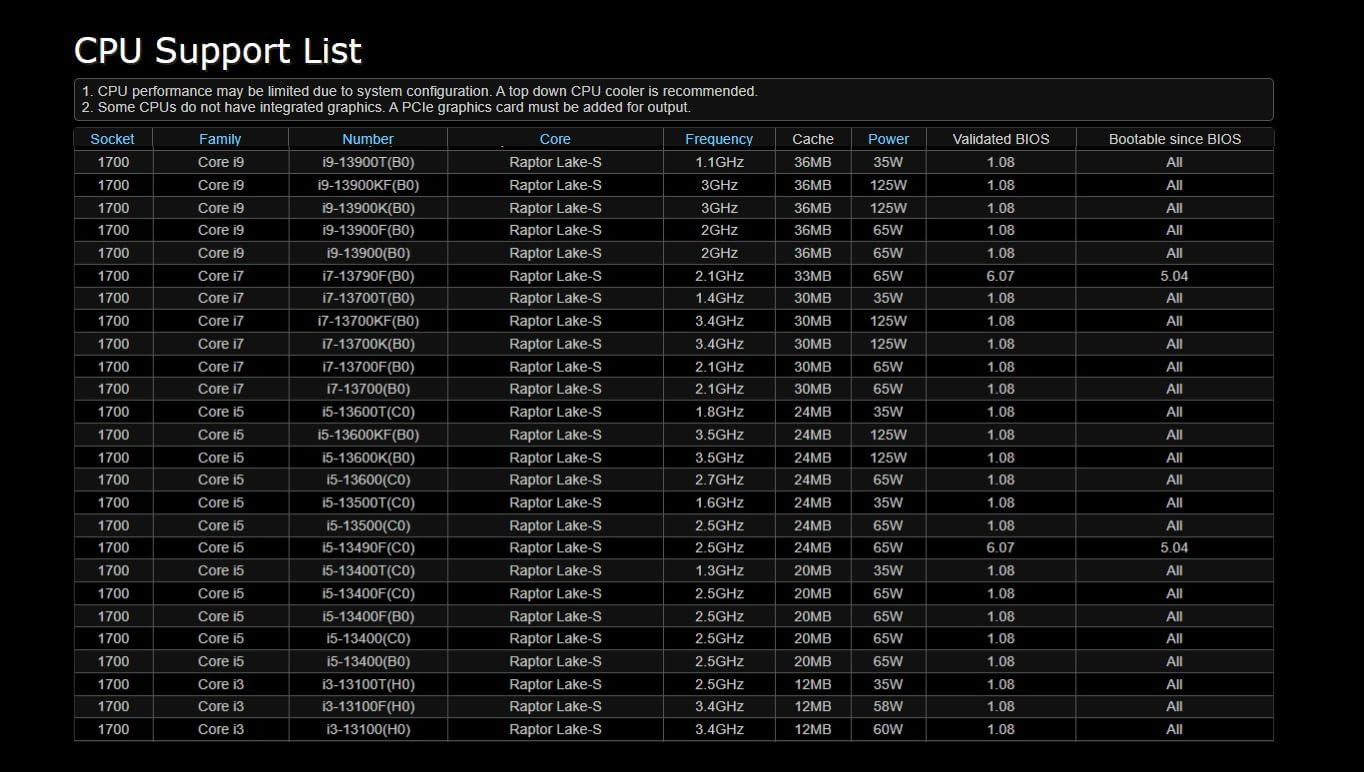
4.2 CPU Installation (LGA1700)
This motherboard supports Intel 13th and 12th Generation Core Processors with an LGA1700 socket. Refer to the CPU support list for compatible processors and recommended BIOS versions.
- Open the CPU socket lever and remove the protective cover.
- Carefully align the CPU with the socket, ensuring the triangular mark on the CPU matches the mark on the socket.
- Gently place the CPU into the socket. Do not force it.
- Close the socket lever to secure the CPU.
- Install your CPU cooler according to its manufacturer's instructions.


4.3 Memory (DDR5) Installation
The motherboard supports DDR5 memory up to 7200MHz (OC). Install memory modules into the DIMM slots.
- Open the clips at both ends of the DIMM slot.
- Align the memory module with the slot, ensuring the notch on the module matches the key in the slot.
- Press down firmly on both ends of the memory module until the clips snap into place.
4.4 Storage Installation (M.2 and SATA)
The motherboard features 3 Hyper M.2 sockets (PCIe Gen4x4) and 4 SATA3 6.0 Gbps ports.
- M.2 SSD: Remove the M.2 heatsink, insert the M.2 SSD into the socket, and secure it with the provided screw/standoff. Reattach the heatsink.
- SATA Drives: Connect SATA data cables from your storage drives to the SATA ports on the motherboard.
4.5 Power Connections
Connect the power supply unit (PSU) cables to the motherboard.
- Connect the 24-pin ATX power connector.
- Connect the 8-pin + 4-pin 12V power connectors for the CPU.
4.6 Expansion Slots
The motherboard includes 1 PCIe 5.0 x16 slot and 1 PCIe 4.0 x1 slot for expansion cards like graphics cards.
- Insert your graphics card into the PCIe 5.0 x16 slot, ensuring it is fully seated and secured with the case latch or screw.
- Install any other expansion cards into the available PCIe 4.0 x1 slot as needed.
5. Operating Instructions
5.1 Initial Boot and BIOS/UEFI Access
After assembling your system, connect a monitor, keyboard, and mouse. Power on your system.
- During startup, press the Delete or F2 key repeatedly to enter the BIOS/UEFI setup utility.
- Configure boot order, enable XMP for memory, and adjust other settings as required.
5.2 Driver Installation
For optimal performance, install the necessary drivers for your motherboard components. The ASRock B760M Steel Legend WiFi includes an ASRock Auto Driver Installer feature.
- Upon first boot into the operating system, the ASRock Auto Driver Installer may prompt you to install essential drivers. Follow the on-screen instructions.
- Alternatively, download the latest drivers from the official ASRock website for your specific motherboard model.

5.3 Network Connectivity
The motherboard supports Dragon 2.5G LAN and 802.11ax (WiFi 6E) with Bluetooth 5.3.
- Wired LAN: Connect an Ethernet cable to the 2.5G LAN port on the rear I/O panel.
- Wireless WiFi: Screw the included WiFi antennas onto the connectors on the rear I/O panel for optimal wireless signal reception.

6. Maintenance
6.1 BIOS Updates
Keeping your BIOS updated can improve system stability, compatibility, and performance. ASRock provides BIOS updates on their official website.
- Download the latest BIOS file for your specific motherboard model from the ASRock website.
- Follow the instructions provided by ASRock for updating the BIOS, typically involving a USB flash drive.
6.2 General Cleaning
Regular cleaning helps maintain optimal performance and extends the lifespan of your motherboard.
- Ensure the system is powered off and unplugged before cleaning.
- Use compressed air to remove dust from components, heatsinks, and fan blades.
- Gently wipe surfaces with a soft, lint-free cloth. Avoid using liquid cleaners directly on components.
7. Troubleshooting
This section addresses common issues you might encounter.
7.1 System Does Not Boot
- Verify all power cables (24-pin ATX, 8-pin + 4-pin CPU) are securely connected to the motherboard and PSU.
- Ensure RAM modules are correctly seated in their slots. Try booting with only one RAM stick.
- Check that the CPU is properly installed and the CPU cooler is making good contact.
- Confirm that the graphics card is fully seated in the PCIe slot and any required power connectors are attached.
- Clear the CMOS (Complementary Metal-Oxide-Semiconductor) by removing the CMOS battery for a few minutes or using the clear CMOS jumper (refer to the motherboard diagram for location).
7.2 M.2 SSD Not Recognized
- Ensure the M.2 SSD is correctly installed and secured in its socket.
- Check the BIOS/UEFI settings to confirm the M.2 slot is enabled and configured correctly.
- Some M.2 slots may share bandwidth with SATA ports or other PCIe slots. Refer to the motherboard's detailed manual for specific configurations and potential limitations, especially when multiple M.2 drives or a high-bandwidth GPU are installed.
- Verify the M.2 SSD is compatible with the motherboard (NVMe vs. SATA M.2).
8. Specifications
| Feature | Specification |
|---|---|
| Brand | ASRock |
| Model Name | B760M STEEL LEGEND WIFI |
| CPU Socket | LGA 1700 |
| Compatible Processors | Intel 13th Gen & 12th Gen Core Processors |
| Chipset Type | Intel B760 |
| RAM Memory Technology | DDR5 |
| Memory Clock Speed | Up to 7200MHz (OC) |
| Memory Storage Capacity (Max) | 192 GB |
| PCIe Slots | 1x PCIe 5.0 x16, 1x PCIe 4.0 x1 |
| Graphics Output Options | HDMI, DisplayPort, eDP |
| Audio Codec | Realtek ALC897 7.1 CH HD Audio, Nahimic Audio |
| SATA Ports | 4x SATA3 6.0 Gbps |
| M.2 Sockets | 3x Hyper M.2 (PCIe Gen4x4) |
| USB Ports (Rear) | 1x USB 3.2 Gen2 Type-C, 1x USB 3.2 Gen2 Type-A, 4x USB 3.2 Gen1, 2x USB 2.0 |
| USB Ports (Front) | 1x USB 3.2 Gen2 Type-C, 2x USB 3.2 Gen1, 4x USB 2.0 |
| LAN | Dragon 2.5G LAN |
| Wireless Connectivity | 802.11ax (WiFi 6E) + Bluetooth 5.3 |
| Form Factor | Micro ATX |
| Product Dimensions | 10.85 x 10.25 x 2.4 inches |
| Item Weight | 2.86 pounds |
| Batteries Required | 1 CR2032 (for CMOS) |
9. Warranty and Support
ASRock provides a limited warranty for its products. For specific warranty terms and conditions, please refer to the warranty card included with your product or visit the official ASRock website. Technical support and driver downloads are also available on the ASRock support page.
For further assistance, please visit the ASRock Support Website.