1. Introduction
This manual provides detailed instructions for the installation, operation, and maintenance of your YEEHUNG Ultra-Thin 12.3-inch Linux Car Radio Multimedia Screen. This unit is specifically designed for 2012-2015 Mercedes-Benz ML GL Class W166 X166 vehicles equipped with NTG4.5/4.7 systems. Please read this manual thoroughly before installation and use to ensure proper functionality and to avoid damage.

Image: The YEEHUNG 12.3-inch Linux Car Multimedia Screen seamlessly integrated into a Mercedes-Benz dashboard, showcasing its navigation interface.
2. Compatibility
This multimedia screen is compatible with Mercedes-Benz ML GL Class W166 X166 models from 2012 to 2015 that utilize the NTG4.5 or NTG4.7 system. It is designed for seamless integration with the vehicle's original equipment system.
Important Note: If your NTG4.5 system lacks an AUX menu, it must be activated for sound output. Depending on your car's interface, you may need to choose an AMI cable or use the ISO cable's Audio out to connect to the car's AUX jack.
3. Package Contents
Verify that all items listed below are present in your package:
- 1 x Ultra-Thin 12.3-inch Multimedia Screen
- 1 x ISO Wiring Harness
- 1 x USB Cable
- 1 x BC AMI Cable (if applicable)
- 1 x Panel
- 1 x Base
- 1 x Installation Manual (this document)

Image: All components included in the YEEHUNG multimedia screen package, laid out for inspection.
4. Installation and Setup
Installation should be performed by a qualified professional or an individual with experience in car electronics. Ensure the vehicle's power is disconnected before beginning installation.
4.1 General Installation Principles
- No Injury Installation: The design allows for installation without damaging the original vehicle wiring.
- OEM System Retention: The original COMAND system functions, including knob control and steering wheel buttons, are retained.
- Original CD Player: The original CD player can be used normally after installation.

Image: Overview of installation features, emphasizing non-destructive integration and retention of original vehicle controls.
4.2 Wiring Connections
Carefully connect the provided ISO wiring harness to the vehicle's existing wiring. Ensure all connections are secure.

Image: Example of a wiring harness connection, highlighting the secure insertion of wires.
4.3 Audio Output Connection
For audio output, connect the "Audio out" from the ISO cable to either the car's AMI port using the BC AMI cable or directly to the car's AUX jack. This step is crucial for sound functionality, especially if your original system lacks an AUX menu.

Image: Connecting the 'Audio out' cable to an AMI cable for sound transmission.

Image: Identifying the car's AUX-in port and the 3.5mm audio jack for connection.
4.4 Mechanical Hourly Clock Installation
If your vehicle has a mechanical hourly clock in the center of the air conditioning panel, follow these steps to install it:
- Remove the clock back case.
- Load an SR626W model button battery (not included).
- Remove the protective tape from the clock.
- Press the clock into the air conditioning panel.

Image: Step-by-step guide for installing the mechanical hourly clock.
4.5 USB Connection and Camera Settings
For wired CarPlay and Android Auto functionality, ensure your device is connected to USB IN 1. The system also allows for adjustment of display resolution and camera settings.
- USB Connection: Wired CarPlay and Android Auto must use USB IN 1.
- Resolution Settings: Navigate to the setup menu to select the correct NTG system resolution (e.g., NTG4.5 400x240, NTG4.5/4.7 800x480).
- Camera Settings: In the setup menu, you can configure settings for the original camera or an aftermarket camera (CVBS/720P AHD format supported).

Image: Visual guide for USB connections and accessing display resolution and camera settings within the system menu.
5. Operating Instructions
The multimedia screen offers a range of features designed to enhance your driving experience.
5.1 System Switching
You can seamlessly switch between the original OEM information display and the new Linux system interface. This allows access to both original vehicle data and the advanced multimedia features.
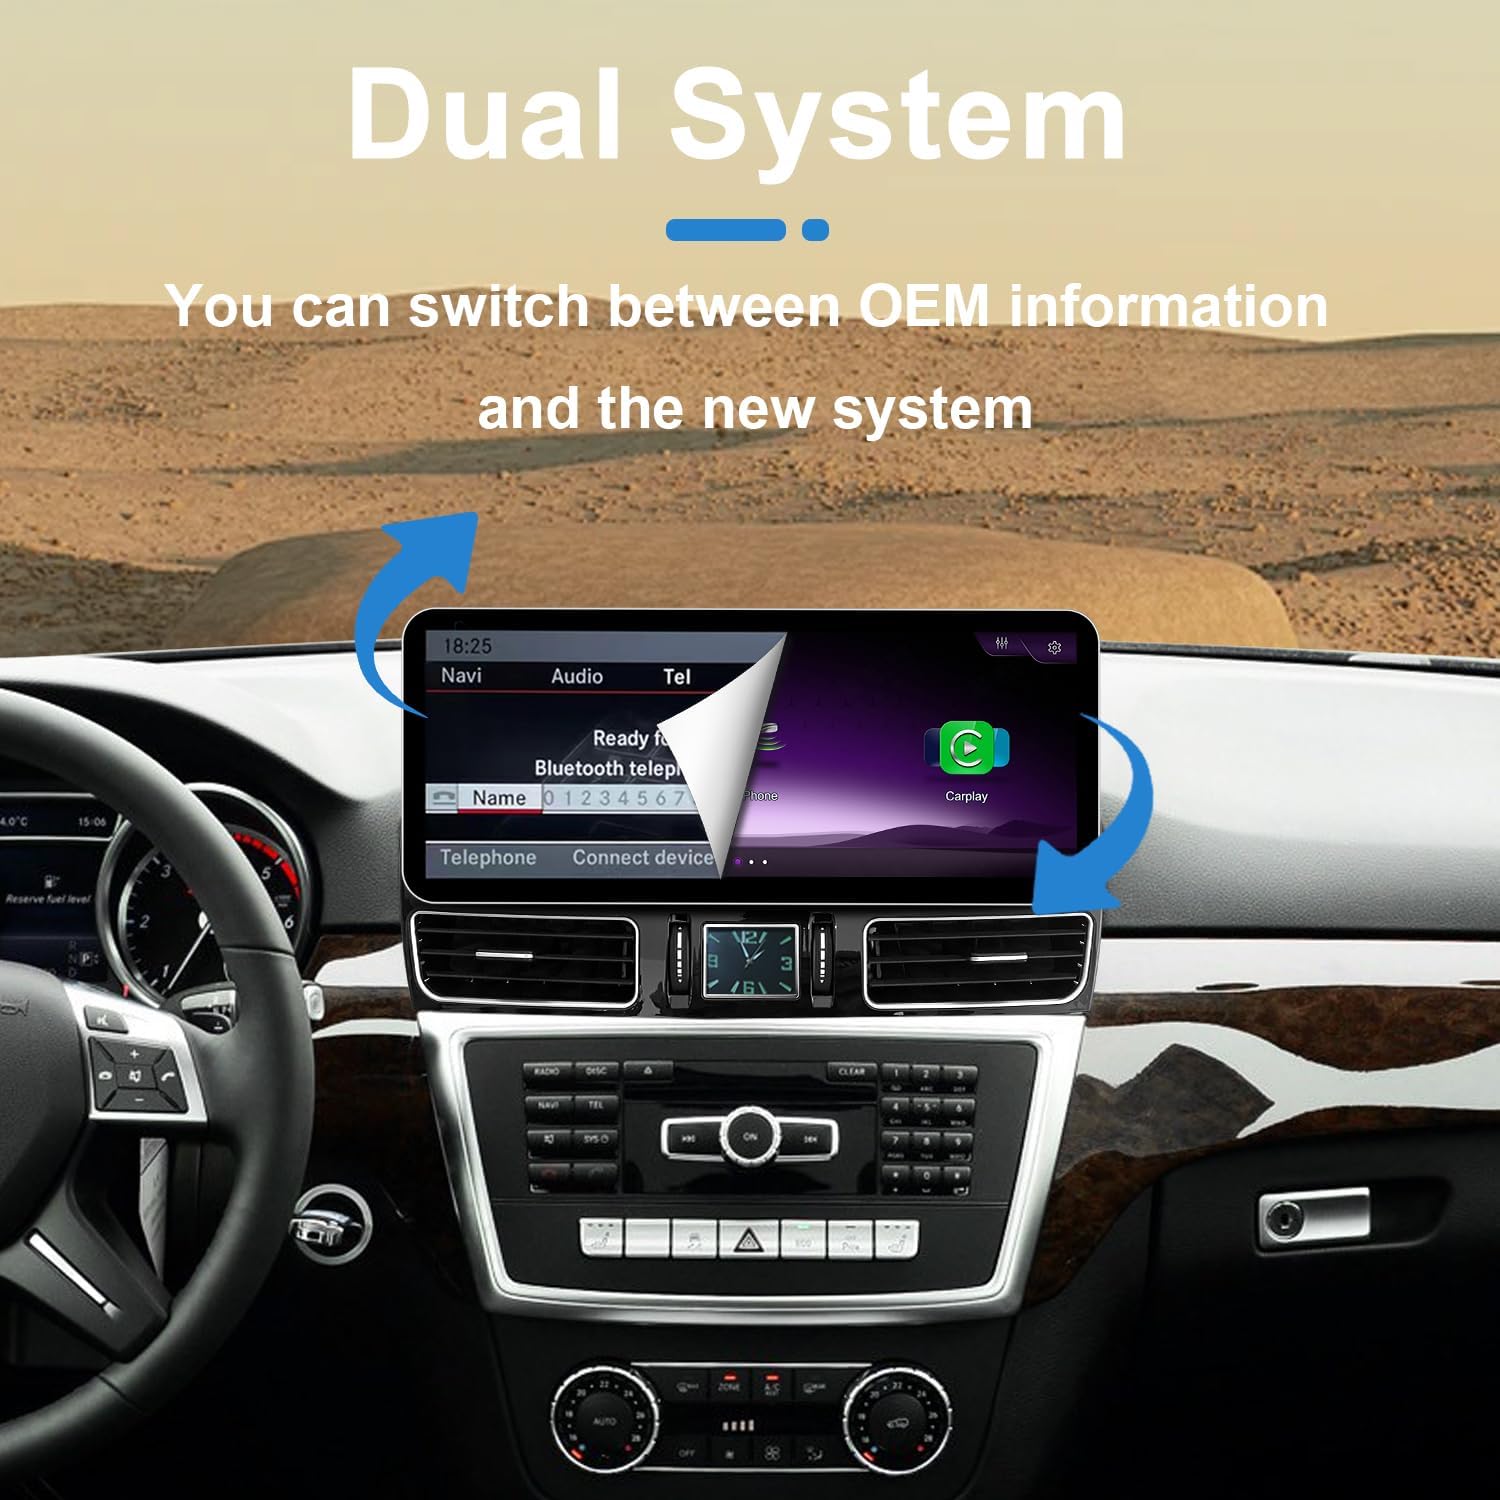
Image: Illustration of the dual system capability, allowing users to switch between the original car interface and the new Linux system.
5.2 Wireless CarPlay and Android Auto
The unit supports both wireless and wired CarPlay and Android Auto. Connect your smartphone to access navigation, music, calls, and other apps directly on the screen.
- OEM Bluetooth Sound Quality: The product utilizes the OEM Bluetooth for CarPlay and Android Auto calls and music, ensuring excellent sound quality.
- Control: CarPlay and Android Auto can be controlled using the car's original knob and steering wheel buttons.
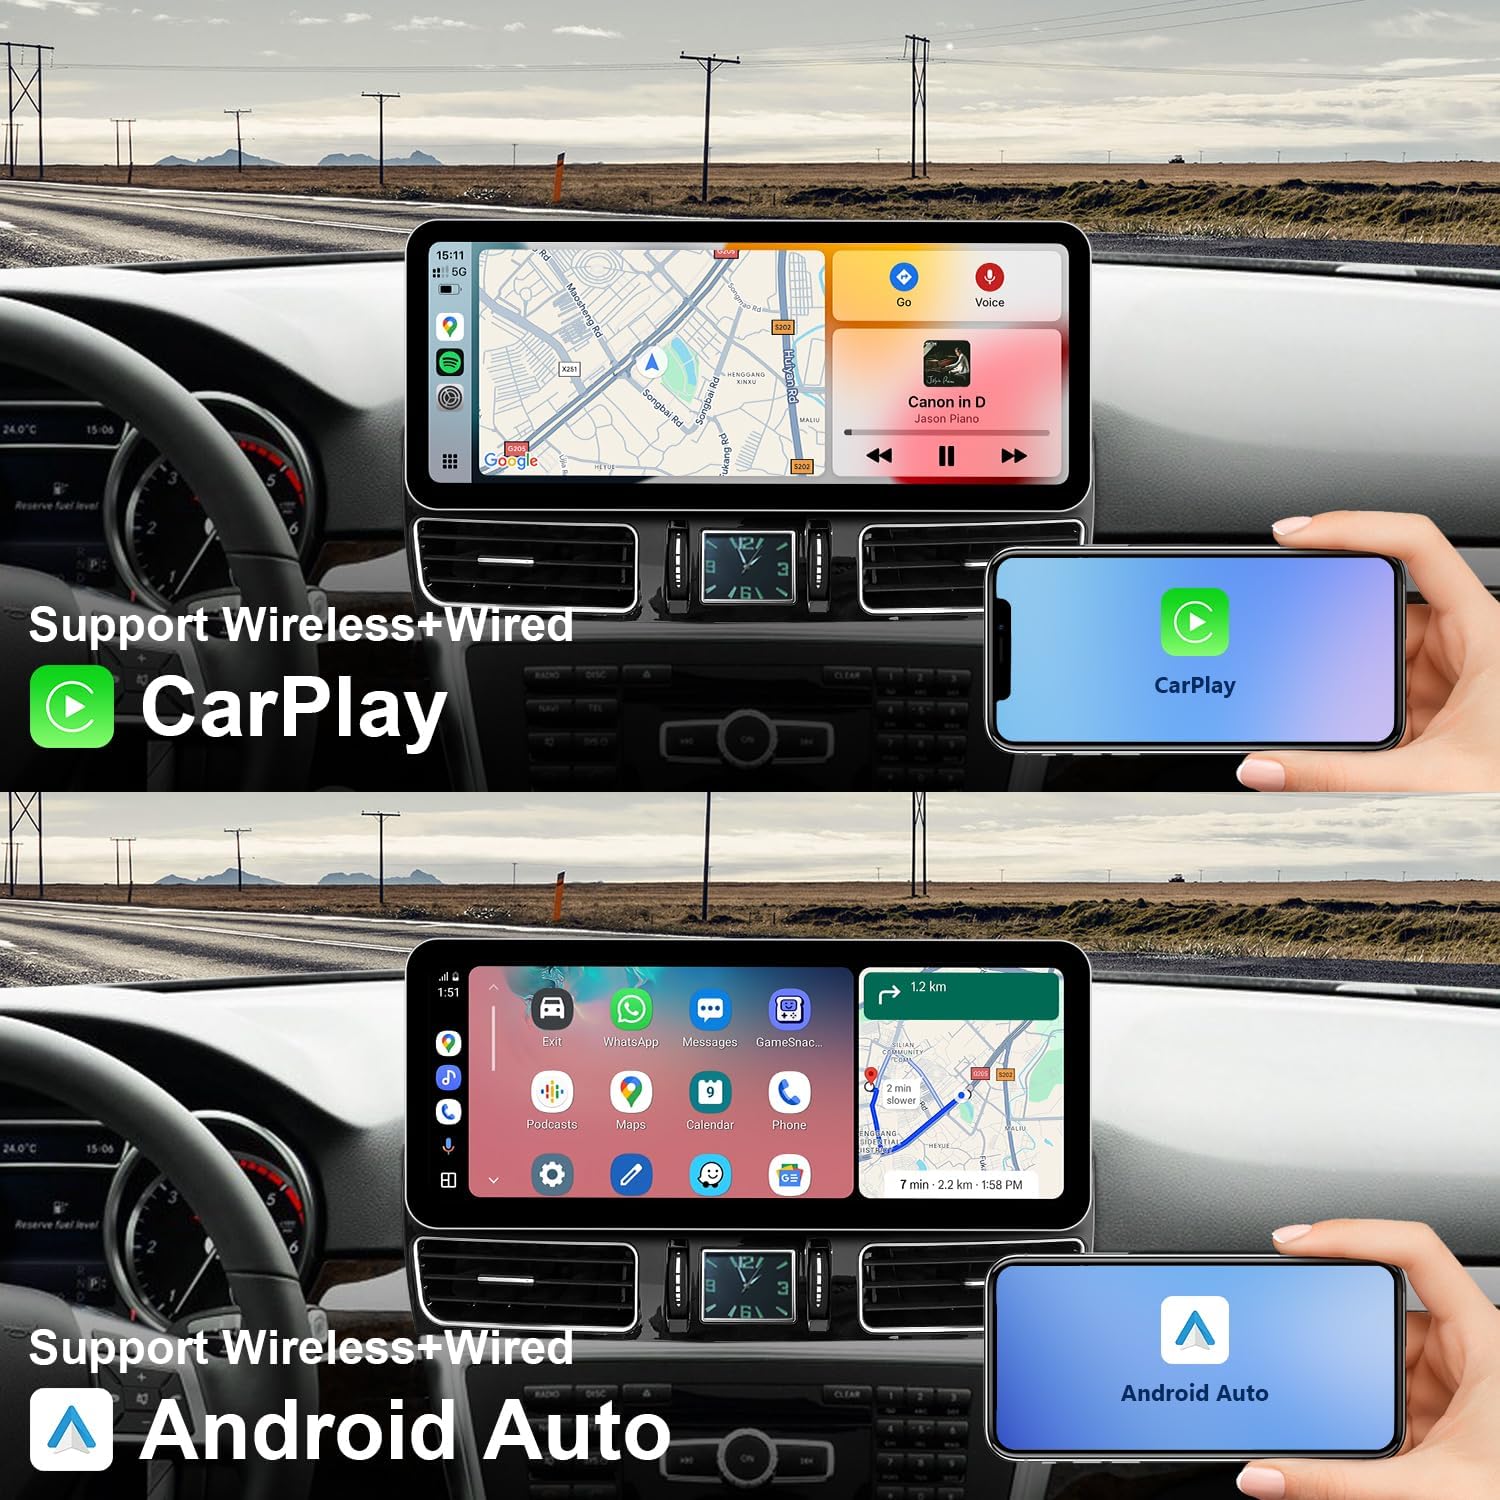
Image: The multimedia screen displaying both Wireless CarPlay and Android Auto interfaces, demonstrating smartphone integration.
5.3 Mirror Link
Mirror Link functionality allows you to display your smartphone's screen directly onto the multimedia unit, providing access to all your phone's content.

Image: Mirror Link in action, displaying a smartphone's content on the car's screen.
5.4 Reversing Camera and Radar Information
The screen displays the car's reversing camera and radar information, enhancing safety during parking maneuvers. It is compatible with both OEM and aftermarket CVBS/720P AHD cameras.
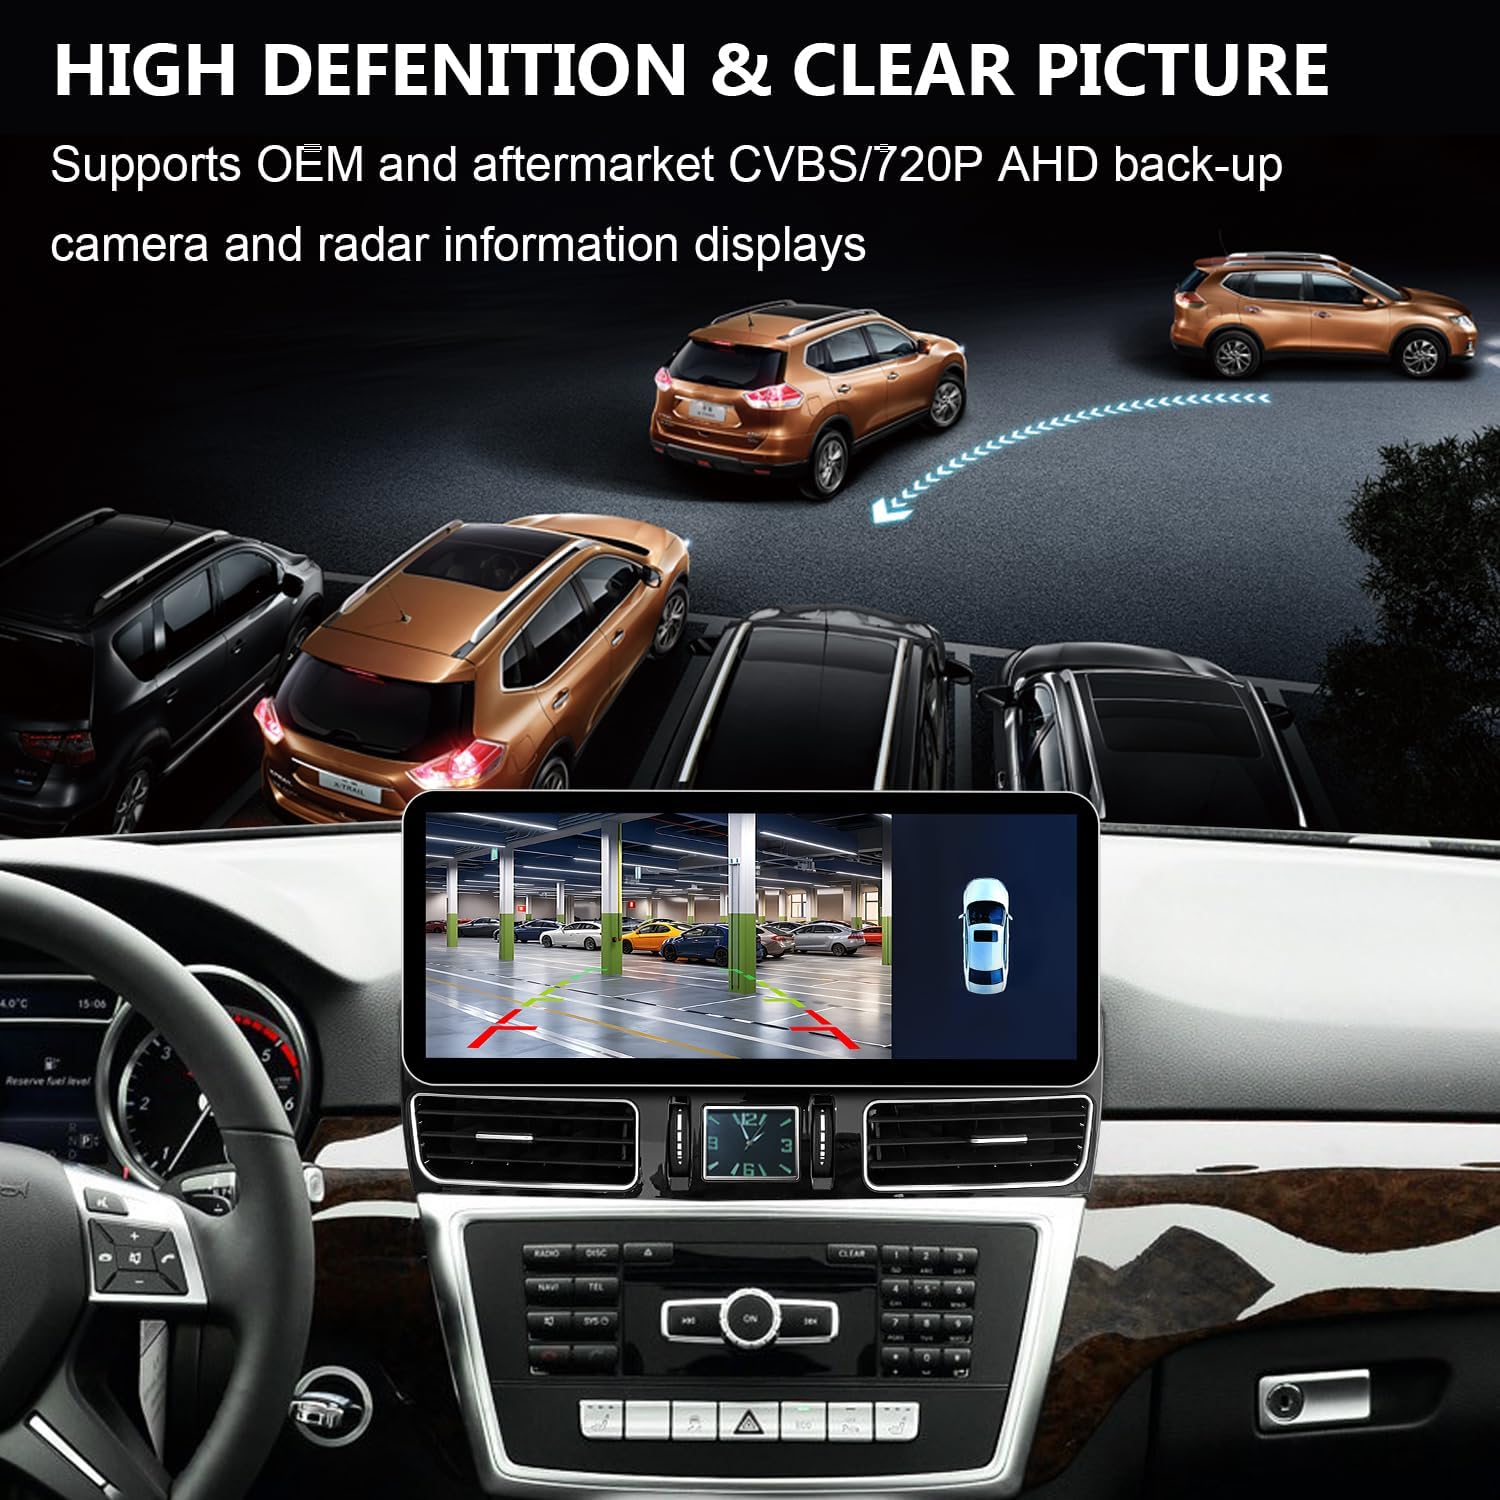
Image: The multimedia screen displaying a clear backup camera view with integrated radar information for safe parking.
5.5 Media Playback
Play music and videos directly via USB. The system supports up to 720P offline video playback.
6. Specifications
| Feature | Detail |
|---|---|
| Model Number | YH-SL15 |
| Display Size | 12.3 Inches |
| Display Resolution | 1920x720 |
| Operating System | Linux |
| Connectivity | Bluetooth 5.0, USB, Wi-Fi, Wireless CarPlay/Android Auto |
| Supported Cameras | OEM, Aftermarket CVBS/720P AHD (does not support cameras exceeding 720P AHD) |
| Video Playback | Up to 720P offline video |
| Dimensions | 12.83 x 11.02 x 7.48 inches |
| Item Weight | 9.58 pounds |

Image: Summary of the multimedia screen's key features and capabilities.
7. Troubleshooting
This section addresses common issues you might encounter. For problems not listed here, please contact customer support.
- No Sound:
- Ensure the AUX menu is activated in your NTG4.5 system if it was previously missing.
- Verify the "Audio out" from the ISO cable is correctly connected to either the AMI port or the car's AUX jack.
- CarPlay/Android Auto Not Connecting Wirelessly:
- Check your phone's Bluetooth and Wi-Fi connections.
- Ensure the built-in Wi-Fi hotspot on the unit is active for automatic connection.
- Wired CarPlay/Android Auto Not Working:
- Confirm your device is connected to USB IN 1.
- Try a different USB cable.
- Black Screen / No Display:
- Check all power and video cable connections.
- Ensure the correct NTG system resolution is selected in the settings.
- If the issue persists, a system reset may be required (consult support).
- Aftermarket Camera Not Displaying:
- Verify the camera is CVBS or 720P AHD format. Cameras exceeding 720P AHD are not supported.
- Check camera connections and settings in the unit's menu.
8. Maintenance
To ensure the longevity and optimal performance of your multimedia screen, follow these maintenance guidelines:
- Cleaning the Screen: Use a soft, lint-free cloth specifically designed for electronic screens. Do not use abrasive cleaners, solvents, or aerosol sprays. Gently wipe the screen to remove dust and fingerprints.
- Temperature: Avoid exposing the unit to extreme temperatures, both hot and cold, for extended periods.
- Liquid Exposure: Prevent any liquids from entering the unit. In case of accidental spills, immediately power off the unit and allow it to dry completely before attempting to use it again.
- Software Updates: Periodically check the manufacturer's website or contact support for any available software updates to ensure optimal performance and access to new features.
9. Warranty and Support
YEEHUNG provides the following warranty and support services for your product:
- Free Returns: Within 1 month of purchase, free returns are available according to Amazon's policies. Please contact Amazon Buyer Services before initiating a return.
- Free Warranty Service (1-12 Months): For non-human damage occurring within 12 months after the first month of purchase, free warranty service is provided. The customer is responsible for the cost of shipping the product back and forth within the U.S.
- Repair Service (After 1 Year): After 1 year, repair service is available. In addition to paying for postage within the U.S., you will be responsible for the cost of replacement parts and labor.
For any questions, technical assistance, or warranty claims, please contact YEEHUNG customer support. When contacting support, please provide your product model number (YH-SL15) and a clear description of the issue.


