1. Product Overview
The Rishoesu Crease Protectors are designed to prevent creases and maintain the original shape of your sneakers. Made from lightweight and durable materials, these protectors offer comfort and extend the lifespan of your footwear.

Figure 1: Rishoesu Crease Protectors (Black and White)

Figure 2: Before and After using Crease Protectors
2. Safety Information
To ensure comfort and proper fit, please observe the following safety guidelines:
- It is recommended that the shoes are half a size larger than your usual size to avoid discomfort when using the crease protectors.
- Always place the crease protectors in the ball-of-foot area of your shoes.
- This product is intended for general shoe protection and crease prevention.
3. Setup and Installation
Follow these steps to correctly install the Rishoesu Crease Protectors into your shoes:
- Step 1: Take out the insole. Carefully remove the existing insole from your shoe.

Figure 3: Removing the shoe insole
- Step 2: Put in the shoe crease protector. Insert the crease protector into the toe box of your shoe. Ensure it is positioned correctly, with the "L" mark for the left shoe and "R" mark for the right shoe facing upwards. The protector should sit snugly against the inside of the shoe's toe area.
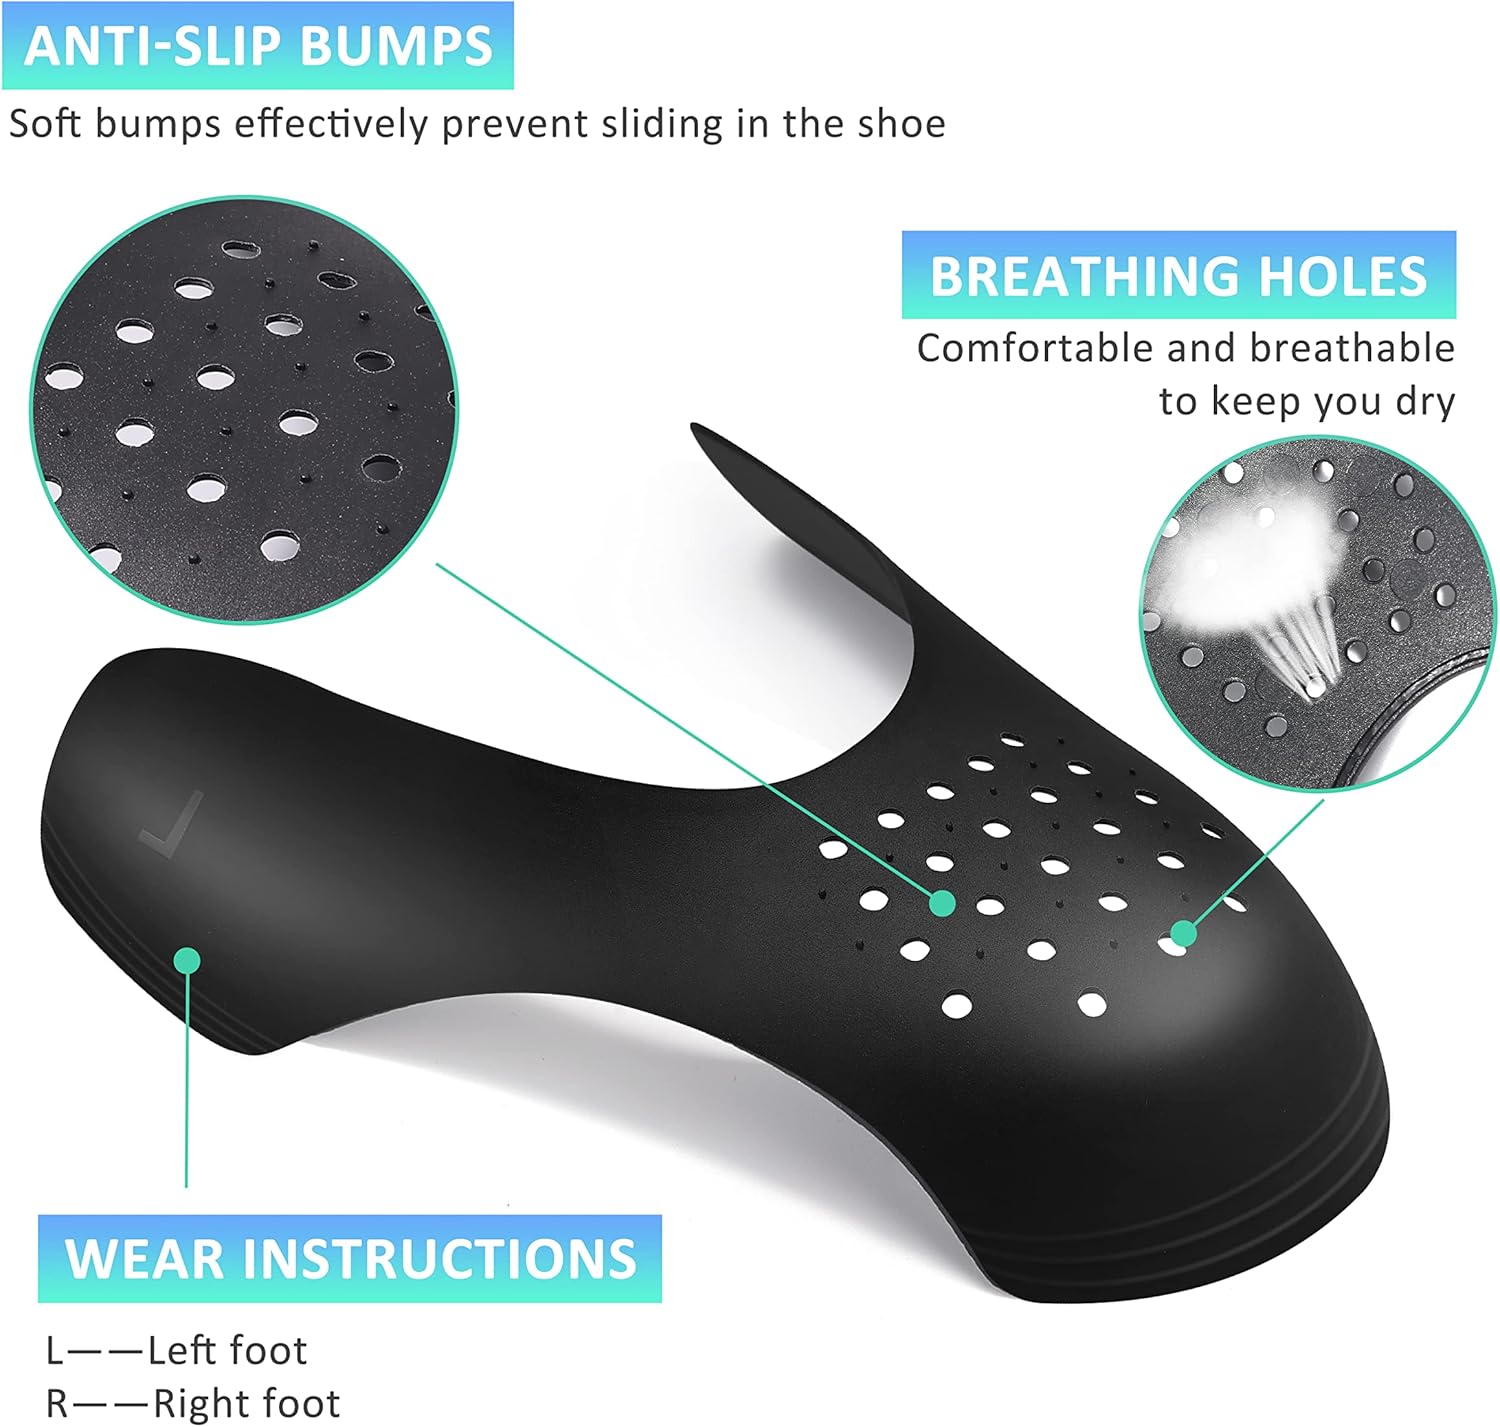
Figure 4: Inserting the crease protector
- Step 3: Put back the insole. Place the insole back into the shoe, over the crease protector. Adjust as needed to ensure a comfortable fit.
Figure 5: Replacing the shoe insole
The crease protectors feature auxiliary cutting lines, allowing them to be trimmed for a more customized fit if necessary. Refer to the markings on the protector for guidance on cutting for small, medium, or large sizes.

Figure 6: Auxiliary Cutting Lines for Custom Fit
4. Usage and Features
Once installed, the Rishoesu Crease Protectors work by providing a rigid barrier within the toe box of your shoe, preventing the material from creasing as you walk. Key features include:
- Ergonomic Design: Shaped to fit the natural contours of the shoe's toe box, ensuring comfort and reserving toe space.
- Anti-Slip Bumps: Soft bumps on the surface help keep the protector securely in place within the shoe, preventing movement during wear.
- Breathing Holes: Strategically placed ventilation holes promote airflow, keeping your feet dry and breathable, and preventing stuffiness.
- Wide Compatibility: Suitable for most types of sneakers, including popular models like Jordan 1, Air Force 1, and Dunk Low.

Figure 7: Ergonomic Design for Comfort
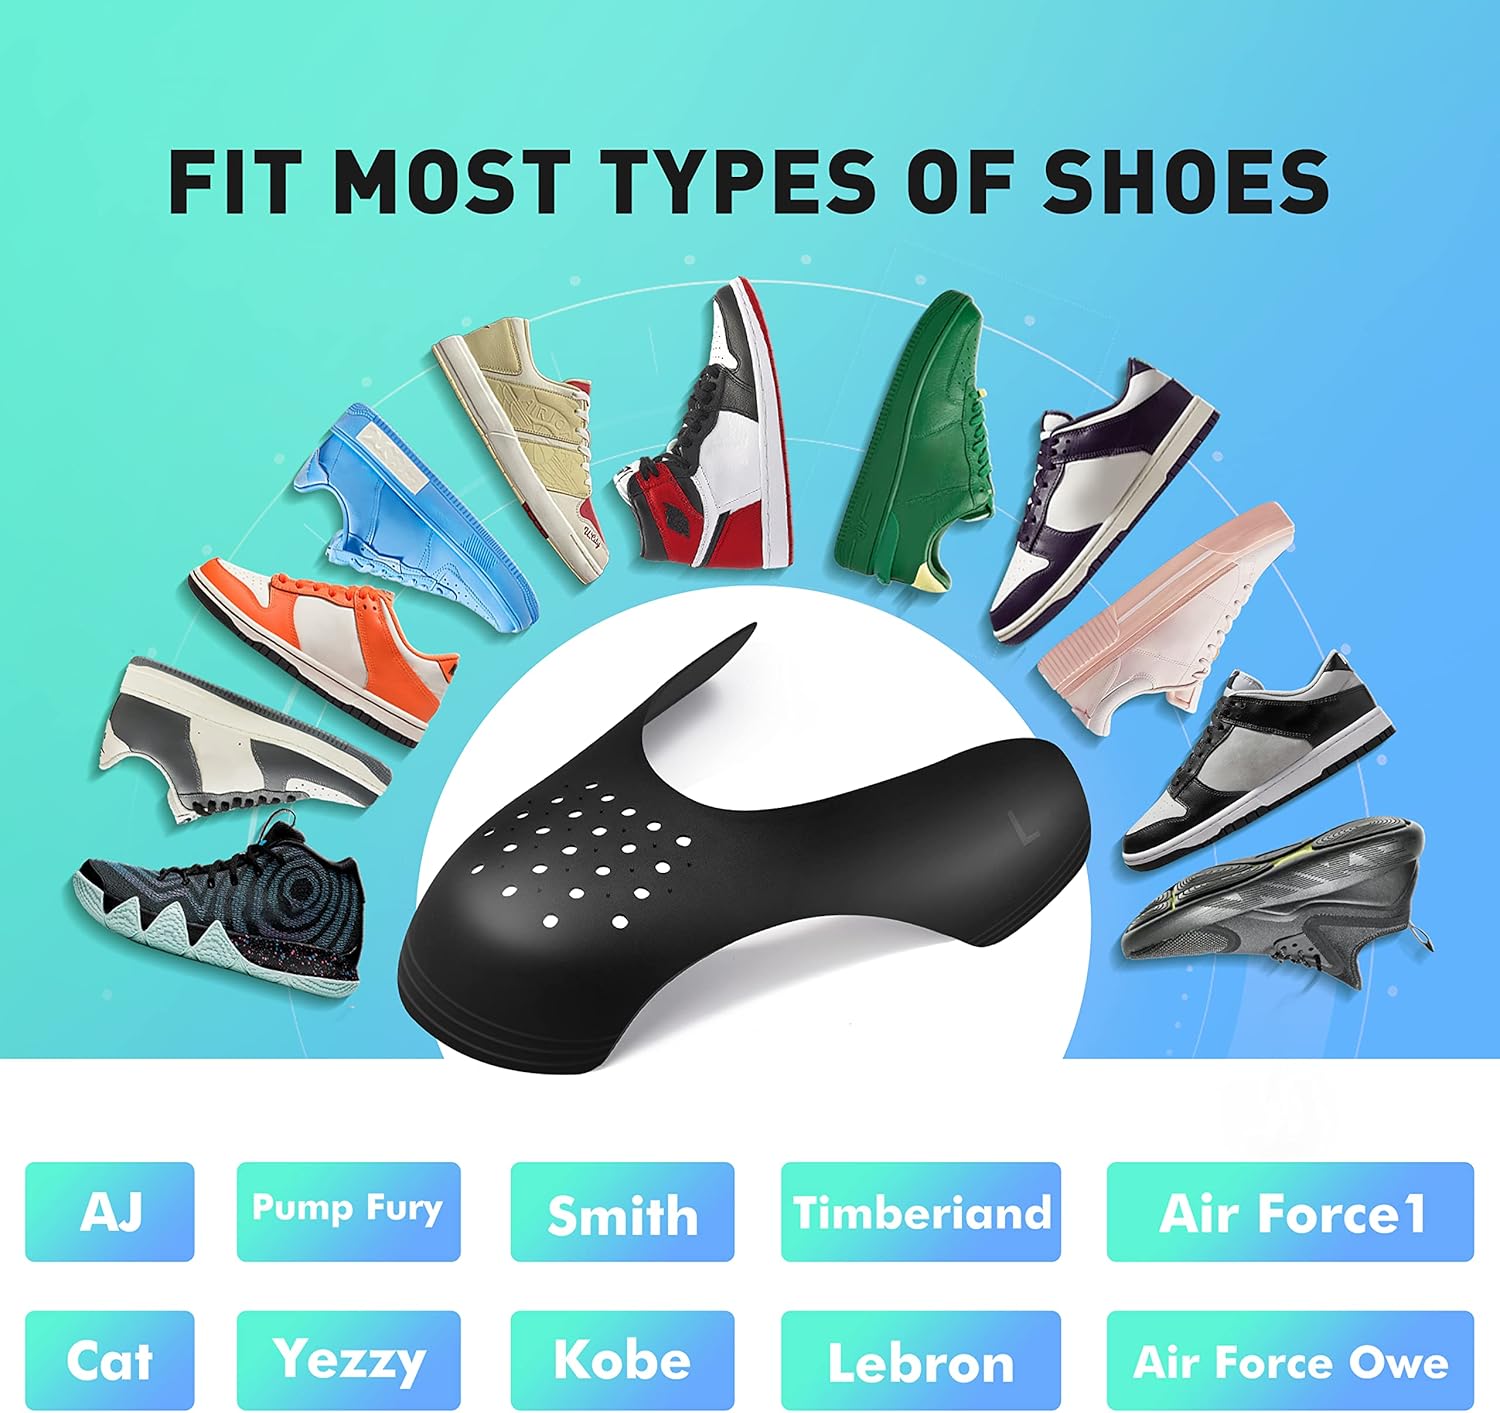
Figure 8: Compatibility with Various Shoe Types
5. Maintenance
To maintain the effectiveness and hygiene of your Rishoesu Crease Protectors, follow these simple maintenance steps:
- Cleaning: The protectors can be cleaned with a damp cloth and mild soap. Wipe them down gently to remove any dirt or debris.
- Drying: Allow the protectors to air dry completely before reinserting them into your shoes. Avoid direct sunlight or high heat, which could deform the material.
- Storage: When not in use, store the protectors in a cool, dry place away from direct sunlight.
6. Troubleshooting
If you encounter any issues while using your Rishoesu Crease Protectors, consider the following:
| Problem | Possible Cause | Solution |
|---|---|---|
| Discomfort or tightness in shoe | Shoe size is too small for protector, or protector is not positioned correctly. | Ensure your shoes are half a size larger than your usual size. Re-adjust the protector to ensure it sits properly in the toe box. If needed, use the auxiliary cutting lines to trim the protector for a better fit. |
| Protector moves inside the shoe | Protector not snugly fitted, or insole not properly replaced. | Ensure the protector is pushed firmly into the toe box. Make sure the insole is placed correctly over the protector to hold it in place. |
| Shoes still creasing | Protector not covering the entire creasing area, or incorrect size. | Verify the protector is fully inserted and covers the area prone to creasing. Consider if a different size protector or trimming is needed for optimal coverage. |
7. Specifications
| Attribute | Detail |
|---|---|
| Product Name | Crease Protectors Suitable for Most Sneakers |
| Brand | Rishoesu |
| Model Number (ASIN) | B0BQR315SM |
| Material | Plastic (Pure TEP Granules) |
| Color | Black+white (as per current variant) |
| Package Quantity | 4 Pairs |
| Recommended Shoe Size (Men's) | US Size 7.5-12 |
| Recommended Shoe Size (Women's) | US Size 5-8.5 |
| Dimensions (Package) | 6.14 x 4.96 x 1.97 inches |
| Weight (Package) | 3.53 ounces |
8. Warranty and Support
Rishoesu is committed to providing high-quality products. For any questions, concerns, or support needs regarding your crease protectors, please contact the seller directly through the platform where the purchase was made.
While specific warranty details are not provided in this manual, customer satisfaction is a priority. Please refer to your purchase documentation or the product listing for any applicable return or refund policies.