bion HEATING 12000 BTU
Bion Electrics 12000 BTU Mono Inverter Air Conditioner User Manual
Model: 12000 BTU
1. Introduction
Thank you for choosing the Bion Electrics 12000 BTU Mono Inverter Air Conditioner. This manual provides essential information for the safe and efficient operation, installation, and maintenance of your new air conditioning unit. Please read it thoroughly before use and keep it for future reference.
This unit is designed to provide efficient cooling, dehumidification, and ventilation for medium-sized rooms, utilizing advanced inverter technology for reduced energy consumption. Key features include a remote control, programmable timer, and a silent operation mode.
2. Safety Information
Important: Always follow basic safety precautions when using electrical appliances to reduce the risk of fire, electric shock, and injury to persons.
- Read all instructions before using the appliance.
- This appliance must be properly grounded.
- Do not operate the air conditioner with a damaged power cord or plug.
- Do not insert fingers or foreign objects into the air inlet or outlet.
- Ensure the power supply matches the voltage specified on the rating label.
- Keep the unit away from flammable gases or combustible materials.
- Do not attempt to repair or modify the unit yourself. Contact qualified service personnel.
- Supervise children to ensure they do not play with the appliance.
3. Package Contents
Verify that all items listed below are present in your package:
- Indoor Unit (Evaporator)
- Outdoor Unit (Condenser)
- Remote Control
- User Manual (this document)
- Installation Kit (pipes, cables, drainage hose - specific components may vary)
4. Product Overview
The Bion Electrics 12000 BTU Mono Inverter Air Conditioner consists of an indoor unit and an outdoor unit, connected by refrigerant lines and electrical wiring. The remote control allows for convenient operation.
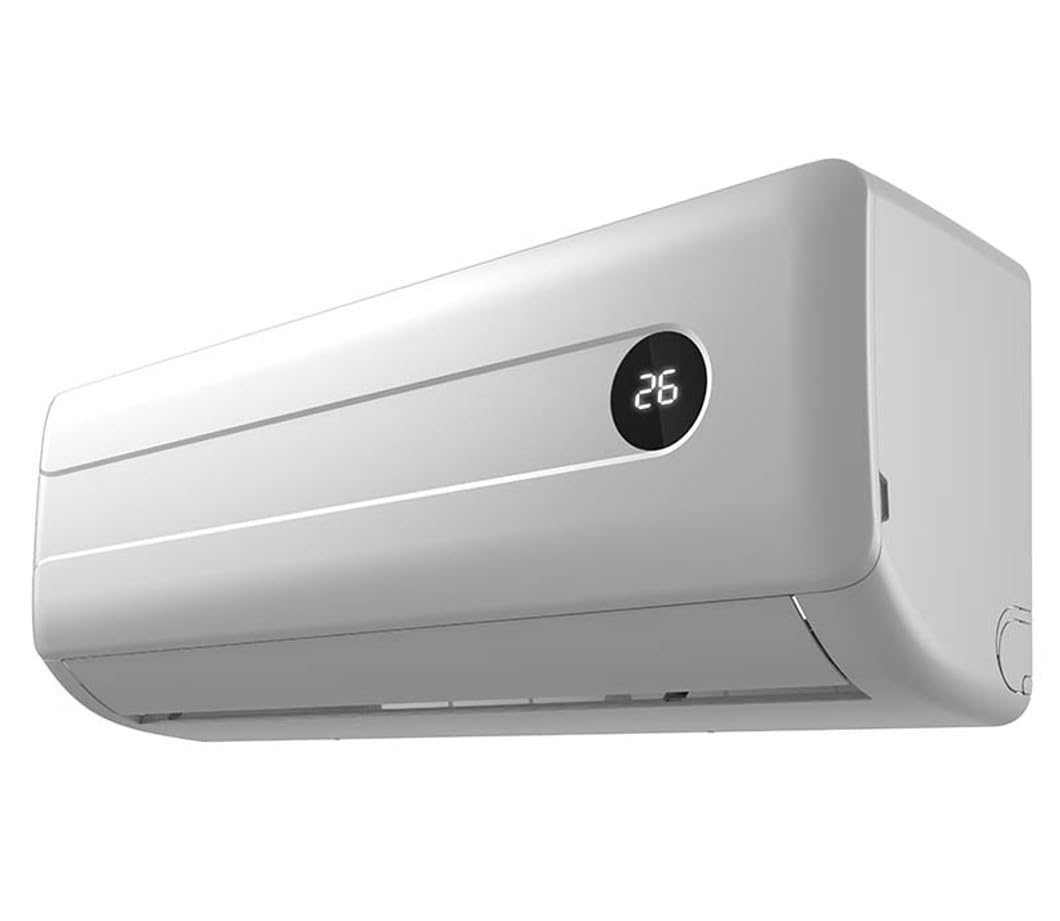
Figure 4.1: Front view of the Bion Electrics 12000 BTU Mono Inverter Air Conditioner indoor unit. This image shows the main body of the indoor unit, typically mounted on a wall, with its air outlet and control panel area.
4.1 Indoor Unit Components
- Air Filter: Located behind the front panel, cleans the air.
- Air Outlet Louvers: Adjustable to direct airflow.
- Display Panel: Shows temperature, mode, and other indicators.
- Remote Control Receiver: Receives signals from the remote.
4.2 Outdoor Unit Components
- Condenser Coil: Releases heat to the outside air.
- Fan: Circulates air over the condenser coil.
- Compressor: Pumps refrigerant.
- Refrigerant Pipes: Connects indoor and outdoor units.
4.3 Remote Control
The remote control allows you to adjust settings such as temperature, operating mode, fan speed, and timer functions. Refer to the remote control section for detailed button functions.
5. Setup and Installation
Warning: Installation of this air conditioning unit requires specialized knowledge and tools. It is strongly recommended that installation be performed by a qualified and certified technician to ensure proper functioning, safety, and warranty validity.
5.1 Site Selection
- Indoor Unit: Choose a location that allows for even air distribution, away from direct sunlight or heat sources. Ensure sufficient space around the unit for maintenance.
- Outdoor Unit: Select a well-ventilated area, free from obstructions, and with adequate drainage. Avoid locations exposed to strong winds or direct rain.
5.2 Electrical Connection
Ensure the electrical supply meets the unit's requirements (voltage, frequency, and current). A dedicated circuit breaker is recommended. All electrical work must comply with local codes and regulations.
5.3 Refrigerant Piping and Drainage
Proper installation of refrigerant pipes and drainage lines is crucial for efficient operation and to prevent leaks. Ensure pipes are insulated and drainage is sloped correctly to allow water to flow freely.
5.4 Test Run
After installation, a test run should be performed to verify proper operation, check for refrigerant leaks, and confirm all functions are working correctly.
6. Operating Instructions
This section details how to operate your Bion Electrics air conditioner using the remote control.
6.1 Remote Control Functions
- POWER Button: Turns the unit ON or OFF.
- MODE Button: Cycles through operating modes:
- COOL: For cooling the room.
- DRY (Dehumidification): Reduces humidity.
- FAN: Circulates air without cooling or heating.
- AUTO: Automatically selects mode based on room temperature.
- TEMP ▲/▼ Buttons: Adjusts the desired temperature.
- FAN SPEED Button: Selects fan speed (Low, Medium, High, Auto).
- TIMER Button: Sets the ON/OFF timer.
- SLEEP Mode: Adjusts temperature for comfortable sleep and energy saving.
- SWING Button: Controls the vertical louver movement.
6.2 Basic Operation
- Power On: Press the POWER button on the remote control.
- Select Mode: Press the MODE button to choose your desired operating mode (e.g., COOL).
- Set Temperature: Use the TEMP ▲/▼ buttons to set the desired room temperature.
- Adjust Fan Speed: Press the FAN SPEED button to select your preferred fan speed.
- Power Off: Press the POWER button again to turn off the unit.
7. Maintenance
Regular maintenance ensures optimal performance and extends the lifespan of your air conditioner. Always disconnect power before performing any maintenance.
7.1 Cleaning the Air Filter
- Open the front panel of the indoor unit.
- Remove the air filters.
- Clean the filters with a vacuum cleaner or wash them with lukewarm water and mild detergent.
- Rinse thoroughly and allow them to dry completely in a shaded area.
- Reinstall the dry filters and close the front panel.
Frequency: Clean air filters every two weeks or more frequently if the unit is used often or in dusty environments.
7.2 Cleaning the Indoor Unit
- Wipe the exterior of the indoor unit with a soft, damp cloth.
- Do not use harsh detergents, abrasive cleaners, or solvents.
7.3 Outdoor Unit Maintenance
Periodically check the outdoor unit for debris, leaves, or other obstructions that might block airflow. Clean the coil fins gently with a soft brush or vacuum. For thorough cleaning and inspection, it is recommended to contact a professional service technician annually.
8. Troubleshooting
Before contacting service, refer to the following table for common issues and their solutions.
| Problem | Possible Cause | Solution |
|---|---|---|
| Unit does not start | No power; remote control batteries low; circuit breaker tripped. | Check power supply; replace remote batteries; reset circuit breaker. |
| Insufficient cooling | Dirty air filter; blocked outdoor unit; wrong mode selected; room too large. | Clean air filter; clear obstructions from outdoor unit; select COOL mode; ensure unit capacity matches room size. |
| Water leakage from indoor unit | Blocked drainage hose; improper installation. | Clear drainage hose; contact a professional for inspection. |
| Unusual noise | Loose parts; foreign objects in fan; compressor noise (normal). | Check for loose parts; remove foreign objects; consult manual for normal operating sounds. |
If the problem persists after attempting these solutions, please contact customer support.
9. Specifications
| Feature | Detail |
|---|---|
| Model | 12000 BTU Mono Inverter |
| Cooling Capacity | 12000 BTU |
| Type | Mono Inverter |
| Functions | Cooling, Dehumidification, Ventilation |
| Energy Class | A++ |
| Special Features | Inverter, Remote Control, Programmable Timer, Silent Mode |
| Power Source | Gas |
| Item Weight | 50 Kilograms |
| Control Method | Remote |
| ASIN | B0BQJRZXQV |
| Country of Origin | Italy |
Note: The power source listed as "Gas" in the provided specifications may be a data entry error. Air conditioners typically operate on electricity. Please refer to the product's physical label for accurate power requirements.
10. Warranty and Support
Bion Electrics products are manufactured to high-quality standards. For specific warranty terms and conditions, please refer to the warranty card included with your product or visit the official Bion Electrics website.
For technical support, service, or spare parts, please contact your authorized dealer or Bion Electrics customer service. When contacting support, please have your model number (12000 BTU Mono Inverter) and ASIN (B0BQJRZXQV) ready.
Online Resources: For additional information, FAQs, and product registration, please visit the official Bion Electrics website.
Related Documents - 12000 BTU
 |
Bion Safety Bedrail F200 Assembly and Folding Instructions Detailed assembly and folding instructions for the Bion Safety Bedrail F200. Learn how to safely install and use this bed rail for enhanced safety and support. |
 |
NOVA BION 3 Tandem-Gleitschirm Handbuch: Sicherheit, Bedienung & Leistung Das offizielle Handbuch für den NOVA BION 3 Tandem-Gleitschirm. Erfahren Sie alles über sicheres Fliegen, Bedienung, Wartung und technische Details für unvergessliche Tandemflüge. |
 |
Kanadenia INOVA BION™: Robuste, flexible, umweltbewusste Synthetische Methanproduktion Erfahren Sie mehr über das BION™-System von Kanadenia INOVA zur biologischen Methanisierung, das CO₂ und H₂ in erneuerbares synthetisches Methan (SNG) umwandelt. Robuste, flexible und umweltfreundliche Technologie für die Gasaufbereitung und Netzeinspeisung. |
 |
Bion Homecare Chair J310: Specifications and Features Discover the Bion Homecare Chair J310, designed for elegance and comfort. Features include adjustable leg elevation, supreme cushioning, and detailed specifications for this advanced homecare solution. |
 |
BION™ 400: Synthetic Methane Production System | Kanadevia INOVA Discover the BION™ 400 system by Kanadevia INOVA for biological methanation, producing synthetic methane from CO₂ and H₂. Learn about its robust, flexible, and ecology-minded design, technical specifications, and applications in renewable gas production and power-to-gas. |
 |
BION C1306-6 Pendant Lamp by Pepe Fornás | Aromas del Campo Detailed technical specifications for the BION C1306-6 pendant lamp designed by Pepe Fornás for Aromas del Campo. Features include 6xG9 LED 5W 2700K, dimmable functionality with Dali-Push option, and available finishes in Matt black, Aged gold, and Matt white. |
Ask a question about this manual
Ask about setup, troubleshooting, compatibility, parts, safety, or missing instructions. Manuals+ will review the question and use this page’s manual context to help answer it.