1. Introduction
Thank you for choosing the STIO 54.6V 2A Electric Bike Charger. This charger is designed to provide efficient and safe charging for 48V lithium/Li-ion batteries commonly found in electric bikes, wheelchairs, and ATVs. Please read this manual thoroughly before use to ensure proper operation and to maximize the lifespan of your charger and battery.
2. Important Safety Information
To prevent injury, damage, or electric shock, observe the following safety precautions:

This image highlights critical safety warnings, emphasizing the charger's compatibility exclusively with 48V lithium/Li-ion batteries and the importance of matching voltage and connector size before purchase.
- Battery Compatibility: This charger is ONLY for 48V Lithium/Li-ion batteries. Do NOT use with lead-acid batteries or other battery types. Using the wrong battery type can cause severe damage or fire.
- Voltage Match: Ensure the charger's output voltage (54.6V) matches your battery's charging requirements. Incorrect voltage can damage the battery.
- Connector Match: Verify that the charger's connector type and size are compatible with your device's charging port. An incorrect connector can lead to poor connection or damage.
- Polarity: Confirm that the positive and negative terminals of the charger connector align correctly with your battery's charging port. Incorrect polarity can cause damage.
- Environmental Conditions: Use the charger in a dry, well-ventilated area. Avoid exposure to water, moisture, or extreme temperatures.
- Damage Inspection: Do not use the charger if the battery, charger unit, or cables are broken or damaged. Contact customer support for assistance.
- Supervision: Do not leave charging batteries unattended for extended periods.
- Ventilation: Ensure adequate ventilation around the charger during operation to prevent overheating.
3. Product Features
The STIO 54.6V 2A Electric Bike Charger incorporates several features for safe and efficient charging:
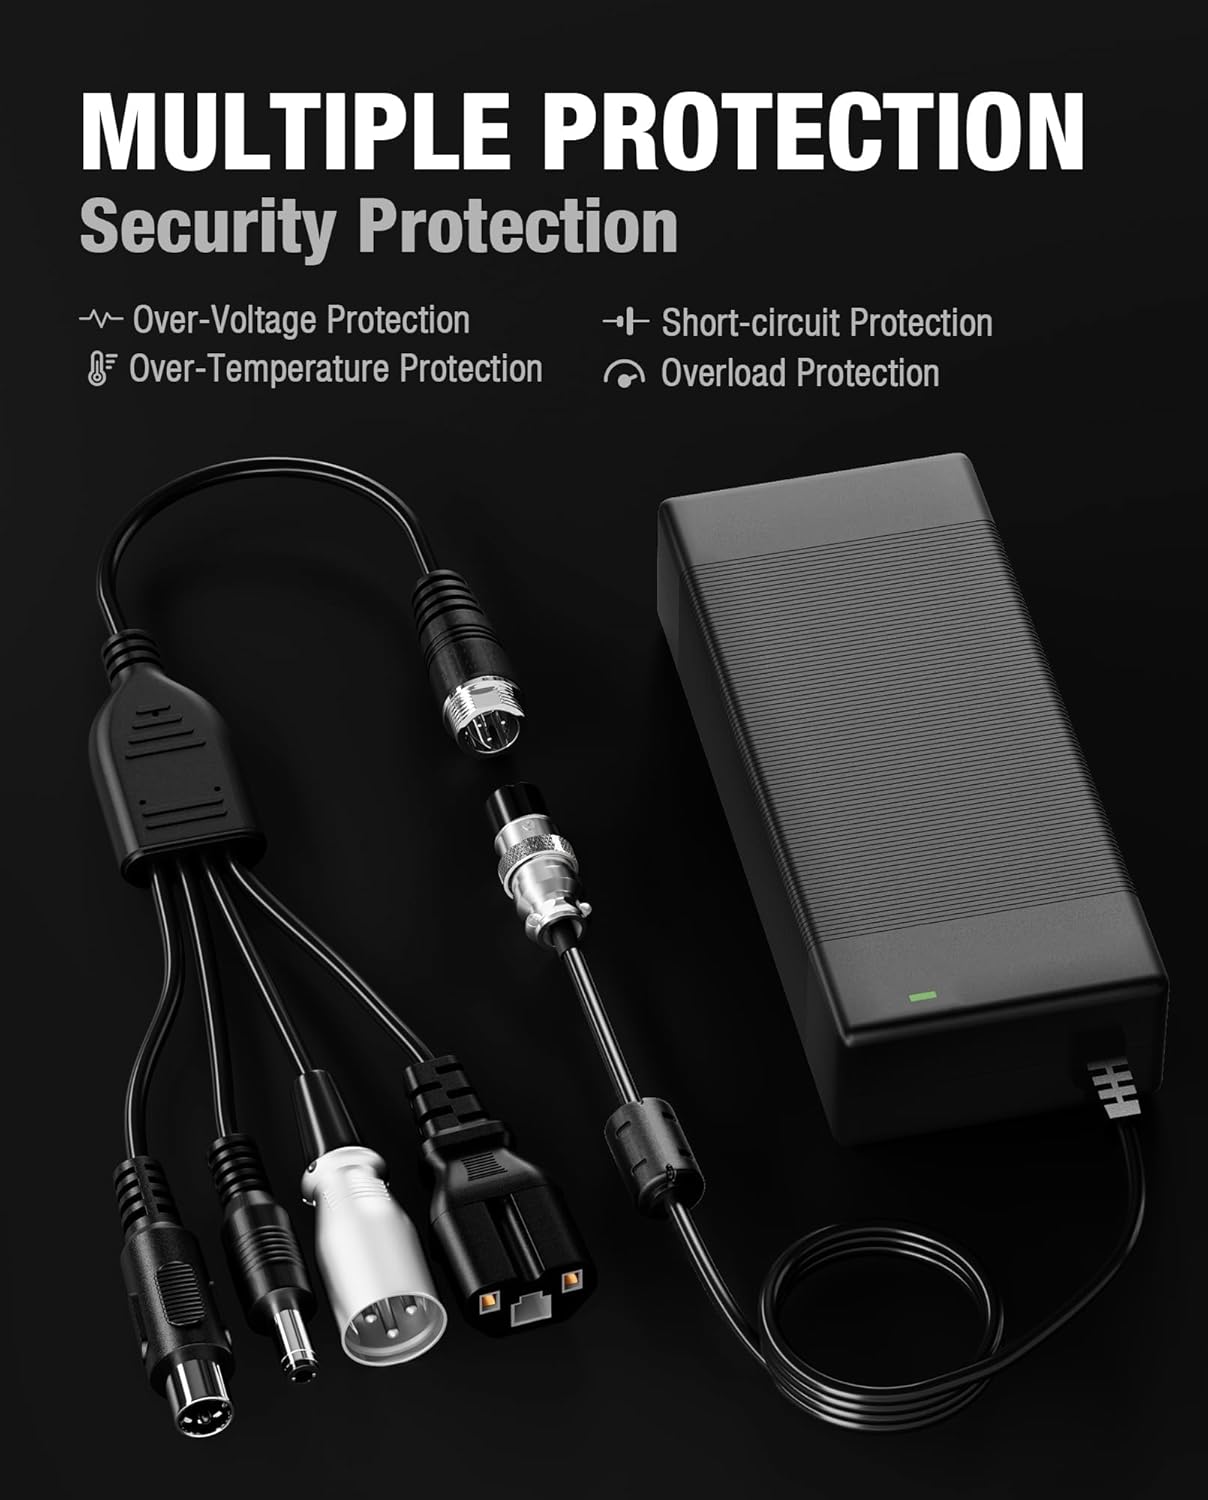
This graphic explains the built-in safety mechanisms of the charger, including protection against over-voltage, over-temperature, short-circuits, and overloads, ensuring safe charging.
- Safeguard Smart Charger: ETL certified, equipped with multiple protection features including Short-circuit Protection, Over Voltage Protection, Over Temperature Protection, and Overload Protection.
- Fast Charging: Delivers a maximum of 2.0A current, with a maximum power output of 109W, significantly reducing charging time compared to lower amperage chargers.
- Universal Compatibility: Includes 5 interchangeable connectors to suit various 48V electric bikes, wheelchairs, and ATVs.
- Advanced Technology: Features a dual cooling system utilizing silicone and aluminum for efficient heat dissipation.
4. Package Contents
Verify that all items are present in your package:

An image displaying all items included in the product package: the main charger unit, the AC power cable, and the multi-function cable equipped with various adapters.
- 1 x STIO 54.6V 2A Charger Unit
- 1 x AC Power Cable
- 1 x Multifunction Cable with 4 Adapters (DC 5.5x2.5/2.1mm, RCA, IEC, XLR)
- 1 x Standard 3-Prong GX16 Connector (pre-attached to charger output cable)
5. Setup
Follow these steps to set up your charger:

A visual guide demonstrating the correct method for connecting the charger to both the battery and the AC power source, with a reminder to ensure all connections are secure.
- Select the Correct Connector: Identify the appropriate connector from the multifunction cable that matches your device's charging port. The standard 3-prong GX16 connector is pre-attached to the charger's output cable. If a different connector is needed, attach the correct adapter to the GX16 connector.
- Connect to Battery: Plug the selected connector securely into your device's charging port. Ensure a firm connection.
- Connect to Power: Plug the AC power cable into the charger unit, then plug the other end into a standard 110V-240V AC wall outlet.
- Verify Connection: The LED indicator on the charger will illuminate to show the charging status.
6. Operating Instructions
The charger features an LED indicator to communicate its status:

An image of the STIO charger connected to a battery, with a close-up on the LED indicator showing its status.
- Red LED: Indicates the battery is currently charging.
- Green LED: Indicates the battery is fully charged.
Once the LED turns green, disconnect the charger from the battery and the power outlet.
7. Compatibility
This charger is compatible with various 48V electric bikes and other devices. Always verify your device's battery voltage and connector type before use.

This image visually represents the charger's broad compatibility with popular electric bike models such as Ecotric Hammer, Lectric XP (1.0, 2.0, 3.0), and others, suitable for 48V systems.
Known compatible models include (but are not limited to):
- Ecotric Hammer, Ecotric Matt Black 48V Fat Tire FAT20S900, Ecotric 48V Fat Tire FAT20850C, Ecotric Matt Green 48V Fat Tire, Ecotric Seagull
- Lectric XP (1.0, 2.0, 3.0 models), Lectric XP Step-Thru (1.0, 2.0, 3.0 models), Lectric XP Lite, Lectric XPremium
- Evercross H5
- Kugoo M4/X1/M4 Pro, KUGOO C1, KUGOO G2 PRO
- SAMEBIKE 20LVXD30/LO26
- WUXI D-Power DPLC
- 48V Kaabo Mantis 8/10, 48V ZERO 8/9, 48V VSETT 8/8+/9+, 48V Skywalker 8S
The charger is also suitable for other 48V e-bikes, wheelchairs, and ATVs that require a 54.6V 2A output and one of the included connector types.

A visual guide illustrating the five distinct connector types provided with the charger: DC 5.5x2.5/2.1mm, RCA, IEC, Standard 3-prong GX16, and XLR, along with their dimensions and polarity.
8. Specifications
Technical details of the STIO 54.6V 2A Electric Bike Charger:

A detailed view of the charger's specification label, confirming the model number GJS150-5460183, input voltage range (AC100-240V), and output specifications (DC54.6V 2.0A), and reiterating its use for 48V lithium batteries only.
| Feature | Specification |
|---|---|
| Model | GJS150-5460183 |
| Input Voltage | AC 100-240V, 50/60Hz, 3.0A Max |
| Output Voltage | DC 54.6V |
| Output Current | 2.0A |
| Max Power | 109W |
| Compatible Battery Type | 48V Lithium/Li-ion Battery |
| Connector Types Included | Standard 3-Prong GX16 (0.47 inch), DC 5.5x2.5/2.1mm, RCA (0.4 inch), IEC (0.88 inch), XLR (0.7 inch) |
| Protection Features | Short-circuit Protection, Over Voltage Protection, Over Temperature Protection, Overload Protection |
| Certifications | ETL Certified |
| Color | Black |
| Item Weight | 1.1 pounds |
| Package Dimensions | 7.91 x 5.43 x 1.73 inches |
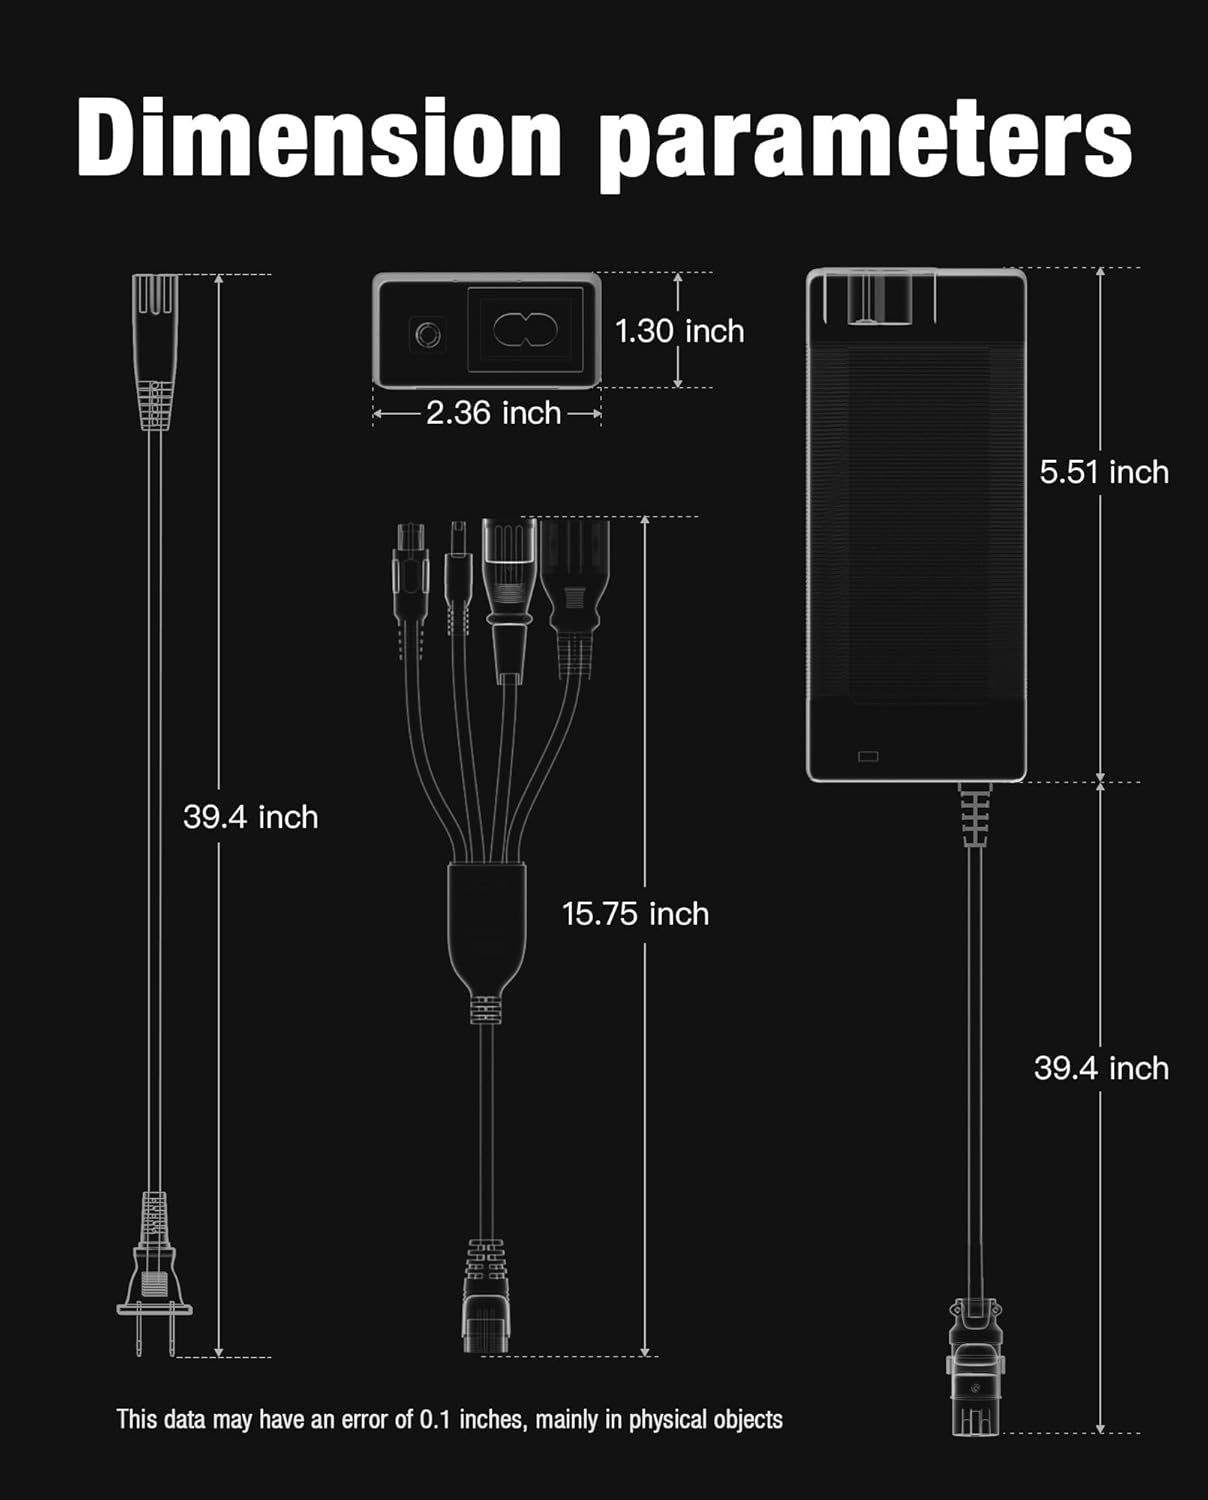
A technical diagram providing the precise dimensions of the charger unit and the lengths of its various cables, useful for understanding its physical footprint.
9. Maintenance
Proper maintenance ensures the longevity and performance of your charger:
- Cleaning: Disconnect the charger from power and the battery before cleaning. Use a soft, dry cloth to wipe the exterior. Do not use liquid cleaners or solvents.
- Storage: Store the charger in a cool, dry place away from direct sunlight, moisture, and corrosive materials when not in use.
- Cable Care: Avoid bending or crimping the cables excessively. Do not pull the cables to disconnect; always grasp the plug.
- Inspection: Periodically inspect the charger, cables, and connectors for any signs of damage, wear, or loose connections.
10. Troubleshooting
If you encounter issues with your charger, refer to the following common problems and solutions:
| Problem | Possible Cause | Solution |
|---|---|---|
| Charger LED does not light up. | No power from outlet; Loose connection; Faulty charger. | Check wall outlet with another device; Ensure all cables are securely connected; Contact customer support if issue persists. |
| LED remains green, but battery is not fully charged. | Battery issue; Incorrect charger for battery. | Verify battery health; Ensure charger is compatible with your 48V lithium battery. |
| Charger LED is red, but charging takes too long. | Battery capacity is very large; Battery degradation. | Charging time varies with battery capacity; Consider battery replacement if degradation is suspected. |
| Charger or battery gets excessively hot. | Poor ventilation; Internal fault; Damaged battery. | Ensure charger is in a well-ventilated area; Discontinue use immediately and contact customer support. |
| Connector does not fit. | Incorrect connector selected; Incompatible device. | Refer to Section 5 to select the correct connector; Verify device compatibility. |
11. Warranty and Customer Support
STIO provides a 3-year hassle-free warranty and dedicated technology support for this product.
- Warranty Period: 3 Years from the date of purchase.
- Coverage: Covers defects in materials and workmanship under normal use.
- Exclusions: Does not cover damage caused by misuse, accidents, unauthorized modifications, or use with incompatible devices.
- Customer Service: For any questions, technical assistance, or warranty claims, please contact STIO customer service. Our support team is available 24/7 to assist you.
Please retain your proof of purchase for warranty service.