1. Introduction
Thank you for choosing the PARKSIDE Airless Paint Spray Gun. This manual provides essential information for the safe and efficient operation, maintenance, and troubleshooting of your new paint sprayer. This system is designed for reduced pressure and low spray mist, ensuring uniform paint application.
It is suitable for thick and fluid paints, water-based and solvent-based paints, and standard varnishes and coating agents. It is ideal for medium to large-sized projects, both indoors and outdoors, on smooth or textured surfaces.
2. Safety Information
WARNING: Please handle with care, as the product may contain pressurized liquids and could pose risks of chemical exposure or mechanical hazards. It is recommended to use eye protection, avoid skin contact, and do not point the dispenser towards people or animals.
General Safety Precautions:
- Always wear appropriate personal protective equipment (PPE), including safety glasses, gloves, and a respirator, especially when working with paints and solvents.
- Ensure adequate ventilation in the work area to prevent the buildup of hazardous fumes.
- Keep children and pets away from the work area.
- Never spray flammable liquids near open flames or ignition sources.
- Disconnect the power supply before performing any maintenance, cleaning, or when the unit is not in use.
- Do not modify the spray gun or any of its components. Use only original spare parts and accessories.
3. Product Overview
Components:
- Main Airless Spray Unit
- Ergonomic Spray Gun
- High-Pressure Paint Hose (9m length)
- Suction Tube with Filter
- Return Tube
- 2 Interchangeable Nozzles (for thick or fluid products)
- Nozzle Storage Compartment (integrated)
- Cleaning Accessories (e.g., filter, funnel)

Figure 3.1: Overview of the PARKSIDE Airless Paint Spray Gun system, showing the main unit, high-pressure hose, and spray gun.
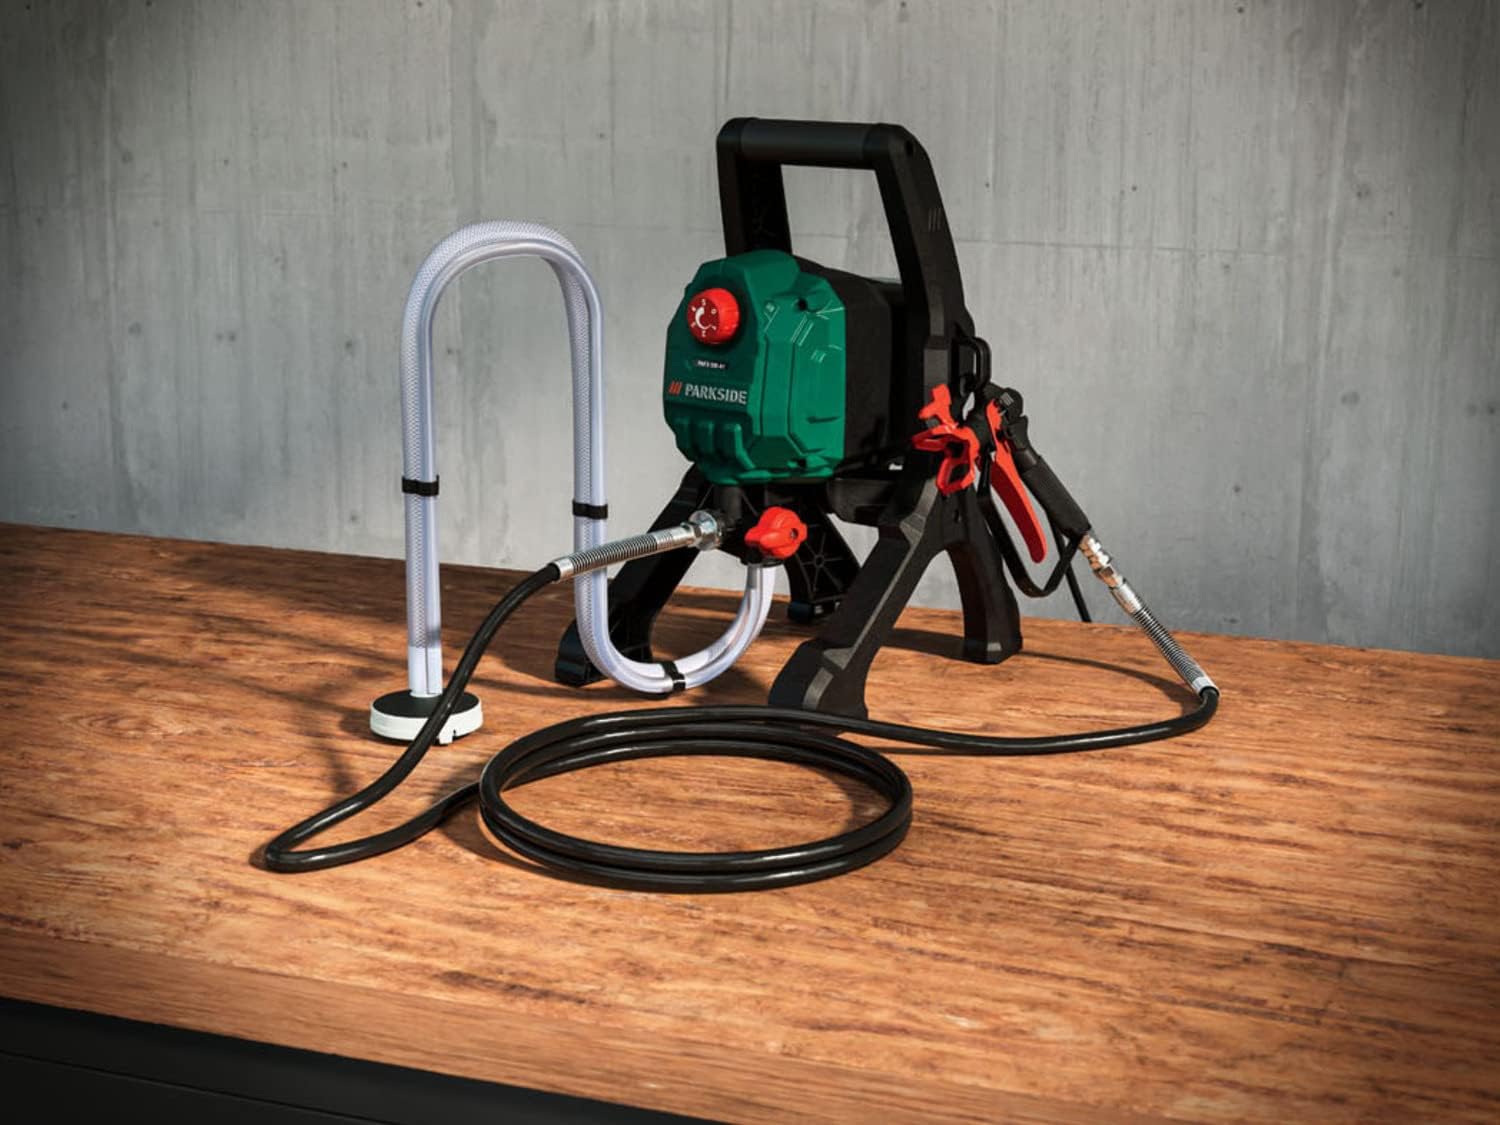
Figure 3.2: The airless paint spray gun unit positioned on a workbench, ready for operation.

Figure 3.3: Detailed view of the ergonomic spray gun, highlighting its comfortable grip and trigger mechanism.
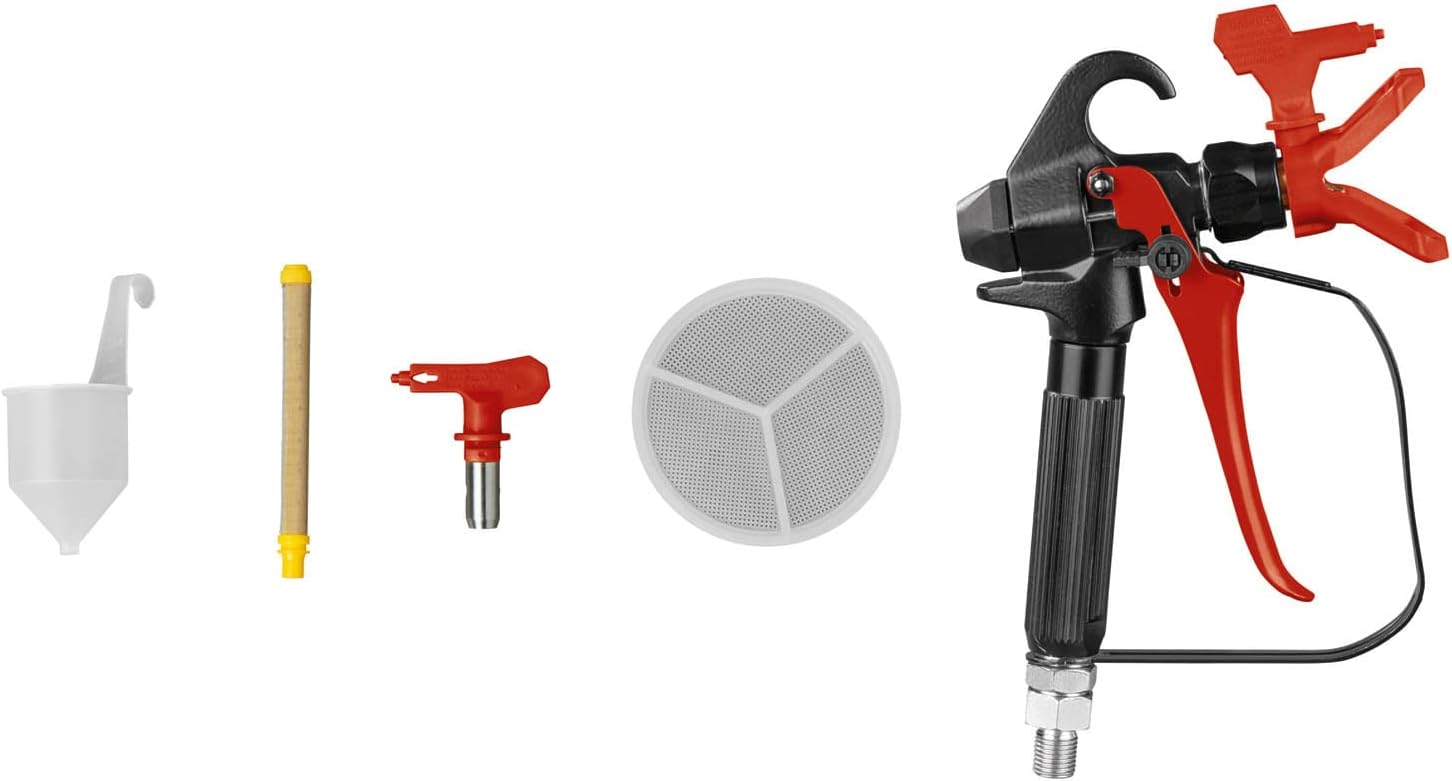
Figure 3.4: The spray gun displayed with its essential accessories, including a filter, funnel, and interchangeable nozzles.

Figure 3.5: Close-up of the integrated storage compartment for nozzles and small accessories on the main unit.
4. Setup
4.1 Unpacking and Inspection:
- Carefully remove all components from the packaging.
- Inspect all parts for any signs of damage. Do not use the unit if any part is damaged.
- Ensure all listed components are present.
4.2 Assembly:
- Place the main unit on a stable, level surface. The solid structure with a pleasant-to-touch carrying handle ensures stability.
- Connect the high-pressure paint hose to the main unit's outlet and to the spray gun. Ensure connections are secure.
- Attach the suction tube with its filter to the inlet port of the main unit.
- Attach the return tube to its designated port.
4.3 Preparing the Paint:
- Ensure the paint is suitable for airless spraying. Refer to the paint manufacturer's instructions for thinning if necessary.
- Strain the paint through a fine mesh filter to remove any lumps or debris that could clog the nozzle.
- Place the suction tube directly into the paint can. The unit supports direct suction from the paint can.

Figure 4.1: The airless spray unit set up with the suction tube placed directly into a paint bucket, demonstrating direct paint aspiration.
4.4 Priming the Unit:
- Ensure the spray gun is in the unlocked position and the nozzle is removed.
- Place the spray gun over a waste container.
- Turn on the unit. Allow the paint to circulate through the system until it flows smoothly from the spray gun, free of air bubbles.
- Once primed, turn off the unit and attach the desired nozzle.
5. Operating Instructions
5.1 Adjusting Pressure:
The PARKSIDE Airless Paint Spray Gun features multi-level adjustable pressure. Adjust the pressure knob on the main unit according to the paint type and desired spray pattern. Start with a lower pressure and gradually increase until the optimal spray is achieved.
5.2 Spraying Technique:
- Hold the spray gun perpendicular to the surface, maintaining a consistent distance (typically 25-30 cm).
- Move the gun in smooth, even strokes, overlapping each pass by about 50%.
- Release the trigger at the end of each stroke to prevent paint buildup.
- For best results, practice on a scrap piece of material before spraying your final surface.

Figure 5.1: An individual demonstrating the proper technique for using the airless paint spray gun on a wall surface.
5.3 Changing Nozzles:
The spray gun comes with 2 interchangeable nozzles for thick or more fluid products. To change a nozzle:
- Ensure the unit is turned off and depressurized.
- Unscrew the nozzle guard.
- Remove the current nozzle and insert the desired one.
- Reattach the nozzle guard securely.
5.4 Pausing Operation:
When taking a break, engage the trigger lock on the spray gun to prevent accidental spraying. Always turn off the main unit for longer breaks.
6. Maintenance and Cleaning
Proper cleaning and maintenance are crucial for the longevity and optimal performance of your airless paint spray gun.
6.1 After Each Use:
- Turn off the unit and disconnect the power.
- Relieve any remaining pressure in the system by pointing the gun into a waste container and triggering it.
- Remove the suction tube from the paint and place it into a bucket of appropriate cleaning solution (water for water-based paints, mineral spirits for oil-based paints).
- Turn on the unit and flush the system until the cleaning solution runs clear from the spray gun and return tube.
- Turn off the unit and disconnect all hoses and the spray gun.
6.2 Cleaning Nozzles and Filters:
- Remove the nozzle and nozzle guard. Clean them thoroughly with a brush and cleaning solution.
- Remove the filter from the spray gun handle and clean it.
- Clean the suction tube filter.
- Rinse all cleaned parts with clean water and allow them to dry completely before reassembly or storage.
6.3 Long-Term Storage:
For long-term storage, after thorough cleaning, circulate a small amount of pump protector fluid or mineral spirits through the system to prevent corrosion and keep seals lubricated.
7. Troubleshooting
| Problem | Possible Cause | Solution |
|---|---|---|
| No paint flow or weak flow | Clogged nozzle, filter, or suction tube; insufficient paint; air in system; incorrect pressure setting. | Clean nozzle and filters; ensure sufficient paint in container; re-prime the unit; adjust pressure. |
| Uneven spray pattern | Worn or clogged nozzle; inconsistent gun movement; incorrect pressure. | Clean or replace nozzle; maintain consistent gun distance and speed; adjust pressure. |
| Leaking from connections | Loose connections; damaged O-rings or seals. | Tighten all connections; inspect and replace damaged O-rings/seals. |
| Motor not starting | No power supply; faulty switch; internal electrical issue. | Check power connection and outlet; contact customer support if problem persists. |
8. Technical Specifications
- Model Number: PAFS 550
- Part Number: PAFS 550 A1
- Dimensions: 60 x 40 x 30 cm
- Weight: 6 kg
- Material: Plastic
- Power Source: Corded Electric
- Hose Length: 9 m
- Recommended Use: Interior and exterior painting, coatings, and varnishing of smooth or textured surfaces.
9. Warranty and Support
For detailed warranty information, please refer to the warranty card included with your product or the purchase documentation. Keep your proof of purchase for any warranty claims.
If you encounter any issues not covered in this manual or require technical assistance, please contact Parkside customer support. Contact details can typically be found on the product packaging or the official Parkside website.