1. Introduction
This manual provides detailed instructions for the safe and effective use of your Camnoon Smart 360° Auto Face Tracking Gimbal. Please read this manual thoroughly before operating the device and retain it for future reference.

Image 1.1: The Camnoon Smart 360° Auto Face Tracking Gimbal in black.
2. Product Overview
2.1 Key Features
- Smart & Accurate Auto Tracking: Features real-time face tracking and AI recognition gesture control for live streaming, video recording, and online chatting.
- Flexible and Smooth Rotation: Offers 360° horizontal rotation. The phone holder and lens can be tilted upward and downward, minimizing blind spots.
- No APP Required: Operates with a built-in auto-tracking camera system, eliminating the need for app downloads or Bluetooth connections.
- Simple to Use: Compatible with most smartphones (width 40-80mm). Easy one-button operation and quick switching between horizontal and vertical phone placement.
- Standard Extensibility: Equipped with a stable base and anti-slip pads. A 1/4 inch screw hole at the bottom allows for mounting on tripods or other brackets.
2.2 Components
The Camnoon Smart 360° Auto Face Tracking Gimbal consists of the main tracking unit, a phone holder, and a detachable stable base.

Image 2.1: The main tracking unit with its detachable stable chassis.
3. Setup
- Assemble the Base: If the base is detached, align it with the main unit and secure it firmly.
- Mount Your Smartphone: Gently expand the phone holder and insert your smartphone. Ensure the phone is securely gripped by the holder. The holder supports smartphones with a width between 40-80mm.
- Position the Gimbal: Place the gimbal on a stable, flat surface. The anti-slip pads on the base provide stability.
- Optional Tripod Mounting: For extended use or different perspectives, locate the 1/4 inch screw hole at the bottom of the gimbal. Attach it to a compatible tripod or bracket (not included).

Image 3.1: The gimbal attached to a tripod for versatile positioning.
4. Operating Instructions
4.1 Power On/Off
Press and hold the power button located on the front of the gimbal to turn it on or off. The device will indicate its power status, typically with an LED light.
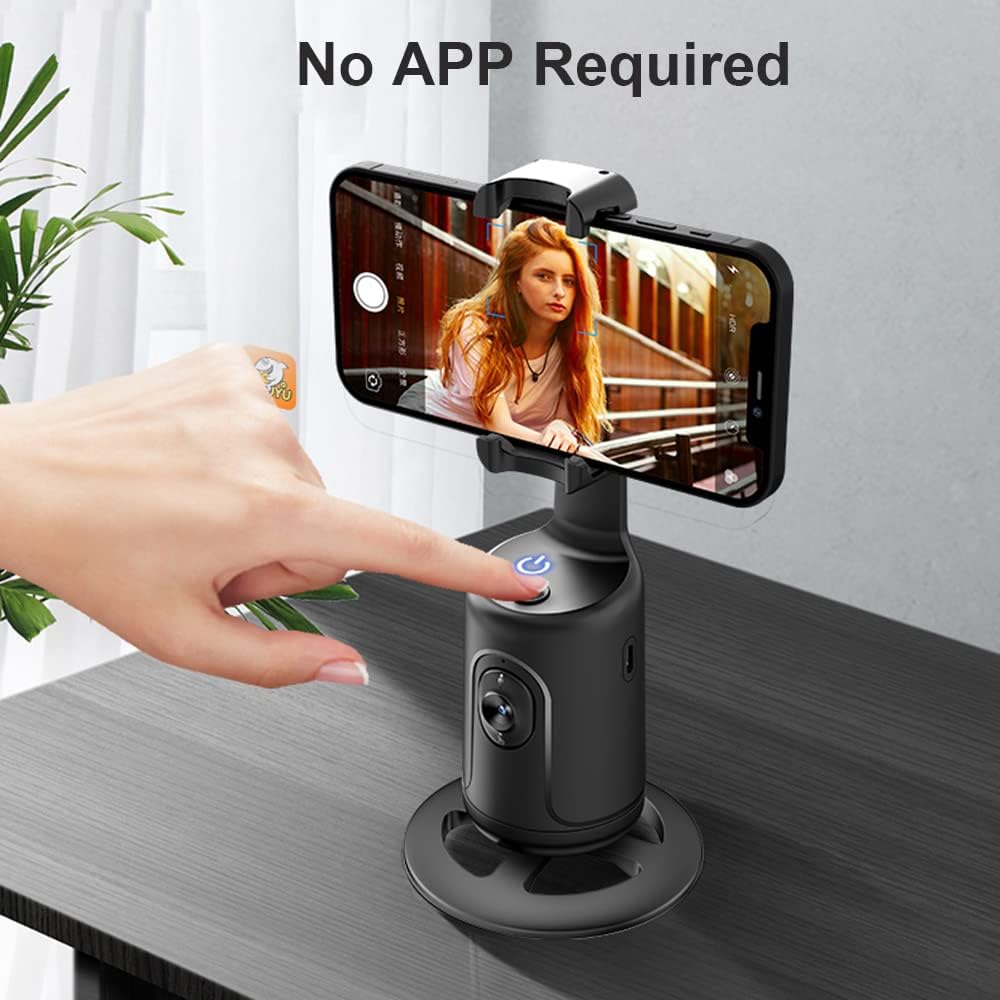
Image 4.1: Activating the gimbal by pressing the power button.
4.2 Auto Face Tracking
Once powered on, the built-in camera system will automatically detect and track faces. Position yourself within the camera's view, and the gimbal will rotate 360° horizontally to keep you centered.

Image 4.2: The gimbal's 360° rotation feature for continuous face tracking.
4.3 Adjustable Lens and Shooting Modes
The gimbal's lens can be adjusted to optimize tracking for different heights or positions. It supports two primary modes:
- Standing Shot: Ideal for users standing.
- Sitting Shot: Ideal for users seated.
For optimal performance, it is recommended to use the gimbal within 1-3 meters of the subject.

Image 4.3: Illustration of adjustable lens for standing and sitting shot modes.
4.4 Gesture Control
The gimbal supports AI recognition gesture control for convenient operation:
- "OK" Gesture: Make an "OK" sign with your hand to initiate tracking.
- "Palm" Gesture: Show an open palm to pause or stop tracking.

Image 4.4: Gesture commands for starting and pausing tracking.
4.5 Switching Orientation
The phone holder allows for easy switching between horizontal (landscape) and vertical (portrait) shooting modes. Simply rotate your smartphone within the holder to change orientation.
5. Maintenance
- Cleaning: Use a soft, dry cloth to clean the surface of the gimbal. Avoid using abrasive cleaners or solvents.
- Storage: Store the device in a cool, dry place away from direct sunlight and extreme temperatures.
- Battery: The gimbal has a built-in lithium battery. Recharge it using the provided USB cable when the battery is low. Avoid overcharging or fully discharging the battery for extended periods.
6. Troubleshooting
| Problem | Possible Cause | Solution |
|---|---|---|
| Gimbal does not power on. | Low battery. | Charge the gimbal using the provided USB cable. |
| Face tracking is inconsistent. | Subject too far or too close; poor lighting; obstructions. | Ensure the subject is within 1-3 meters. Improve lighting conditions. Remove any obstructions between the gimbal and the subject. |
| Gimbal does not respond to gestures. | Incorrect gesture; poor lighting; subject too far. | Ensure gestures are clear and performed within the camera's view. Verify lighting. Maintain optimal distance. |
| Phone not fitting in holder. | Phone width exceeds limits. | The holder supports phones with a width between 40-80mm. Ensure your phone is within this range. |
7. Specifications
| Feature | Detail |
|---|---|
| Model Number | QLO5636660097763WD |
| Product Dimensions | 2.24 x 2.16 x 2.24 inches (5.69 x 5.49 x 5.69 cm) |
| Item Weight | 7.8 ounces (220 grams) |
| Brand | Camnoon |
| Compatible Devices | Smartphones (width 40-80mm) |
| Tracking Type | 360° Auto Face Tracking |
| Connectivity | No APP Required (Built-in system) |
| Power Source | Built-in Lithium Battery (rechargeable via USB) |
8. Safety Information
Please observe the following safety guidelines to ensure safe operation and prevent damage to the device or injury.

Image 8.1: Important safety warning regarding product use.
- This product is not suitable for children. Please read the product instructions and applicable age range carefully before purchase and use.
- Do not disassemble, repair, or modify the device.
- Keep the device away from water, fire, and high temperatures.
- Use only the provided or a certified USB cable for charging.
- Avoid dropping or subjecting the device to strong impacts.
9. Warranty and Support
For warranty information or technical support, please refer to the documentation included with your purchase or contact Camnoon customer service through their official channels. Keep your purchase receipt as proof of purchase.