
G-Homa T1101F
G-Homa Mechanical Timer Outlet User Manual
Model: T1101F
Introduction
The G-Homa Mechanical Timer Outlet is designed for indoor use, providing a simple and reliable way to automate your electrical appliances and lighting. This 24-hour analog timer allows you to set daily on/off cycles with ease, helping to save energy and enhance convenience in your home or office.
This manual provides detailed instructions for setting up, operating, and maintaining your G-Homa Mechanical Timer Outlet. Please read it thoroughly before use.
Product Overview
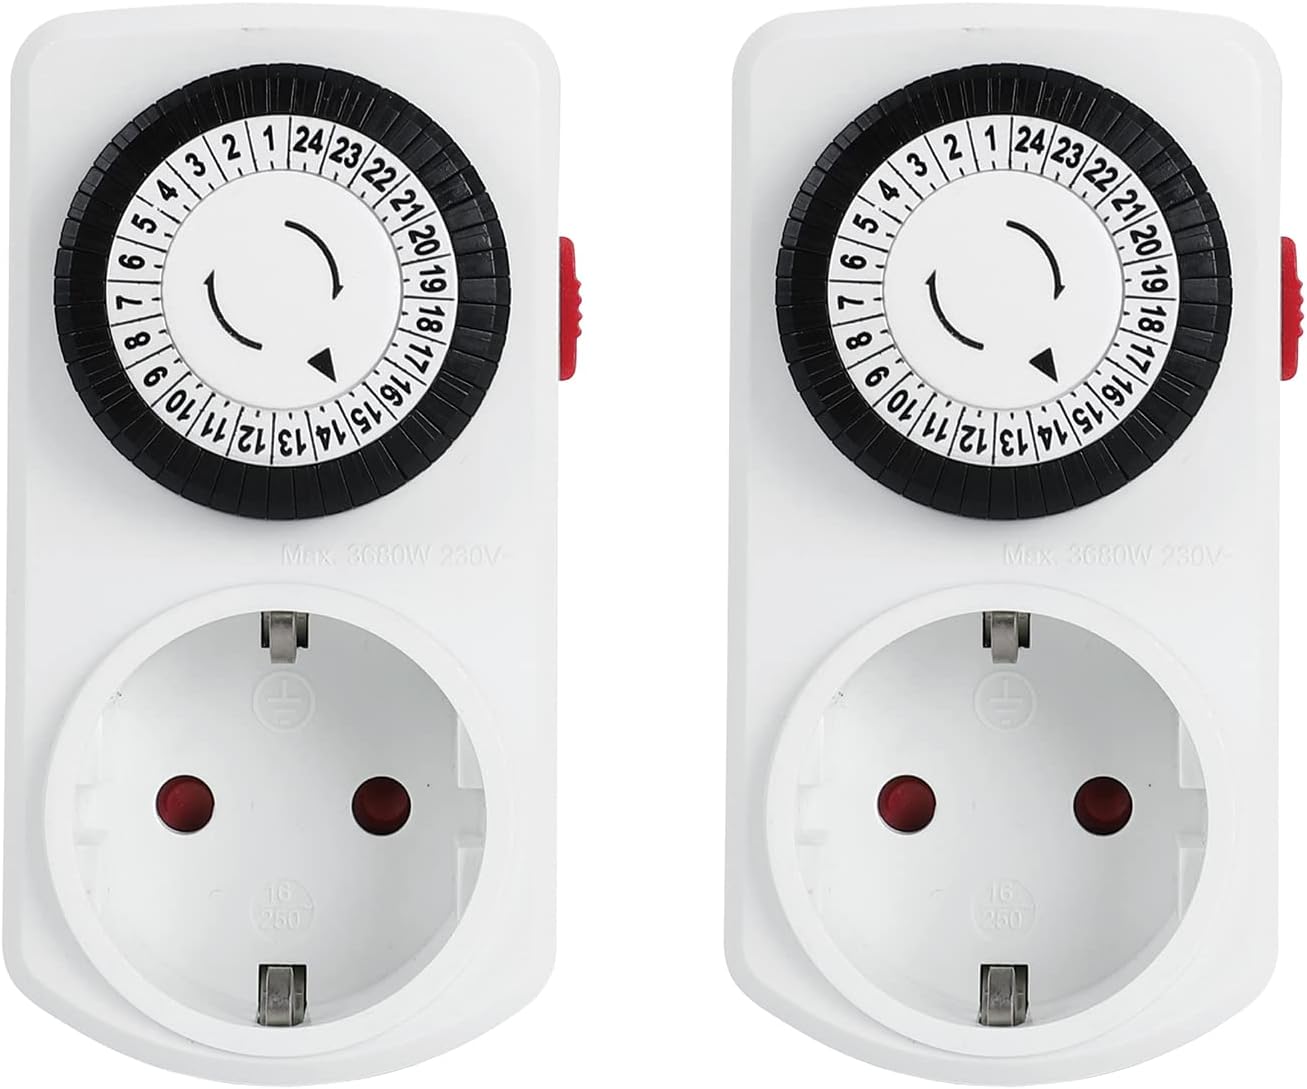
Front view of the G-Homa Mechanical Timer Outlet, showing the 24-hour dial and the power socket.

Key components of the timer outlet: Arrow, Clock Dial, Slide Switch, and Push Pins.
The timer features a clear 24-hour clock dial, adjustable push pins for setting on/off times, and a manual slide switch for continuous operation or timer mode. Its compact design ensures it does not obstruct adjacent outlets.
Setup
- Unpack: Carefully remove the timer outlet from its packaging.
- Initial Charge (if applicable): This mechanical timer does not require batteries or initial charging.
- Plug In: Insert the G-Homa Mechanical Timer Outlet into a standard wall socket.
- Set Current Time: Rotate the clock dial clockwise until the current time aligns with the arrow indicator. The dial is marked with hours from 1 to 24.

The timer outlet plugged into a wall socket, ready for use.
Operating Instructions
Setting the Program
The timer allows for programming in 30-minute intervals, with up to 48 on/off programs per day. Each segment on the dial represents 30 minutes.
- To Set ON Time: Push the pins down for the desired ON period.
- To Set OFF Time: Pull the pins up for the desired OFF period.

Illustration of setting the timer: Pins down for ON, Pins up for OFF. Each pin represents a 30-minute interval.
Manual Override Switch
The timer features a slide switch on the side for manual control:
- Timer Mode: Slide the switch to the timer icon position for programmed operation.
- Continuous ON: Slide the switch to the "I" (Continuous) position to keep the connected appliance continuously on, bypassing the timer settings.

The slide switch allows you to toggle between timer mode and continuous power.
Connecting an Appliance
Once the timer is programmed and the current time is set, plug your appliance into the timer outlet. Ensure the appliance's power switch is in the ON position if it has one, so the timer can control its power supply.

The timer is suitable for various indoor appliances such as lamps, coffee makers, and holiday lights.
Maintenance
- Cleaning: Disconnect the timer from the wall outlet before cleaning. Wipe the surface with a soft, dry cloth. Do not use liquid cleaners or abrasive materials.
- Storage: When not in use, store the timer in a cool, dry place away from direct sunlight and moisture.
- Inspection: Periodically inspect the timer and its cord for any signs of damage. Do not use if damaged.
Troubleshooting
| Problem | Possible Cause | Solution |
|---|---|---|
| Appliance does not turn ON/OFF at programmed times. |
|
|
| Timer is not running. |
|
|
Specifications
| Model Number | T1101F |
| Brand | G-Homa |
| Rated Voltage | 230 V~ |
| Frequency | 50 Hz |
| Max. Load Power | 3680 W |
| Minimum Setting Unit | 30 minutes |
| Number of Programs | Up to 48 ON/OFF cycles per day |
| Material | ABS |
| Color | White |
| Dimensions (L x W x H) | 8.5D x 5.7W x 15.3H cm |
| Batteries Required | No |

Detailed dimensions of the timer outlet.
Warranty and Support
The G-Homa Mechanical Timer Outlet comes with a 3-year warranty. This warranty covers defects in materials and workmanship under normal use.
For professional customer service and support, please contact G-Homa directly through their official website or the retailer where you purchased the product. Please have your model number (T1101F) and purchase information ready when contacting support.
Ask a question about this manual
Ask about setup, troubleshooting, compatibility, parts, safety, or missing instructions. Manuals+ will review the question and use this page’s manual context to help answer it.