KIDOMO F02
KIDOMO F02 Mini Drone User Manual
Model: F02
Your comprehensive guide to operating and maintaining your F02 Mini Drone.
1. Safety Precautions
To ensure safe operation and prevent damage, please read and follow these precautions carefully:
- Environment: Fly in open, clear areas away from people, animals, buildings, and power lines. Avoid flying in strong winds or rain.
- Pre-Flight Check: Always ensure propellers are securely attached and undamaged. Check battery levels for both drone and remote control before each flight.
- Propeller Guards: Utilize the included propeller protection covers, especially for beginner pilots, to prevent accidental injury and damage.
- Emergency Stop: Familiarize yourself with the emergency stop function. The drone is designed to automatically stop rotating when it hits a wall or object.
- Battery Safety: Use only original or approved batteries. Do not overcharge or short-circuit batteries. Store batteries in a cool, dry place.
- Supervision: Children should operate the drone under direct adult supervision.
2. Package Contents
Upon unboxing, please verify that all items listed below are present:
- KIDOMO F02 Mini Drone x 1
- Remote Controller x 1
- Rechargeable Drone Batteries x 4
- USB Charging Cable x 1
- Spare Propellers x 4
- Propeller Protection Covers x 4
- Screwdriver x 1
- User Manual x 1
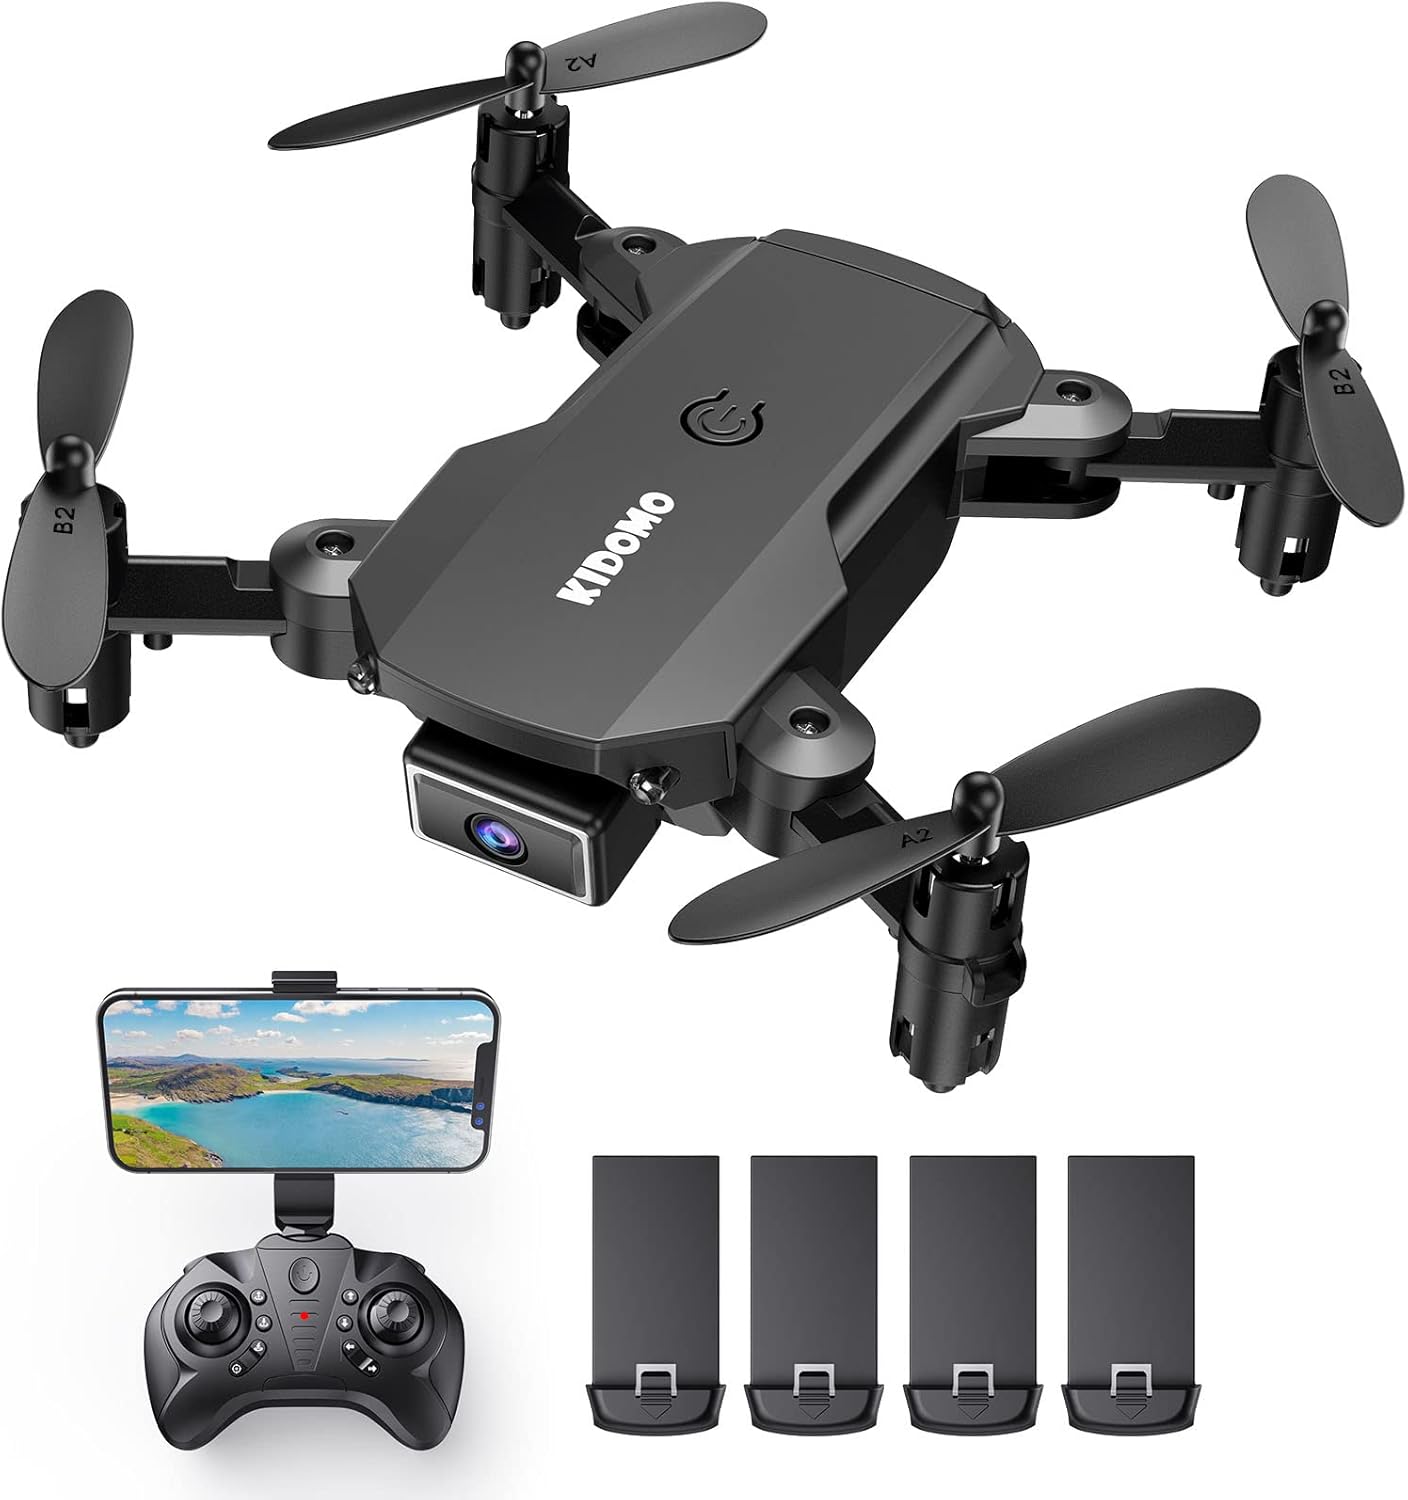
Image: Contents of the KIDOMO F02 Mini Drone package, including the drone, remote, and four batteries.
3. Product Overview
3.1 Drone Components
The F02 Mini Drone features a compact, foldable design for easy portability.

Image: The F02 Mini Drone held in a hand, illustrating its small, portable size (less than 7.05 ounces) and folded dimensions (3.15"L x 2.56"W x 1.18"H).
- Foldable Arms: For compact storage and transport.
- 1080P HD Camera: Located at the front for capturing photos and videos.
- Propellers: Four propellers (two A-type, two B-type) for flight.
- Battery Compartment: Located at the rear/bottom of the drone.
- Power Button: On top of the drone.
3.2 Remote Controller
The remote controller allows for precise control of the drone.
- Left Joystick: Controls altitude (up/down) and rotation (left/right).
- Right Joystick: Controls forward/backward and left/right movement.
- One Key Take-off/Landing Button: For simplified flight initiation and termination.
- Speed Switch: Adjusts flight speed (beginner/intermediate/advanced).
- Phone Holder: To mount your smartphone for FPV viewing.
4. Setup
4.1 Charging Batteries
The drone comes with 4 rechargeable batteries. Ensure all batteries are fully charged before first use.
- Connect the USB charging cable to the drone battery.
- Plug the other end of the USB cable into a USB power adapter (e.g., phone charger, computer USB port).
- The indicator light on the USB cable will show charging status (e.g., red for charging, off for fully charged).
- Charging time is approximately 60-90 minutes per battery. Each battery provides 8-12 minutes of flight time.

Image: Visual representation of the drone batteries, indicating 8-12 minutes of flight per battery and 25-30 minutes with two batteries.
4.2 Battery Installation
- Drone Battery: Insert the charged drone battery into the battery compartment at the rear of the drone until it clicks into place.
- Remote Controller Batteries: Open the battery cover on the back of the remote controller and insert 3 x AAA batteries (not included), ensuring correct polarity. Close the cover.
4.3 Propeller Installation/Check
Ensure propellers are correctly installed and free from damage. Each propeller is marked 'A' or 'B' and must match the corresponding motor arm.
- If replacing, use the screwdriver to remove the screw holding the old propeller.
- Align the new propeller (A or B) with the motor shaft and secure it with the screw.
- Attach the propeller protection covers by snapping them onto the motor arms.
4.4 Pairing the Drone and Remote
- Place the drone on a flat, level surface.
- Turn on the drone by pressing the power button. The drone's indicator lights will flash.
- Turn on the remote controller.
- Push the left joystick (throttle) all the way up, then all the way down. The drone's lights will stop flashing and become solid, indicating successful pairing.
4.5 Gyro Calibration
After pairing, calibrate the gyroscope for stable flight.
- With the drone on a flat surface, push both joysticks down and to the right simultaneously.
- The drone's lights will flash rapidly and then become solid, indicating successful calibration.
5. Operating the Drone
5.1 Basic Flight Controls

Image: Depiction of the drone's three simple operation modes: One Key Start/Landing, Headless Mode, and Altitude Hold.
- One Key Start/Landing: Press the dedicated button on the remote to automatically take off or land.
- Altitude Hold: The drone will automatically maintain a certain height, making it easier to control.
- Take-off (Manual): Slowly push the left joystick up.
- Landing (Manual): Slowly pull the left joystick down.
- Forward/Backward: Push the right joystick up/down.
- Left/Right Sideways Flight: Push the right joystick left/right.
- Rotation: Push the left joystick left/right.
5.2 Advanced Features
- Headless Mode: Press the Headless Mode button. In this mode, the drone's orientation is relative to the pilot, regardless of the drone's front direction. This simplifies control for beginners.
- 360° 3D Flip: Fly the drone to a height of at least 2 meters. Press the 3D Flip button, then push the right joystick in any direction to perform a flip.

Image: The F02 Mini Drone executing a 360° 3D flip, adding dynamic maneuvers to flight.
- Voice Control: After enabling voice control via the app, you can give commands like "Take off," "Land," "Forward," etc.
- Gesture Control: Specific hand gestures can trigger photo or video capture (refer to app instructions for details).
- Trajectory Flight: Open the app and draw a flight path on your smartphone screen. The drone will follow the designated route automatically.

Image: A smartphone displaying a custom flight trajectory drawn by the user, which the drone will follow.
5.3 Camera Operation (1080P HD FPV)
The F02 drone is equipped with a 1080P HD camera for capturing high-quality aerial footage.

Image: Visual comparison demonstrating the superior clarity of 1080P HD footage captured by the drone's FPV camera compared to 720P.
- App Connection: Download the dedicated drone app (check manual for QR code or app name). Connect your smartphone to the drone's Wi-Fi network.
- Live View: Once connected, you will see a live feed from the drone's camera on your smartphone screen.
- Take Photo: Tap the photo icon in the app or use the designated button on the remote (if available).
- Record Video: Tap the video icon in the app to start/stop recording.
- Storage: Photos and videos are typically saved directly to your smartphone's gallery.
6. Maintenance
Proper maintenance ensures the longevity and optimal performance of your drone.
- Cleaning: Use a soft, dry cloth to clean the drone body and camera lens. Avoid using liquids or solvents.
- Propeller Inspection: Regularly check propellers for cracks, bends, or damage. Replace any damaged propellers immediately using the provided spare parts.
- Motor Care: Keep motors free from dust, hair, or debris. Do not attempt to lubricate the motors.
- Battery Storage: If storing the drone for an extended period, charge batteries to about 50% and remove them from the drone and remote. Store in a cool, dry place.
- General Storage: Store the drone in its original packaging or a protective case to prevent damage.
7. Troubleshooting
If you encounter issues with your F02 Mini Drone, refer to the following common problems and solutions:
| Problem | Possible Cause | Solution |
|---|---|---|
| Drone does not respond to remote. | Not paired; low battery; remote off. | Ensure drone and remote are on. Re-pair the drone and remote (Section 4.4). Charge batteries. |
| Drone flies erratically or drifts. | Gyroscope not calibrated; damaged propeller; strong wind. | Perform gyroscope calibration (Section 4.5). Check and replace damaged propellers. Fly in calm conditions. |
| Drone crashes immediately after take-off or flies into objects. | Improper calibration; propeller issue; environmental interference. | Ensure drone is on a flat surface for calibration. Check propellers for correct installation (A/B) and damage. Ensure sufficient clear space for flight. |
| Camera feed is blurry or not showing. | App not connected to drone Wi-Fi; dirty lens. | Ensure your phone is connected to the drone's Wi-Fi network. Clean the camera lens gently. |
| Short flight time. | Battery not fully charged; old battery. | Ensure batteries are fully charged. Consider replacing old batteries if performance degrades significantly. |
8. Specifications
| Feature | Detail |
|---|---|
| Brand | KIDOMO |
| Model Name | F02 |
| Color | Black |
| Video Capture Resolution | 1080p |
| Connectivity Technology | Remote, Wi-Fi (for FPV) |
| Skill Level | Beginner |
| Item Weight | 0.43 Pounds (approx. 6.9 ounces) |
| Battery Capacity | 650 mAh (per battery) |
| Flight Time | 8-12 minutes per battery (up to 50 minutes with 4 batteries) |
| Special Features | Voice Control, Gesture Control, Foldable Design, One Key Start/Landing, Altitude Hold, Headless Mode, 360° Flip, Trajectory Flight |
| Product Dimensions | 3.14"L x 2.5"W x 1.18"H (folded) |
| UPC | 860009191877 |
9. Warranty and Support
KIDOMO products are designed for quality and reliability. For warranty information or technical support, please refer to the contact details provided with your purchase documentation or visit the official KIDOMO website.
Always ensure you have your product model number (F02) and purchase date available when contacting support.
Ask a question about this manual
Ask about setup, troubleshooting, compatibility, parts, safety, or missing instructions. Manuals+ will review the question and use this page’s manual context to help answer it.