Introduction
Welcome to the Nilox S1 E-Scooter user manual. This guide provides essential information for the safe and efficient use of your electric scooter. The Nilox S1 features a powerful 350W motor, cruise control, a smart display, and a dual braking system with an electronic front brake and a rear disc brake, designed for urban mobility.
Safety Guidelines
Your safety is paramount. Please read and understand all safety instructions before operating the Nilox S1 E-Scooter.
- Wear a Helmet: Always wear a certified helmet and other protective gear (knee pads, elbow pads) when riding.
- Check Before Ride: Before each use, inspect the scooter for any loose parts, brake functionality, tire pressure, and battery level.
- Local Regulations: Adhere to all local traffic laws and regulations regarding electric scooters. In Italy, speed limits are 6 km/h in pedestrian areas and 20 km/h elsewhere.
- Braking System: The scooter is equipped with both front electronic and rear disc brakes. Familiarize yourself with their operation for effective stopping.
- Visibility: Utilize the front light, rear LED light, and front/rear turn signals, especially during low-light conditions or at night, to ensure maximum visibility.
- Riding Conditions: Avoid riding in heavy rain, on slippery surfaces, or over large obstacles.
- Weight Limit: Do not exceed the maximum supported weight of 100 kg.
- Age Recommendation: This scooter is recommended for adults.
- Awareness: Remain alert and aware of your surroundings, including pedestrians, vehicles, and other riders.
What's in the Box
Upon unboxing your Nilox S1 E-Scooter, ensure all components are present:
- Nilox S1 E-Scooter
- Power Cable
- NFC Keys (2)
- Shoulder Strap
- User Manual (this document)
Setup and Assembly
Follow these steps to assemble your Nilox S1 E-Scooter and prepare it for its first ride.
- Unboxing: Carefully remove all components from the packaging.
- Handlebar Assembly: Attach the handlebar to the main stem. Ensure all connections are secure and screws are tightened using the provided tools.
- Cable Connection: Connect any visible cables according to the instructions.
- Initial Charge: Before first use, fully charge the scooter's battery. Refer to the "Charging Operation" section for details.
Video: Unboxing and Basic Assembly Guide. This video demonstrates the initial setup, including handlebar attachment and cable connections.

Image: The Nilox S1 E-Scooter in an urban setting, showcasing its sleek design and ready-to-ride stance.
Operating Your Nilox S1 E-Scooter
Power On/Off
- To Power On: Press and hold the power button on the smart display until the screen illuminates.
- To Power Off: Press and hold the power button until the display turns off.
Riding
- Starting: Place one foot on the deck and push off with the other foot to gain initial momentum. Once moving, gently press the accelerator.
- Speed Modes: Double-click the power button to switch between different speed modes (e.g., ECO, D, S). The smart display will indicate the current mode.
- Cruise Control: The scooter features cruise control for consistent speed on longer rides. Activate it according to the specific instructions in the full manual.
- Braking: Use the electronic front brake and the rear disc brake for controlled stopping. Apply both brakes simultaneously for emergency stops.
Lights and Signals
- Headlight: Click the power button once to turn on/off the front light.
- Rear LED Light: The rear LED light activates automatically with the headlight and also functions as a brake light.
- Turn Signals: Use the dedicated controls on the handlebar to activate the front and rear turn signals when changing direction.

Image: A rider's hands on the handlebars, showing the illuminated front light and controls for safe night riding.
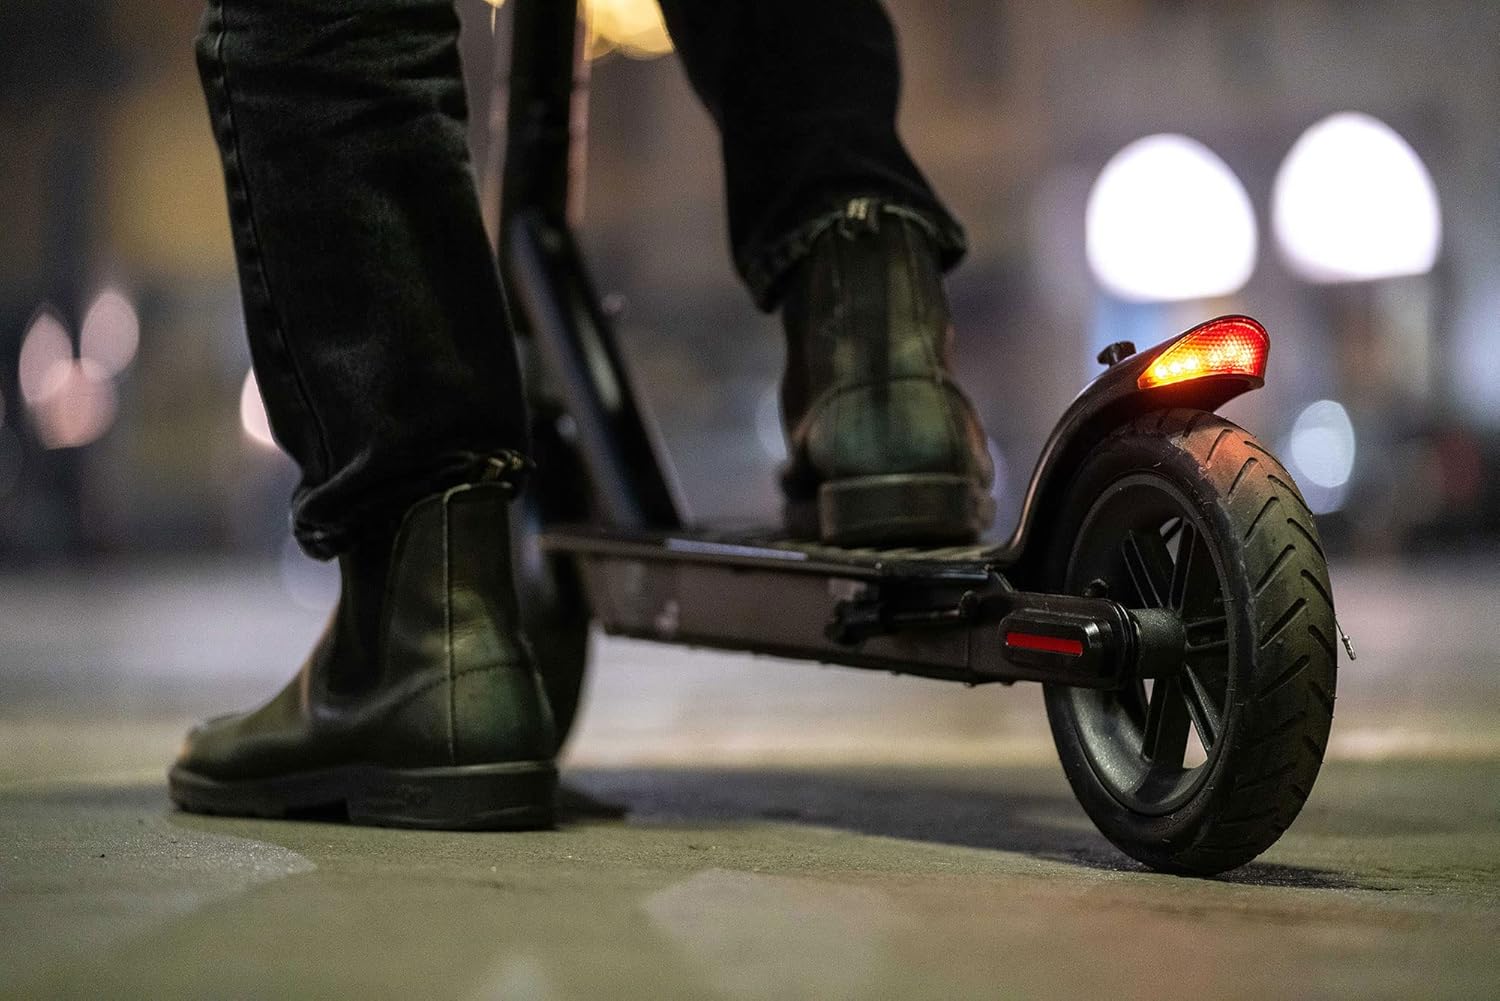
Image: The rear wheel and bright LED taillight of the Nilox S1 E-Scooter, enhancing visibility from behind.
App Connection (if applicable)
Your scooter may support a mobile application for additional features and settings. Scan the QR code on your scooter or refer to the full manual for app download and connection instructions.
Video: Demonstrates power-on, light activation, speed switching, and app connection for the scooter.
Folding Operations
The Nilox S1 E-Scooter is designed for easy portability. Follow these steps to fold and unfold your scooter:
- Folding: Locate the folding mechanism on the stem. Release the latch and carefully fold the stem downwards until it locks into place.
- Unfolding: Release the locking mechanism and raise the stem until it clicks securely into the upright position. Ensure it is fully locked before riding.
Video: Shows the one-click folding mechanism for convenient storage and transport.
Maintenance
Regular maintenance ensures the longevity and safe operation of your scooter.
- Cleaning: Clean the scooter regularly with a damp cloth. Do not use high-pressure water or immerse the scooter in water.
- Tires: Check tire pressure regularly. The 8.5-inch wheels are designed for durability, but proper inflation is crucial for performance and safety.
- Brakes: Periodically inspect the brake pads and cables for wear and tear. Adjust or replace as needed.
- Battery Care: Store the scooter in a cool, dry place. If storing for extended periods, charge the battery to approximately 50-70% and recharge every 30-60 days to prevent deep discharge.
- Fasteners: Check all screws and bolts for tightness regularly.
Charging Operation
To charge your Nilox S1 E-Scooter:
- Locate the charging port on the scooter.
- Connect the power cable to the charging port.
- Plug the other end of the power cable into a suitable power outlet.
- The indicator light on the charger will typically turn red during charging and green when fully charged.
- A full charge takes approximately 4.5 hours.
Video: Illustrates how to connect the charger to the scooter and monitor the charging status.
Troubleshooting
If you encounter issues with your Nilox S1 E-Scooter, refer to this section for common solutions.
| Problem | Possible Cause | Solution |
|---|---|---|
| Scooter does not power on | Low battery; loose connections; power button malfunction. | Charge the battery; check all visible cable connections; contact support if issue persists. |
| Reduced range or speed | Low tire pressure; heavy load; riding uphill; battery degradation. | Check and inflate tires; reduce load; ensure battery is fully charged. |
| Brakes not effective | Worn brake pads; loose brake cable; disc brake misalignment. | Inspect brake pads and cables; adjust or replace as necessary; seek professional service. |
| NFC key not working | Incorrect placement; faulty key; reader issue. | Ensure correct placement over the NFC reader; try the second NFC key; contact support. |
Technical Specifications
| Feature | Detail |
|---|---|
| Model Number | NXESS185BL |
| Motor Power | 350 Watt |
| Max Speed | 20 km/h (up to 25 km/h in some regions, check local regulations) |
| Max Range | Up to 28 km |
| Battery | 36V Lithium-ion (1 included) |
| Charging Time | Approx. 4.5 hours for full charge |
| Braking System | Electronic Front Brake, Rear Disc Brake |
| Wheels | 8.5-inch (Rubber material) |
| Frame Material | Aluminum |
| Max Load Weight | 100 kg |
| Product Weight | 13.8 kg |
| Dimensions (Package) | 114 x 50.5 x 18 cm |
| Features | Headlights, Anti-slip footboard, Foldable, Turn Signals, Bell |
| Recommended Age | Adults |
Warranty and Support
For warranty information, please refer to the documentation included with your purchase or visit the official Nilox website. For technical support or service inquiries, please contact Nilox customer service through their official channels.
Note: Keep your proof of purchase for warranty claims.