JKHFDDIG FJW4
FJW4 WiFi Digital Alarm Clock Multifunctional Color Weather Station User Manual
Model: FJW4 | Brand: JKHFDDIG
1. Introduction
This manual provides detailed instructions for the setup, operation, and maintenance of your FJW4 WiFi Digital Alarm Clock Multifunctional Color Weather Station. This device offers comprehensive weather data, including indoor and outdoor temperature and humidity, barometric pressure, and wind speed, all displayed on a large, easy-to-read screen. It also features an alarm clock with snooze function and automatic time setting via the internet.
2. Package Contents
Please check the package for the following items:
- FJW4 Main Weather Station Unit
- Wireless Outdoor Sensor (1 unit included, supports up to 3)
- Power Adapter (EU Plug, DC5V 1.2A)
- User Manual (this document)
3. Setup
3.1 Power Supply
The main unit can be powered by the included power adapter or by batteries (not included). The wireless outdoor sensor requires batteries.
- Main Unit: Use the DC5V 1.2A power adapter for continuous backlight and operation. Alternatively, insert 2 x LR6 AA batteries (not included) for portable use. When running on batteries, the backlight will only activate for 15 seconds by pressing the "LIGHT" button.
- Wireless Outdoor Sensor: Insert 2 x LR6 1.5V (size AA) batteries (not included).

Image: Illustration of battery compartment and power adapter connection.

Image: Rear view of the main unit, highlighting the USB charging port and power adapter interface.
3.2 Wireless Outdoor Sensor Placement
Place the wireless outdoor sensor in a location that is protected from direct sunlight and rain, but allows for accurate temperature and humidity readings. The sensor has an IPX4 protection class, meaning it is resistant to splashing water. The maximum transmission range is 60 meters in an open area.
3.3 Initial Setup and APP Connection
The weather station can connect to your smartphone for convenient and accurate data collection from the internet.
- Download the App: Search for the 'WeatherSense' app on the App Store (iOS) or Google Play (Android) and install it on your smartphone.
- Connect to WiFi: Follow the in-app instructions to connect your weather station to your home WiFi network. This enables automatic time and date setting, and allows the station to retrieve weather data from the internet.

Image: WeatherSense app download availability.

Image: Weather station connecting to WiFi.
4. Operation
4.1 Display Features
The FJW4 weather station features a large, color display with big digital numbers, ensuring all information is easy to read from any viewing angle. The backlight has 4 levels of brightness, selectable when using the power adapter. When on battery power, the backlight activates for 15 seconds upon pressing the 'LIGHT' button.

Image: Main display of the FJW4 weather station.
4.2 Time, Date, and Alarm
The time and date are automatically set from the internet once connected to WiFi. You can select between 12-hour or 24-hour format. The device also functions as a daily alarm with a snooze function. The day of the week can be displayed in 8 user-selectable languages: English, German, Italian, French, Spanish, Dutch, Danish, and Russian.
4.3 Weather Forecasting
The station provides weather forecasting for today and the next 4 days. It displays indoor and outdoor temperature (in °C or °F), humidity, barometric pressure, wind speed, and frost alerts. There are 20 different weather conditions that can be displayed, including sunny, cloudy, various rain types, snow, and more.
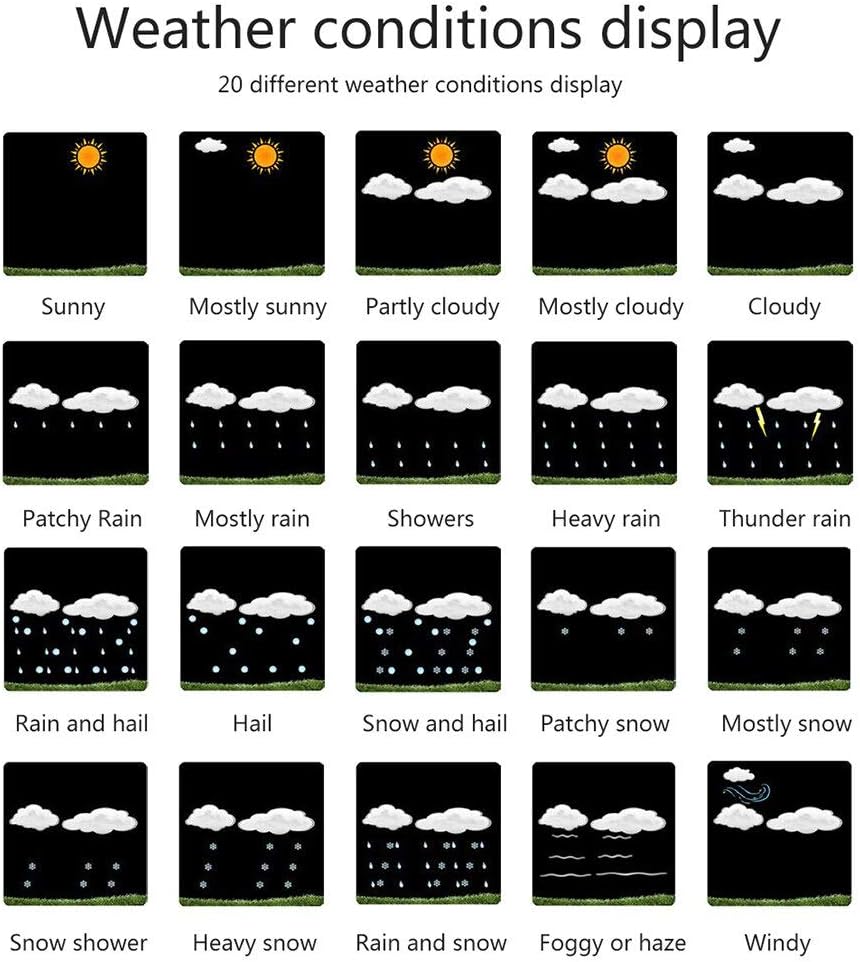
Image: Examples of weather condition icons.
4.4 Wind Speed, Humidity, and Temperature
Wind speed can be displayed alternatively in km/h or Mph. The station also shows minimum and maximum values for air humidity and temperature, along with a trend display for air pressure, temperature, and humidity.
4.5 Multiple Sensors
The main unit supports connection with up to 3 remote sensors, allowing you to monitor weather data from three different locations. Please note that only one sensor is included with the product.
4.6 USB Charging Port
The main unit is equipped with a USB charging port, which can be used to charge electronic devices.
5. Specifications
| Feature | Specification |
|---|---|
| Model | FJW4 |
| Main Material | ABS |
| Power Supply (Main Unit) | DC5V 1.2A Power Adapter (Included), 2 * LR6 AA Batteries (Not included) |
| Plug Type | EU Plug, 220-240V |
| Outdoor Temperature Range | -40°C (-4°F) ~ 70°C (158°F) |
| Outdoor Humidity Range | 20% RH to 95% RH |
| Data Transmission Frequency | 433 MHz |
| Wireless Range (Open Area) | Max. 60 meters |
| Sensor Battery | 2 * LR6 1.5V (size AA) (Not included) |
| Sensor Protection Class | IPX4 |
| Item Weight | 1 Grams (Main Unit) |
6. Troubleshooting
- No Display / Dim Display: Ensure the power adapter is securely connected. If using batteries, check if they are inserted correctly and have sufficient charge. Remember, backlight is limited to 15 seconds on battery power.
- Outdoor Sensor Not Connecting: Check the batteries in the outdoor sensor. Ensure the sensor is within the 60-meter transmission range and there are no major obstructions (thick walls, metal objects) between the sensor and the main unit. Try re-pairing the sensor according to the app instructions.
- Incorrect Time/Date: Verify that the main unit is successfully connected to your WiFi network and has internet access. The time and date are automatically synchronized from the internet.
- Inaccurate Readings: Ensure the outdoor sensor is placed in a location protected from direct sunlight and rain, which can affect temperature and humidity readings.
7. Maintenance
To ensure the longevity and accurate operation of your weather station, follow these maintenance guidelines:
- Clean the display and unit surfaces with a soft, dry cloth. Avoid abrasive cleaners or solvents.
- Do not expose the main unit to extreme temperatures, direct sunlight, or high humidity.
- Regularly check and replace batteries in the outdoor sensor and main unit (if used) as needed.
- Ensure the outdoor sensor's ventilation openings are clear of debris.
8. Warranty and Support
For warranty information or technical support, please refer to the contact details provided by your retailer or visit the official JKHFDDIG website. Keep your purchase receipt as proof of purchase for any warranty claims.
Ask a question about this manual
Ask about setup, troubleshooting, compatibility, parts, safety, or missing instructions. Manuals+ will review the question and use this page’s manual context to help answer it.