Introduction
The TRIMUI Smart is a compact handheld retro game console designed for portable entertainment. Featuring a Linux operating system and a 2.4-inch IPS LCD screen, it offers a sleek design and supports a variety of classic gaming platforms. This manual provides essential information for setting up, operating, and maintaining your TRIMUI Smart console.
Key Features
- Compact Design: Horizontal design, similar to a Game Boy Advance, making it comfortable to hold and highly portable.
- Linux System: Runs on a Linux system, offering flexibility and potential for future software upgrades.
- 2.4-inch IPS LCD Screen: Provides a clear display for retro gaming.
- Built-in Performance: High-performance ARM processor (1.5GHz) and 128MB LPDDR3 memory for smooth emulation of various platforms.
- Connectivity: Supports Wi-Fi (2.4GHz 802.11b/g/n) for network battles and hotspot mode, and Bluetooth 4.0 for headsets and gamepads.
- Storage: 8GB internal storage, expandable via Micro SD card.
- Battery Life: Built-in 1000mAh lithium battery provides approximately 3.5 hours of gameplay.
- User Interface: TRIMUI's self-developed UI system is easy to operate, with real-time archiving (9 slots per game) and game management features.
Specifications
| Component | Detail |
|---|---|
| Material | ABS + Electronic Components |
| System | Linux System |
| CPU | ARM processor, 1.5GHz |
| Memory | LPDDR3 128MB |
| Screen | 2.4-inch, 240x320 IPS LCD |
| Speaker | 0.5W |
| Internal Storage | 8GB |
| External Storage | Micro SD card |
| Network | Wi-Fi, 2.4GHz 802.11b/g/n |
| USB Peripheral | USB Type-C OTG (gamepad/headset/storage device) |
| Bluetooth Peripheral | Bluetooth 4.0 (speaker/headset/gamepad) |
| Battery | Built-in lithium battery, 1000mAh |
| Charging | USB Type-C 5V/1A |
| Battery Life | 3.5 hours |
| Product Dimensions | 4.33 x 2.28 x 0.59 inches |
| Item Weight | 0.14 Kilograms (5 ounces) |
Package Contents
Verify that all items are present in the package:
- TRIMUI SMART Game Console x 1
- Charging Cable x 1

Image: Contents of the TRIMUI Smart package, including the console, charging cable, and a small instruction manual.
Setup Guide
- Charging the Console:
Connect the provided USB Type-C charging cable to the console's USB-C port (located on the bottom frame) and plug the other end into a 5V/1A power adapter (not included). The console will indicate charging status.

Image: The bottom edge of the TRIMUI Smart console, highlighting the Micro SD card slot and the USB-C charging port.
- Inserting a Micro SD Card:
If you wish to expand storage or add more games, insert a Micro SD card into the dedicated slot on the bottom frame of the console. Ensure it is inserted correctly until it clicks into place.
- Powering On:
Locate the power toggle switch on the top frame of the console. Slide the switch to the 'ON' position. The TRIMUI boot screen will appear, and the device should be ready for use within approximately 7 seconds.
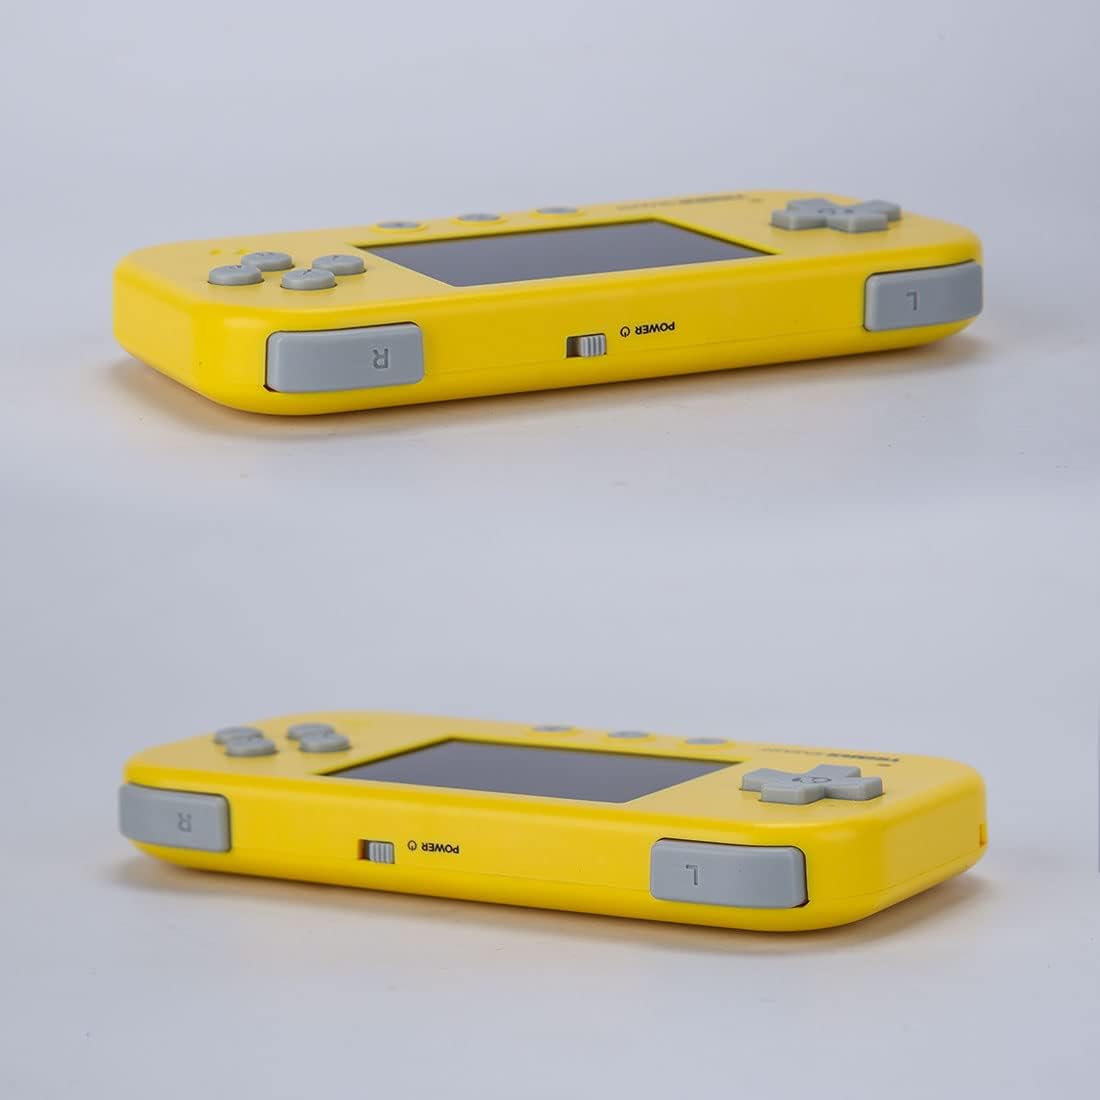
Image: Top view of the TRIMUI Smart console, displaying the left (L) and right (R) shoulder buttons, and the central power toggle switch.
Operating Instructions
Console Layout:
The TRIMUI Smart features a horizontal design for comfortable gameplay.
- D-pad: Located on the left side of the display for directional input.
- A, B, X, Y Buttons: Standard action buttons on the right side.
- Select, Menu, Start Buttons: Located along the bottom edge of the console.
- L and R Shoulder Buttons: Positioned on the top edge.
- Speaker: A small speaker is located on the right, just below the face buttons.

Image: Front view of the TRIMUI Smart console, highlighting the control layout.
Navigation and Gameplay:
- Upon powering on, you will be greeted by the main home screen with icons such as Retrogame, App, File, Settings, Activity, Playlist, and Favorites.
- Use the D-pad to navigate through menus and select options.
- The TRIMUI platform supports multi-platform games and allows for real-time archiving with 9 archiving locations per game.
- To adjust audio volume, use a combination of the Select button and the shoulder triggers. There is no single dedicated volume control.
Maintenance
- Keep the console clean by wiping it with a soft, dry cloth.
- Avoid exposing the device to extreme temperatures, direct sunlight, or moisture.
- Store the console in a protective case when not in use to prevent scratches and damage.
Troubleshooting
- Console Not Powering On: Ensure the battery is charged. Verify the power toggle switch is fully in the 'ON' position.
- Memory Card Errors: If you encounter messages like "ERROR: MEMORY CARD cannot be found" or "Data hasn't been autoloaded," ensure the Micro SD card is properly inserted into its slot. Do not remove the memory card while the console is powered on or saving data.
- Performance Issues (Lag/Heating): The console is optimized for entry-level retro games, particularly Game Boy Advance titles. Playing more demanding games (e.g., some PlayStation 1 titles) for prolonged periods may result in heating, frame skips, or audio tearing. This is expected behavior due to hardware limitations.
- Uncomfortable Grip: While designed for portability, the flat back panel may feel less comfortable during extended play sessions. Adjust your grip or take breaks as needed.
Warranty and Support
For warranty information and technical support, please refer to the contact details provided by the manufacturer, Petforu, or your point of purchase. Keep your proof of purchase for any warranty claims.