
1. Introduction
Thank you for choosing the Bazargame 500mW CNC Laser Engraving Machine. This device is designed for precise engraving and cutting on various materials such as wood, metal, glass, and acrylic. This manual provides essential information for safe operation, assembly, maintenance, and troubleshooting to ensure optimal performance and longevity of your engraver.
2. Safety Information
Operating a laser engraving machine involves inherent risks. Please read and understand all safety warnings before use.
- Eye Protection: Always wear the provided laser safety glasses or equivalent eye protection when the laser is active. Direct exposure to the laser beam can cause permanent eye damage.
- Ventilation: Operate the machine in a well-ventilated area. Engraving certain materials can produce fumes and particles that may be harmful if inhaled.
- Fire Hazard: The laser can ignite flammable materials. Never leave the machine unattended during operation. Keep a fire extinguisher nearby.
- Material Compatibility: Only engrave materials specified as safe. Avoid highly reflective materials, PVC (produces chlorine gas), and other materials that may produce toxic fumes or catch fire easily.
- Children and Pets: Keep children and pets away from the operating area.
- Electrical Safety: Ensure all electrical connections are secure and the power supply is correctly rated. Do not operate with wet hands or in damp conditions.
- Emergency Stop: Familiarize yourself with the location of the power switch for immediate shutdown in case of an emergency.
3. Package Contents
Carefully unpack the box and verify that all components are present and undamaged. If any parts are missing or damaged, please contact customer support.

Image: All components of the Bazargame 500mW CNC Laser Engraving Machine kit laid out. This includes aluminum profiles, stepper motors, laser module, control board, power supply, USB cable, safety glasses, and various fasteners.
- Aluminum Frame Profiles (X and Y axes)
- Stepper Motors (2 units)
- Laser Module (500mW)
- Control Board
- Power Supply Adapter
- USB Cable
- Laser Safety Glasses
- Assembly Hardware (screws, nuts, spacers, belts)
- Tools for Assembly
4. Assembly and Setup
Follow these general steps to assemble your laser engraver. Refer to the detailed assembly guide (if provided separately) for specific instructions and diagrams.
- Frame Assembly: Connect the aluminum profiles to form the rectangular frame using the provided fasteners. Ensure all connections are secure and the frame is square.
- Motor Installation: Mount the stepper motors onto the designated positions on the frame.
- Belt Installation: Install the timing belts onto the stepper motor pulleys and guide rails, ensuring proper tension.
- Laser Module Mounting: Attach the laser module to the moving carriage on the X-axis.
- Control Board Connection: Mount the control board and connect the stepper motors, laser module, and limit switches (if applicable) to the appropriate ports on the board.
- Power and USB Connection: Connect the power supply to the control board and plug it into an electrical outlet. Connect the USB cable from the control board to your computer.
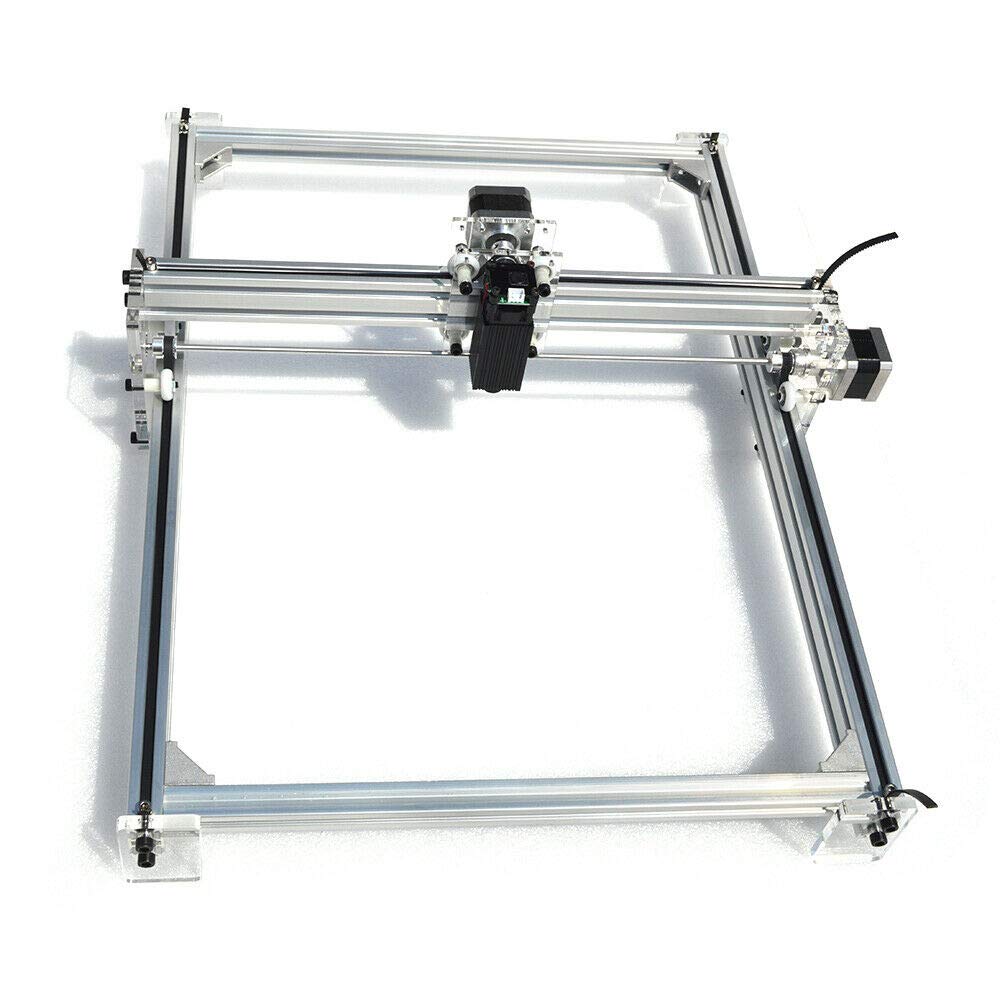
Image: The fully assembled Bazargame 500mW CNC Laser Engraving Machine, showing the aluminum frame, stepper motors, and laser module.
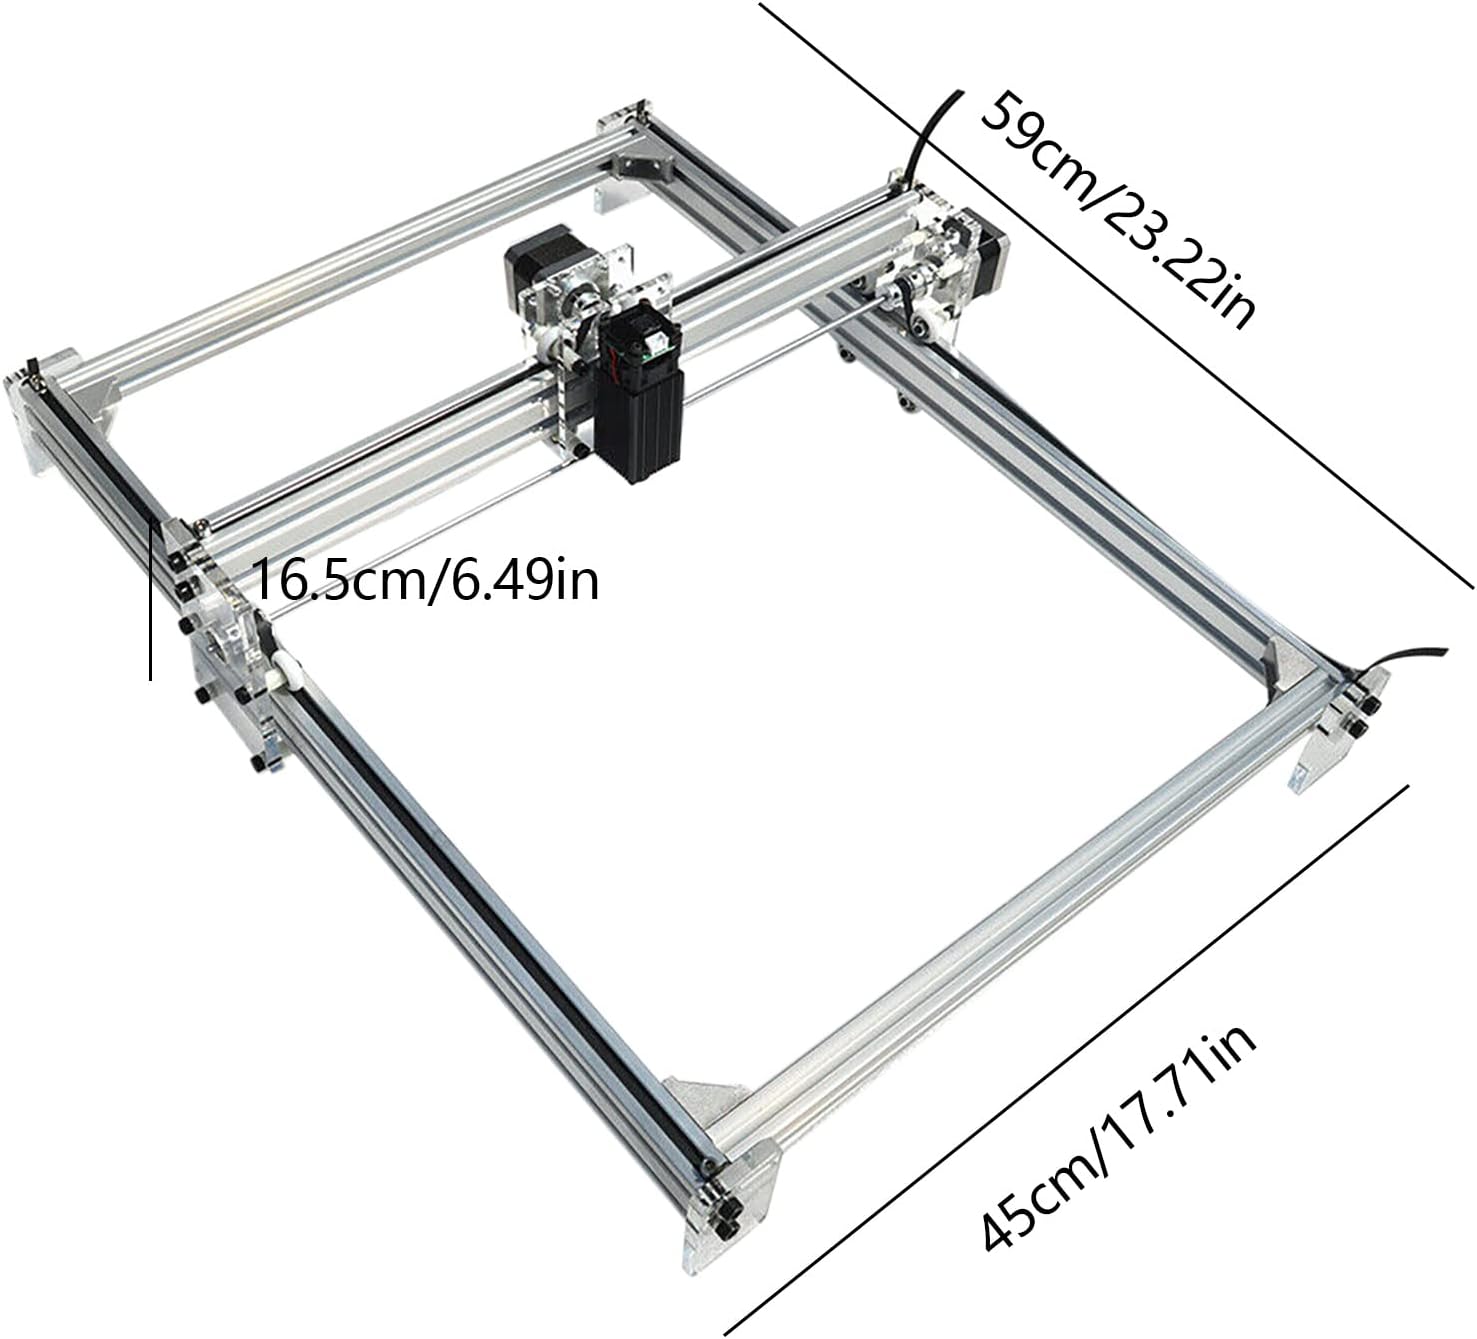
Image: Diagram illustrating the dimensions of the Bazargame 500mW CNC Laser Engraving Machine, with measurements for length, width, and height.

Image: Close-up view of the two stepper motors used in the Bazargame CNC Laser Engraving Machine, showing their design and connection points.

Image: The control board for the Bazargame CNC Laser Engraving Machine, encased in a clear blue housing, showing its electronic components and connection ports.
5. Operating Instructions
Once assembled, follow these steps to begin your engraving projects.
- Software Installation: Install the recommended laser control software on your computer. (Common software includes GRBL-compatible programs like LaserGRBL or LightBurn).
- Connect to Computer: Ensure the engraver is powered on and connected to your computer via USB. Open the laser control software and establish a connection with the machine.
- Material Placement: Place the material to be engraved securely on the work surface. Ensure it is flat and stable.
- Focusing the Laser: Adjust the laser module's height or lens to achieve the smallest possible laser dot on the material surface. This is crucial for precise engraving.
- Design and Settings: Import or create your design in the software. Adjust laser power, speed, and passes according to the material type and desired effect. Start with lower power settings and gradually increase if needed.
- Frame/Preview: Use the software's framing function to preview the engraving area and ensure it aligns with your material.
- Start Engraving: With safety glasses on and proper ventilation, initiate the engraving process from the software. Monitor the machine closely during operation.

Image: Examples of intricate designs engraved on wood and other materials, demonstrating the capabilities of the laser engraving machine.
6. Maintenance
Regular maintenance ensures the longevity and optimal performance of your laser engraver.
- Cleaning: Regularly clean dust and debris from the machine, especially from the rails, belts, and laser lens. Use a soft, lint-free cloth. For the laser lens, use specialized lens cleaning solution and wipes.
- Belt Tension: Check the tension of the timing belts periodically. They should be taut but not overly tight. Adjust if necessary to prevent skipping or inaccurate movements.
- Lubrication: Apply a small amount of appropriate lubricant to the linear guide rails if movement becomes stiff.
- Laser Module Inspection: Inspect the laser module for any signs of damage or degradation. Replace if necessary.
- Firmware Updates: Check for and install any available firmware updates for the control board to ensure compatibility and improved features.
7. Troubleshooting
Here are some common issues and their potential solutions:
- Machine Not Connecting to Software:
- Ensure USB cable is securely connected.
- Verify power supply is connected and turned on.
- Check if the correct COM port is selected in the software.
- Install or update USB drivers for the control board.
- Laser Not Firing:
- Check laser module connections to the control board.
- Ensure laser power settings in software are not set to zero.
- Verify the laser module is not damaged.
- Confirm the laser is properly focused.
- Inaccurate Engraving/Skipping:
- Check belt tension; adjust if too loose or too tight.
- Ensure all frame connections are secure and rigid.
- Verify stepper motor connections.
- Reduce engraving speed if the machine is struggling.
- Poor Engraving Quality:
- Re-focus the laser for a sharper dot.
- Adjust laser power and speed settings for the specific material.
- Clean the laser lens.
- Ensure the material is flat and level.
8. Specifications
| Brand | Bazargame |
| Model Number | OT-HSWJL-661-EU-you |
| Laser Power | 500mW |
| Engraving Area | 40 x 50 cm |
| Compatible Materials | Wood, Metal (surface engraving), Glass (surface engraving), Acrylic, Leather, Paper, Fabric, etc. |
| Manufacturer | Miisyou |
9. Warranty and Support
For warranty information, technical support, or replacement parts, please contact the seller or manufacturer directly. Keep your purchase receipt as proof of purchase.