
SMALLRIG 4135-AU
SmallRig X-T5 Camera Full Cage Instruction Manual
Model: 4135-AU | Brand: SMALLRIG
Introduction
Thank you for choosing the SmallRig X-T5 Camera Full Cage. This aluminum alloy camera rig is specifically designed for the Fujifilm XT5, providing enhanced protection, improved ergonomics, and multiple mounting options for various accessories. This manual will guide you through the installation, operation, and maintenance of your new camera cage to ensure optimal performance and longevity.
What's in the Box
- 1 x Cage
- 1 x Shutter Button
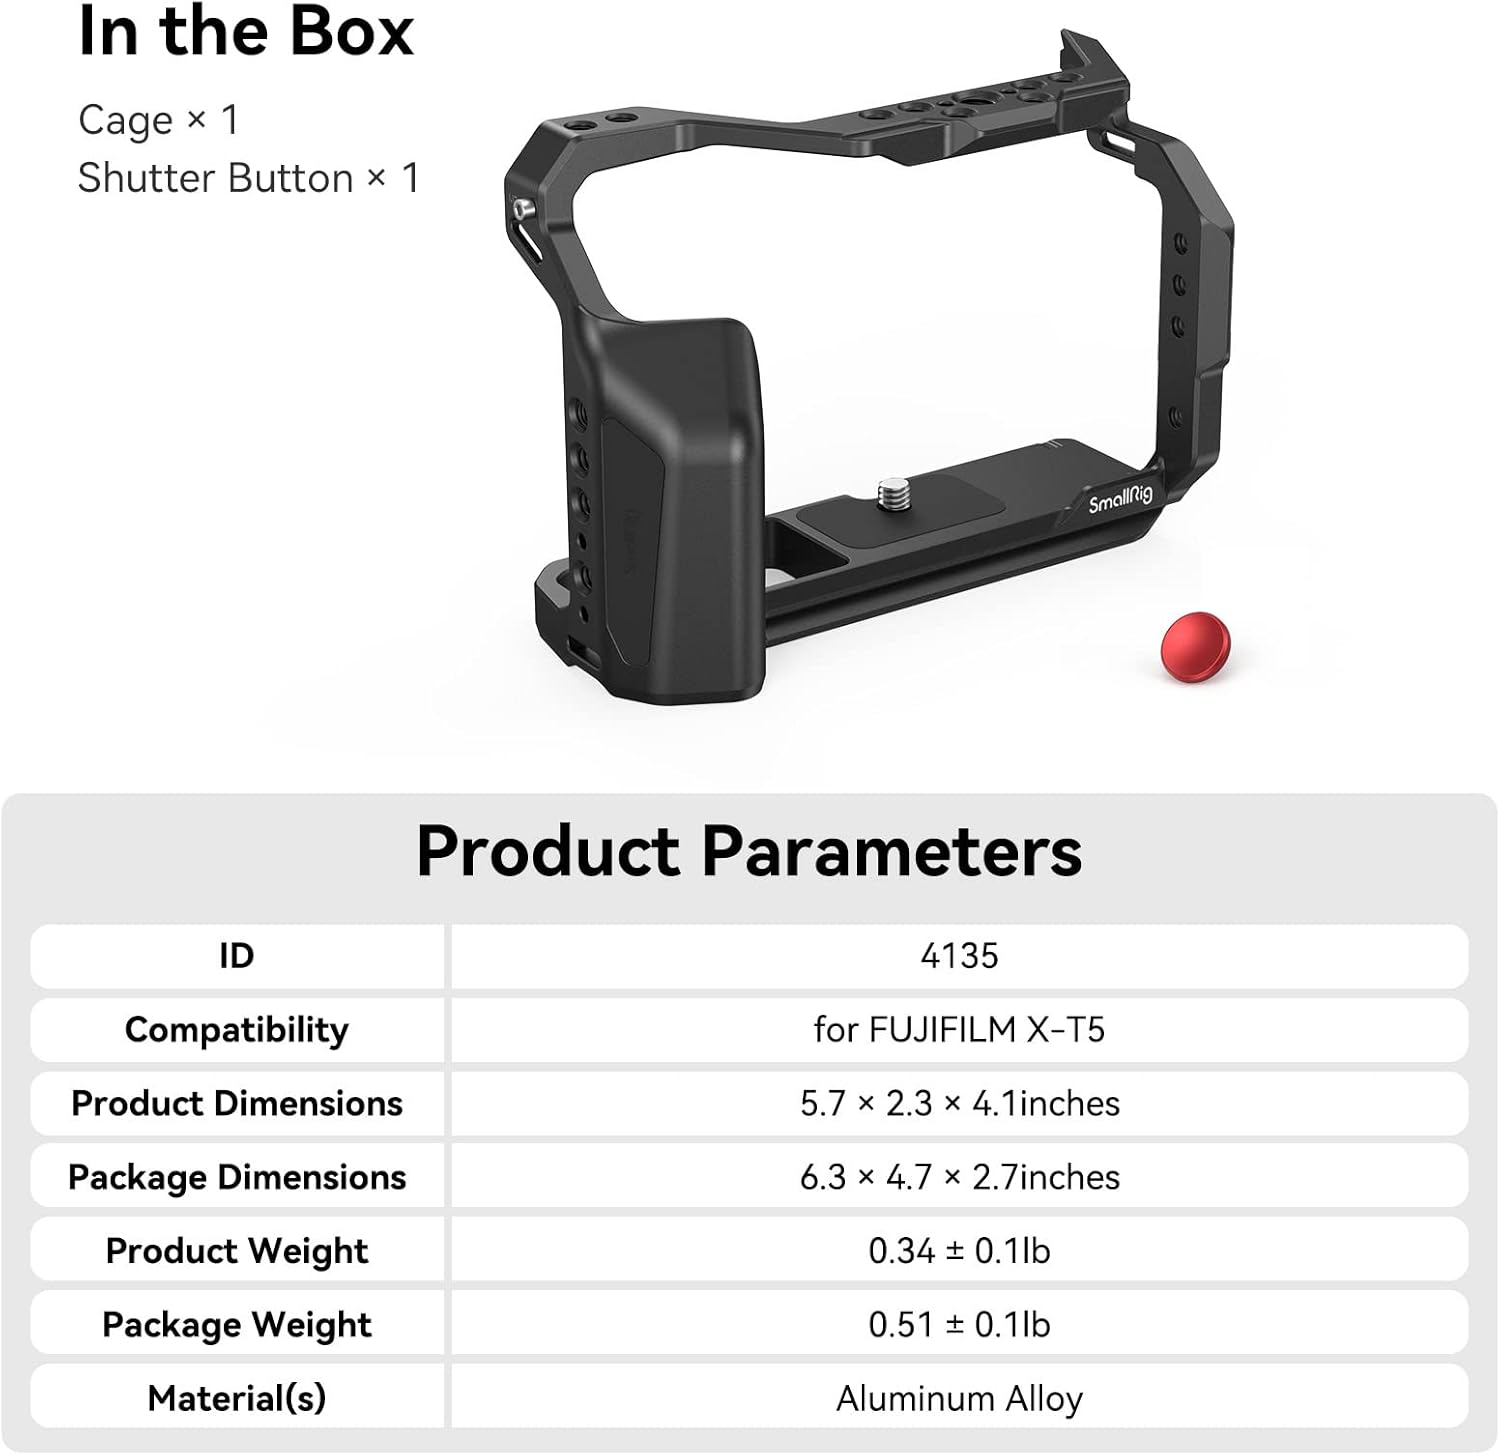
Figure 1: Package Contents
Key Features
- Customized X-T5 Cage: Form-fitting design to protect your XT5 camera without blocking buttons, card slots, screen, and battery door.
- Ergonomic Grip: Equipped with an ergonomically designed grip for improved handling. Includes a complimentary shutter button for enhanced tactile feedback.
- Anti-Deflection Design: Secures the camera via one 1/4"-20 screw at the bottom and two M2 screws on both sides. Built-in rubber pads prevent scratches and wiggles.
- Multiple Mounting Options: Provides various accessory mounts including QD port for quick-release shoulder buckles, 1/4"-20 threaded holes, 3/8"-16 threaded holes, 3/8"-16 locating holes for ARRI, NATO rails, and a cold shoe mount.
- Quick Switch: Built-in Arca-Swiss quick release plate at the bottom allows for rapid installation on RS 2 / RSC 2 / RS 3 / RS 3 Pro gimbals, facilitating seamless transitions between gimbal, handheld, and tripod shooting.

Figure 2: SmallRig X-T5 Full Cage Overview
Setup and Installation
Follow these steps to properly install the SmallRig X-T5 Camera Full Cage onto your Fujifilm XT5 camera:
- Prepare the Camera: Before installation, ensure you remove the split D-ring (strap attachment) from your Fujifilm XT5 camera. This is crucial for a secure and proper fit.
- Align the Cage: Carefully align the camera with the cage, ensuring the bottom 1/4"-20 screw hole on the camera matches the corresponding screw on the cage's base plate.
- Secure the Bottom Screw: Tighten the 1/4"-20 screw at the bottom of the cage into the camera's tripod mount. Use the included dual-head wrench for this.
- Fasten Side Screws: Locate the two M2 screw holes on the sides of the camera (one on each side). Insert and tighten the two M2 screws provided with the cage into these holes. These screws, along with the bottom screw, provide triple protection against twisting and ensure a stable fit.
- Attach Shutter Button (Optional): If desired, screw the complimentary red shutter button onto the camera's shutter release button for improved tactile feel.

Figure 3: Stable Installation Points
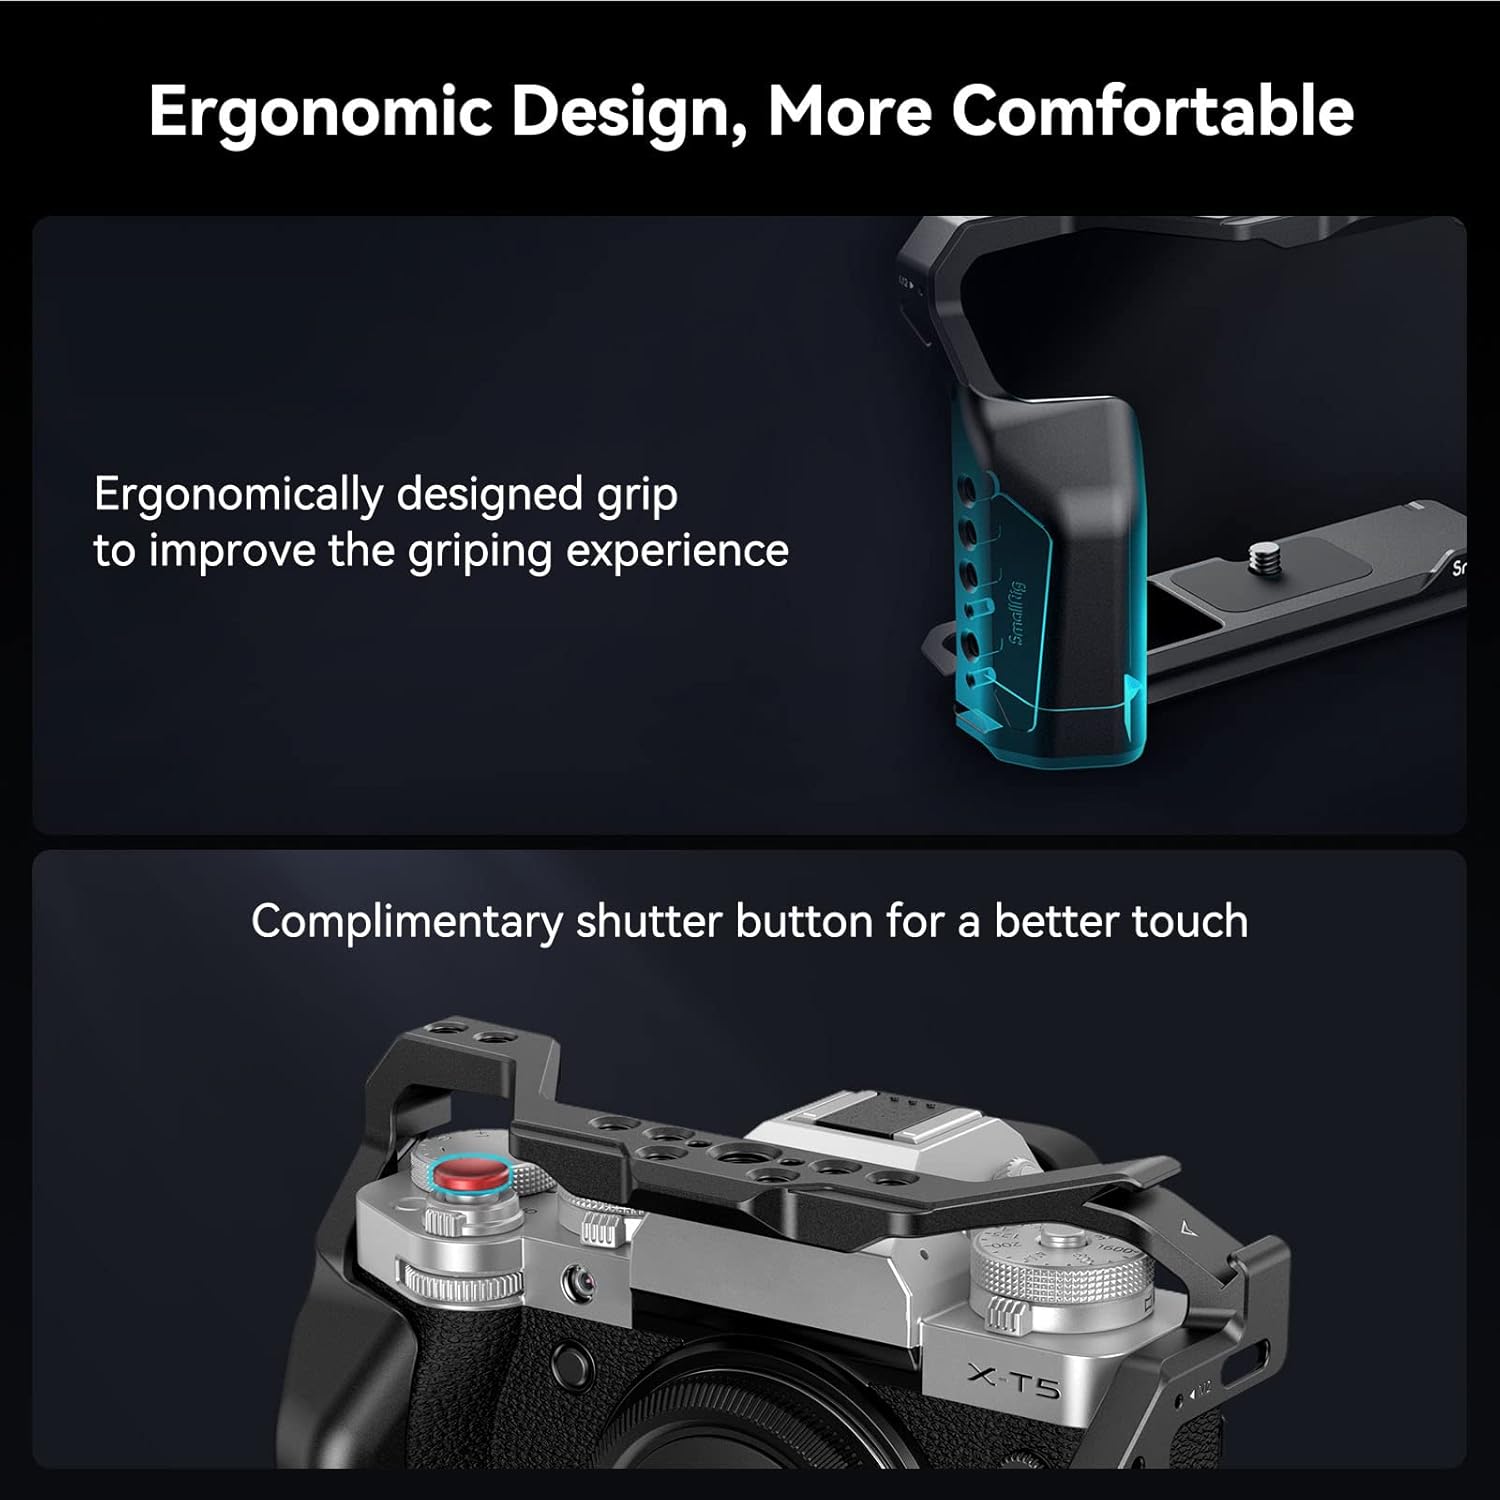
Figure 4: Ergonomic Grip and Shutter Button
Installation Video Guide
Video 1: SmallRig Multifunctional Cage for FUJIFILM X-T5 4135 Installation Guide. This video demonstrates the step-by-step process of attaching the cage to the camera, including securing the screws and highlighting key features.
Operating Instructions
The SmallRig X-T5 Camera Full Cage enhances your camera's functionality and versatility. Utilize its various mounting points and features as described below:
Accessory Mounting Points
- 1/4"-20 Threaded Holes: Located on the top, sides, and bottom for attaching various accessories like magic arms, monitors, microphones, and lights.
- 3/8"-16 Threaded Holes: Larger threaded holes for more robust accessories or handles.
- 3/8"-16 Locating Holes for ARRI: Designed to prevent twisting when attaching ARRI-standard accessories.
- NATO Rails: Integrated on the sides for quick attachment and detachment of NATO rail compatible accessories, such as top handles or side handles.
- Cold Shoe Mount: Located on the top for mounting cold shoe compatible accessories like microphones, LED lights, or wireless receivers.
- QD Port: A quick-release port for attaching QD shoulder buckles, allowing for rapid transitions between carrying styles.
- Strap Slots: Located on the sides for attaching camera straps.
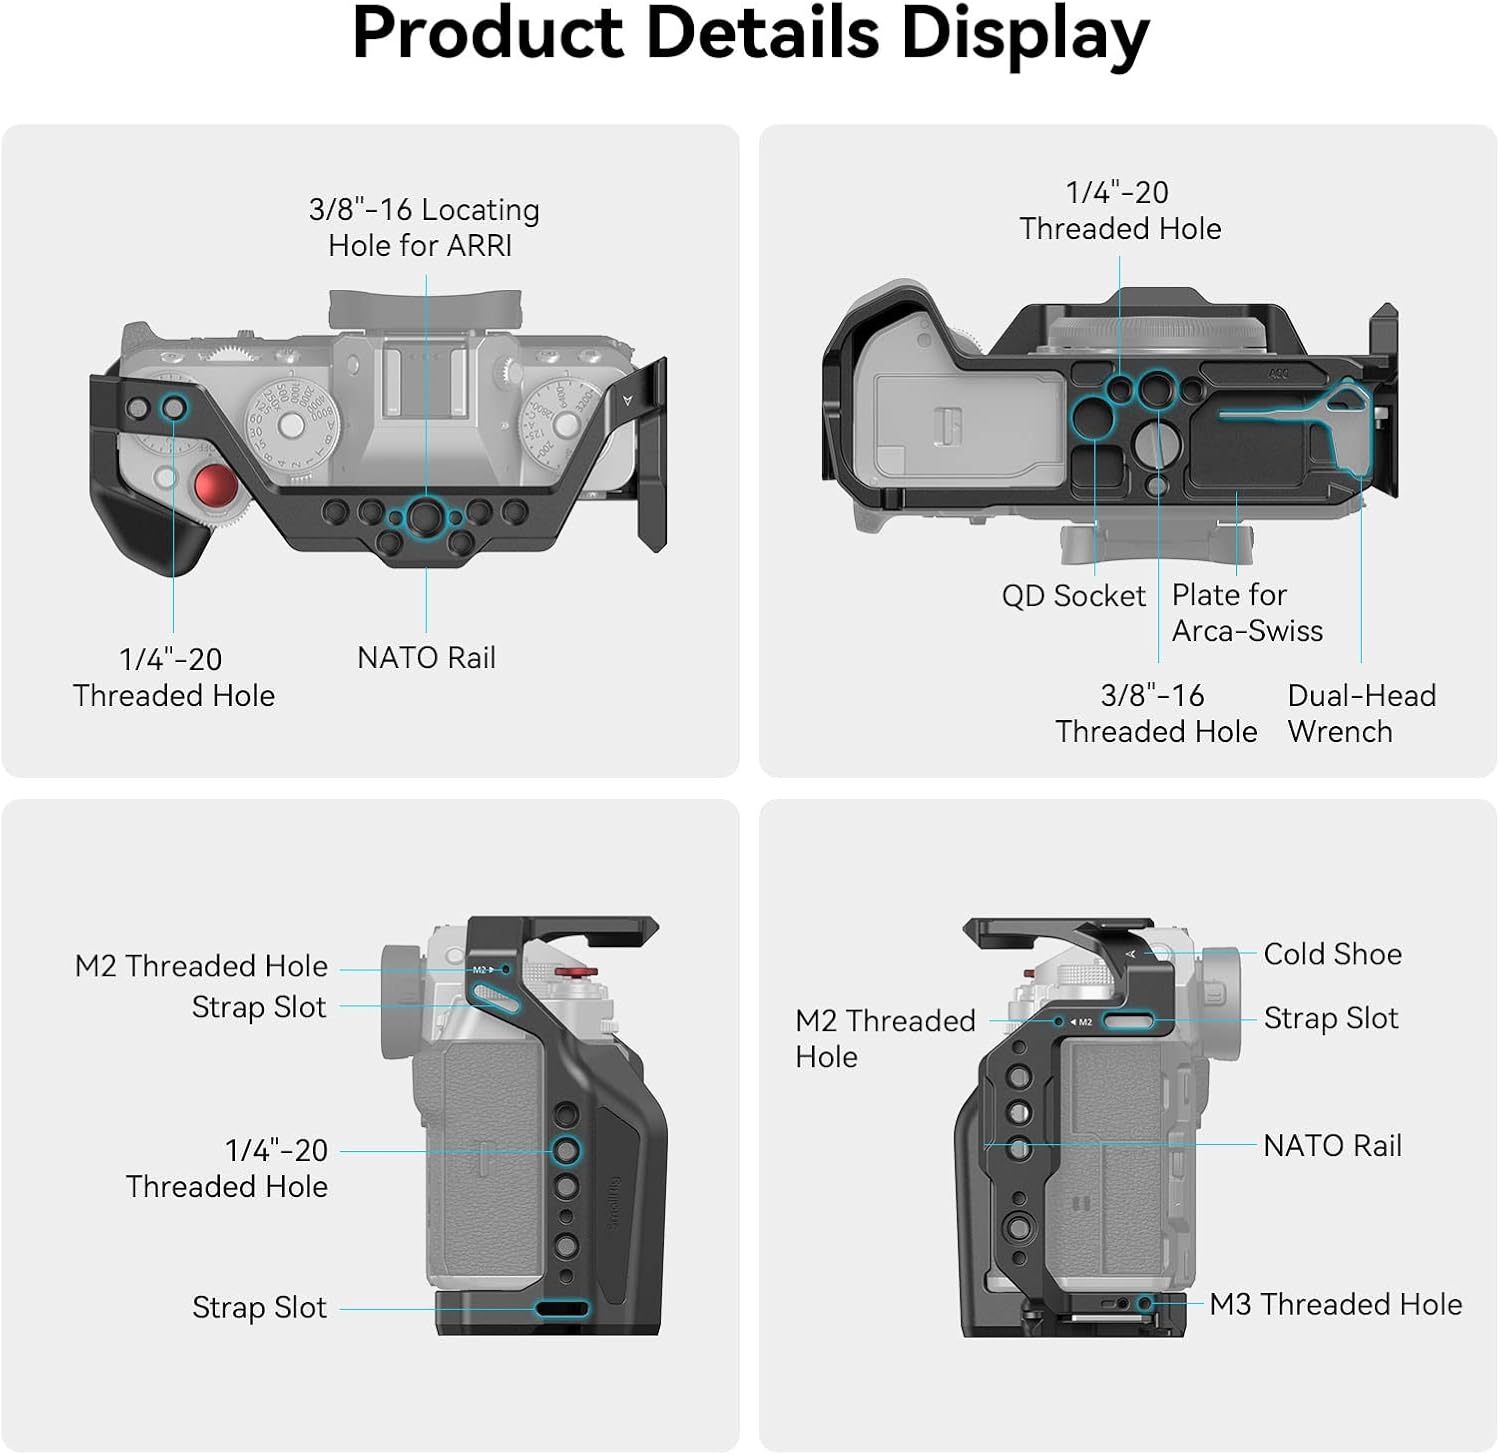
Figure 5: Product Details and Mounting Options
Quick Switching Between Shooting Scenes
The integrated Arca-Swiss quick release plate at the bottom of the cage allows for seamless transitions between different shooting setups:
- Gimbal Compatibility: Quickly mount your camera onto DJI RS 2 / RSC 2 / RS 3 / RS 3 Pro stabilizers.
- Tripod Shooting: Easily attach the caged camera to any Arca-Swiss compatible tripod head.
- Handheld Shooting: The ergonomic grip provides a comfortable and secure hold for freehand shooting.

Figure 6: Quick Switch Between Scenes

Figure 7: Recommended Shooting Scenarios
Maintenance
To ensure the longevity and optimal performance of your SmallRig X-T5 Camera Full Cage, follow these maintenance guidelines:
- Cleaning: Wipe the cage regularly with a soft, dry cloth to remove dust and fingerprints. For stubborn dirt, a slightly damp cloth can be used, followed by immediate drying. Avoid abrasive cleaners or solvents.
- Screw Check: Periodically check all screws (1/4"-20 and M2) to ensure they are securely tightened. Loose screws can lead to instability or damage to your camera.
- Storage: Store the cage in a dry, cool place away from direct sunlight and extreme temperatures when not in use.
- Avoid Impact: While the cage provides protection, avoid dropping or subjecting it to severe impacts, as this can still cause damage to both the cage and your camera.
Troubleshooting
If you encounter any issues with your SmallRig X-T5 Camera Full Cage, refer to the following common problems and solutions:
| Problem | Possible Cause | Solution |
|---|---|---|
| Cage does not fit securely or camera wiggles. | Screws are not fully tightened; D-ring was not removed. | Ensure all three screws (one 1/4"-20 at the bottom, two M2 on the sides) are tightened. Verify the camera's split D-ring was removed prior to installation. |
| Difficulty accessing the shutter button. | Minor design variation or user preference. | The included complimentary shutter button can improve access and feel. Adjust your grip slightly if needed. |
| Strap attachments interfere with cage. | Original camera strap rings are in the way. | Remove the original triangular strap attachments from the camera. Utilize the strap slots on the cage for attaching your camera strap. |
| Accessories do not mount properly. | Incorrect screw size or accessory type. | Ensure you are using the correct screw size (1/4"-20 or 3/8"-16) and that your accessory is compatible with the cage's mounting points (e.g., NATO rail, cold shoe). |
Specifications
| Attribute | Detail |
|---|---|
| Model Number | 4135-AU |
| Compatibility | FUJIFILM X-T5 Camera |
| Material | Aluminum Alloy |
| Product Dimensions | 5.51 x 1.97 x 3.94 inches (140 x 50 x 100 mm) |
| Item Weight | 5.6 ounces (158 Grams) |
| Color | Black |
| Mounting Points | 1/4"-20, 3/8"-16, ARRI 3/8"-16 Locating Holes, NATO Rails, Cold Shoe, QD Port, Strap Slots |
| Quick Release Plate | Built-in Arca-Swiss |
Figure 8: Product Parameters
Warranty and Support
SmallRig products are designed for durability and performance. For specific warranty information, please refer to the warranty card included with your product or visit the official SmallRig website. If you require technical assistance, have questions about product usage, or need to report an issue, please contact SmallRig customer support through their official channels. Keep your purchase receipt as proof of purchase for any warranty claims.
You can find more information and contact details on the SmallRig Amazon Store.
Related documents4135-AU


Ask a question about this manual
Ask about setup, troubleshooting, compatibility, parts, safety, or missing instructions. Manuals+ will review the question and use this page’s manual context to help answer it.