1. Product Overview
The Preciva DG00135 Digital T-Bevel Gauge & Protractor is a versatile tool designed for precise angle measurement in various applications such as carpentry, woodworking, metalworking, and construction. It features a digital display, a sliding T-bevel, and integrated bubble levels for both horizontal and vertical alignment.
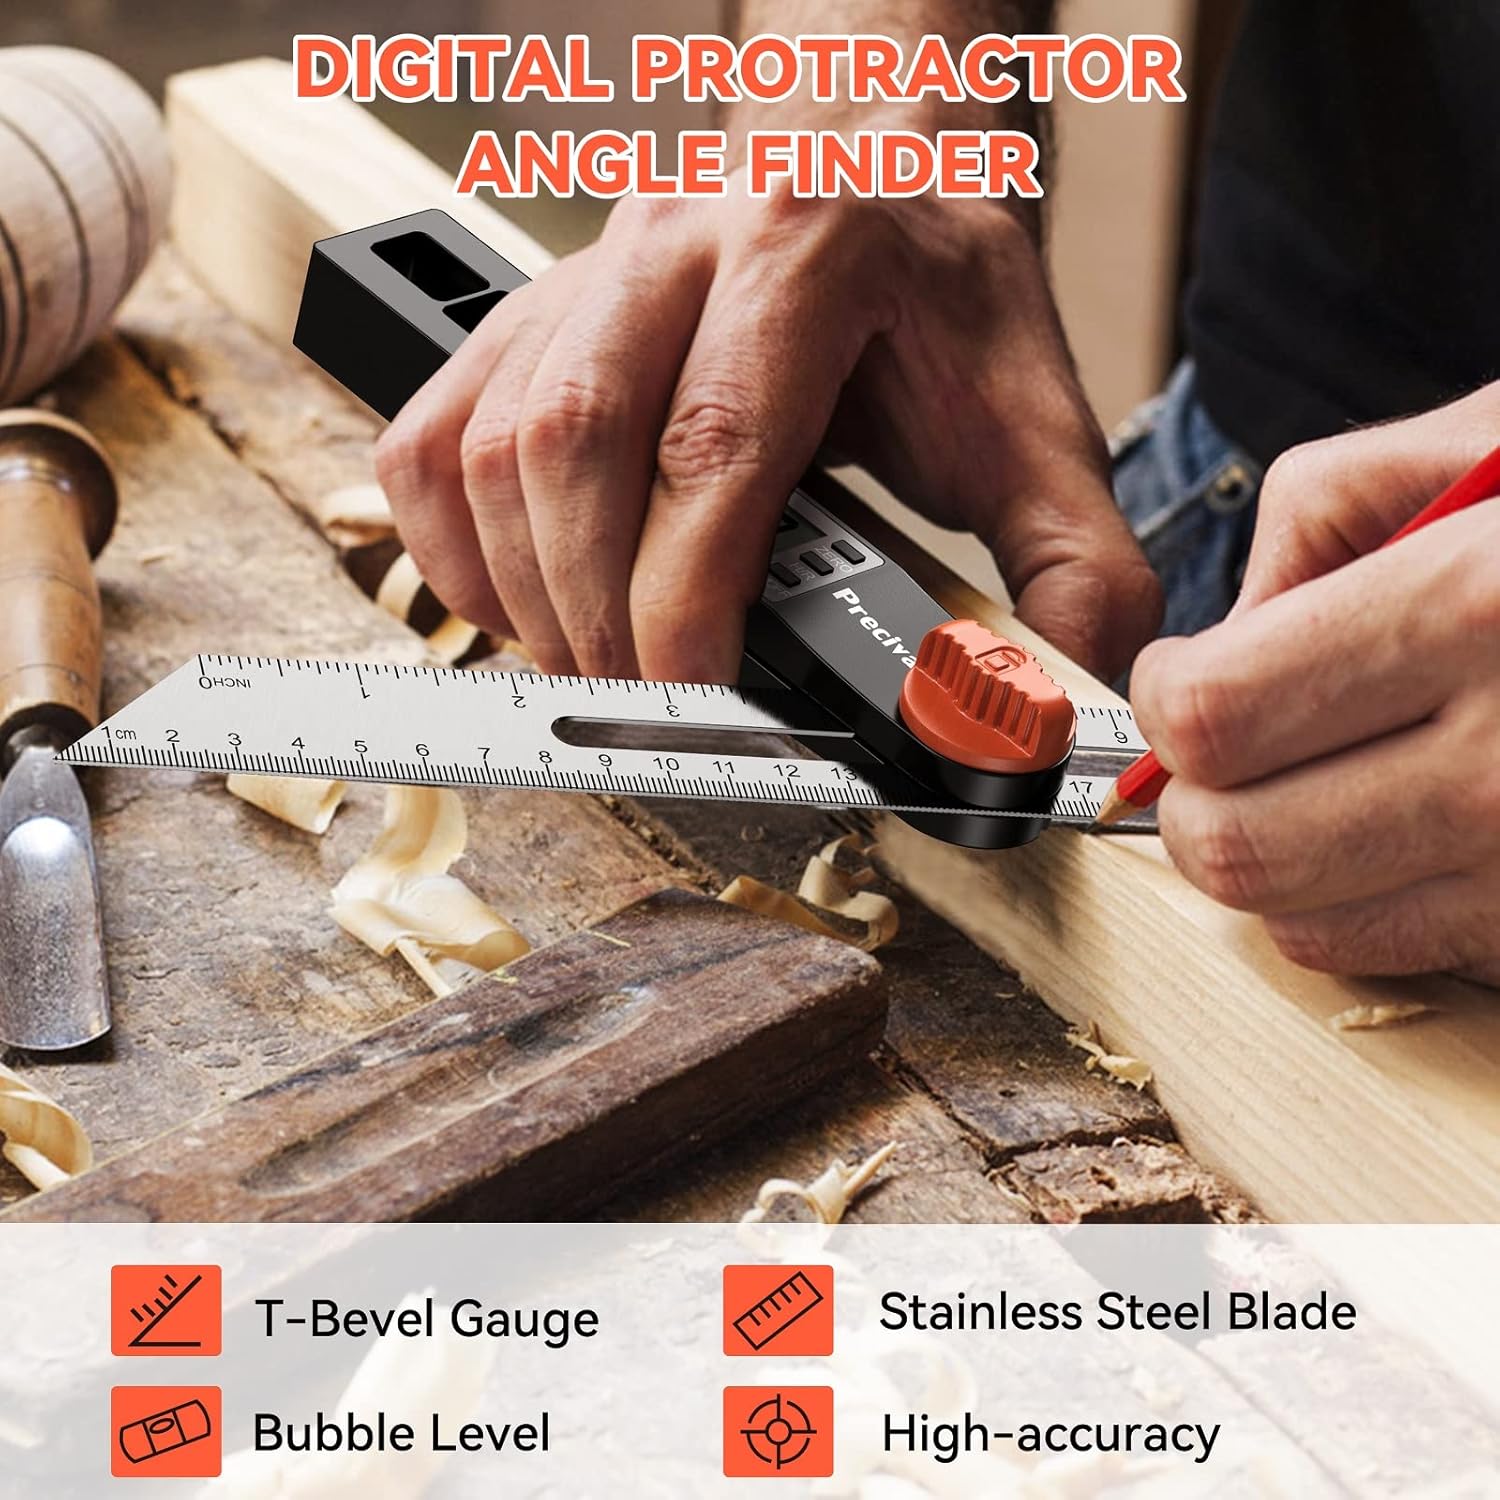
Figure 1: Preciva Digital T-Bevel Gauge in action, demonstrating its use for angle measurement on a workpiece. Key features like the T-bevel, stainless steel blade, bubble level, and high-accuracy are highlighted.

Figure 2: Detailed diagram illustrating the main components of the digital T-bevel gauge, including the battery container, LCD display, lock knob, movable ruler, vertical level, horizontal level, ZERO button, H/R button, and ON/OFF button.
2. Key Features
- High Accuracy: Measures angles from 0-338° with an accuracy of ±0.3° and a resolution of 0.1°. Features two scales on the ruler for direct reading.
- Three Large Control Buttons: Includes H/R (Hold/Reverse), ZERO, and ON/OFF buttons for easy operation.
- Digital Sliding T-Bevel: Allows locking of angles from 0 to 328 degrees using the center knob, and can easily set 45-degree angles.
- LCD Display & Bubble Levels: Large LCD for clear readings and integrated horizontal and vertical bubble levels for precise leveling before measurements.
- Auto Power Off: Automatically shuts off after 5-6 minutes of inactivity to conserve battery life.
3. Specifications
| Feature | Specification |
|---|---|
| Model Number | DG00135 |
| Measuring Angle Range | 0-338° |
| Accuracy | ±0.3° |
| Resolution | 0.1° |
| Auto Power Off | 5-6 minutes of inactivity |
| Material | ABS, Aluminum, Stainless Steel |
| Dimensions (Parcel) | 30.71 x 3.81 x 3.71 cm |
| Weight (Parcel) | 150 g |
| Included Components | T Bevel Gauge |
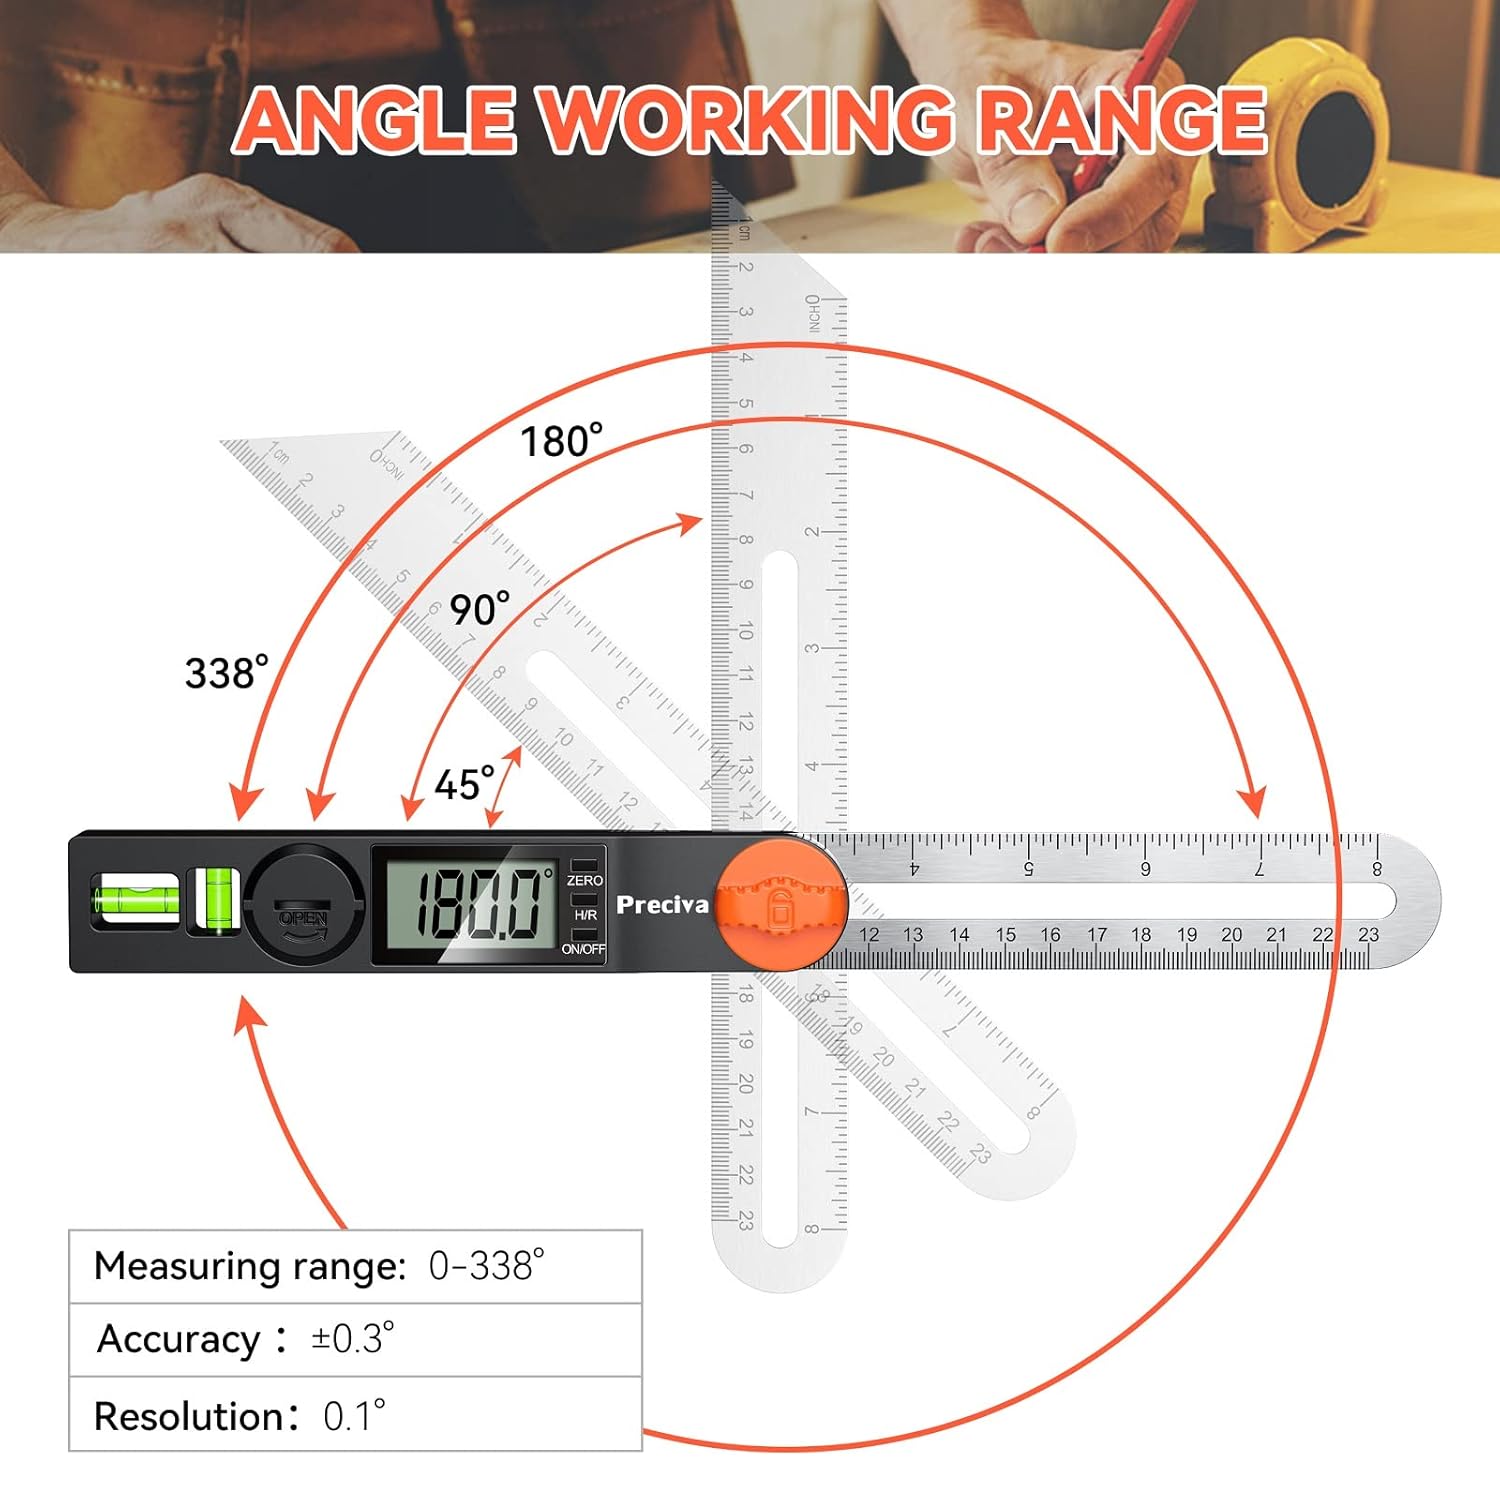
Figure 3: Visual representation of the angle working range (0-338°), accuracy (±0.3°), and resolution (0.1°) of the Preciva Digital T-Bevel Gauge.
4. Battery Installation
The device requires a 9V battery for operation. To install or replace the battery:
- Locate the battery compartment cover on the side of the main body.
- Gently slide or open the cover to reveal the battery terminals.
- Connect a 9V battery to the battery clip, ensuring correct polarity.
- Place the battery into the compartment and close the cover securely.
5. Operating Instructions
5.1. Power On/Off
- Press the ON/OFF button to turn the device on or off.
- The device will automatically power off after 5-6 minutes of inactivity. To reactivate, simply move the scale.
5.2. Zeroing the Display
- To set the current position as zero, press the ZERO button. This is useful for relative measurements.
5.3. Angle Measurement
To measure an angle:
- Ensure the device is powered on.
- Place the base of the protractor firmly against one surface of the angle you wish to measure.
- Adjust the movable ruler until it aligns with the second surface of the angle.
- Read the angle displayed on the LCD screen.
- Use the center knob to lock the ruler in place for transferring angles.

Figure 4: The T-Bevel Gauge positioned to measure a 45-degree angle on a piece of wood, demonstrating its practical application.
5.4. Hold and Reverse Function (H/R Button)
- Short Press: Press the H/R button briefly to lock the current reading on the display. This is useful for retaining a measurement.
- Long Press: Press and hold the H/R button to reverse the display reading by 180°. This allows for easier reading when the device is inverted.

Figure 5: Illustration detailing the functionality of the H/R button: a short press locks the reading, and a long press flips the reading 180 degrees for convenience.
5.5. Using the Bubble Levels
The integrated horizontal and vertical bubble levels assist in ensuring the device is perfectly level or plumb before taking measurements or marking lines. Observe the bubble within the vial; when it is centered between the two lines, the surface is level or plumb.
6. Care and Maintenance
- Keep the device clean and dry. Wipe with a soft, damp cloth. Do not use abrasive cleaners or solvents.
- Avoid exposing the device to extreme temperatures or high humidity.
- Store the device in a protective case when not in use to prevent damage to the display or ruler.
- Remove the battery if the device will not be used for an extended period to prevent leakage.
7. Troubleshooting
- Display Not Working: Check if the battery is correctly installed and has sufficient charge. Replace the battery if necessary.
- Inaccurate Readings: Ensure the surfaces being measured are clean and free of debris. Recalibrate by pressing the ZERO button on a known flat surface.
- Buttons Unresponsive: Ensure the device is not in a locked state (e.g., if the H/R button was pressed to hold a reading). If issues persist, try removing and reinserting the battery.
8. Warranty and Support
For warranty information or technical support, please refer to the documentation included with your purchase or contact Preciva customer service through their official website or the retailer where the product was purchased. Please have your model number (DG00135) and purchase date available when contacting support.