
Sound Way KA22-130P
Sound-way Car Radio Mounting Kit User Manual
Model: KA22-130P
Product Overview
This Sound-way car radio mounting kit is designed to facilitate the installation of a 9-inch aftermarket car radio into Peugeot 207 models manufactured between 2006 and 2015. The kit includes a custom-fit fascia frame, an antenna adapter, an ISO harness, and a CAN BUS adapter for retaining steering wheel controls. It ensures a seamless and integrated look for your new car audio system.

Figure 1: Complete Sound-way Car Radio Mounting Kit, including the fascia, wiring harness, antenna adapter, and radio removal tools.
Package Contents
- 9-inch Radio Fascia Frame (Black)
- ISO Wiring Harness with 16-pin connector
- CAN BUS Adapter (for steering wheel control retention)
- Antenna Adapter
- Radio Removal Tools (2 pieces)
Setup and Installation
Before beginning installation, ensure your vehicle's ignition is off and the battery is disconnected to prevent electrical damage. Professional installation is recommended.
1. Removing the Factory Radio
- Carefully use the provided radio removal tools to extract the existing factory radio from the dashboard.
- Disconnect all wiring harnesses and antenna cables from the back of the factory radio.
2. Assembling the New Fascia Frame
The fascia frame consists of two main parts that fit together to accommodate the 9-inch aftermarket radio.
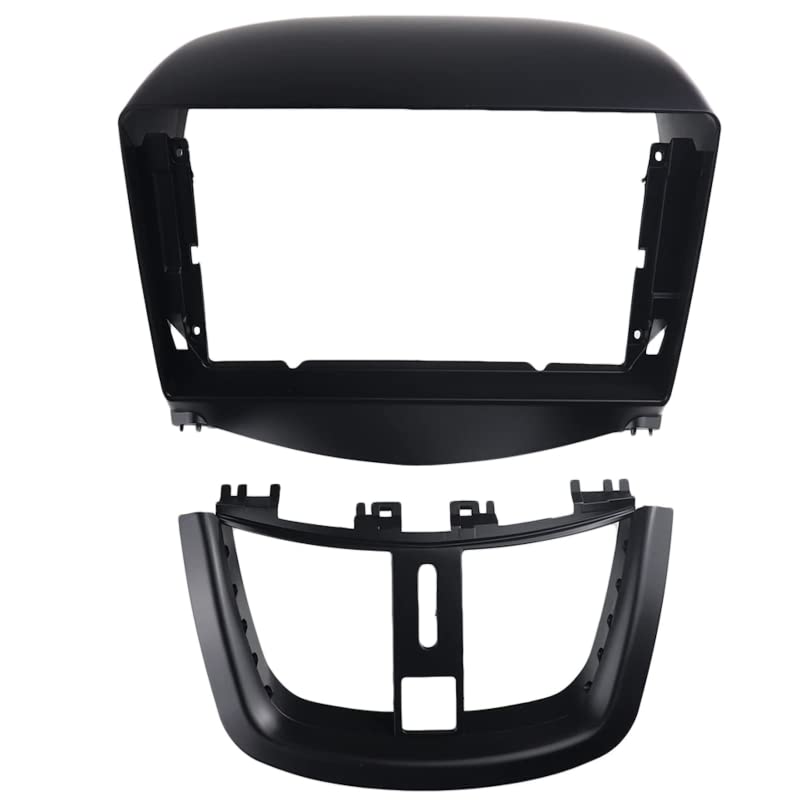
Figure 2: The two main components of the radio fascia frame, designed to snap together.
- Align the top and bottom sections of the fascia frame and gently snap them together until they are securely connected.
- Ensure the assembled frame matches the dimensions of your 9-inch radio. Refer to the product size diagram for verification.
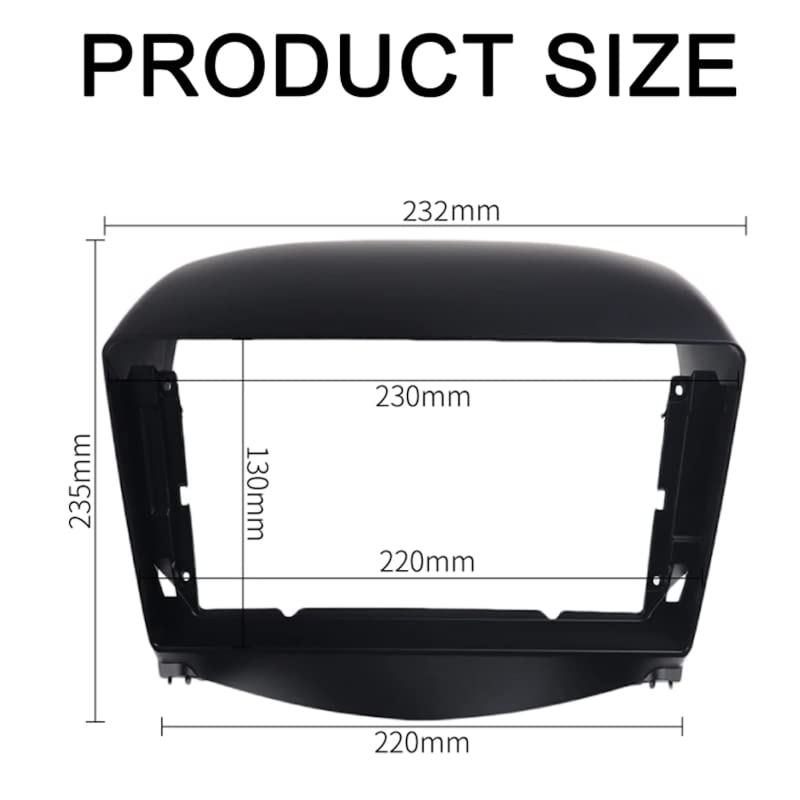
Figure 3: Detailed dimensions of the assembled radio fascia frame, showing measurements for height and width.
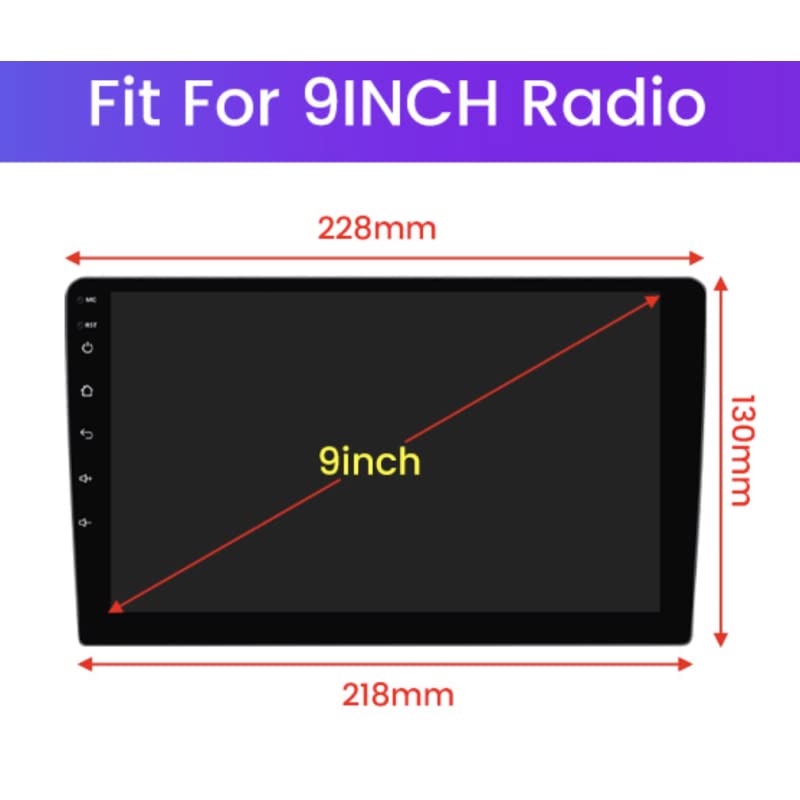
Figure 4: Diagram illustrating the standard dimensions for a 9-inch car radio, which this fascia is designed to fit.
3. Wiring Connections
Connect the ISO wiring harness and CAN BUS adapter to your new Android car radio. This kit is designed for radios with a 16-pin ISO connector.
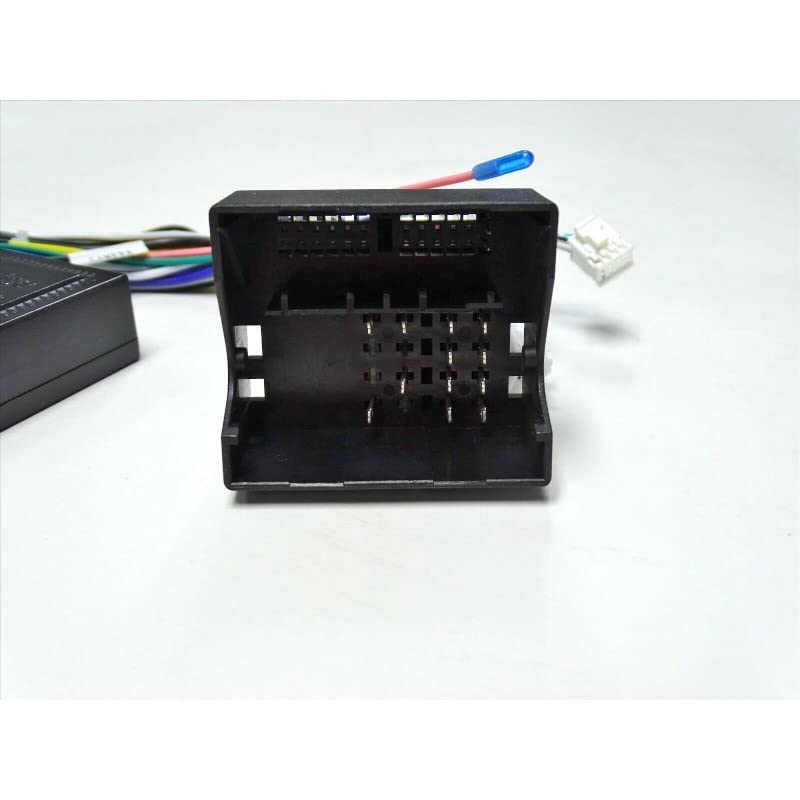
Figure 5: Close-up view of the 16-pin ISO connector, which is compatible with most Android car radios.
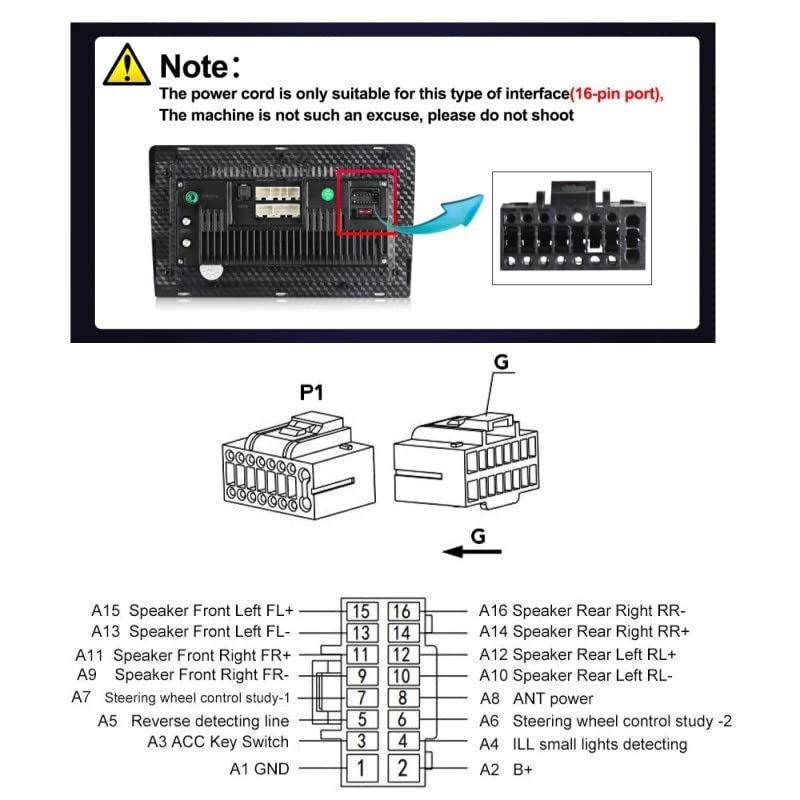
Figure 6: Detailed wiring diagram for the 16-pin connector, showing pin assignments for power, speakers, and control signals. Note: The power cord is only suitable for this type of interface (16-pin port).
- Connect the ISO harness to the 16-pin port on your new Android radio.
- Connect the other end of the ISO harness to the vehicle's factory wiring.
- Integrate the CAN BUS adapter as per the radio's instructions to enable steering wheel controls.
- Connect the antenna adapter to the vehicle's antenna cable and the new radio's antenna input.
This kit supports various Android car radio models, provided they have the standard 16-pin connector.
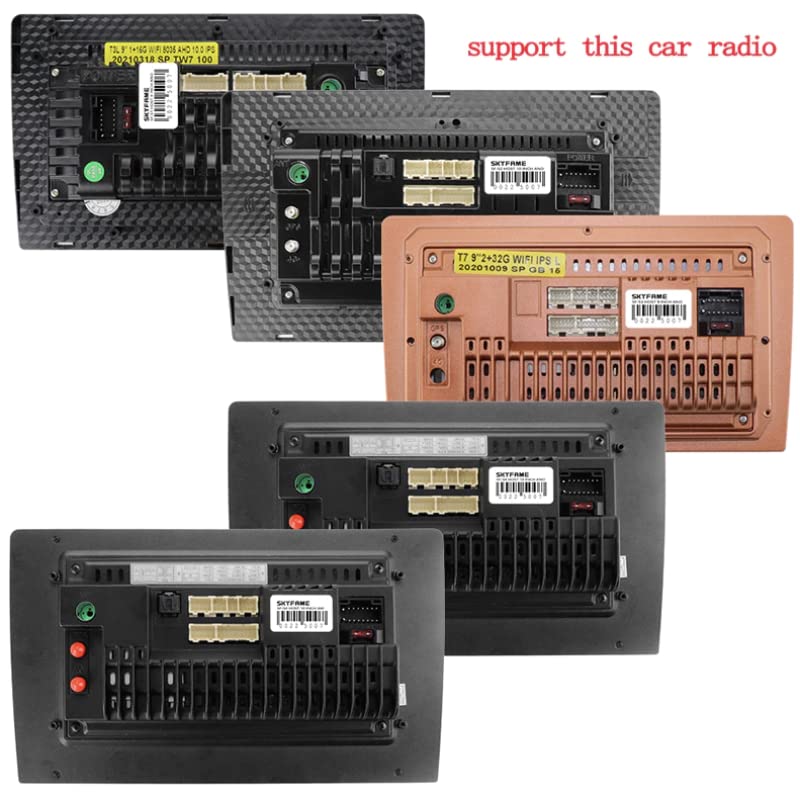
Figure 7: Examples of compatible car radio rear panels, highlighting the 16-pin connector type supported by this kit.
4. Installing the New Radio and Fascia
- Mount your new 9-inch car radio into the assembled fascia frame.
- Carefully slide the radio and fascia assembly into the dashboard opening until it clicks into place. Ensure all wires are tucked away and not pinched.
- Reconnect the vehicle's battery.
- Turn on the ignition and test the new radio's functionality, including audio, steering wheel controls, and antenna reception.
Operating Considerations
While this is a mounting kit, its primary function is to enable the proper operation and integration of your aftermarket car radio. The included CAN BUS adapter is crucial for maintaining the functionality of your vehicle's original steering wheel controls with the new radio. Ensure the adapter is correctly connected and configured according to your specific Android radio's instructions for optimal performance.
Maintenance
This product requires minimal maintenance. The fascia can be cleaned with a soft, damp cloth. Avoid using abrasive cleaners or solvents, as these may damage the finish. Periodically check all connections to ensure they remain secure, especially if you experience any intermittent issues with your car radio.
Troubleshooting
| Problem | Possible Cause | Solution |
|---|---|---|
| New radio does not power on. | Incorrect wiring, blown fuse, or loose connection. | Check all power connections (constant 12V, ignition 12V, ground). Verify vehicle fuses and radio fuse. Ensure the 16-pin connector is fully seated. |
| Steering wheel controls do not work. | CAN BUS adapter not connected or configured correctly, or radio not compatible with steering wheel controls. | Ensure the CAN BUS adapter is properly connected to both the vehicle and the radio. Refer to your radio's manual for steering wheel control setup. Verify the radio supports external steering wheel control interfaces. |
| Poor radio reception. | Antenna adapter not connected or faulty. | Check the connection of the antenna adapter to both the vehicle's antenna and the new radio. Ensure the adapter is not damaged. |
| Fascia does not fit correctly. | Incorrect model year or radio size. | Double-check that your Peugeot 207 is within the 2006-2015 model range. Confirm your aftermarket radio is a 9-inch unit with compatible dimensions (230/220 x 130 mm). |
Specifications
| Feature | Detail |
|---|---|
| Brand | Sound Way |
| Model Number | KA22-130P |
| Compatible Vehicle | Peugeot 207 (2006-2015) |
| Compatible Radio Size | 9 inches (230/220 x 130 mm) |
| Color | Black |
| Material | Plastic, Metal |
| Connector Type | 16-pin ISO Connector |
| Included Accessories | Fascia Frame, ISO Harness, CAN BUS Adapter, Antenna Adapter, Removal Tools |
| Package Dimensions | 39.79 x 31.8 x 14.8 cm |
| Package Weight | 500 grams |
Warranty and Support
Information regarding specific warranty terms for this product is not available in the provided data. For support or warranty claims, please contact your retailer or the manufacturer, Sound Way, directly. Keep your purchase receipt as proof of purchase.
For further assistance, you may refer to the product's listing on Amazon.com.be: Product Page
Related documentsKA22-130P

Ask a question about this manual
Ask about setup, troubleshooting, compatibility, parts, safety, or missing instructions. Manuals+ will review the question and use this page’s manual context to help answer it.