HERCHR HERCHR2tuied7xw5
HERCHR Ebike Headlight with Horn User Manual
Model: HERCHR2tuied7xw5
Brand: HERCHR
1. Introduction
This manual provides comprehensive instructions for the installation, operation, and maintenance of your HERCHR Ebike Headlight with integrated horn. Designed for electric bicycles, this unit operates on 36V-48V systems and features a 3-pin SM connector for easy integration. Please read this manual thoroughly before use to ensure proper function and safety.
2. Safety Information
- Always ensure the headlight is securely mounted before riding.
- Verify correct wiring connections to prevent damage to the unit or your ebike's electrical system.
- Do not look directly into the light beam to avoid eye strain or temporary vision impairment.
- The horn is designed for warning pedestrians and other road users; use it responsibly.
- Regularly inspect the unit for any signs of damage or loose connections.
- Ensure your ebike's power system matches the headlight's voltage requirements (36V-48V).
3. Package Contents
Verify that all items are present in your package:
- HERCHR Ebike Headlight with integrated horn
- Mounting bracket
- Necessary mounting hardware (screws, nuts)
- 3-pin SM connector cable

4. Specifications
| Brand | HERCHR |
| Model Number | HERCHR2tuied7xw5 |
| Color | Black |
| Material | ABS, Steel |
| Power Source | Battery Powered (Ebike System) |
| Voltage | 36V-48V |
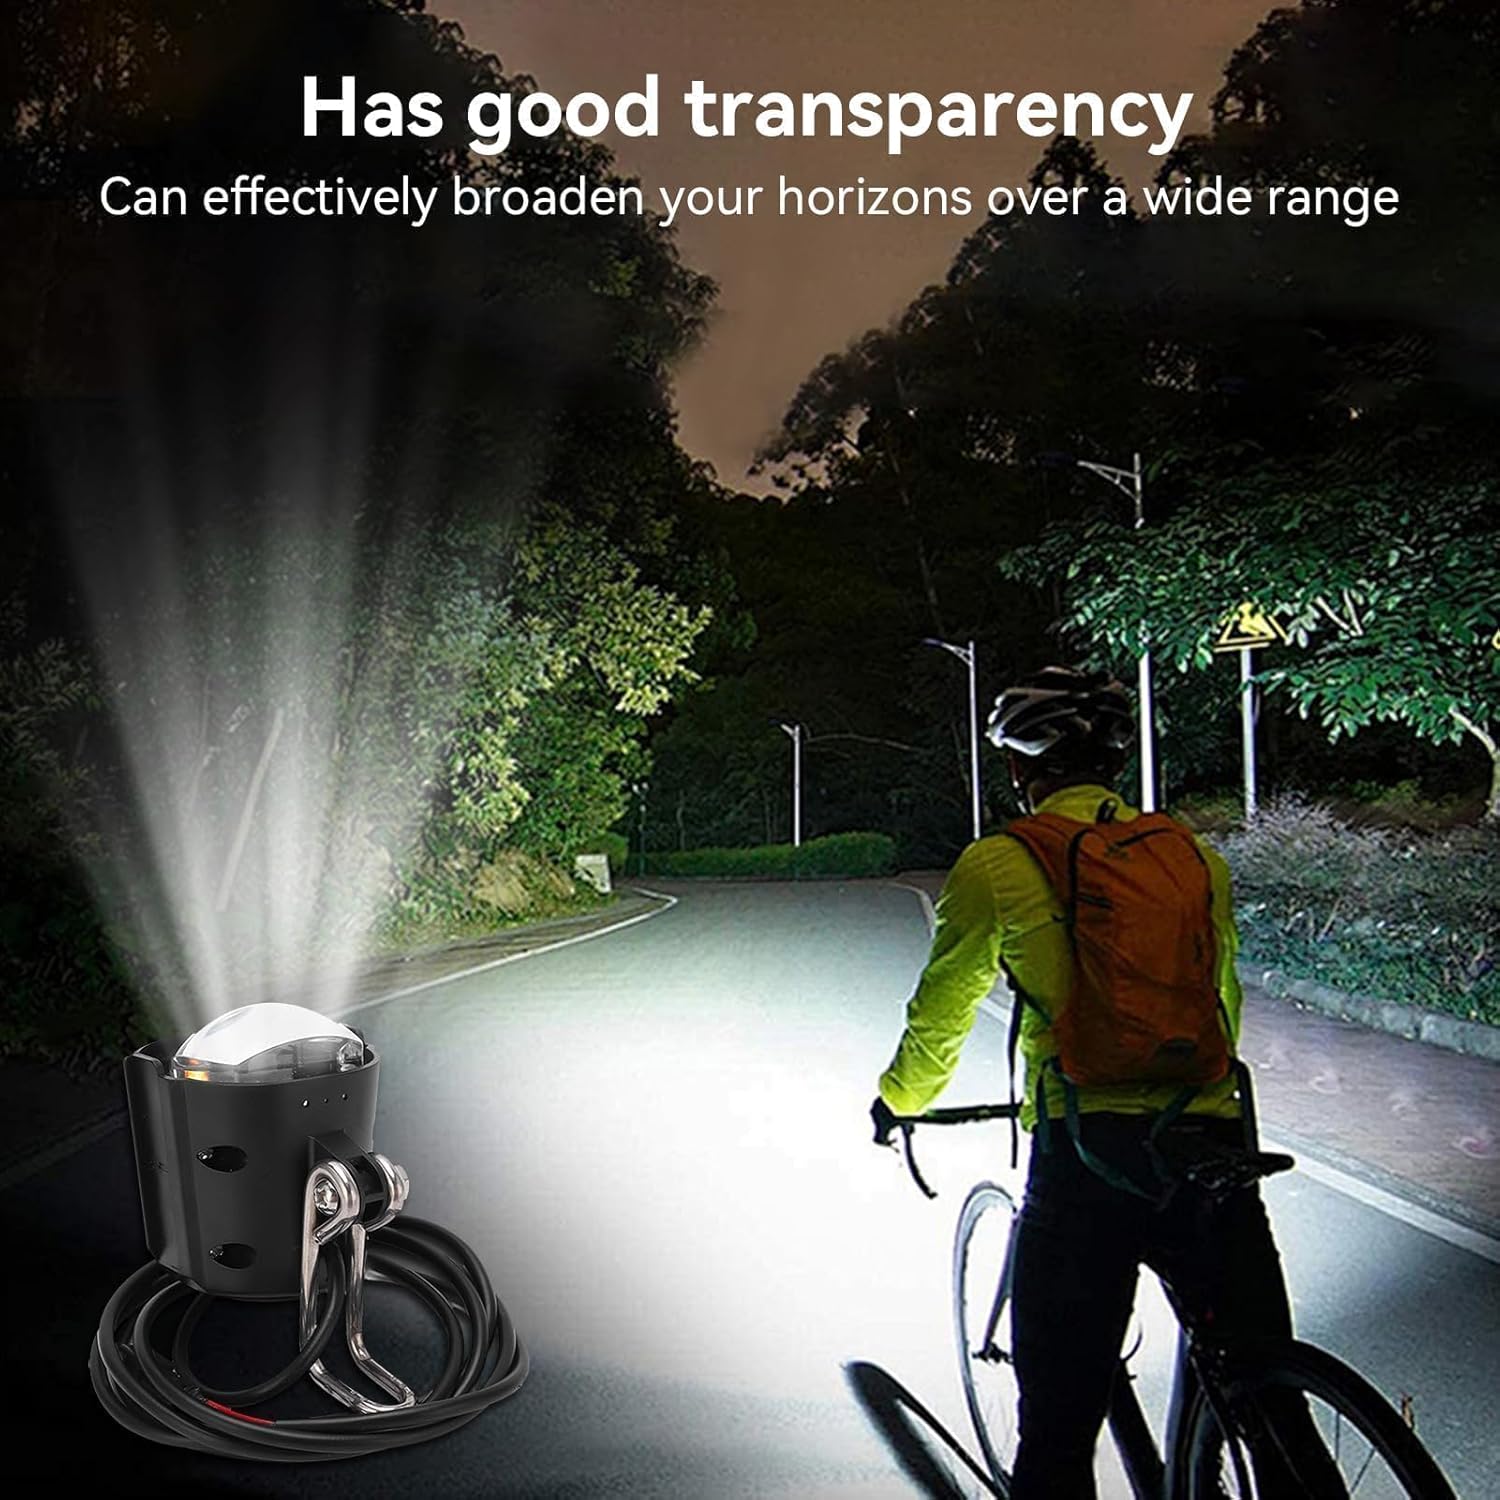
| Light Output Maximum | 120 Lumens |
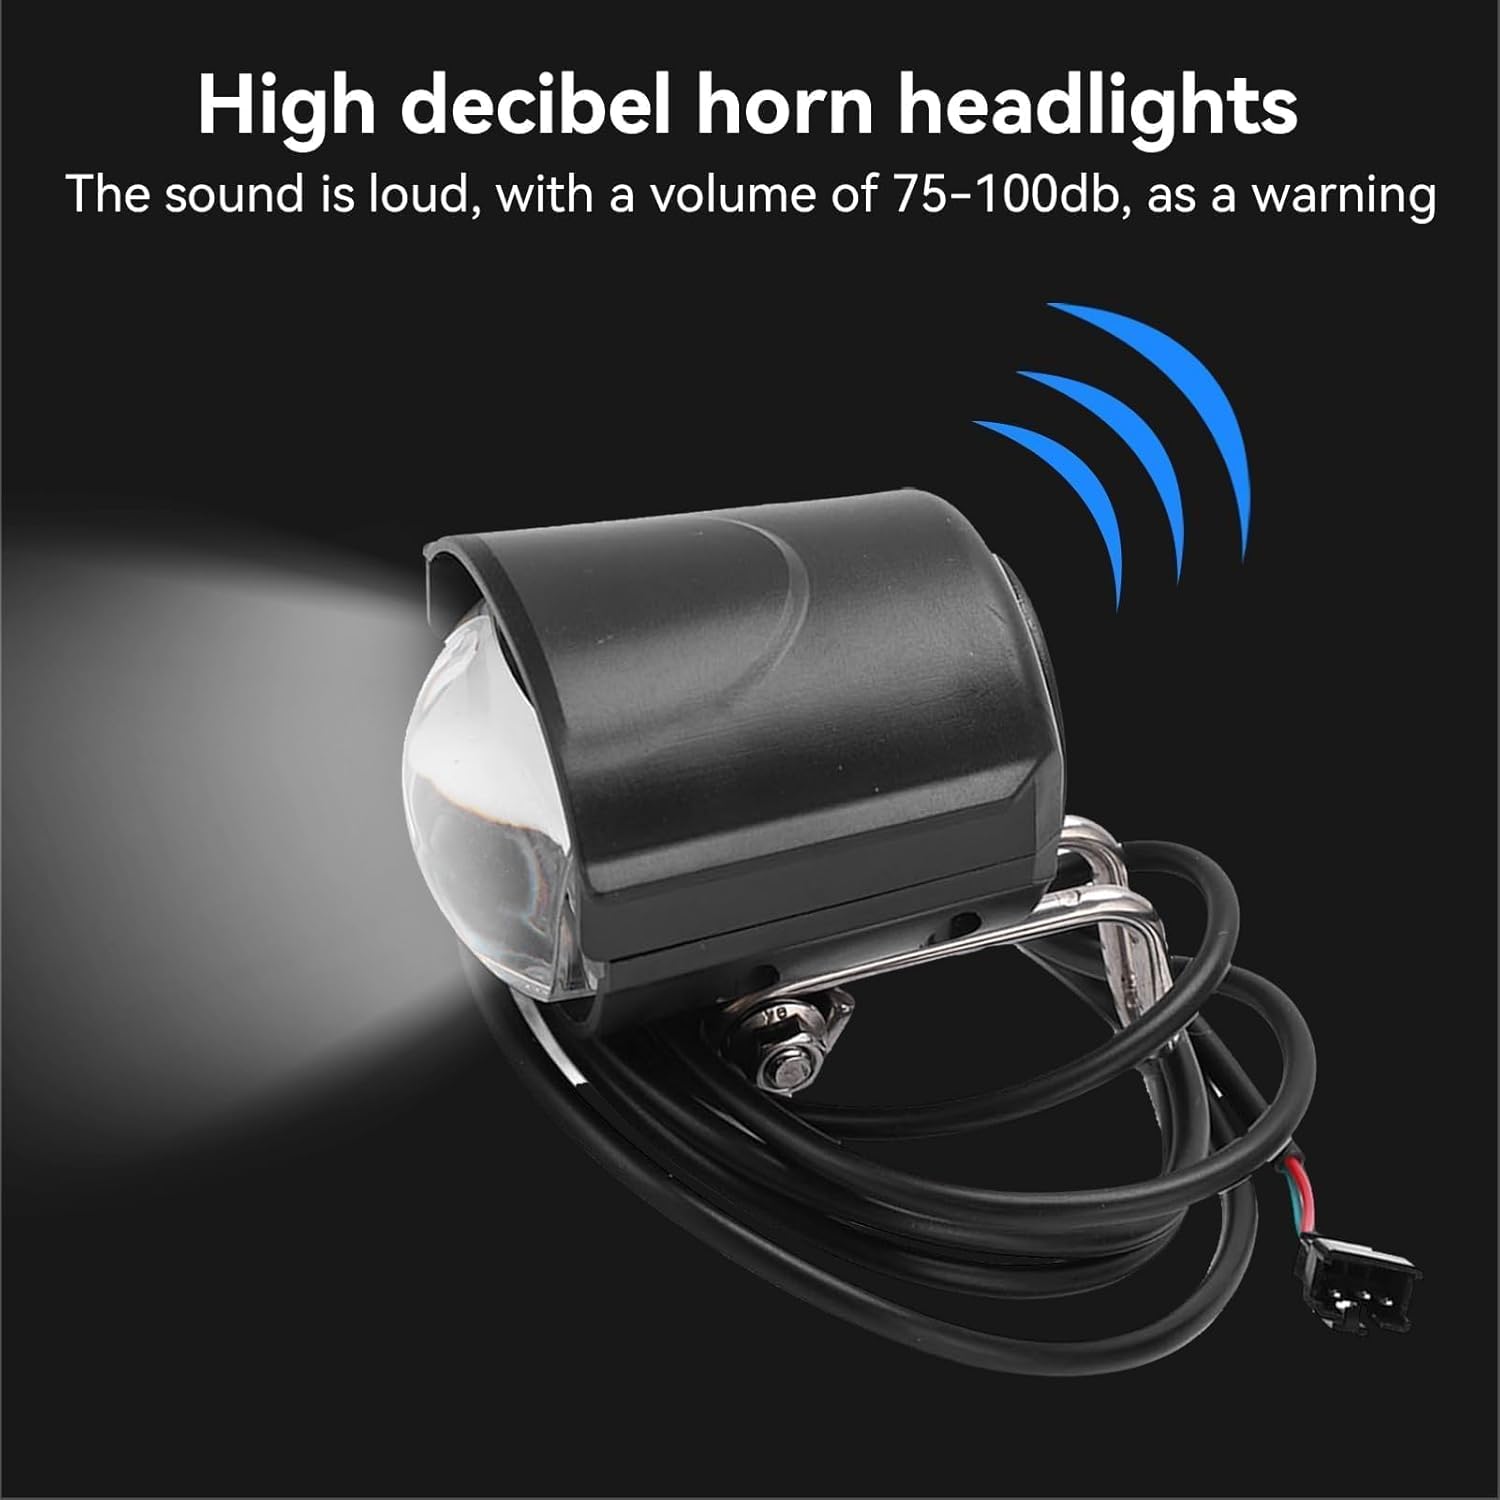
| Horn Volume | 75-100db |
| Water Resistance Level | Waterproof (IP54) |
| Mounting Type | Handlebar Mount / Front Fork Mount |
5. Setup and Installation
Follow these steps to install your ebike headlight and horn:
5.1 Mounting the Headlight
- Identify a suitable mounting location on your ebike's front fork or handlebar. The included stainless steel bracket is designed for secure attachment.
- Position the bracket and headlight, ensuring the light beam will be directed forward and slightly downward for optimal visibility without blinding oncoming traffic.
- Use the provided screws and nuts to firmly attach the bracket to your ebike. Do not overtighten.


5.2 Electrical Connection
The headlight uses a 3-pin SM connector for power and control. Ensure your ebike has a compatible connector or an adapter if necessary.
- Locate the 3-pin SM connector on your ebike's wiring harness.
- Connect the headlight's 3-pin SM connector to the corresponding port on your ebike.
- Wiring Color Code: The red wire typically controls the horn, while the green wire is for the light. Confirm your ebike's wiring diagram for exact compatibility.
6. Operating Instructions
6.1 Turning the Headlight On/Off
The headlight is typically controlled via your ebike's existing control panel or a dedicated switch. Refer to your ebike's manual for specific instructions on activating accessories.
6.2 Using the Horn
The integrated horn is activated by a dedicated button on your ebike's control panel. Press the button to emit a loud warning sound (75-100db).

6.3 Waterproof Feature
The headlight is designed with an IP54 waterproof rating, making it resistant to light rain, snow, and dust. It is not intended for submersion.

7. Maintenance
- Cleaning: Wipe the headlight lens and body with a soft, damp cloth. Avoid abrasive cleaners or solvents that could damage the plastic.
- Inspection: Periodically check the mounting bracket and wiring connections for tightness and wear. Ensure the cable is not pinched or frayed.
- Storage: If storing your ebike for an extended period, ensure the headlight is clean and dry.
8. Troubleshooting
| Problem | Possible Cause | Solution |
|---|---|---|
| Headlight does not turn on. | Loose connection, no power from ebike, faulty switch. | Check all wiring connections, ensure ebike power is on, test the ebike's accessory switch. |
| Horn does not sound. | Loose connection, faulty horn button, incorrect wiring. | Verify horn wiring (red wire), check connections, test the horn button. |
| Light is dim or flickers. | Insufficient power, loose connection, voltage fluctuation. | Ensure stable power supply from ebike, check connections, confirm ebike battery charge. |
| Horn and light functions are reversed. | Incorrect wiring during installation. | Recheck the wiring connections for the red (horn) and green (light) wires according to your ebike's specifications. |
9. Warranty and Support
For warranty information or technical support, please refer to the retailer or manufacturer's official website. Keep your purchase receipt as proof of purchase.
no relevant documents