Introduction
Thank you for purchasing the Akozon Atomic Alarm Clock. This compact digital clock offers multiple functions including time, date, day of the week, indoor temperature display, daily alarm with snooze, a countdown timer, and a birthday reminder. Its foldable design makes it suitable for both tabletop use and travel. Please read this manual carefully to ensure proper setup and operation.
Safety Information
- Use only 1 AAA battery (not included). Ensure correct polarity when inserting.
- Remove batteries if the clock will not be used for an extended period.
- Do not expose the clock to extreme temperatures, direct sunlight, or high humidity.
- Keep out of reach of children.
- Do not attempt to disassemble or repair the clock yourself. Contact customer support if issues arise.
Product Overview
Display Elements
The digital display shows the following information:
- Time: In 12-hour (with AM/PM indicator) or 24-hour format.
- Date: Month and Day.
- Day of Week: Abbreviated (e.g., MON, TUE).
- Temperature: Indoor temperature in Celsius (°C) or Fahrenheit (°F).
- Alarm Icon: Indicates if the alarm is active.
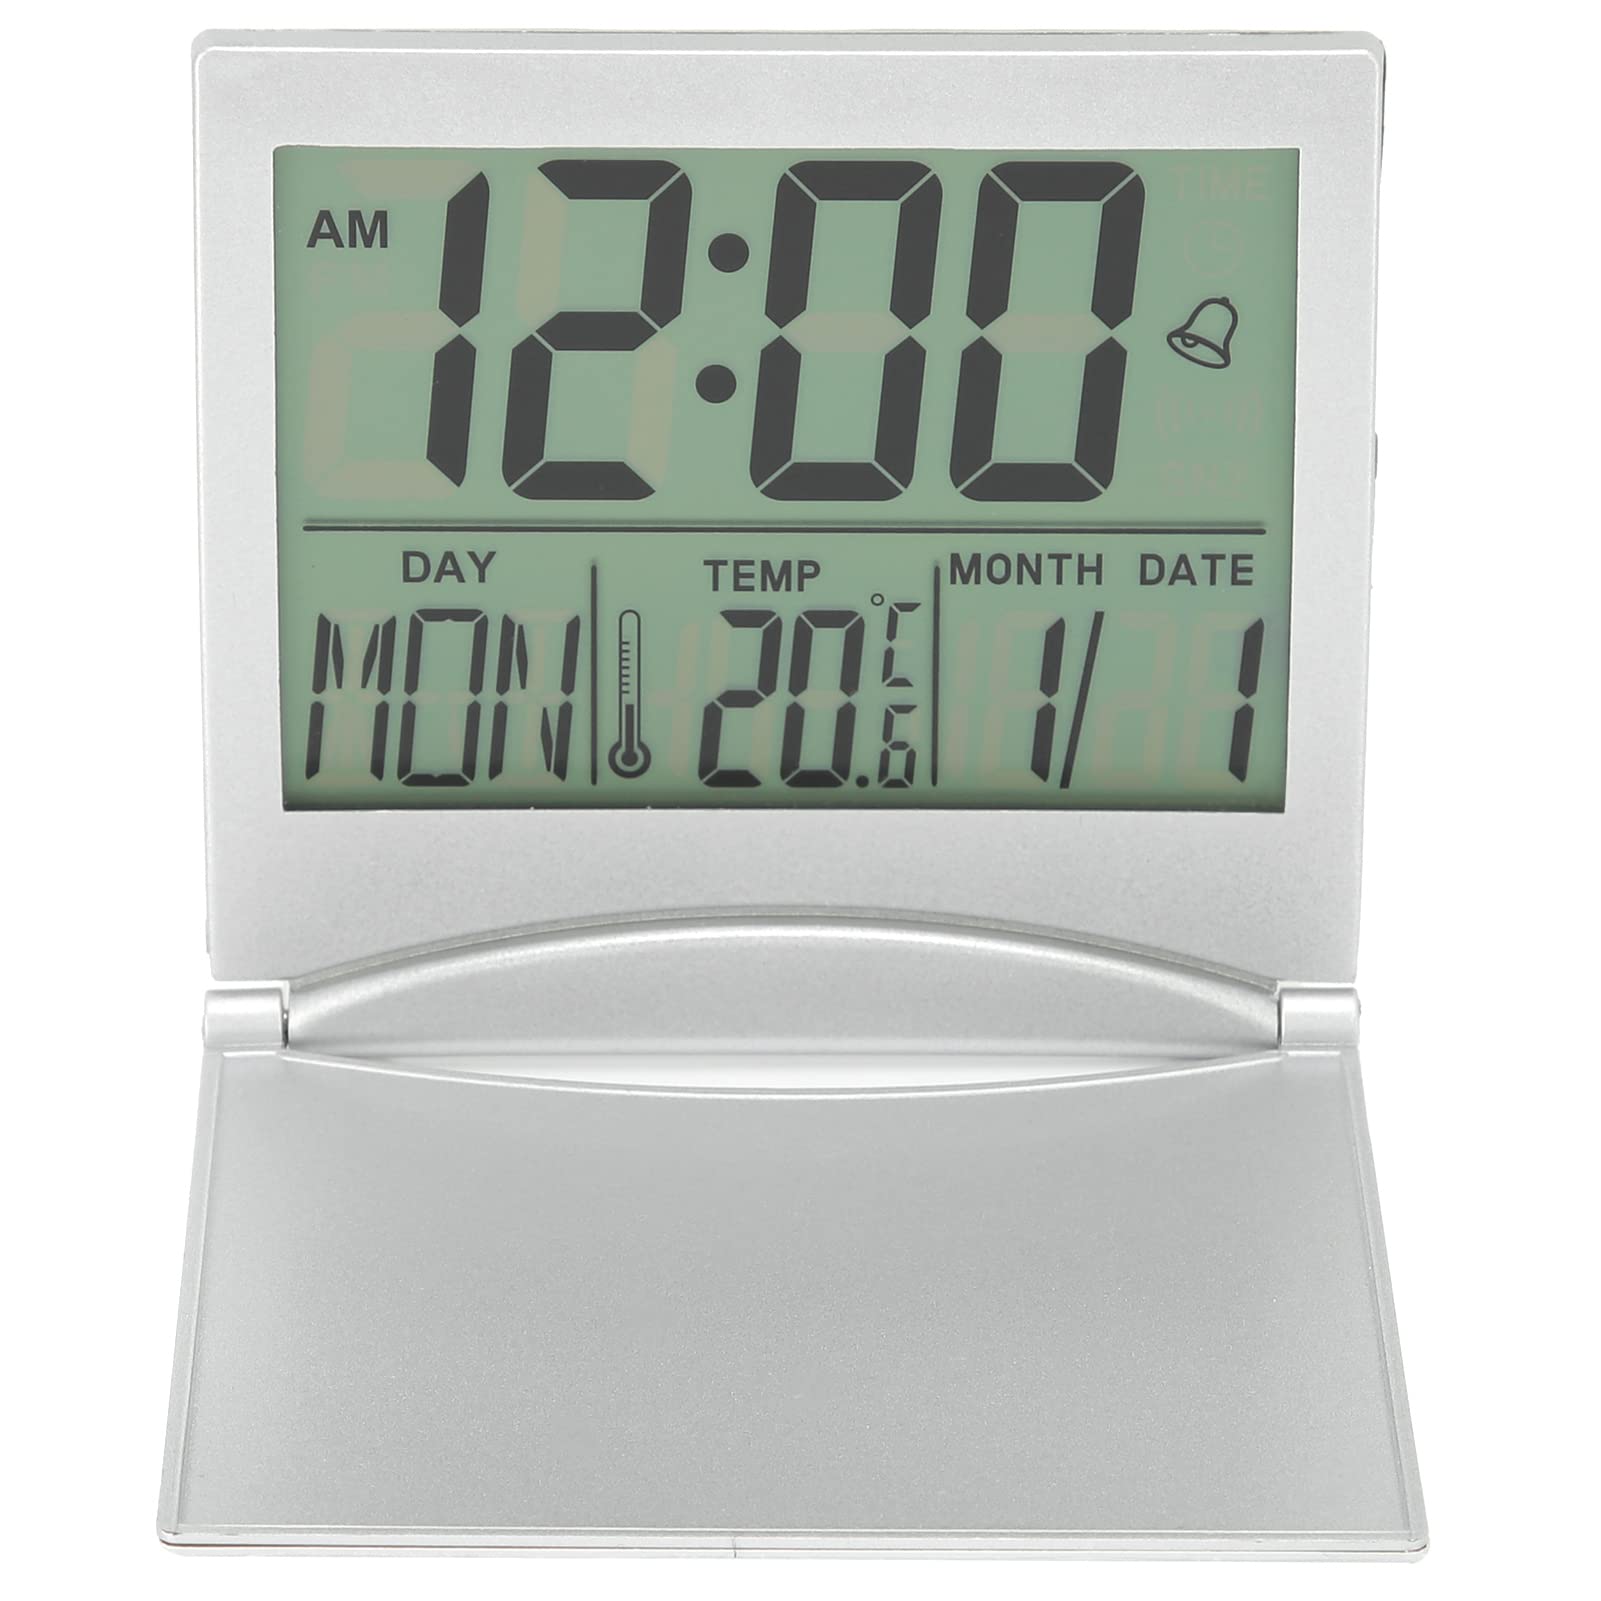
Figure 1: Front view of the Akozon Atomic Alarm Clock display.
Control Buttons
The clock features several buttons on the back for configuration and operation:
- MODE: Switches between time display, alarm setting, and timer setting modes.
- DOWN/C/F: Decreases values during setting; switches temperature unit between Celsius and Fahrenheit.
- ADJ/UP: Increases values during setting.
- TIMER: Activates and sets the countdown timer.
- SET: Confirms settings or enters setting mode.
- SNOOZE/LIGHT: Located on top. Activates snooze during an alarm; illuminates backlight for 5 seconds.

Figure 2: Rear view showing control buttons.
Physical Features
- Foldable Stand: Allows the clock to stand upright on a flat surface.
- Wall Mount Hole: Located on the back for hanging the clock.
- Battery Compartment: Houses the AAA battery.
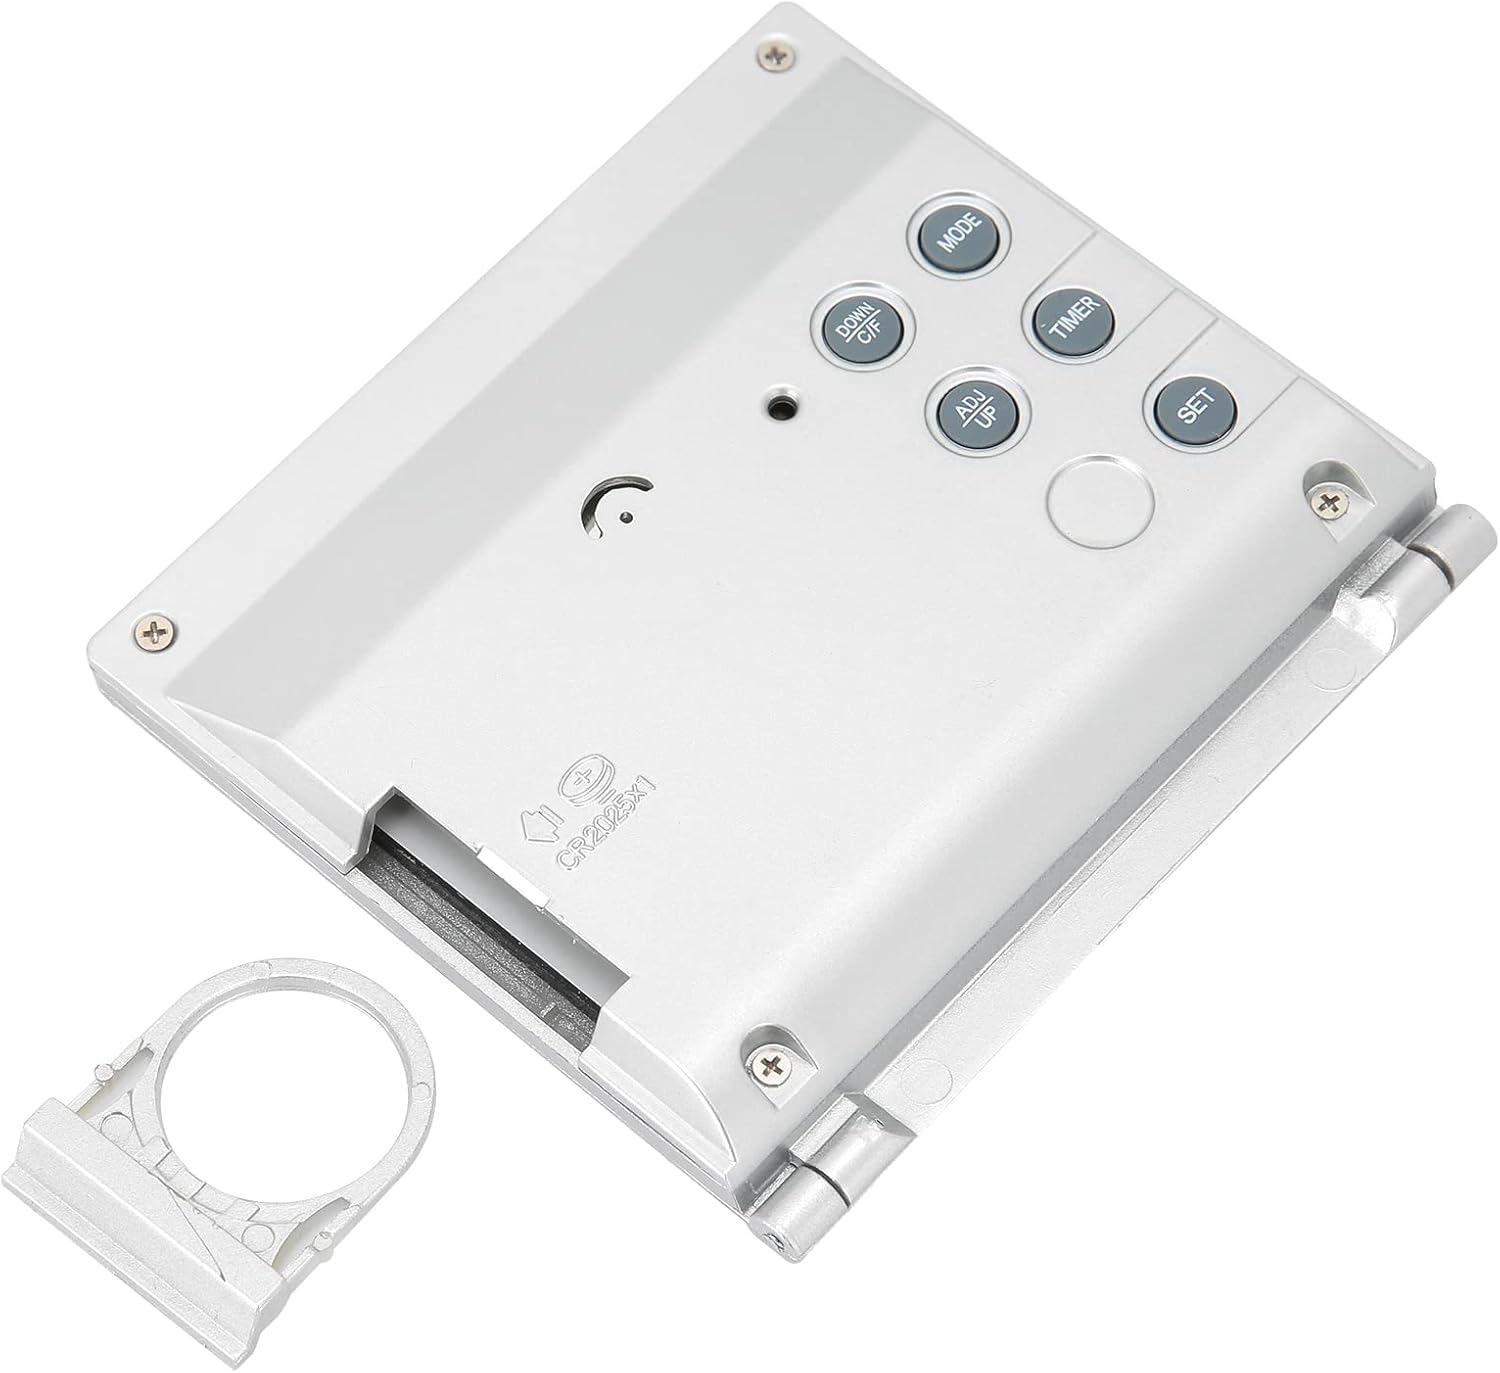
Figure 3: Back view with battery compartment and stand.
Setup
1. Battery Installation
- Open the battery compartment cover on the back of the clock.
- Insert one (1) AAA battery, ensuring the correct positive (+) and negative (-) polarity.
- Close the battery compartment cover securely.
2. Initial Power On
Upon battery installation, the clock will power on and display default settings. The clock is designed with a built-in receiver for automatic time synchronization. If automatic synchronization does not occur, please proceed with manual time setting.
3. Manual Time and Date Setting
- In normal time display mode, press and hold the SET button for approximately 3 seconds to enter time setting mode. The hour digits will flash.
- Press ADJ/UP or DOWN/C/F to adjust the hour.
- Press SET again to confirm the hour and move to minute setting. The minute digits will flash.
- Repeat the process using ADJ/UP or DOWN/C/F to set minutes, then SET to confirm.
- Continue pressing SET to cycle through and set the Year, Month, and Date. Adjust each value with ADJ/UP or DOWN/C/F.
- After setting the date, press SET one last time to exit setting mode.
4. 12/24 Hour Format Selection
In normal time display mode, press the ADJ/UP button to toggle between 12-hour (with AM/PM indicator) and 24-hour formats.
5. Temperature Unit Selection
In normal time display mode, press the DOWN/C/F button to switch the temperature display between Celsius (°C) and Fahrenheit (°F).
Operating Instructions
1. Time Display Mode
This is the default mode, showing current time, date, day, and indoor temperature.

Figure 4: Clear display of time, date, and temperature.
2. Alarm Setting
- Press the MODE button once to enter Alarm Mode. The alarm time will be displayed.
- Press and hold the SET button for approximately 3 seconds. The hour digits of the alarm time will flash.
- Use ADJ/UP or DOWN/C/F to set the desired alarm hour. Press SET to confirm.
- Use ADJ/UP or DOWN/C/F to set the desired alarm minute. Press SET to confirm.
- Press SET again to exit alarm setting mode.
- To activate/deactivate the alarm, in Alarm Mode, press ADJ/UP. An alarm icon will appear/disappear on the display.
3. Snooze Function and Backlight
- When the alarm sounds, press the SNOOZE/LIGHT button on top of the clock to activate the snooze function. The alarm will temporarily stop and sound again after a few minutes (default snooze duration).
- Pressing the SNOOZE/LIGHT button at any time will illuminate the display backlight for approximately 5 seconds. The backlight also illuminates when the alarm sounds.
4. Timer Mode (Countdown)
The clock features a countdown timer with a range of 23 hours, 59 minutes, and 00 seconds.
- Press the TIMER button once to enter Timer Mode. The display will show '00:00'.
- Press and hold the SET button for approximately 3 seconds. The hour digits will flash.
- Use ADJ/UP or DOWN/C/F to set the desired countdown hour. Press SET to confirm.
- Use ADJ/UP or DOWN/C/F to set the desired countdown minute. Press SET to confirm.
- Press TIMER again to start the countdown.
- When the timer reaches '00:00', an alarm will sound.
- To pause/resume the timer, press TIMER. To reset, press and hold TIMER.
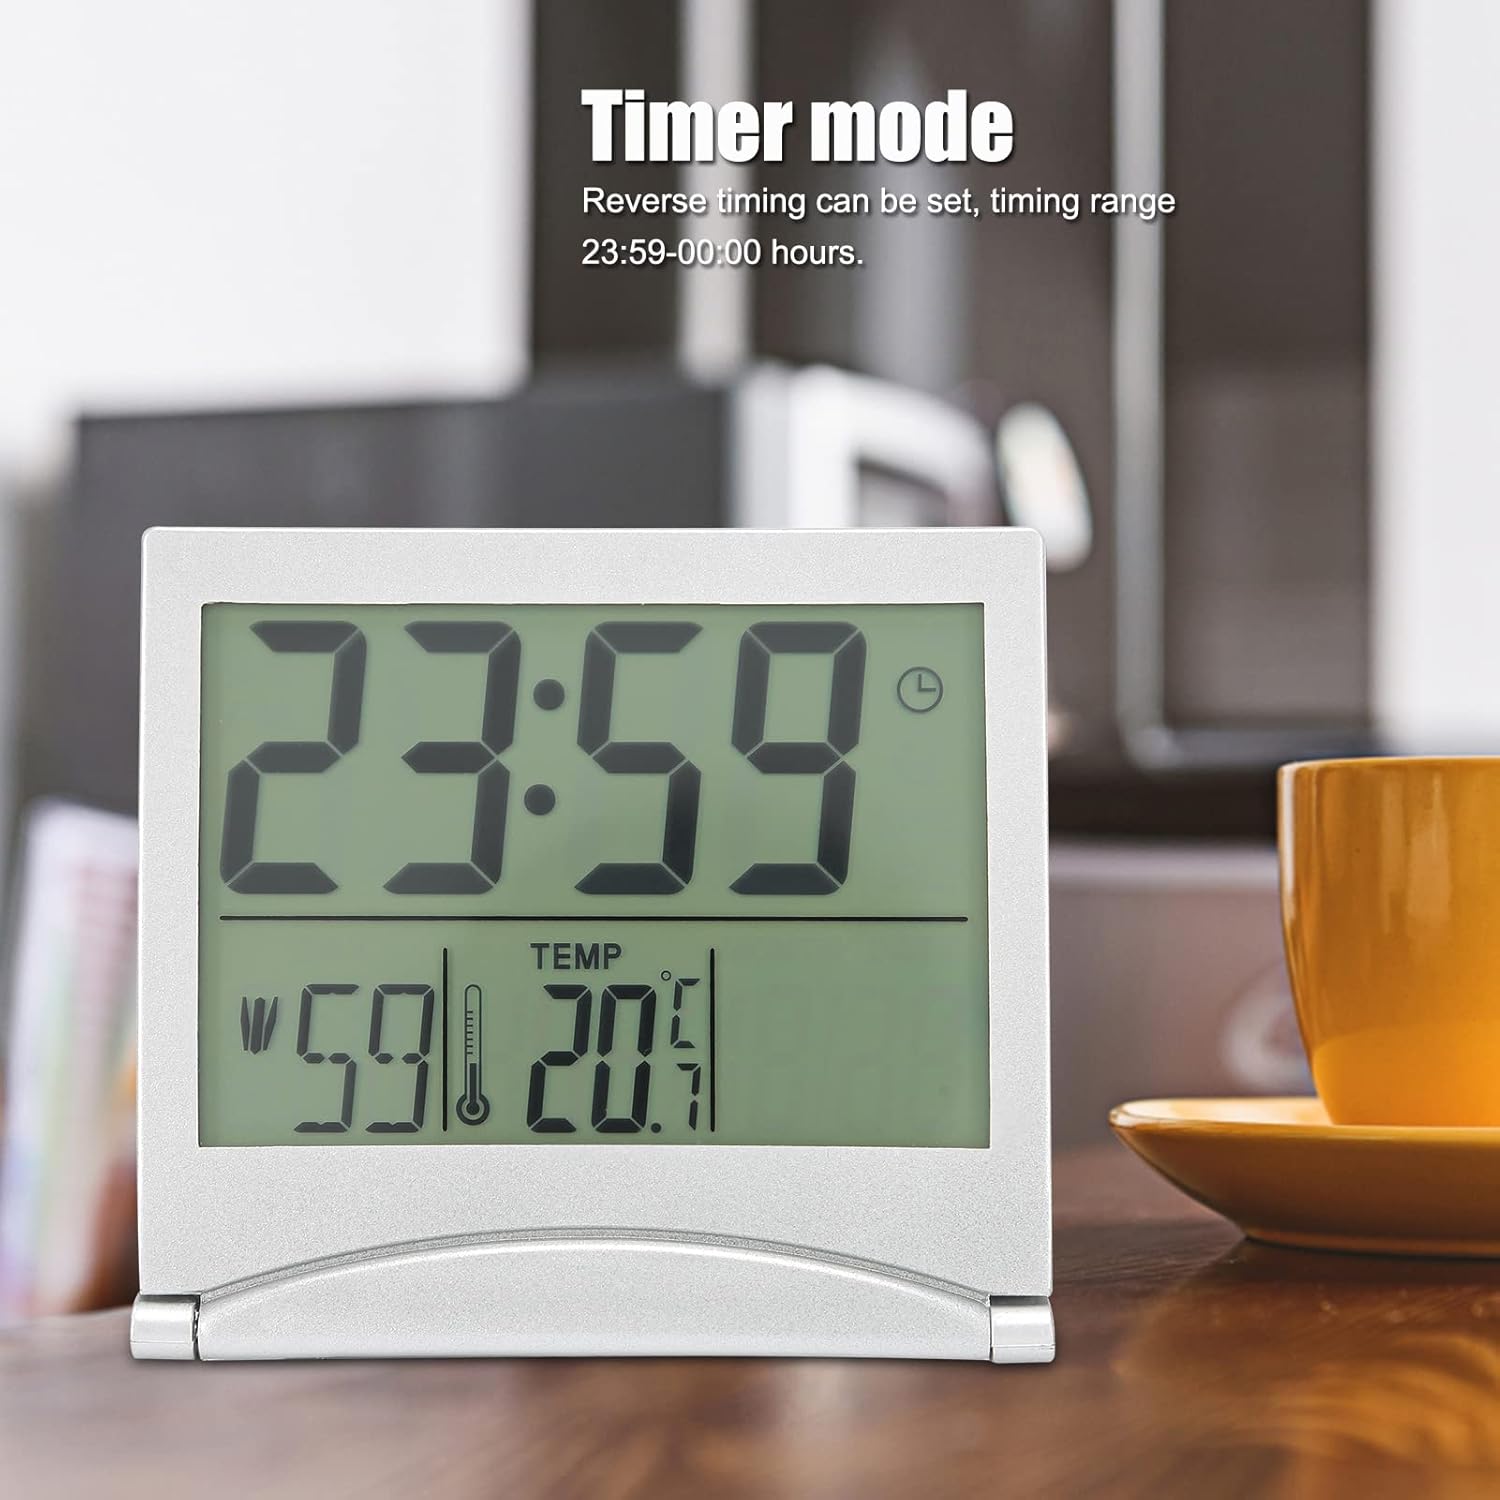
Figure 5: Timer mode display.
5. Birthday Reminder
The clock allows you to set a specific time and date for a birthday reminder, which will play a birthday song when activated.
- In normal time display mode, press the MODE button twice to enter Birthday Reminder Mode.
- Press and hold the SET button for approximately 3 seconds. The hour digits will flash.
- Use ADJ/UP or DOWN/C/F to set the desired reminder hour. Press SET to confirm.
- Use ADJ/UP or DOWN/C/F to set the desired reminder minute. Press SET to confirm.
- Continue pressing SET to cycle through and set the Month and Date for the birthday reminder. Adjust each value with ADJ/UP or DOWN/C/F.
- Press SET one last time to exit setting mode.
- To activate/deactivate the birthday reminder, in Birthday Reminder Mode, press ADJ/UP. A birthday cake icon (or similar indicator) may appear/disappear.
6. Placement Options
- Tabletop Use: Extend the foldable stand on the back of the clock to place it on any flat surface.
- Wall Mounting: Use the hang hole located on the back of the clock to mount it on a wall using a suitable screw or hook (not included).

Figure 6: Clock with foldable stand extended.
Maintenance
- Cleaning: Wipe the clock gently with a soft, dry cloth. Do not use abrasive cleaners or solvents.
- Battery Replacement: Replace the AAA battery when the display becomes dim or functions become erratic. Follow the battery installation steps in the Setup section.
- Storage: If storing the clock for an extended period, remove the battery to prevent leakage.
Troubleshooting
| Problem | Possible Cause | Solution |
|---|---|---|
| Display is blank or dim. | Low or dead battery; incorrect battery installation. | Replace with a fresh AAA battery, ensuring correct polarity. |
| Time is incorrect or not setting automatically. | Weak atomic signal; clock out of range; manual setting required. | Move the clock to a location with better signal reception (e.g., near a window). Manually set the time and date as per instructions. |
| Alarm does not sound. | Alarm is not activated; alarm volume too low (if adjustable); battery low. | Ensure the alarm icon is displayed. Replace battery if needed. (Note: This model does not have adjustable alarm volume). |
| Temperature reading seems inaccurate. | Clock placed near heat/cold source; sensor obstruction. | Relocate the clock away from direct heat, cold drafts, or direct sunlight. Allow time for the sensor to stabilize. |
Specifications
- Brand: Akozon
- Model: B0BNNTLZBS
- Display Type: Digital
- Material: Acrylonitrile Butadiene Styrene (ABS)
- Power Source: 1 x AAA Battery (not included)
- Item Weight: Approximately 78.8 Grams
- Functions: Time (12/24H), Date, Day of Week, Indoor Temperature (°C/°F), Daily Alarm, Snooze, Countdown Timer, Birthday Reminder, Backlight.
- Mounting Type: Tabletop / Wall Mountable
Warranty and Support
For warranty information and customer support, please refer to the documentation provided with your purchase or contact the retailer directly. Keep your purchase receipt as proof of purchase.
