1. Introduction
The AMROOLOO Dual System Car Head-Up Display projects essential vehicle and driving data onto its screen, allowing you to monitor information such as speed, RPM, and more without diverting your gaze from the road. This device supports both OBD and GPS modes, offering broad compatibility across various vehicle types. It can be installed on your car's center console or windshield using the provided double-sided adhesive pad or suction cup bracket.

Image 1.1: The AMROOLOO Head-Up Display mounted on a car dashboard, showing various driving parameters.
2. Package Contents
Verify that all items listed below are included in your product package:
- One (1) Main Head-Up Display Unit
- One (1) Dual-Purpose OBD Cable
- One (1) Suction Cup Bracket
- One (1) Double-Sided Adhesive Pad
- One (1) Instruction Manual

Image 2.1: All components included in the AMROOLOO Head-Up Display package.
3. Device Overview
Familiarize yourself with the main unit's components and connection points:

Image 3.1: Front and rear view of the device with key features labeled.
- Setting Key: Used for navigating menus and confirming selections.
- Adjustment Key 1 & 2: Used for adjusting values or selecting options within menus.
- Manual Shutdown Key: Powers the device on or off manually.
- Photosensitive Hole: Light sensor for automatic screen brightness adjustment.
- Cable Jack: Port for connecting the OBD cable.
- Buzzer Hole: Speaker for audible alerts.
4. Installation
Follow these steps to properly install your Head-Up Display:
- Choose a Mounting Location: Select a flat, stable surface on your car's dashboard or windshield that does not obstruct your view of the road.
- Clean the Surface: Ensure the chosen area is clean and dry for optimal adhesion.
- Attach the Bracket:
- For Dashboard Mounting: Apply the double-sided adhesive pad to the bottom of the main unit or the provided bracket, then firmly press it onto the dashboard.
- For Windshield Mounting: Attach the suction cup bracket to the main unit, then press the suction cup firmly against the windshield and engage its locking mechanism.
- Connect the OBD Cable: Plug one end of the dual-purpose OBD cable into the 'Cable Jack' on the back of the Head-Up Display. Connect the other end to your vehicle's OBD-II port, typically located under the dashboard near the steering wheel.
- Route the Cable: Carefully route the cable to avoid interference with driving controls and to maintain a tidy appearance.
- Power On: Once connected, the device should power on automatically with the vehicle's ignition. If not, press the Manual Shutdown Key.
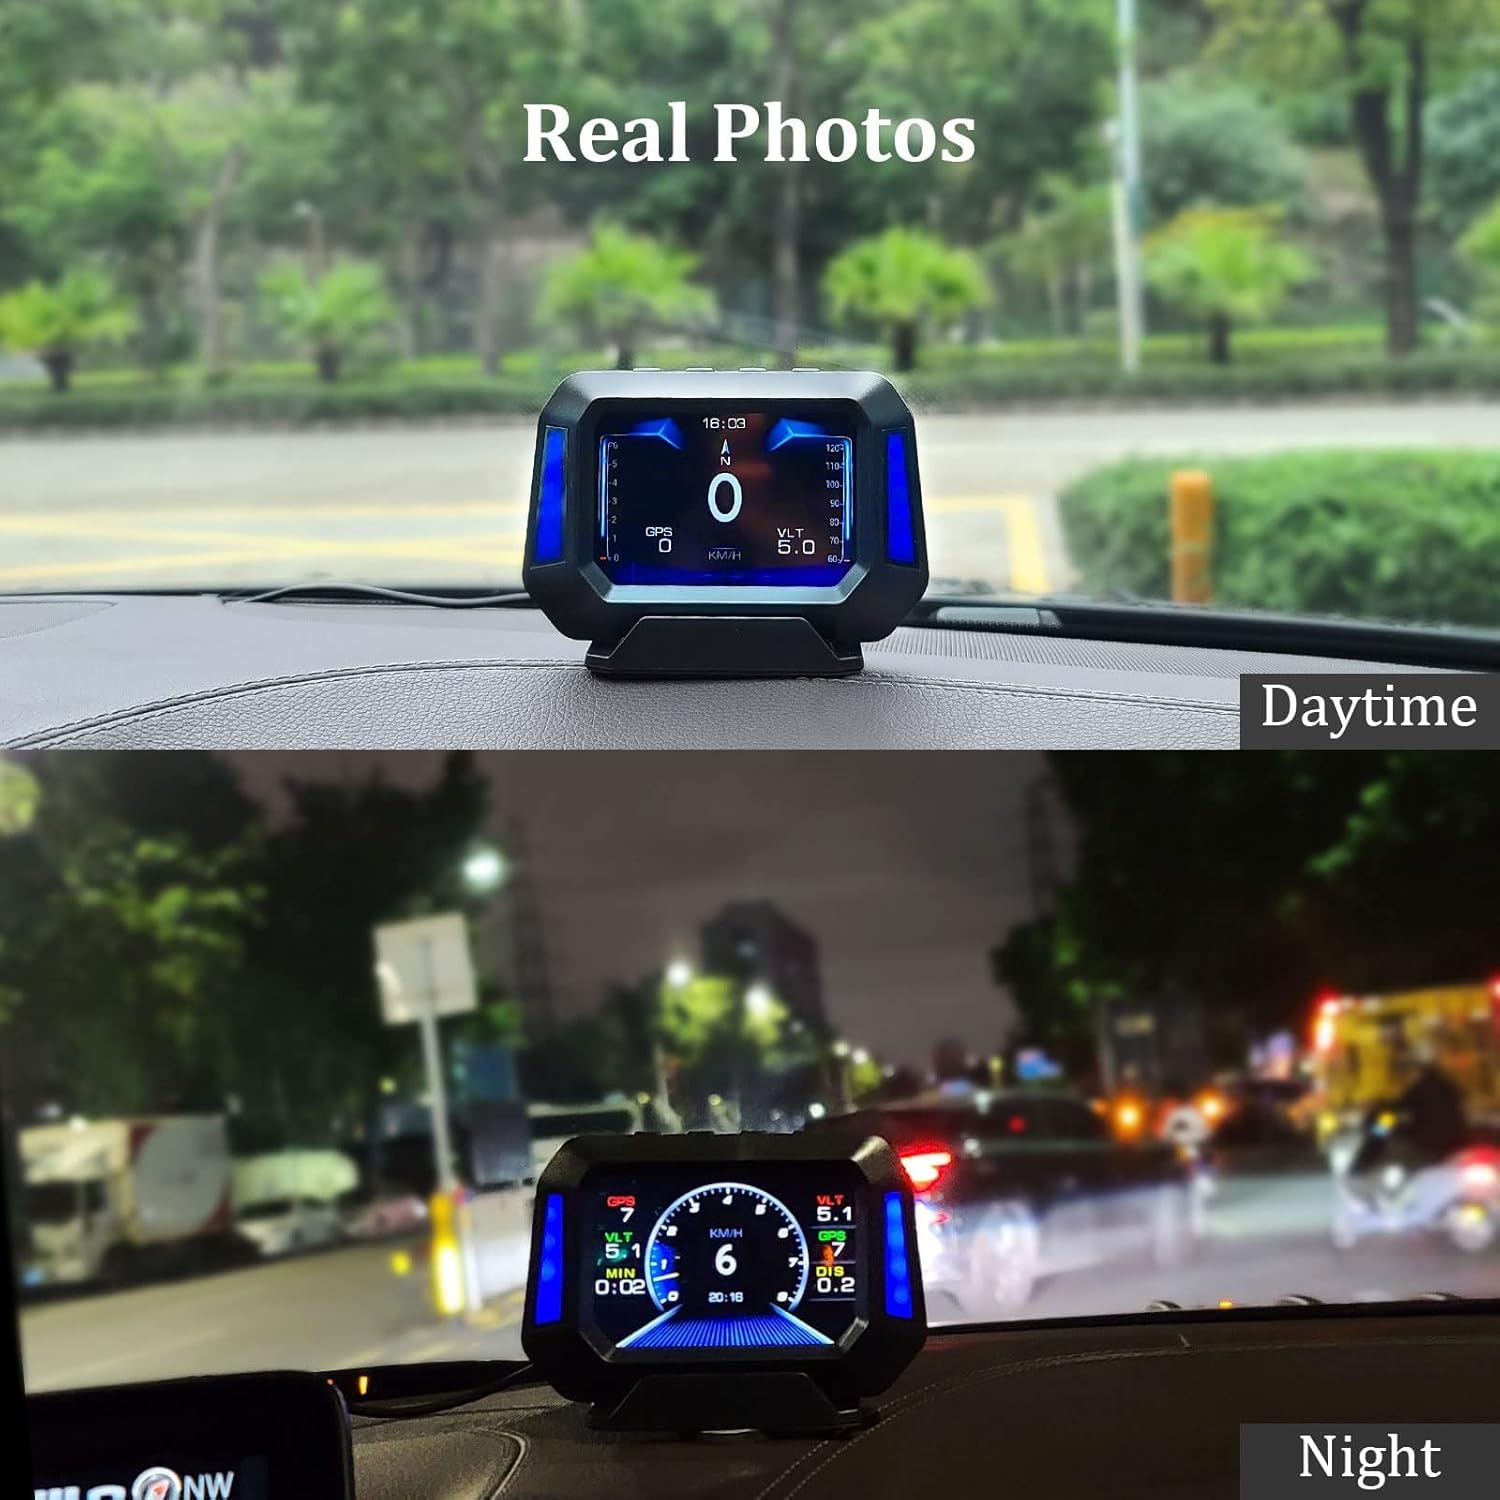
Image 4.1: Examples of the Head-Up Display's appearance when installed, showing visibility in both day and night conditions.
5. Operation Modes and Compatibility
The device supports two primary operation modes:
- OBD Mode: This mode reads data directly from your vehicle's On-Board Diagnostics (OBD-II) system. It is generally compatible with most car models manufactured after 2008.
- GPS Mode: This mode uses satellite signals to obtain driving data. It is compatible with all vehicles, regardless of make or model year.
The device will automatically attempt to connect via OBD first. If OBD data is not detected or if your vehicle is not compatible, it will switch to GPS mode. You can also manually select the preferred mode through the device settings.

Image 5.1: The Head-Up Display is compatible with a wide range of vehicles, utilizing either OBD or GPS mode.
6. Display Functions
The Head-Up Display can show a variety of vehicle and driving parameters. Use the Setting Keys to cycle through different display screens and customize the information shown.

Image 6.1: A visual representation of the numerous data points and functions available on the display.
Commonly displayed data includes:
- Speed (km/h or mph)
- Engine RPM (Revolutions Per Minute)
- Altitude
- Current Time
- Battery Voltage
- Driving Mileage
- Driving Time
- Fuel Consumption
- Water Temperature
- Oil Temperature
- Turbo Pressure
- Intake Air Pressure
- Gearbox Temperature
7. Alarm Functions
The device is equipped with various alarm functions to alert you to potential issues or exceeded limits, enhancing driving safety. These alarms can typically be configured in the device settings.

Image 7.1: Visual representation of the different alarm types provided by the device.
- Overspeed Alarm: Alerts you when the vehicle speed exceeds a preset limit.
- Engine Temperature Alarm: Warns if the engine coolant temperature becomes too high.
- Engine RPM Alarm: Notifies you if the engine RPM exceeds a safe operating range.
- Voltage Alarm: Indicates if the vehicle's battery voltage is too low or too high.
- Tilt Angle Alarm: Alerts you if the vehicle's tilt angle (pitch or roll) exceeds a safe threshold, particularly useful for off-road driving.
8. Slope Meter Function
A distinctive feature of this Head-Up Display is its integrated inclinometer, or slope meter. This function provides real-time monitoring of your vehicle's driving angle, indicating both uphill and downhill inclinations. This feature is active in both OBD and GPS modes, offering continuous feedback for navigating varied terrains and ensuring driving stability.

Image 8.1: The slope meter function visually indicating vehicle inclination during uphill, downhill, and side-tilt scenarios.
9. Troubleshooting
If you encounter issues with your AMROOLOO Head-Up Display, refer to the following common troubleshooting steps:
- No Power/Display Off:
- Check if the OBD cable is securely connected to both the device and the vehicle's OBD-II port.
- Ensure the vehicle's ignition is on.
- Try pressing the Manual Shutdown Key to power on the device.
- No Data Displayed (OBD Mode):
- Verify your vehicle is compatible with OBD mode (most cars after 2008).
- Ensure the OBD cable is not damaged.
- The device may automatically switch to GPS mode if OBD data is unavailable.
- Inaccurate Speed/GPS Data:
- Ensure the device has a clear view of the sky for optimal GPS signal reception.
- Calibrate the speed setting in the device menu if there's a discrepancy with your vehicle's speedometer.
- Alarms Triggering Incorrectly:
- Review the alarm threshold settings in the device menu and adjust them as needed.
- Screen Brightness Issues:
- Ensure the Photosensitive Hole is not obstructed, as it controls automatic brightness adjustment.
- Adjust brightness manually through the device settings if automatic adjustment is not preferred.
If these steps do not resolve the issue, please consult the full instruction manual or contact customer support.
10. Specifications
| Attribute | Value |
|---|---|
| Brand | AMROOLOO |
| Material | Plastic |
| Item Dimensions (LxWxH) | 11.5 x 1.8 x 8.2 cm |
| Item Weight | 121 Grams |
| EU Spare Part Availability | 10 Years |
11. Safety Information
Please read and follow these safety guidelines to ensure safe operation and prevent damage to the device or your vehicle:
- Do not install the device in a location that obstructs your view of the road or interferes with the operation of airbags or other safety features.
- Ensure all cables are securely connected and routed away from moving parts or areas that could cause entanglement.
- Avoid exposing the device to extreme temperatures, direct sunlight for prolonged periods, or excessive moisture.
- Do not attempt to disassemble or repair the device yourself. Refer to qualified service personnel.
- Always prioritize safe driving. Do not operate or adjust the device while driving if it distracts you from the road.
12. Warranty and Support
This product comes with a standard manufacturer's warranty. For specific warranty terms, duration, and claim procedures, please refer to the documentation included in your package or contact the seller directly. For technical support or further assistance, please reach out to AMROOLOO customer service through the contact information provided with your purchase.