1. Introduction
This manual provides comprehensive instructions for the assembly, operation, and maintenance of your VIPEK R2 Plus Rolling Clothes Rack. Please read this manual thoroughly before assembly and use to ensure proper function and safety.
The VIPEK R2 Plus is a heavy-duty garment rack designed for organizing and storing clothing. It features three adjustable wire shelves, two hanging rods, and side hooks, all supported by lockable 360° swivel wheels for mobility.
2. Product Components
Before beginning assembly, verify that all components are present and undamaged. Refer to the parts list included in your packaging. If any parts are missing or damaged, contact customer support.

Figure 2.1: Fully assembled VIPEK R2 Plus Rolling Clothes Rack, showcasing its three tiers, double hanging rods, and side hooks.

Figure 2.2: Dimensional diagram of the VIPEK R2 Plus, indicating its length, width, and height.
3. Setup and Assembly
Assembly of the VIPEK R2 Plus requires careful attention to the order of installation for certain shelves. No additional tools are required.
- Unpack Components: Carefully remove all parts from the packaging and lay them out on a clean, flat surface.
- Attach Casters: Secure the four rolling wheels to the bottom of the vertical poles. Ensure the two locking wheels are positioned where they can be easily accessed.
- Install Lower Shelf: Attach the plastic clips to the vertical poles at the desired height for the bottom shelf. Ensure the arrow on the clip points upwards and the ridge aligns with the groove on the pole. Slide the bottom wire shelf over the clips, pressing down firmly until it is secure.
- Install Middle and Top Shelves: Repeat the process for the middle and top wire shelves. Note that the middle shelf also supports the lower hanging rod, and the top shelf supports the upper hanging rod.
- Attach Hanging Rods: Insert the hanging rods into their designated slots on the middle and top shelves.
- Attach Side Hooks: Secure the side hooks to the vertical poles at the desired height.

Figure 3.1: Detail of the plastic clips used for shelf height adjustment, showing proper orientation with the arrow pointing upwards and ridge aligning with the pole's groove.
For visual guidance, refer to the installation video if available on the product page.
4. Operating Instructions
4.1 Adjusting Shelf Height
The wire shelves can be adjusted to accommodate items of various sizes. To adjust a shelf:
- Empty the shelf of all items.
- Lift the shelf slightly to release it from the plastic clips.
- Remove the plastic clips from the poles.
- Re-position the clips at the desired height, ensuring they are level on all four poles.
- Place the shelf back onto the clips, pressing down firmly until it locks into place.
4.2 Using the Wheels and Locks
The rack is equipped with four 360° swivel wheels for easy mobility. Two of these wheels are lockable to secure the rack in a stationary position.
- To Move: Ensure both locking wheels are in the unlocked position. Gently push the rack to its desired location.
- To Lock: Once the rack is in position, press down on the locking levers on the two designated wheels until they click into place. This will prevent the rack from rolling.
- To Unlock: Lift the locking levers on the two designated wheels to release the lock.

Figure 4.1: Detail of the 360° swivel wheel with its locking mechanism, illustrating its smooth rolling and effortless locking features.
4.3 Utilizing Hanging Rods and Side Hooks
- Hanging Rods: Use the two hanging rods for garments such as shirts, dresses, coats, and trousers. Distribute weight evenly across the rods.
- Side Hooks: The two sets of side hooks are suitable for hanging accessories like bags, scarves, belts, or hats.

Figure 4.2: Close-up view of the durable side hooks, demonstrating their capacity for hanging various accessories.
5. Maintenance
- Cleaning: Wipe the rack with a soft, damp cloth. Avoid abrasive cleaners or harsh chemicals that could damage the powder-coated finish.
- Rust Prevention: The rack is powder-coated for protection against water and rust. To maintain this protection, avoid prolonged exposure to excessive moisture.
- Wheel Maintenance: Periodically check the wheels for any debris or hair that might impede smooth rolling. Clean as necessary.
- Weight Distribution: Always distribute weight evenly across shelves and hanging rods to prevent strain on the structure.
6. Troubleshooting
- Rack is Unstable:
Ensure all shelves are securely seated on their plastic clips and that the clips are correctly positioned at the same height on all poles. Verify that all poles are fully inserted into their connectors.
- Wheels Not Rolling Smoothly:
Check if the wheel locks are engaged. Inspect wheels for any accumulated debris (e.g., hair, lint) and remove it. Ensure the wheels are properly attached to the poles.
- Difficulty Adjusting Shelf Height:
Ensure the shelf is empty before attempting to adjust. The plastic clips must be fully disengaged from the shelf and then re-positioned correctly on the poles.
7. Specifications
| Model | VIPEK R2 Plus |
| Dimensions (Overall with wheels) | 45" L x 17.7" W x 80.3" H |
| Weight Capacity (Stationary) | 400 lbs |
| Weight Capacity (Moving) | 300 lbs |
| Material | Carbon Steel |
| Finish | Powder Coated (Gold) |
| Special Features | Heavy Duty, Lockable 360° Swivel Wheels, Portable, Rust-Proof, Adjustable Shelves, Double Hanging Rods, Side Hooks |
| Assembly Required | Yes |
| Item Weight | 22 Pounds |
| UPC | 192840689221 |
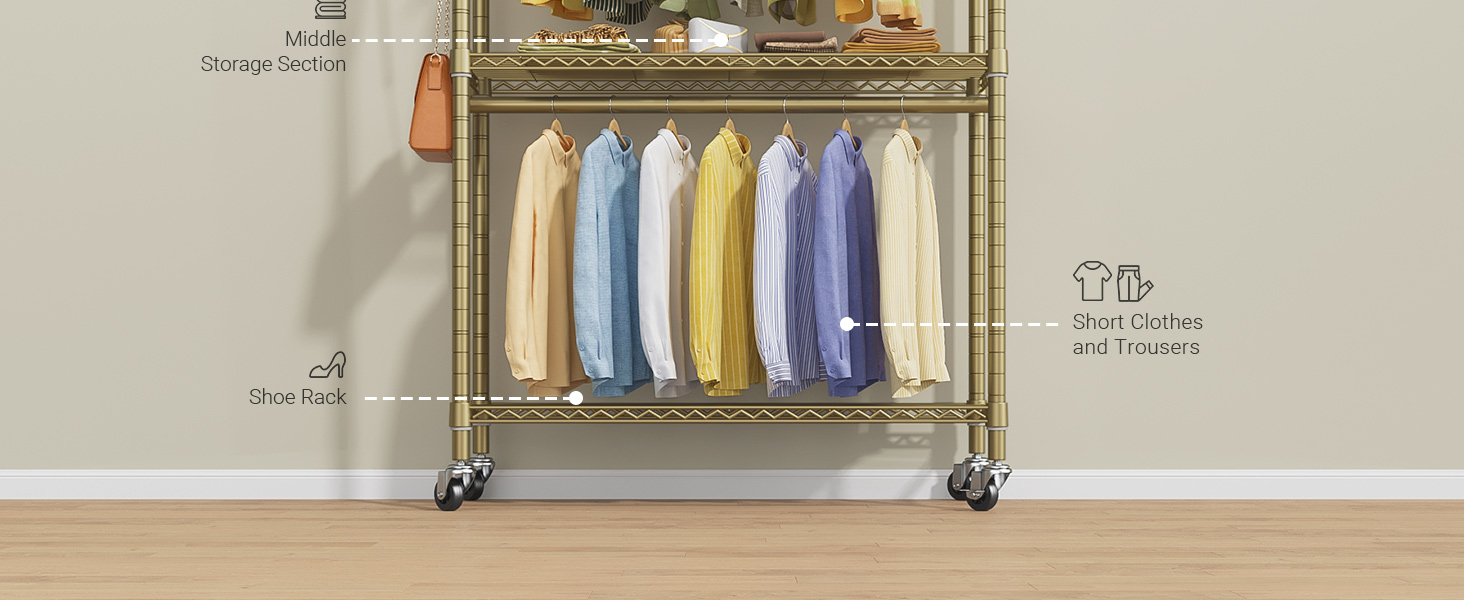
Figure 7.1: Comparison table of dimensions for various VIPEK R2 models, including R2 Mini, R2 Medium, R2, and R2 Plus.
8. Warranty Information
The VIPEK R2 Plus Rolling Clothes Rack comes with a 1-Year Warranty from the date of purchase. This warranty covers manufacturing defects under normal use. It does not cover damage resulting from misuse, accidents, unauthorized modifications, or improper assembly.
Please retain your proof of purchase for warranty claims.
9. Customer Support
If you have any questions regarding the assembly, operation, or maintenance of your VIPEK R2 Plus Rolling Clothes Rack, or if you require assistance with warranty claims, please contact VIPEK customer support.
For the most up-to-date contact information, please visit the official VIPEK store on Amazon or refer to the contact details provided in your product packaging.
Online Store: VIPEK Store on Amazon
10. Official Product Videos
No official seller videos were provided in the product data for embedding in this manual.