KIRANDY TXES021
KIRANDY TXES021 4500Psi 300Bar PCP Air Compressor User Manual
Model: TXES021
1. Important Safety Information and Initial Checks
Before operating the KIRANDY TXES021 PCP Air Compressor, please read and understand all safety instructions. Failure to follow these instructions may result in serious injury or property damage. Always prioritize safety.

Image: Important notes to review upon receiving the compressor, including checks for damage, temperature limits, and oil requirements.
- Inspect the outer packaging and the machine for any signs of damage upon receipt.
- Ensure the compressor's operating temperature does not exceed 85°C.
- Before initial use, replace the crankcase breather. Operating without this replacement is dangerous.
- Add oil to the compressor before use. Verify the oil level is at the red dot indicator.
- The compressor includes a filter to be installed along with the filling hose for optimal air quality.
- When connecting the filter and hose, ensure they are properly assembled and there are no leaks.
- Due to transportation regulations, the compressor is shipped without oil. Users must supply their own oil.
- The maximum filling pressure must not exceed 300 Bar / 4500 PSI / 30 MPa.
2. Product Overview and Components
Familiarize yourself with the various parts of your KIRANDY TXES021 PCP Air Compressor to ensure correct setup and operation.
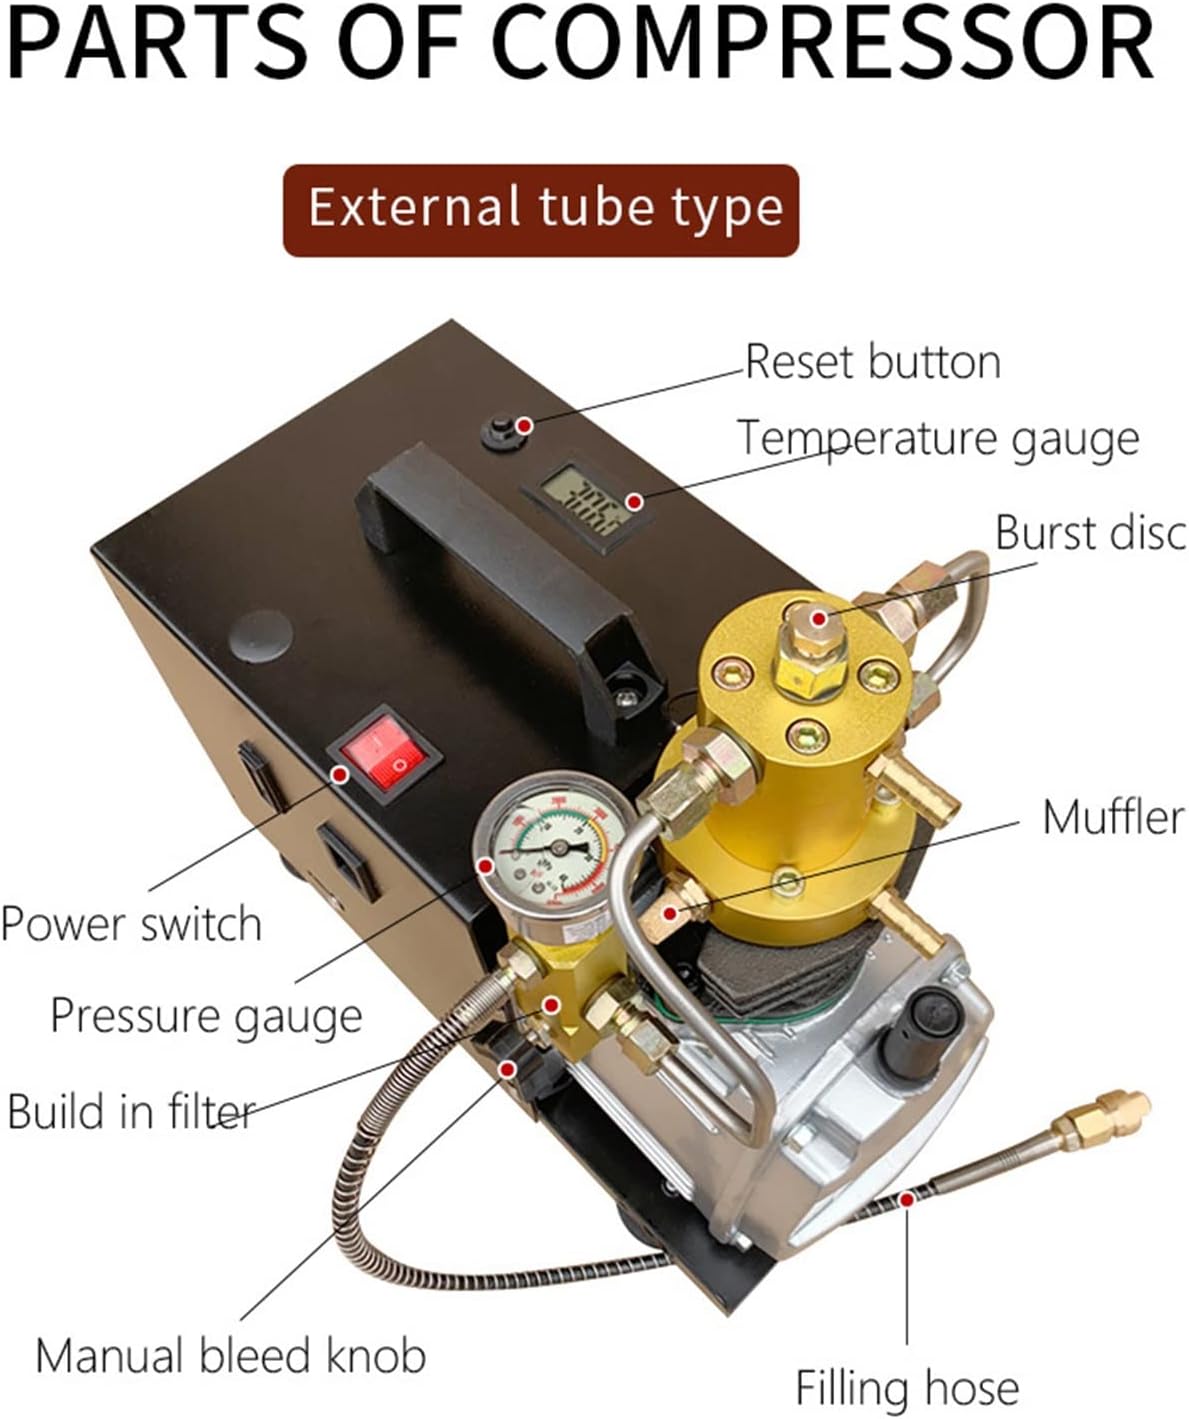
Image: Labeled diagram showing the external components of the compressor, including the power switch, pressure gauge, temperature gauge, reset button, muffler, manual bleed knob, built-in filter, burst disc, and filling hose.
Key Components:
- Power Switch: Controls the main power to the unit.
- Pressure Gauge: Displays the current air pressure.
- Temperature Gauge: Monitors the compressor's operating temperature.
- Reset Button: Used to reset the unit, often after an overheat or overload.
- Burst Disc: A safety device designed to rupture at a predetermined pressure to prevent over-pressurization.
- Muffler: Reduces operational noise.
- Manual Bleed Knob: Used to release pressure from the system.
- Built-in Filter: Helps ensure clean air output.
- Filling Hose: Connects the compressor to the air tank or device to be filled.
3. Specifications
Technical specifications for the KIRANDY TXES021 PCP Air Compressor.
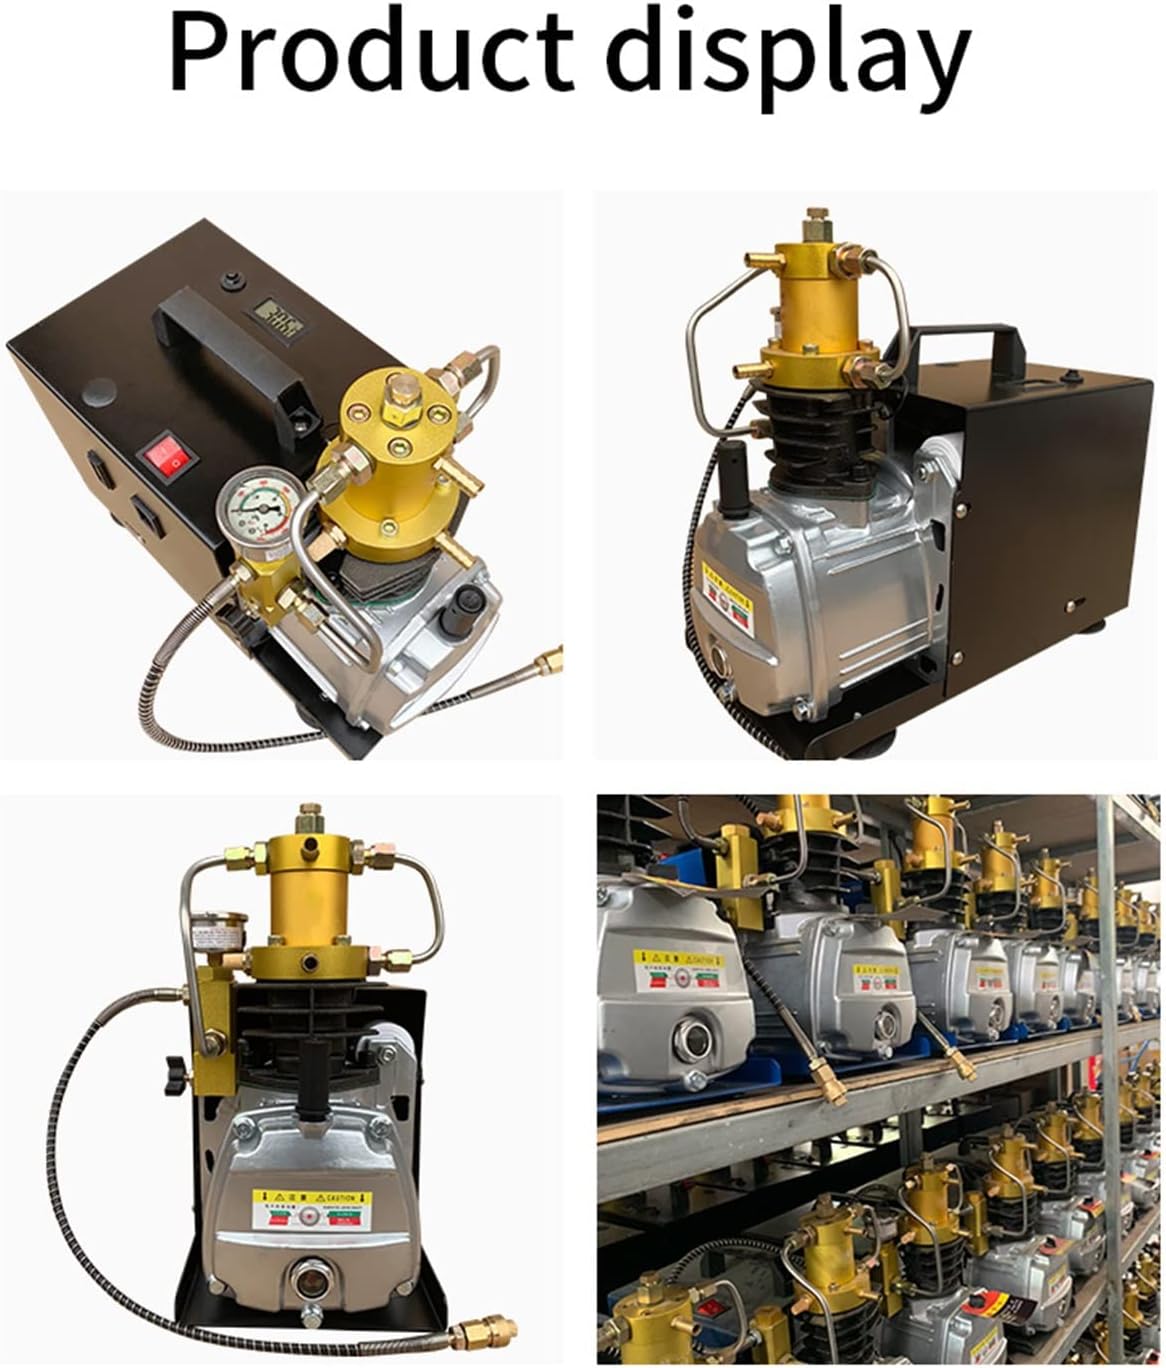
Image: Detailed parameters of the compressor, including voltage, power, RPM, working pressure, lubrication, cooling, compression stage, noise, weight, and volume.
| Parameter | Value |
|---|---|
| Model | TXES021 |
| Net Weight | 17 KG (220V version) / 19.2 KG (110V version) |
| Power Rating | 1800W (1.8KW) |
| Cooling System | Water and Fan Cooling |
| Noise Level | 80 DB |
| Dimensions (L×W×H) | 400mm × 240mm × 450mm (approx. 34cm × 32cm × 18cm from image) |
| Power Voltage | 220V (110V version also available) |
| Compression Stage | Two Stage |
| Lubrication Mode | Splash Type |
| Inflating Speed (R.P.M.) | 2800 R/MIN |
| Working Pressure (Max) | 30 MPa (300 Bar / 4500 PSI) |
4. Unpacking and Setup
Carefully unpack your compressor and prepare it for first use. Ensure all components are present and undamaged.
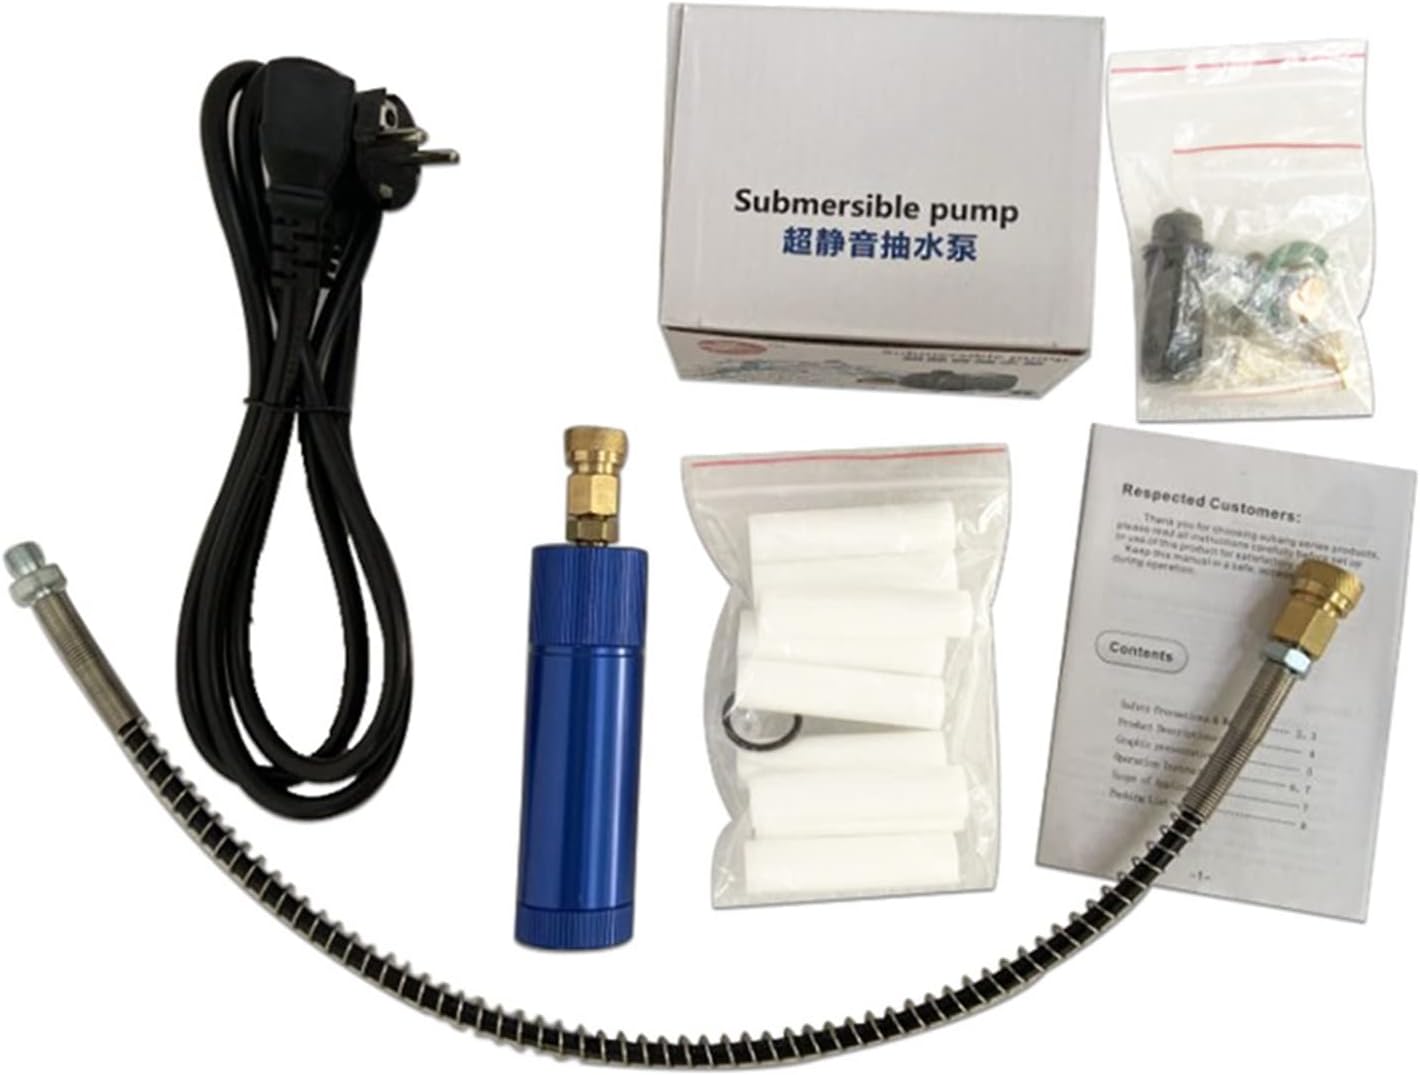
Image: View of the compressor's included accessories, such as the power cord, submersible pump, filter elements, and filling hose.
4.1. Initial Inspection
- Remove the compressor and all accessories from the packaging.
- Check for any visible damage to the compressor or its components. If damaged, do not proceed and contact your supplier.
- Verify that all listed accessories are included.
4.2. Oil Filling
- The compressor is shipped without oil. You must add appropriate compressor oil before first use.
- Locate the oil fill port and fill with the recommended oil type until the level reaches the red dot indicator on the oil sight glass.
- Refer to the manufacturer's recommendations for the specific oil type.
4.3. Water Cooling System Setup
- Connect the water pump (submersible pump) to a suitable water reservoir (e.g., a bucket of water).
- Ensure the water hoses are securely connected to the compressor's cooling inlets and outlets.
- The water cooling system must be operational before starting the compressor to prevent overheating.
4.4. Filter and Hose Connection
- Install the provided air filter along with the filling hose.
- Connect the filling hose to the compressor's output port and to the tank or device you intend to fill.
- Ensure all connections are tight and leak-free.
4.5. Power Connection

Image: Examples of optional power plugs (EU, UK, US, Standard) for different regions, highlighting the importance of using the correct plug for your voltage.
- Connect the appropriate power cord for your region (220V or 110V) to the compressor and a suitable power outlet.
- Ensure the power supply matches the voltage requirements of your compressor model.
5. Operating Instructions
Follow these steps for safe and effective operation of your PCP air compressor.
- Pre-Operation Check:
- Confirm oil level is correct.
- Ensure water cooling system is set up and the pump is submerged and ready.
- Verify all hose connections are secure and leak-free.
- Check that the manual bleed knob is closed.
- Ensure the tank or device to be filled is rated for the pressure you intend to reach.
- Start Water Cooling: Turn on the submersible water pump to begin circulating cooling water through the compressor.
- Start Compressor: Flip the main power switch to the "ON" position. The compressor will begin to build pressure.
- Monitor Pressure and Temperature: Continuously monitor the pressure gauge and temperature gauge.
- Do not exceed the maximum working pressure of 300 Bar / 4500 PSI.
- Do not allow the compressor temperature to exceed 85°C. If it approaches this limit, turn off the compressor immediately and allow it to cool.
- Filling: Allow the compressor to fill your tank or device to the desired pressure.
- Stop Compressor: Once the desired pressure is reached, turn off the main power switch.
- Bleed Pressure: Slowly open the manual bleed knob to release residual pressure from the compressor and hose. This is crucial before disconnecting the filling hose.
- Disconnect: Once pressure is fully bled, disconnect the filling hose from your tank/device.
- Stop Water Cooling: Turn off the submersible water pump.
6. Maintenance
Regular maintenance ensures the longevity and safe operation of your compressor.
- Oil Level Check: Check the oil level before each use and top up as necessary. Change the oil periodically according to manufacturer recommendations (e.g., every 20-50 hours of operation).
- Water Cooling System:
- Ensure the water reservoir is clean and filled with fresh, clean water.
- Periodically clean the submersible pump and check for blockages in the water lines.
- Air Filter Replacement: Replace the air filter elements regularly to maintain air quality and compressor efficiency. The frequency depends on usage and environmental conditions.
- Moisture Bleed: After each use, or periodically during long operations, bleed any accumulated moisture from the system using the manual bleed knob.
- General Cleaning: Keep the exterior of the compressor clean and free from dust and debris to ensure proper ventilation.
- Crankcase Breather: Ensure the crankcase breather is clear and functioning. Replace if necessary.
7. Troubleshooting
This section provides solutions to common issues you might encounter with your compressor.
| Problem | Possible Cause | Solution |
|---|---|---|
| Compressor does not start | No power, power switch off, thermal overload activated. | Check power connection and outlet. Ensure power switch is ON. Press the reset button if applicable. Allow to cool if overheated. |
| Compressor overheats (temperature exceeds 85°C) | Insufficient water cooling, low water level, blocked water lines, prolonged operation. | Turn off compressor immediately. Check water level and pump operation. Clean water lines. Allow compressor to cool down before restarting. Operate in shorter cycles. |
| Slow filling or low pressure output | Air leaks in connections, clogged air filter, low oil level, worn components. | Check all hose connections for leaks. Replace air filter. Check and top up oil. Contact service if problem persists. |
| Excessive noise or vibration | Loose components, worn bearings, improper lubrication. | Inspect for loose bolts or fittings and tighten. Check oil level. If noise persists, discontinue use and seek professional service. |
| Oil leakage | Loose fittings, damaged seals, overfilling oil. | Check and tighten all oil-related fittings. Do not overfill oil. If seals are damaged, professional repair is needed. |
8. Warranty and Support
For warranty information and technical support, please refer to the documentation provided with your purchase or contact the seller/manufacturer directly.
Manufacturer: SENMIAO-UK
Brand: KIRANDY
Model: TXES021 (Model Number: EEKPQNCKY-220V)
ASIN: B0BNH5HT4L
Ask a question about this manual
Ask about setup, troubleshooting, compatibility, parts, safety, or missing instructions. Manuals+ will review the question and use this page’s manual context to help answer it.