Introduction
This instruction manual provides detailed guidance for the installation, operation, and maintenance of your Gugaguga 101237 Cup Seal and Diverter Gate replacement parts. These components are designed to be compatible with Moen 3800 series tub spouts, addressing common issues such as water leakage and ensuring proper diversion to the showerhead.
Product Overview
The Gugaguga 101237 replacement kit includes three sets of essential components for your tub spout diverter mechanism. Each set comprises a white plastic diverter gate and a black rubber cup seal.

This image displays three complete sets of the replacement parts, each consisting of a white plastic diverter gate and a black rubber cup seal.
Key Features:
- Package Contents: 3 sets (plastic cap & rubber seal), replacement part for diverter tub spout. Part number #101237.
- Function: Compatible with 3800 series tub spouts, replaces broken or worn-out parts, solves leaking problems. Original dimensions for a perfect fit.
- Material: Made from high-quality rubber and hard plastic, durable for longer service time. Resistant to corrosion and oxidation.
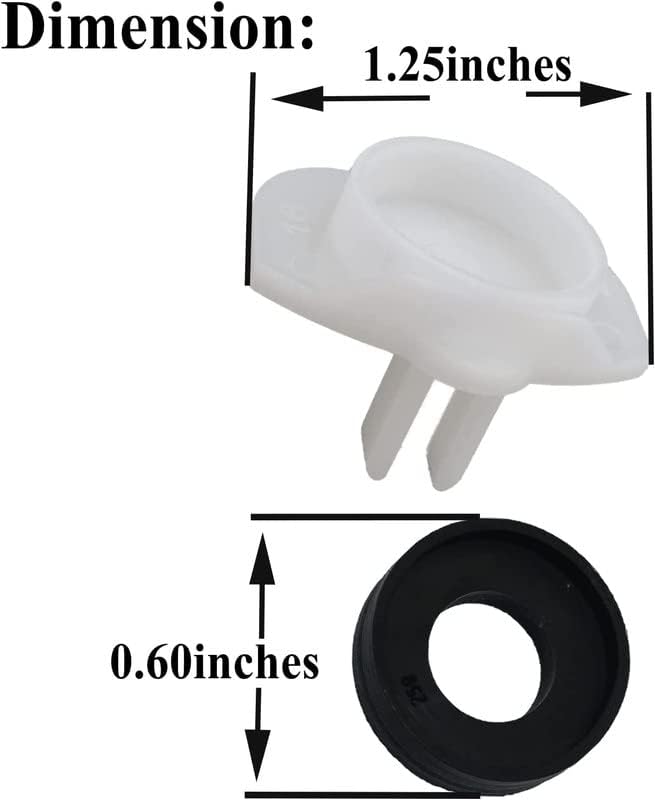
A diagram showing the approximate dimensions of the white plastic diverter gate (1.25 inches wide) and the black rubber cup seal (0.60 inches in diameter).
Installation Instructions
Follow these steps to replace the cup seal and diverter gate in your Moen 3800 series tub spout. No expert installation is required.
- Prepare the Spout: Use a screwdriver to carefully remove the old diverter part from the tub spout.
- Assemble New Parts: Combine the new plastic diverter gate and the rubber cup seal. Ensure the rubber washer's opening is placed inward into the plastic gate for correct function.
- Insert into Spout: Place the assembled new parts into the tub spout. Ensure it is seated correctly.
- Secure: Re-insert the diverter rod or mechanism to secure the new parts in place.

This four-panel image illustrates the installation process: 1. Inserting a tool into the spout. 2. Showing the new assembly parts. 3. Diagram of assembly inside the spout. 4. Text instructions for insertion and assembly.

An image demonstrating the correct (washer opening inward) and incorrect (washer opening outward) placement of the rubber washer within the diverter gate. Proper orientation is crucial for preventing leaks.
Installation Video Guide:
This video demonstrates the components of the 101237 Cup Seal and Diverter Gate and shows how they combine before installation.
Operation
Once installed, the diverter gate and cup seal work together to control water flow. When the diverter knob on your tub spout is pulled up, the gate moves to block the flow of water to the tub spout, redirecting it to the showerhead. Pushing the knob down returns the water flow to the tub spout.
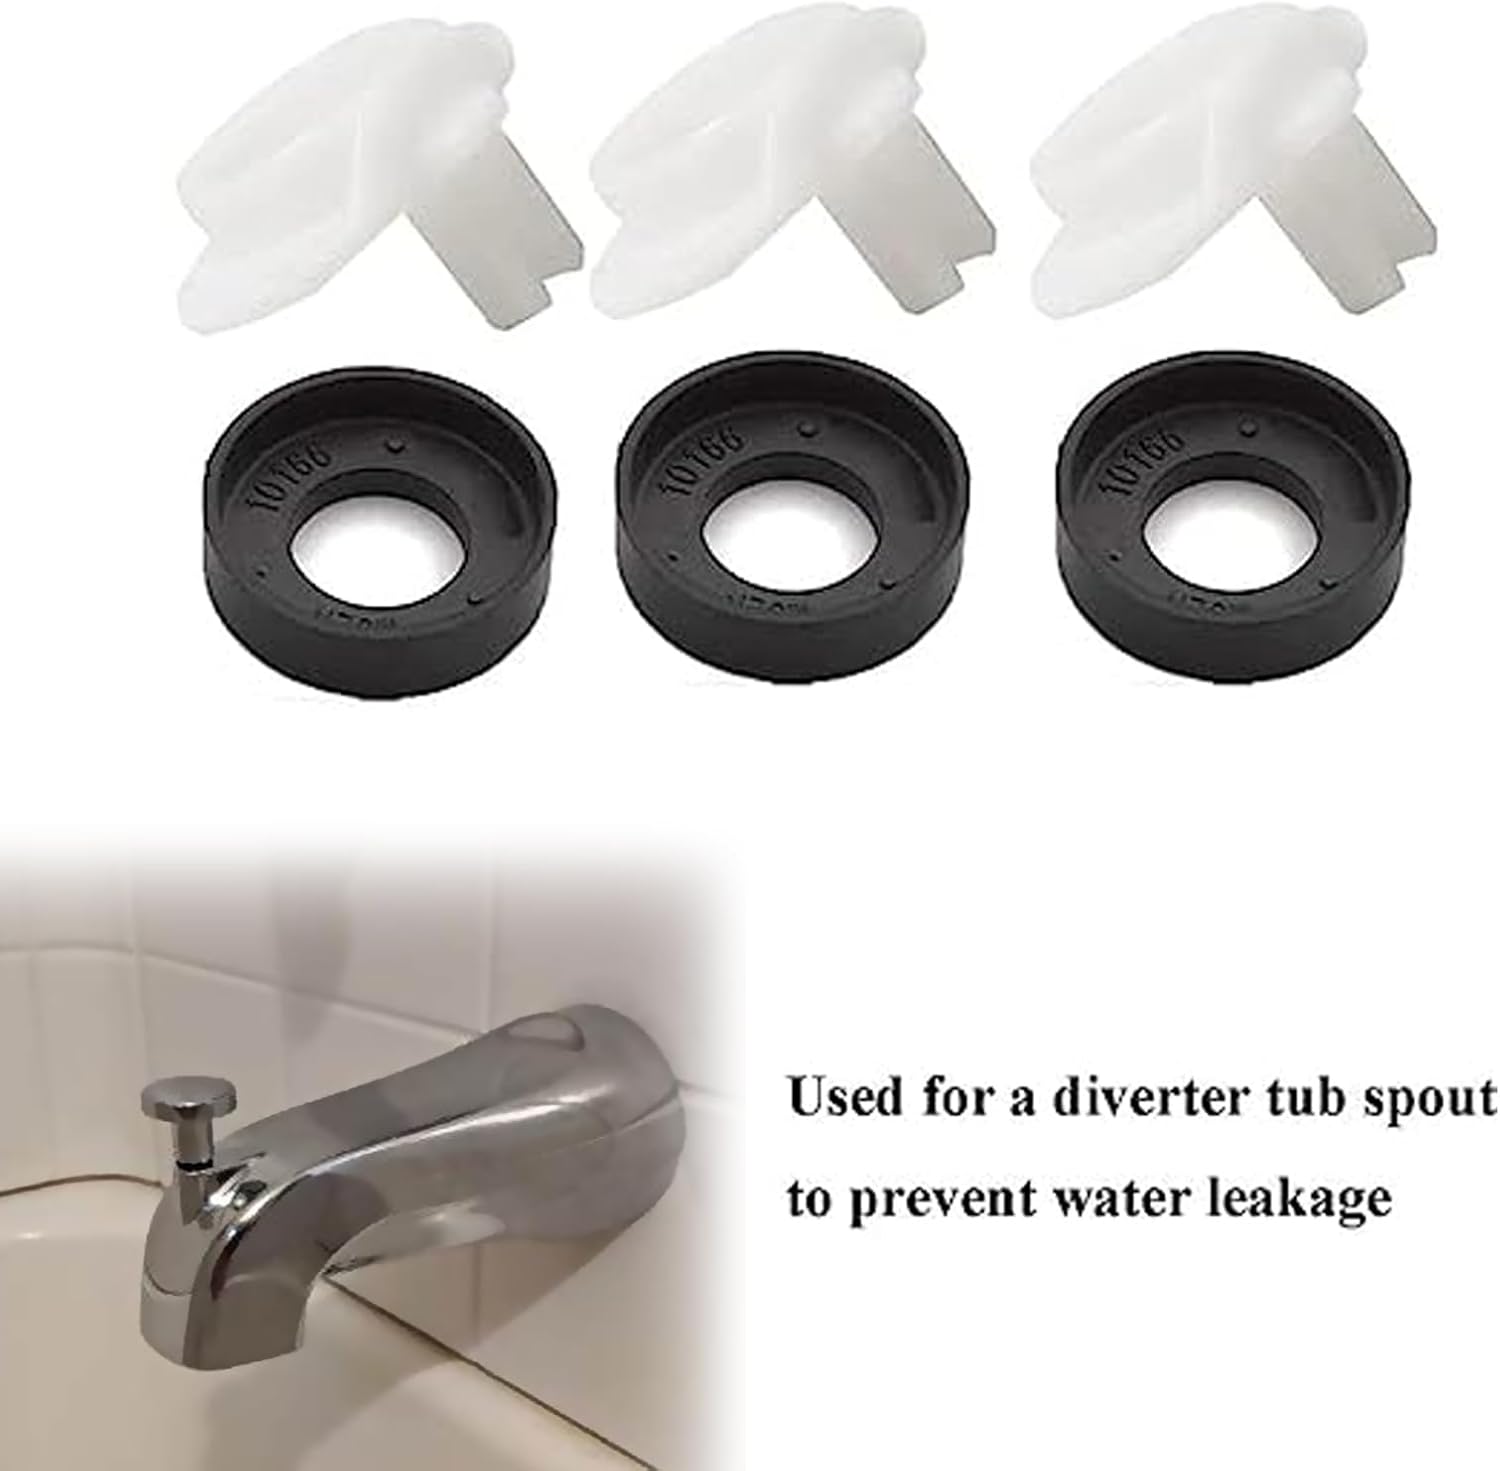
An image showing a tub spout with the diverter mechanism, illustrating how the replacement part functions to prevent water leakage and redirect flow.
Maintenance
To ensure the longevity and optimal performance of your cup seal and diverter gate, consider the following:
- Regular Inspection: Periodically check the tub spout for any signs of leakage or reduced diversion efficiency.
- Cleaning: If hard water minerals build up inside the spout, it can affect the diverter's seal. Gently clean the inner spout wall and the diverter track with a jeweler's file or fine sandpaper if necessary.
- Lubrication: Applying a small amount of silicone grease to the diverter track before installation can help ensure smooth operation and extend the life of the seal.
Troubleshooting
Water Leaks from Tub Spout when Diverted:
- Washer Orientation: Ensure the rubber washer is installed with its opening facing inward into the plastic diverter gate. Refer to the installation instructions and images.
- Mineral Buildup: Hard water deposits can prevent a complete seal. Clean the inside of the tub spout where the diverter seal makes contact.
- Improper Seating: Verify that the new diverter assembly is fully and correctly seated within the tub spout.
Diverter Knob is Stiff or Not Moving Smoothly:
- Lubrication: Apply silicone grease to the diverter track.
- Obstruction: Check for any debris or foreign objects obstructing the diverter's movement.
Specifications
| Brand | Gugaguga |
| Model Name | 101237 |
| Part Number | 101237 |
| Material | Plastic, Rubber |
| Number of Pieces | 3 sets (each set includes 1 plastic cap & 1 rubber seal) |
| Product Dimensions | 1.25 x 0.7 x 0.7 inches (approximate for individual components) |
| Item Weight | 0.352 ounces |
| Recommended Uses | Bathroom Faucet Repair |
Warranty & Support
Gugaguga provides a warranty for this product. If you have any questions or encounter quality problems with your 101237 Cup Seal & Diverter Gate, please contact us. We are committed to responding as soon as possible to assist you.