Elikliv 5D2LG-5-Point-Green Cross Line Laser
Elikliv 5-Point Self-Leveling Laser Level User Manual
Model: 5D2LG-5-Point-Green Cross Line Laser
Brand: Elikliv
1. Introduction
Thank you for choosing the Elikliv 5-Point Self-Leveling Laser Level. This versatile tool is designed for precise indoor and outdoor measurement tasks, offering both 5-point green laser dots and a green cross-line laser. Its robust design and multiple operating modes make it ideal for various construction and DIY projects, ensuring accurate and efficient work.
2. Safety Information
WARNING: LASER RADIATION
- This product is a Class II laser product with a power output of <1mW.
- Do not stare directly into the laser beam. Direct eye exposure to the laser beam can cause serious eye injury.
- Do not intentionally direct the laser beam at people or animals.
- Avoid using optical instruments (e.g., binoculars, telescopes) to view the laser beam, as this can increase eye hazard.
- Keep the device out of reach of children.
- Use only as described in this manual. Any other use may result in hazardous laser exposure.
3. Package Contents
Upon opening your Elikliv Laser Level package, please ensure all the following items are present:
- 1 x Elikliv 5-Point Green Laser Level Unit
- 1 x Strong Magnetic Bracket
- 4 x AA Batteries
- 1 x Laser Target Board
- 1 x Soft Carrying Case
- 1 x User Manual (this document)
- 1 x Professional Outer Box
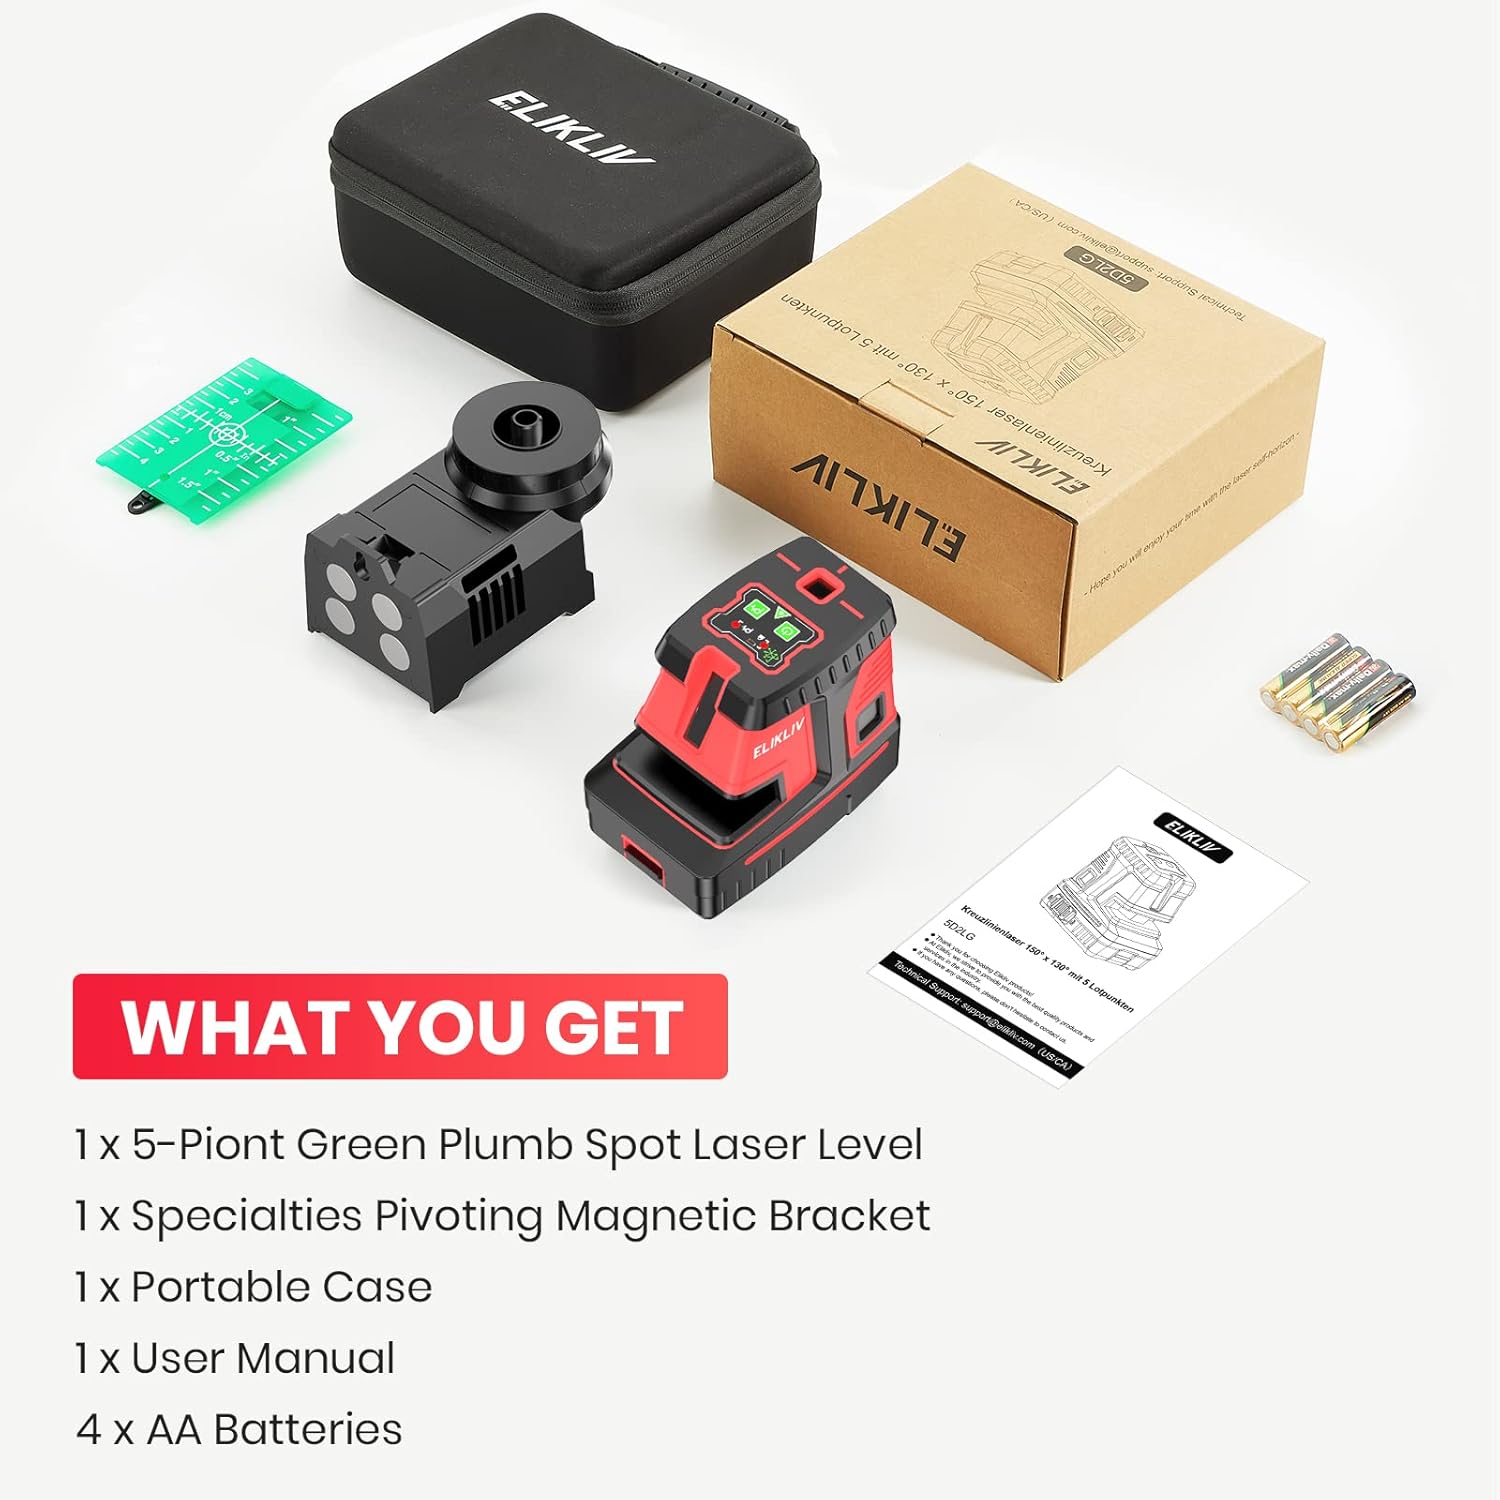
Image: Contents of the Elikliv Laser Level package.
4. Product Features & Components
The Elikliv 5-Point Laser Level combines multiple laser projection capabilities for comprehensive layout tasks:
- 5-Point Green Laser: Projects bright green laser dots to the top, bottom, left, right, and rear, providing precise plumb and level points for alignment.
- Green Cross-Line Laser: Projects horizontal and vertical green laser lines for accurate leveling and alignment across surfaces.
- Control Panel: Located on top of the unit, featuring buttons for power, mode selection (5-point, cross-line), and pulse mode activation. Indicators show battery status and mode.
- Battery Compartment: Located at the bottom, designed for easy installation and replacement of AA batteries.
- Magnetic Bracket: An integrated 360-degree magnetic bracket with 1/4 inch and 5/8 inch tripod mounting threads, featuring enlarged magnetic suction holes for secure attachment to metal surfaces.

Image: Illustration of 5-point green plumb spots and vertical/horizontal green laser lines.

Image: Detailed view of the control panel and indicators.
5. Setup
5.1 Battery Installation
- Locate the battery compartment cover on the bottom of the laser level unit.
- Slide the cover open or remove it according to the markings.
- Insert the 4 AA batteries, ensuring correct polarity (+/-) as indicated inside the compartment.
- Close the battery compartment cover securely.

Image: Battery installation and replacement guide.
5.2 Mounting Options
The Elikliv laser level offers flexible mounting options:
- Magnetic Attachment: Use the integrated magnetic bracket to securely attach the unit to metal surfaces.
- Tripod Mounting: The unit features both 1/4 inch and 5/8 inch threaded mounts on its base, allowing it to be attached to standard tripods or poles. The magnetic bracket also includes a 5/8 inch threaded mount.

Image: Threaded mounts on the laser level and magnetic bracket.
6. Operation
6.1 Powering On/Off
Press and hold the power button (usually marked with a power symbol) for a few seconds to turn the unit on or off.
6.2 Switching Operating Modes
The Elikliv laser level offers three primary operating modes:
- Self-Leveling Mode: When the pendulum lock is unlocked (usually by sliding a switch), the unit will automatically self-level within a range of ±3°. If the tilt exceeds this range, the laser lines will flash to indicate it is out of level. This mode is ideal for achieving perfectly horizontal or vertical lines.
- Manual Mode: To use the laser at any angle (e.g., for stair railings), lock the pendulum. The laser lines will no longer self-level and can be projected at any desired tilt.
- Pulse Mode: Activate pulse mode (indicated by a solid blue light on the control panel) to extend the working range up to 200ft when used with a compatible laser detector (sold separately). This mode is particularly useful for outdoor applications or in bright conditions.
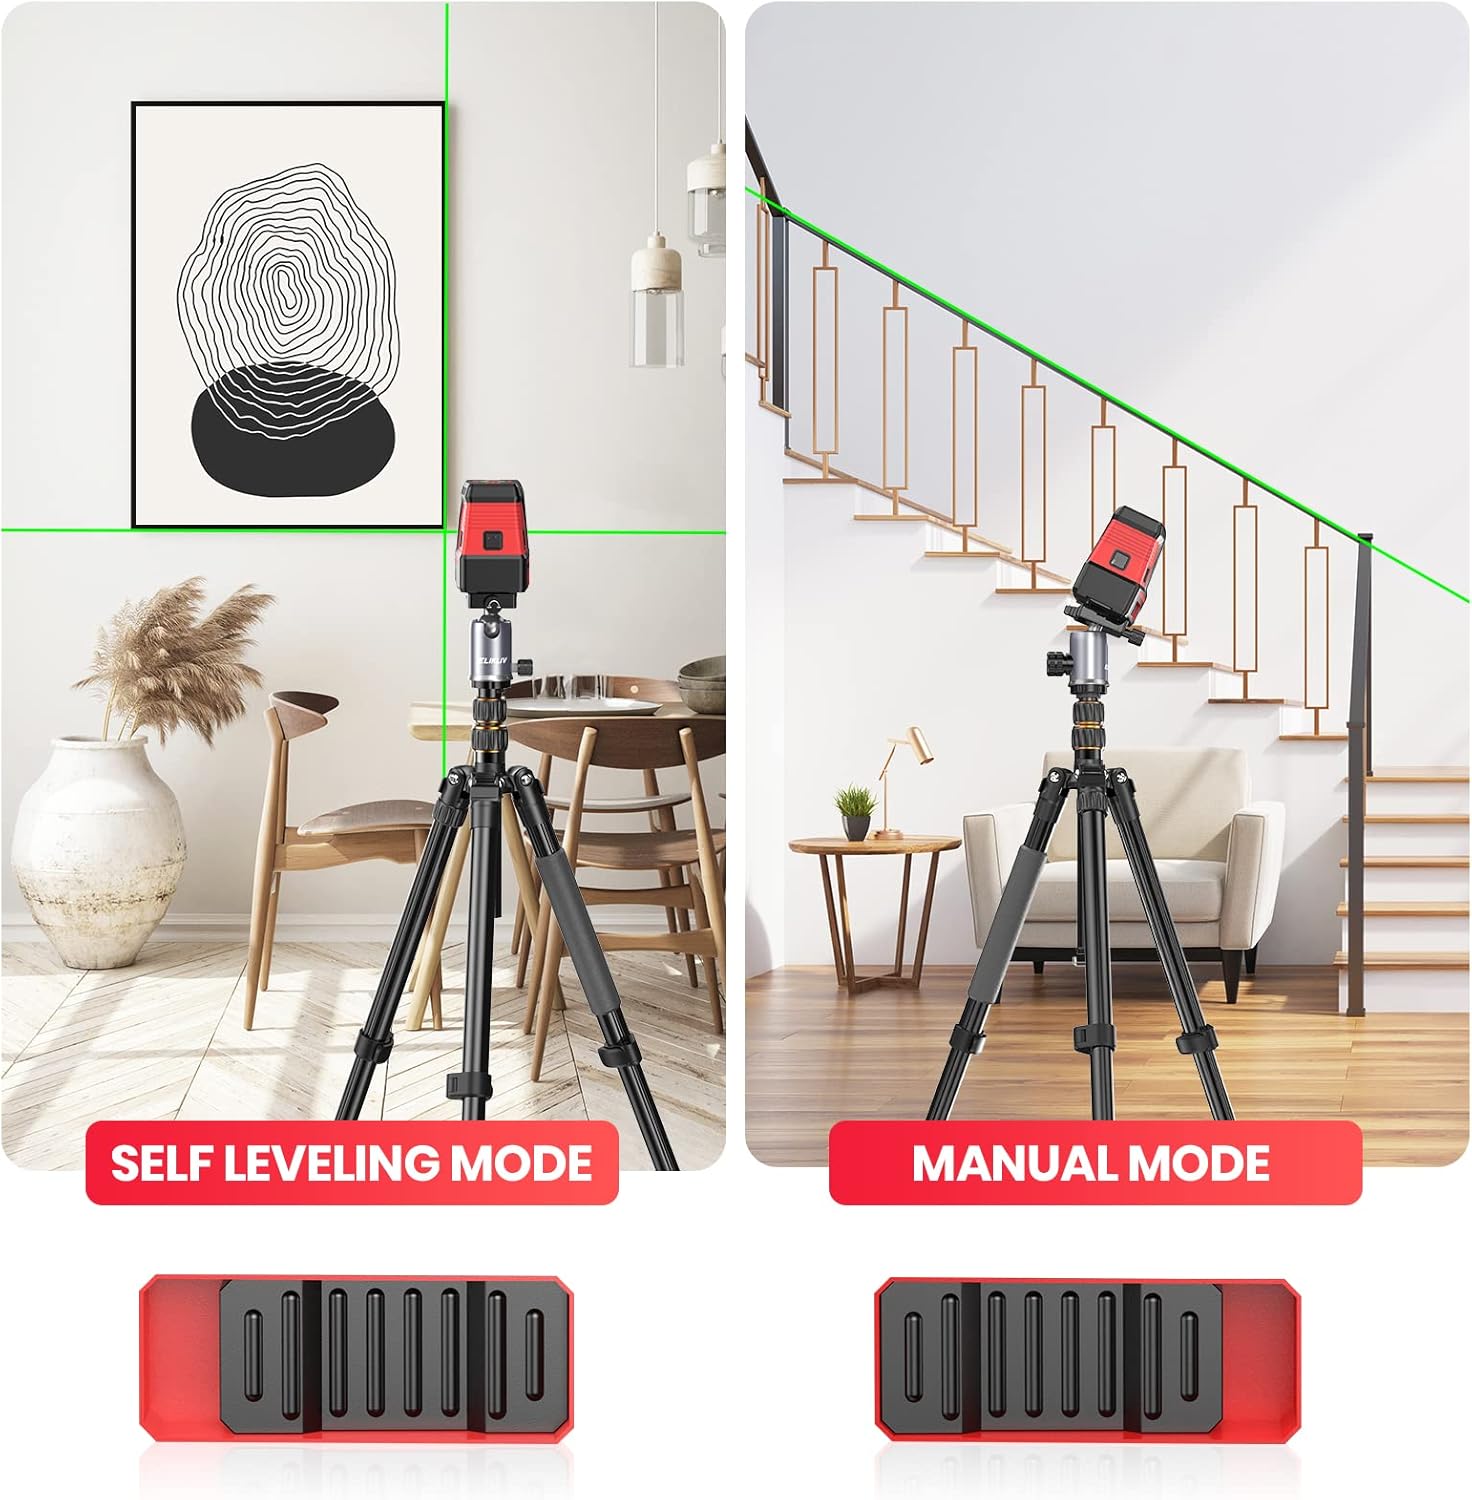
Image: Self-Leveling Mode vs. Manual Mode.
6.3 Using Laser Lines and Dots
Once powered on, use the dedicated buttons on the control panel to switch between the 5-point laser projection and the cross-line laser projection, or to activate both simultaneously. Position the unit as needed for your specific task, utilizing the magnetic bracket or a tripod for stability.

Image: Laser level in use for vertical alignment.
7. Maintenance
7.1 Cleaning
To maintain the accuracy and longevity of your laser level, regularly wipe the unit with a soft, damp cloth. Do not use harsh chemicals or abrasive cleaners. Ensure the laser apertures are clean and free of dust or debris.
7.2 Storage
When not in use, store the laser level in its soft carrying case in a dry, cool environment. For long-term storage, remove the AA batteries to prevent leakage and potential damage to the unit.
7.3 Durability Features
The Elikliv laser level is designed for durability:
- IP54 Dustproof and Waterproof: Provides protection against dust ingress and splashing water from any direction.
- Super Drop-Proof: Constructed with a rugged housing made of advanced TPR material to withstand impacts from drops.
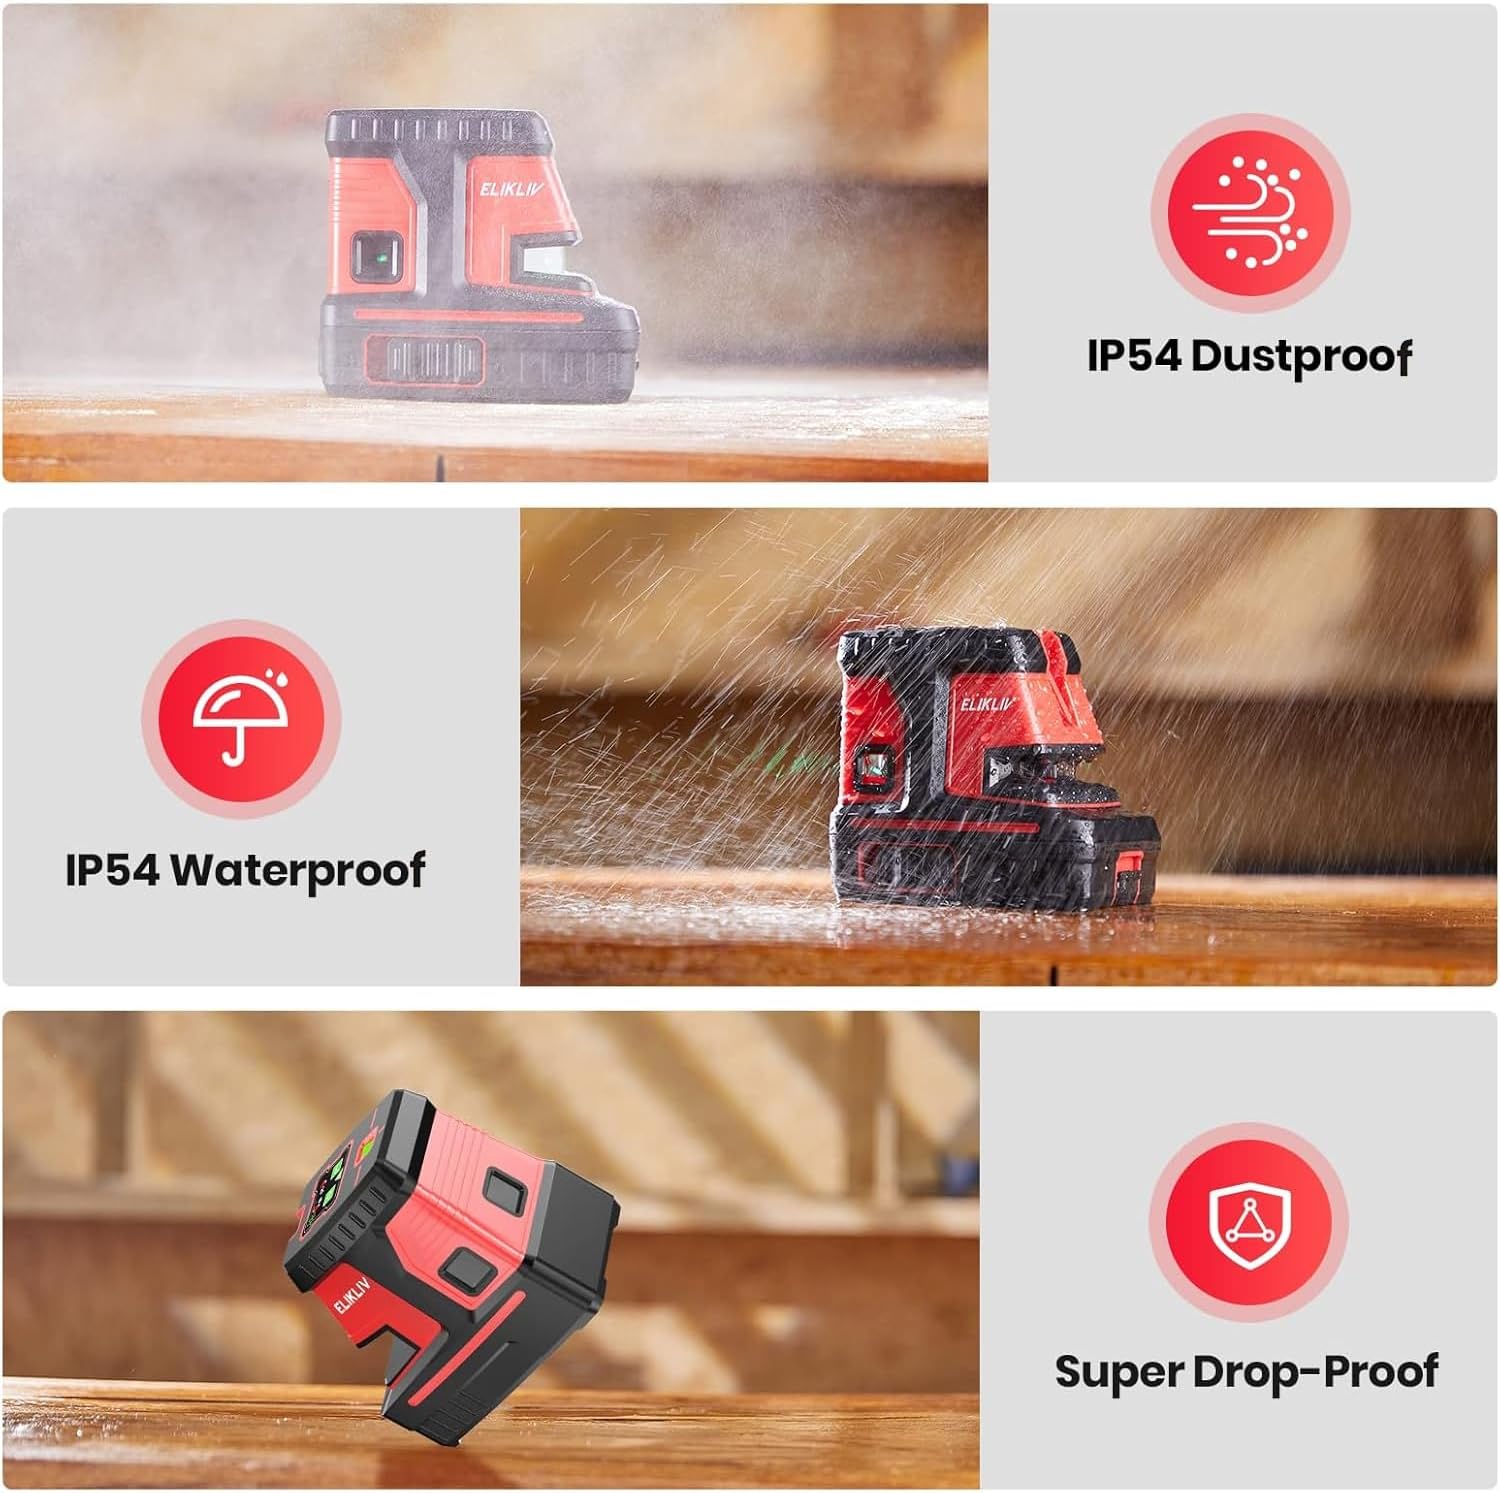
Image: Durability features: IP54 Dustproof, IP54 Waterproof, and Super Drop-Proof.
8. Troubleshooting
If you encounter issues with your Elikliv laser level, please refer to the following common problems and solutions:
| Problem | Possible Cause | Solution |
|---|---|---|
| Laser does not turn on. | Low or dead batteries; incorrect battery installation. | Replace batteries with new ones, ensuring correct polarity. |
| Laser lines are flashing. | Unit is out of self-leveling range (>±3° tilt). | Place the unit on a more level surface. If intentional tilt is desired, switch to Manual Mode. |
| Laser lines are dim or not visible outdoors. | Bright ambient light; operating range exceeded. | Activate Pulse Mode and use with a compatible laser detector for extended range and visibility. Reduce ambient light if possible. |
| Unit does not self-level. | Pendulum lock is engaged (Manual Mode). | Unlock the pendulum to enable Self-Leveling Mode. |
9. Specifications
| Feature | Specification |
|---|---|
| Brand | Elikliv |
| Model Number | 5D2LG-5-Point-Green Cross Line Laser |
| Material | Laser Level Eminent Rubber |
| Color | Green |
| Operation Mode | Automatic (Self-Leveling) / Manual |
| Laser Class | Class II, <1mW power output |
| Measurement System | 5-Point Alignment, Self Leveling, Green Cross Laser |
| Self-Leveling Range | ±3° |
| Pulse Mode Range | Up to 200ft (with detector) |
| Power Source | Battery Powered |
| Batteries | 4 AA batteries required (included) |
| Item Weight | 3.3 pounds |
| Package Dimensions | 8.54 x 7.36 x 3.82 inches |
| Date First Available | November 25, 2022 |
10. Warranty & Support
For warranty information and customer support, please refer to the documentation included with your purchase or visit the official Elikliv brand store on Amazon. The brand store often provides detailed information regarding product warranties, returns, and contact options for technical assistance.
Visit the Elikliv Store: Elikliv Official Store
Ask a question about this manual
Ask about setup, troubleshooting, compatibility, parts, safety, or missing instructions. Manuals+ will review the question and use this page’s manual context to help answer it.