Product Overview
This manual provides detailed instructions for replacing the battery in compatible Philips Sonicare electric toothbrushes using the Kuflant 800mAh Li-ion battery and included tools. This replacement battery is designed to match the quality and design of the original, featuring upgrades for improved connection stability and durability.

Image: The Kuflant 800mAh electric toothbrush replacement battery, accompanied by a solder wire, a shaft rubber seal, a custom-made spudger, and two triangle pick openers.
Compatibility
This replacement battery is compatible with the following Philips Sonicare electric toothbrush series:
- HX6500 Series: HX6511, HX6530
- HX6700 Series: HX6710, HX6720, HX6730, HX6750, HX6760
- HX6800 Series: HX6817, HX681x, HX682x, HX683x, HX684x, HX685x, HX686p
- HX6900 Series: HX6910, HX6920, HX6930, HX6950, HX6960, HX6970, HX6980
- HX8900 Series: HX8910, HX8920, HX8911, HX8962
- HX9900 Series: HX992x, HX993x, HX9957, HX9903, HX9924, HX9954, HX9984
The HX number of your toothbrush is typically marked on the bottom of the handle. For example, if your handle shows HX6530, it belongs to the HX6500 series.
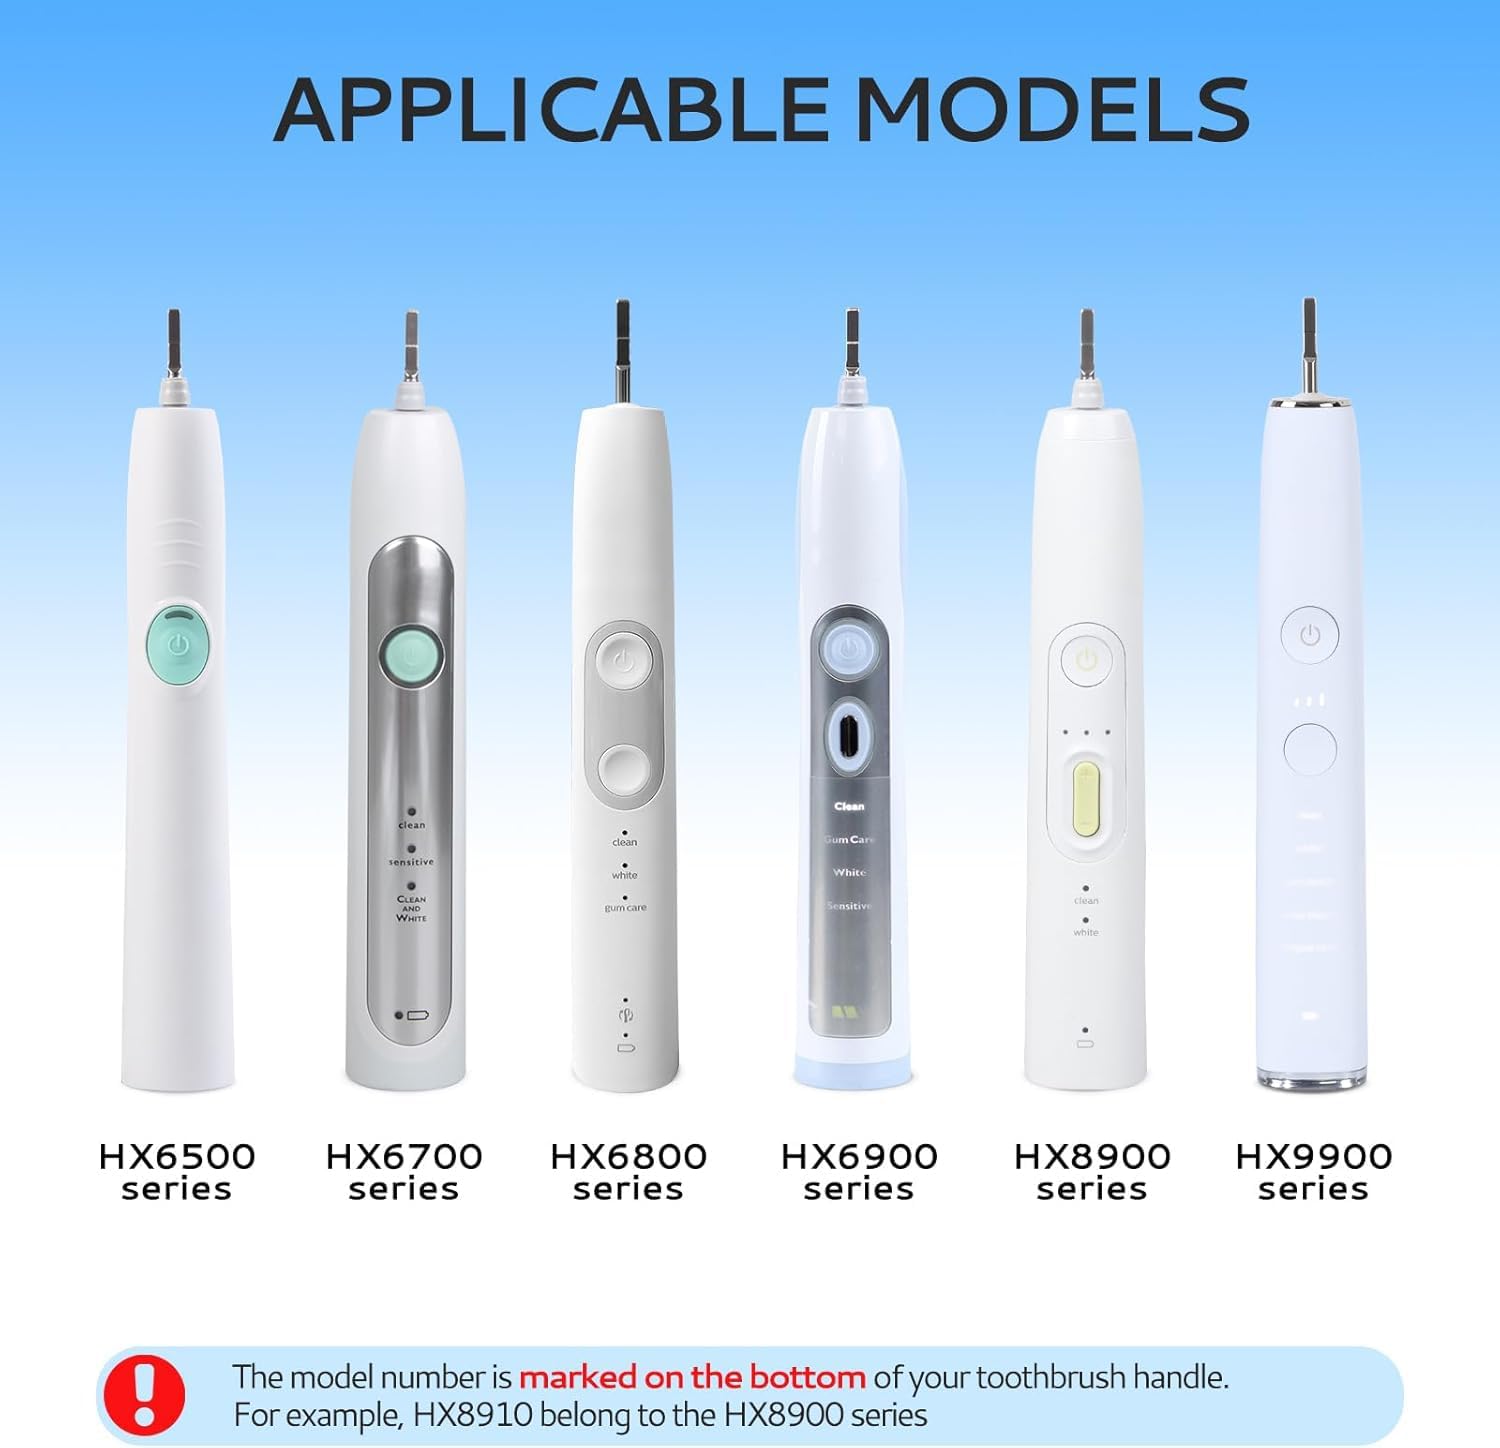
Image: Visual representation of compatible Philips Sonicare toothbrush models, categorized by their respective HX series (HX6500, HX6700, HX6800, HX6900, HX8900, HX9900).
Package Contents
Your package includes the following items:
- 1x Rechargeable battery replacement for Sonicare parts (800mAh)
- 1x Tin wire (solder wire)
- 1x Shaft rubber seal (upgraded version)
- 1x Set of Disassemble Tools, including:
- 1x Custom-made Spudger
- 2x Triangle Pick Openers
Installation Guide
Replacing the battery in your electric toothbrush requires careful handling and basic soldering skills. Please read all instructions thoroughly before beginning.
Important Note: For a visual step-by-step guide, it is highly recommended to search for "kuflant disassembly" on YouTube. The manufacturer provides detailed video tutorials that complement these written instructions.
Required Tools (Included)
- Custom-made Spudger
- Triangle Pick Openers (2)
- Tin Wire (Solder Wire)
These custom tools are designed to help safely remove the toothbrush bottom cover and prevent damage to internal components, such as the charging coil or base cover, which can occur with improper prying methods.

Image: Illustration of how a deteriorated rubber seal can lead to water ingress and internal damage (e.g., toothpaste entering shaft, damaged internal components). Also shown are the custom disassembly tools (spudger and triangle picks) designed to prevent damage during opening, such as to the charging coil or base cover.
Battery Features and Soldering Tips
The replacement battery features a V-shaped design that limits the distance between contacts and the board, preventing short circuits. The solder contacts are upgraded for enhanced durability.
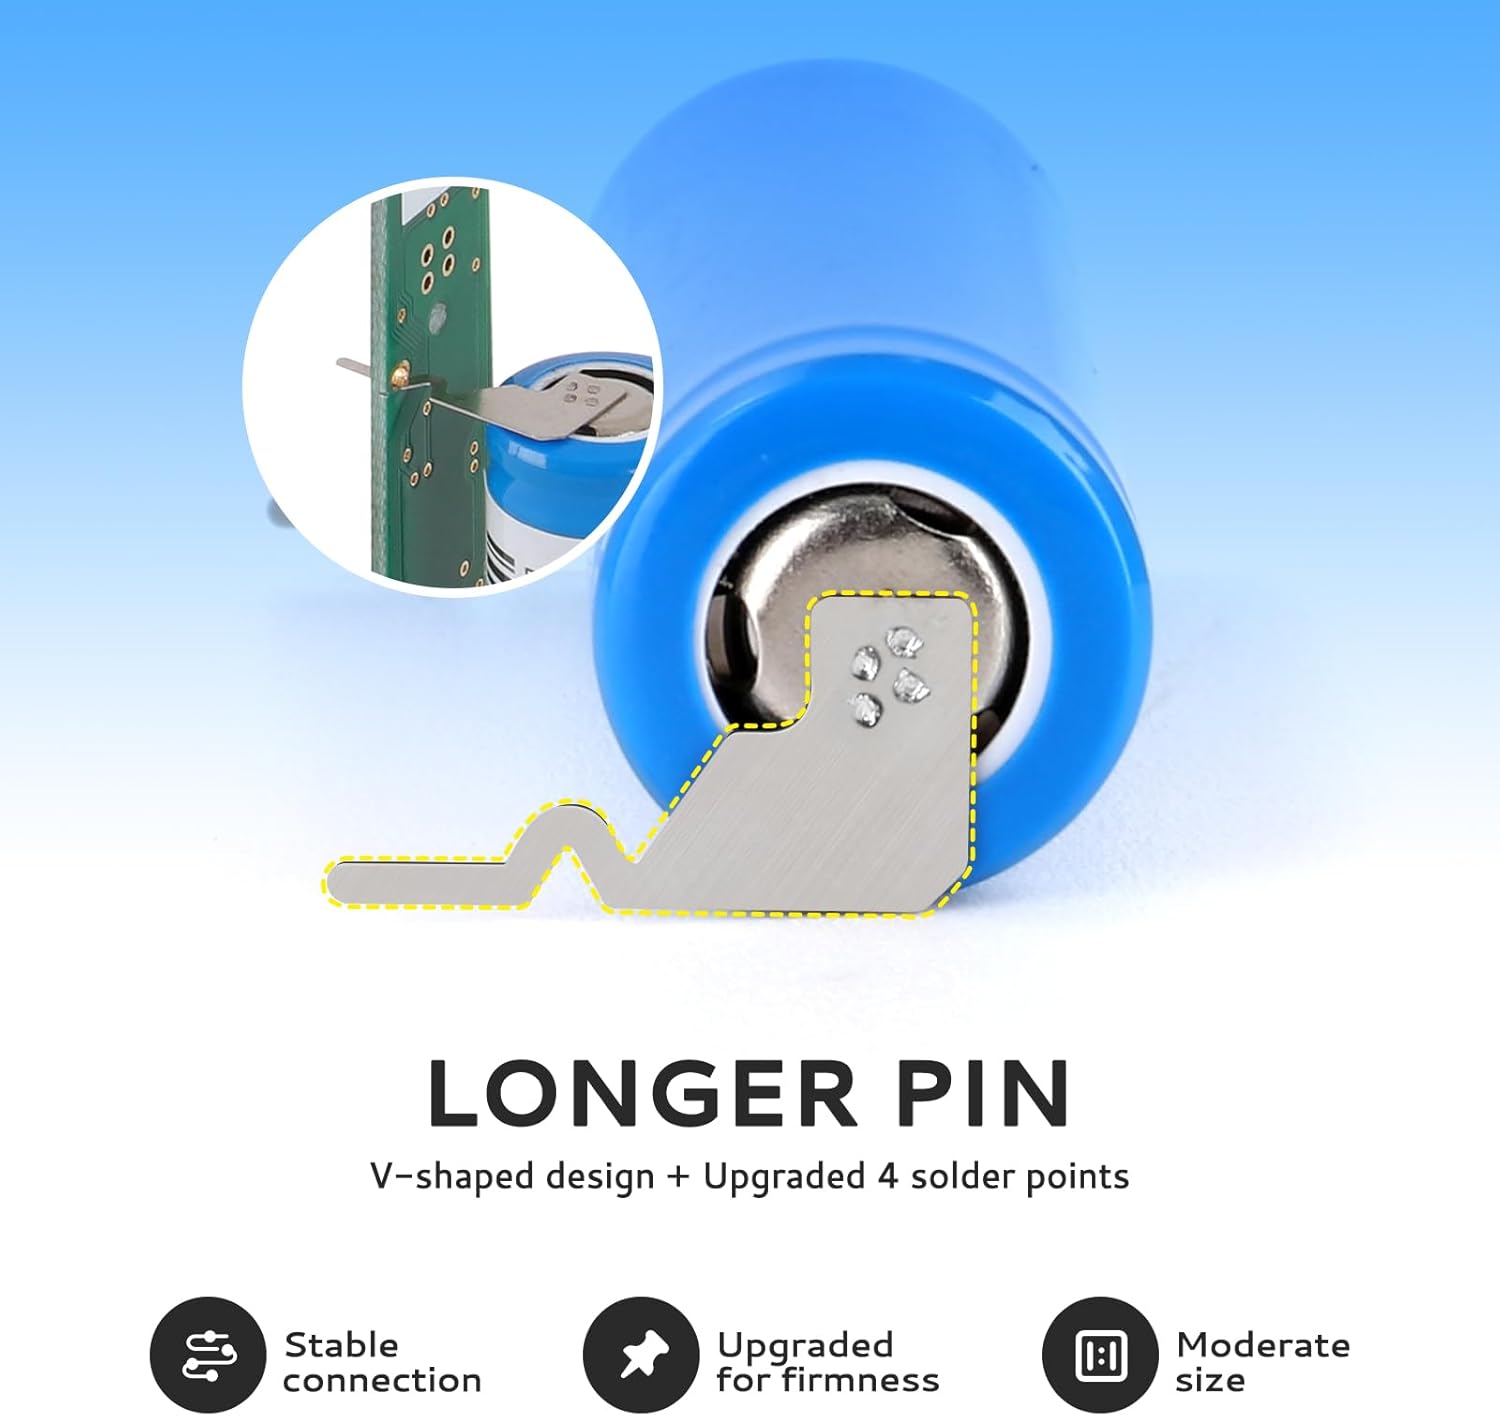
Image: A detailed view of the battery's longer, V-shaped pin design, highlighting the upgraded four solder points for stable and firm connection.
When soldering the new battery, ensure the following:
- Recommended Soldering Temperature: 350°C (662°F).
- It typically takes 2-5 seconds for the solder to melt with a soldering iron.
- Ensure the solder points on the PCB are perfectly cleaned before attaching the new battery.
- Position the battery with the "+" (positive) and "-" (negative) poles in the correct orientation.
- Verify that the battery pins are properly inserted into their respective slots on the circuit board.

Image: Three key tips for successful battery soldering: 1) Solder points perfectly cleaned, 2) "+" and "-" poles in the right position, and 3) Pins properly inserted.
Maintenance
The shaft rubber seal plays a crucial role in preventing water from seeping into the toothbrush handle and damaging internal components. It is recommended to replace the rubber seal every 3 months to maintain the integrity of your toothbrush and prevent future issues.
Troubleshooting
If your toothbrush is not responding or not charging at all, even after replacing the battery, it indicates that the PCB (Printed Circuit Board) or motor of the toothbrush is likely damaged. In such cases, replacing the battery will not resolve the issue. This type of damage is often a result of water ingress due to a deteriorated rubber seal.
Product Specifications
| Battery Type | Rechargeable Li-ion |
| Capacity | 800 mAh |
| Voltage | 3.7 V |
| Compatible Devices | Philips Sonicare Electric Toothbrushes (HX6500, HX6700, HX6800, HX6900, HX8900, HX9900 Series) |
| Material (Seal) | Rubber |
| Special Feature | Waterproof (when properly installed with new seal) |

Image: Visual confirmation of the battery's 800mAh capacity, emphasizing it as the most accurate capacity for compatible toothbrushes.

Image: Depiction of the battery's long service time, suggesting approximately one month of use per charge, based on 60 presses and 2 minutes per use.
Support and Contact
For further assistance, technical support, or inquiries regarding your Kuflant replacement battery, please contact the seller directly through the platform where you purchased the product. You can also refer to the official Kuflant YouTube channel for detailed video guides on disassembly and installation by searching for "kuflant disassembly".