
1. Introduction
Thank you for purchasing the SpeaKa Professional SP-HDA-550 4-Port UHD 4K @ 60 Hz HDMI Switch. This device allows you to connect multiple HDMI source devices to a single display, offering convenient switching between inputs. It supports high-resolution video up to 4K at 60Hz and features eARC compatibility for advanced audio routing. Please read this manual carefully to ensure proper installation and operation.
2. Safety Instructions
- Read all instructions before operating this device.
- Do not expose this device to rain, moisture, or extreme temperatures.
- Ensure proper ventilation around the device to prevent overheating.
- Use only the power adapter supplied with the unit.
- Do not attempt to open or modify the device. Refer all servicing to qualified personnel.
- Keep the device away from strong magnetic fields.
3. Package Contents
Please check the package contents to ensure all items are present:
- SpeaKa Professional SP-HDA-550 HDMI Switch
- Power Adapter
- Infrared (IR) Remote Control
- User Manual
4. Product Overview
The SpeaKa Professional SP-HDA-550 is designed for seamless integration into your home theater or professional AV setup. It features multiple HDMI inputs and outputs, including eARC support, for flexible connectivity.
Front/Top Panel Controls and Indicators

Image: Top view of the HDMI switch with control buttons and LED indicators.
- IR Receiver: For receiving signals from the remote control.
- EDID Button: For managing Extended Display Identification Data settings.
- Input/Auto Button: To manually switch between HDMI inputs or enable auto-switching.
- eARC ON/OFF Button: To enable or disable the eARC function.
- LED Indicators: Show active input, audio format (2CH, 5.1CH, 7.1CH), and eARC status.
Rear Panel Connections

Image: Rear view of the HDMI switch displaying all input and output ports.
- DC/5V: Power input port.
- HDMI IN1, IN2, IN3: Standard HDMI inputs for source devices.
- HDMI IN4 (eARC Soundbar): HDMI input specifically designed for an eARC-compatible soundbar or another source.
- HDMI OUT1 (eARC TV): Primary HDMI output for connecting to your eARC-compatible TV or display.
- HDMI OUT2 (Audio Only): Secondary HDMI output for audio playback, suitable for connecting to older AV receivers or audio systems.
5. Setup
Follow these steps to set up your HDMI switch:
- Power Off Devices: Ensure all source devices (Blu-ray player, game console, etc.) and your display (TV, projector) are powered off before making connections.
- Connect HDMI Sources: Connect your HDMI source devices to the HDMI IN1, IN2, IN3, and IN4 ports on the switch using high-quality HDMI cables.
- Connect to Display: Connect the HDMI OUT1 (eARC TV) port of the switch to the HDMI input of your TV or display. If your TV supports eARC, ensure you connect to the designated eARC HDMI port on your TV.
- Connect Audio Output (Optional): If you wish to output audio separately to an older AV receiver or sound system, connect the HDMI OUT2 (Audio Only) port to your audio device.
- Connect Power: Connect the supplied power adapter to the DC/5V port on the switch, then plug it into a power outlet.
- Power On Devices: Power on your display first, then your source devices.
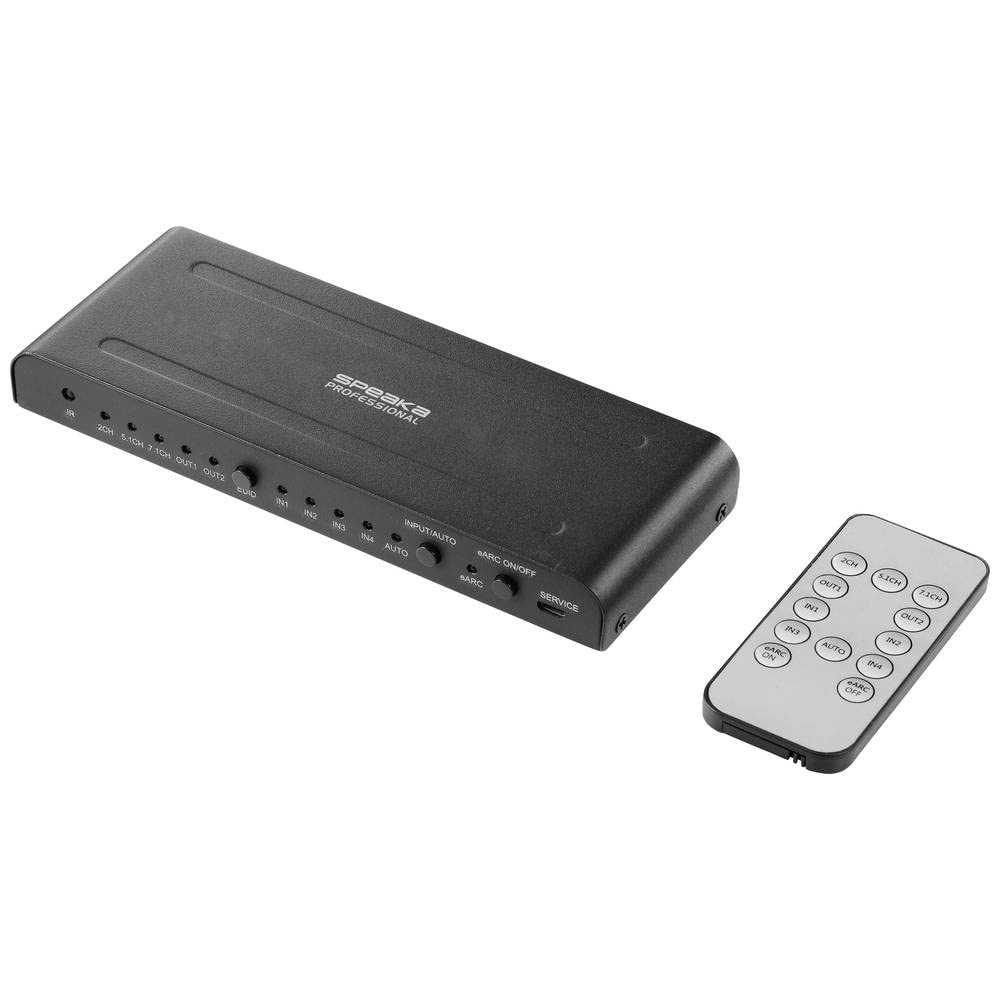
Image: Angled top view of the HDMI switch, illustrating the layout of ports for connection.
6. Operating Instructions
Switching Inputs
- Manual Switching: Press the 'Input/Auto' button on the front panel or the corresponding input button on the remote control (IN1, IN2, IN3, IN4) to select your desired source.
- Auto-Switching: The switch can automatically detect and switch to a newly activated HDMI source. To enable/disable this feature, press and hold the 'Input/Auto' button on the front panel.
eARC Functionality
The eARC (enhanced Audio Return Channel) feature allows audio from your TV's internal apps or connected devices to be sent back to an eARC-compatible soundbar or AV receiver connected to HDMI IN4.
- Enable/Disable eARC: Use the 'eARC ON/OFF' button on the front panel or remote control to activate or deactivate the eARC function. The eARC LED indicator will illuminate when active.
- eARC Setup: Ensure your TV and soundbar/AV receiver are eARC compatible and properly configured according to their respective manuals.
Audio Output (HDMI OUT2)
The HDMI OUT2 port provides an audio-only signal, ideal for connecting to audio systems that do not support video passthrough or for separating audio from video.
- Connect this port to an HDMI input on your audio receiver or sound system.
- The audio format (2CH, 5.1CH, 7.1CH) will be indicated by the LEDs on the front panel.
EDID Management
The EDID button allows you to manage the Extended Display Identification Data, which communicates display capabilities to the source device. This can help resolve compatibility issues.
- Press the EDID button to cycle through available EDID modes (e.g., 2CH, 5.1CH, 7.1CH). Refer to the LED indicators to confirm the selected mode.
7. Maintenance
To ensure the longevity and optimal performance of your HDMI switch, follow these simple maintenance guidelines:
- Cleaning: Use a soft, dry cloth to clean the exterior of the device. Do not use liquid cleaners or aerosols.
- Storage: When not in use for extended periods, store the device in a cool, dry place away from direct sunlight.
- Ventilation: Ensure that the ventilation openings are not blocked to prevent overheating.
8. Troubleshooting
If you encounter issues with your HDMI switch, please refer to the following common problems and solutions:
| Problem | Possible Solution |
|---|---|
| No picture or sound |
|
| Picture flickering or distorted |
|
| Remote control not working |
|
| eARC not functioning |
|
9. Specifications
Below are the technical specifications for the SpeaKa Professional SP-HDA-550 HDMI Switch:
- Model Number: SP-10358320
- Brand: Speaka Professional
- Number of Ports: 4 HDMI Inputs, 2 HDMI Outputs
- Max Resolution: UHD 4K @ 60 Hz
- Special Features: 4K, eARC (enhanced Audio Return Channel) support
- Connector Type: HDMI
- Color: Various (typically black)
- Compatible Devices: Various HDMI devices (e.g., Blu-ray players, game consoles, streaming devices, TVs, soundbars, AV receivers)
- Spare Parts Availability: 1 Year
- Software Updates Guaranteed Until: Information not available
10. Warranty and Support
SpeaKa Professional products are designed for reliability and performance. For warranty information, technical support, or service inquiries, please refer to the warranty card included with your product or visit the official SpeaKa Professional website. Please have your model number (SP-10358320) and purchase details ready when contacting support.


