HATHEPHS CS01
User Manual
HATHEPHS Carbon Monoxide Detector Smoke Detector Combo
Model: CS01
1. Product Overview
The HATHEPHS Carbon Monoxide Detector Smoke Detector Combo provides essential home safety by detecting both smoke and carbon monoxide. This ultra-thin device features a built-in 10-year battery for continuous power and a large test/silence button for easy operation. Its advanced photoelectric and electrochemical sensors ensure high sensitivity and accuracy, minimizing false alarms.

Image: Two HATHEPHS combination smoke and carbon monoxide detectors, showcasing their compact, ultra-thin design.
2. Package Contents
- 2 x 2-in-1 Smoke and CO Alarm
- 2 x Adhesive Tape
- 2 x Mounting Bracket
- 4 x Screws/Anchors
- 1 x User Manual (this document)
3. Specifications
| Feature | Detail |
|---|---|
| Brand | HATHEPHS |
| Model Number | CS01 |
| Style | Standalone |
| Power Source | Battery Powered (Built-in 10-Year Lithium Battery) |
| Color | White |
| Product Dimensions | Ø 4.7"D x 4.7"W x 1.1"H |
| Alarm Type | Audible (exceeds 85 dB) |
| Sensor Type | Photoelectric (Smoke), Electrochemical (CO) |
| Material | ABS |
| Item Weight | 11.7 ounces |
| Voltage | 3 Volts |
4. Setup and Installation
Follow these steps to properly set up and install your HATHEPHS detector:
Activate Before Use: Before mounting, press and hold the center of the top cover for 10 seconds until the LED indicator lights up and you hear a beep. This activates the built-in 10-year battery.

Image: A family in a living room, with a detector mounted on the wall, emphasizing the 10-year battery life that saves on replacements.
Choose Installation Location: For optimal protection, install detectors on every level of your home, inside each bedroom, and outside each sleeping area. Avoid installing near windows, doors, or vents where drafts could interfere with detection. Also avoid areas with high humidity or extreme temperatures.

Image: A detector mounted on a ceiling, with an overlay illustrating its 360-degree monitoring capability for comprehensive coverage.
Mounting Options: The detector can be easily installed on any wall or RV using either the provided adhesive tape or screws.
Adhesive Tape Installation: Clean the mounting surface thoroughly. Peel the backing from the adhesive tape and firmly press the detector onto the desired location. Ensure the surface is smooth and dry for best adhesion.
Screw Installation: Use the mounting bracket as a template to mark the screw holes on the wall or ceiling. Drill pilot holes if necessary, insert the anchors, and then secure the mounting bracket with the provided screws. Attach the detector to the mounting bracket by twisting it clockwise until it locks into place.

Image: A visual guide demonstrating two simple installation methods: using adhesive tape for convenience or screws and anchor plugs for a more secure fit.
5. Operating Instructions
Your HATHEPHS detector is designed for simple operation:
2-in-1 Protection: This device continuously monitors for both smoke and carbon monoxide. In the event of a detected hazard, it will emit an audible alarm exceeding 85 dB to alert you.

Image: An illustration of a living room environment, depicting the detector's ability to sense both smoke and carbon monoxide simultaneously.
Test/Silence Button: The entire top cover of the detector serves as a large test/silence button. Press this button to test the alarm's functionality or to silence a false alarm. This design allows for easy testing with a long stick, eliminating the need to climb.
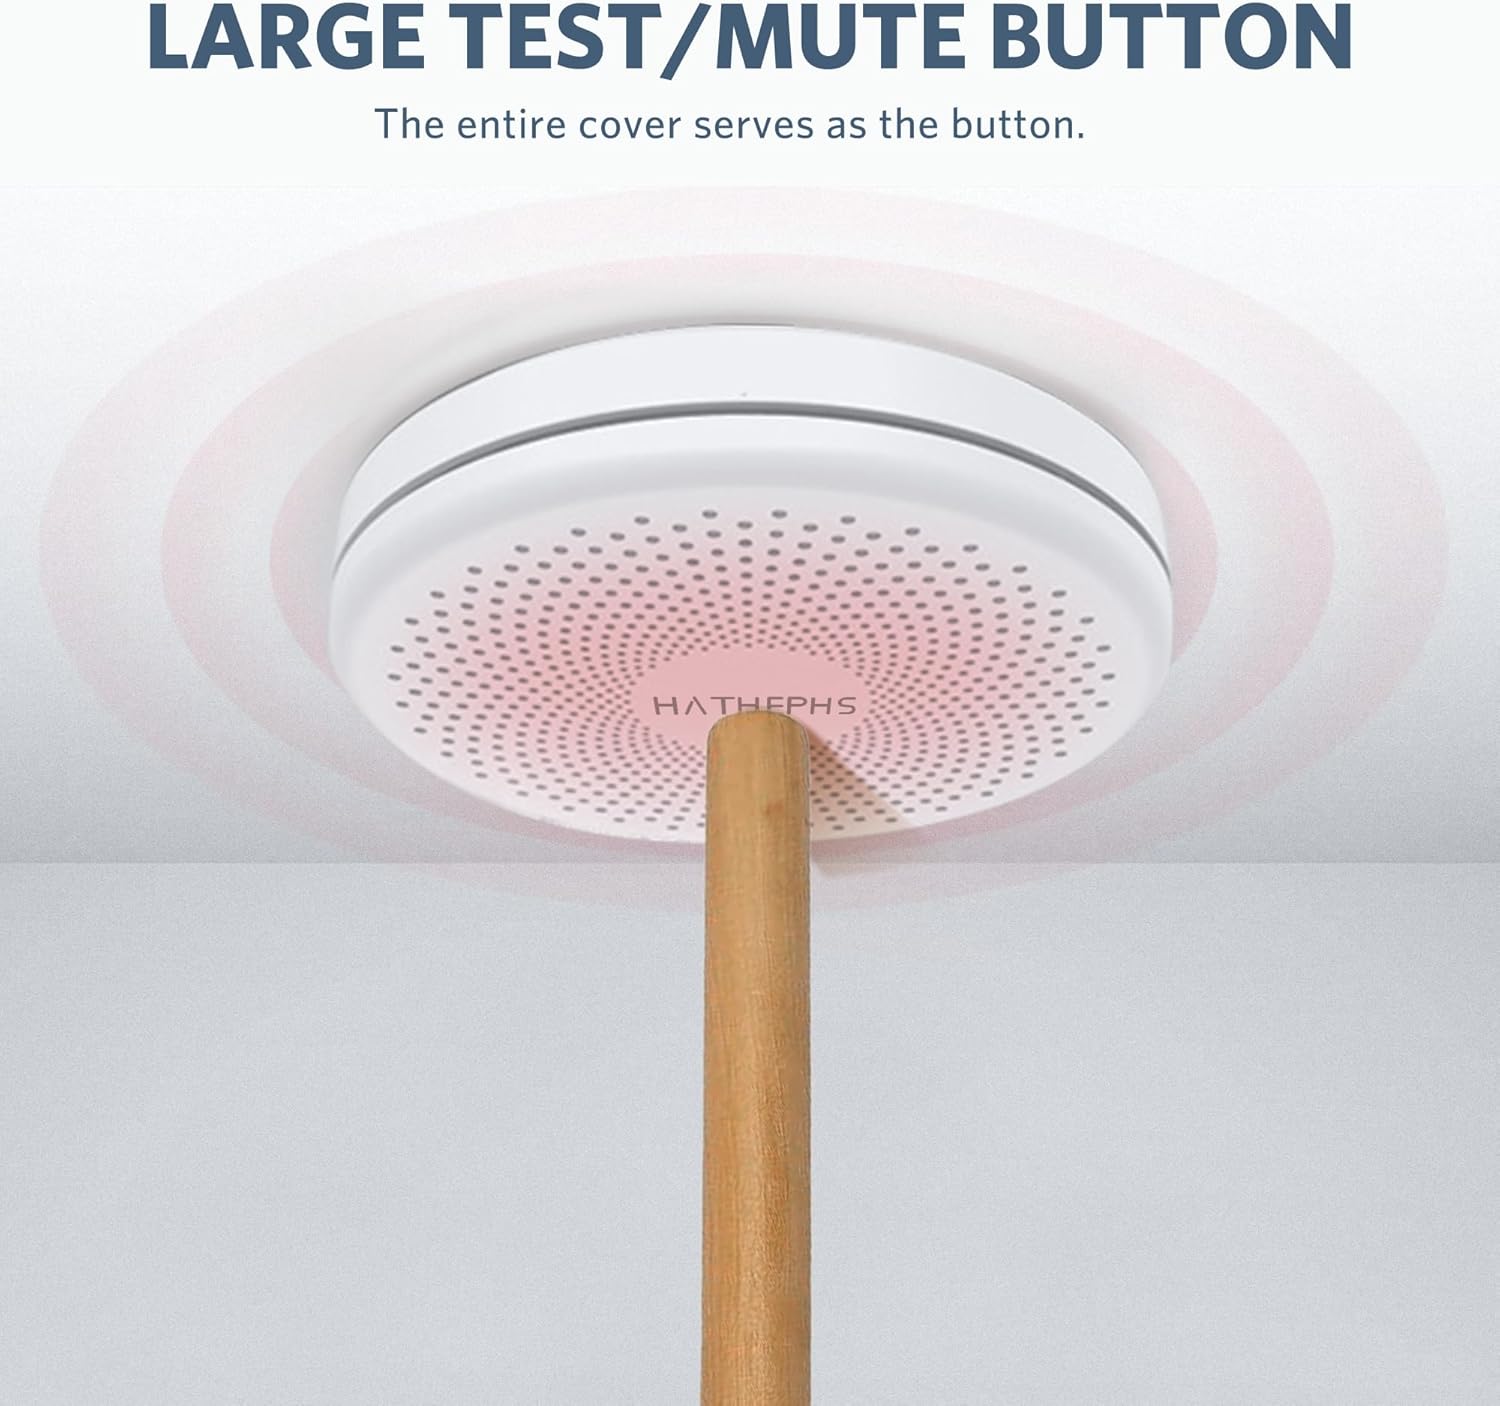
Image: A close-up of the detector showing its large test/mute button, designed for easy activation even with a long stick.
Automatic Self-Check: The detector performs regular self-checks to ensure proper operation. It will provide warnings for low battery or malfunctions, indicated by specific LED patterns or chirps. Refer to the troubleshooting section for details on warning signals.

Image: A detector on a wall, accompanied by icons indicating its automatic self-check features for low battery and malfunction warnings.
Battery Conservation: The detector can be turned off when not in use to conserve battery life, extending its 10-year lifespan.
6. Maintenance
Regular maintenance ensures the longevity and effectiveness of your detector:
- Monthly Testing: Press the test/silence button monthly to ensure the alarm sounds. This confirms the unit is functioning correctly.
- Cleaning: Gently vacuum or wipe the detector's cover with a soft, damp cloth at least once a year to remove dust and debris. Do not use cleaning solvents or sprays.
- Battery: The detector features a sealed 10-year lithium battery that does not require replacement. If a low battery warning occurs before the 10-year lifespan, refer to the troubleshooting section.
7. Troubleshooting
If you encounter issues with your HATHEPHS detector, refer to the following common solutions:
| Problem | Possible Cause / Solution |
|---|---|
| Detector does not activate or respond after installation. |
|
| Alarm sounds without apparent smoke or CO. |
|
| Detector chirps periodically. |
|
| LED indicator is not lit or flashing as expected. |
|
If problems persist after attempting these solutions, please contact HATHEPHS customer support.
8. Warranty and Support
HATHEPHS is committed to providing premium and affordable home safety solutions. For any questions, technical support, or warranty inquiries, please refer to the contact information provided on the product packaging or visit the official HATHEPHS store online: