1. Introduction
The Siterlink GS828C-D Carbon Monoxide (CO) Detector is designed to provide continuous monitoring of carbon monoxide levels in your home. Carbon monoxide is a colorless, odorless, and tasteless gas that can be fatal. This device features an advanced electrochemical sensor, an LCD digital display, and clear LED indicators to alert you to the presence of CO. It is powered by replaceable AA batteries and has a 10-year product life. This detector is certified to UL2034 standard, ensuring reliable performance.
Important Safety Information:
- This CO alarm is designed to detect carbon monoxide gas from any source of combustion. It is not designed to detect smoke or fire.
- Install CO alarms in central locations on every level of your home and in sleeping areas.
- Do not paint the alarm. Paint can clog the openings and interfere with the sensor's ability to detect CO.
- Regularly test the alarm as instructed in this manual.

Image 1.1: Siterlink GS828C-D Carbon Monoxide Detector, front view.
2. Product Features
- 10-Year Product Life: Provides continuous protection for a decade.
- Replaceable Batteries: Powered by 2 AA alkaline batteries (not included).
- LCD Digital Display: Shows real-time carbon monoxide concentration in parts per million (PPM).
- 3 LED Indicators: Visual cues for Power (Green), Fault (Yellow), and Alarm (Red).
- Test/Silence Button: Allows for weekly testing and silencing of nuisance alarms.
- Electrochemical Sensor: Upgraded sensor for high accuracy and reliability.
- Loud 85 dB Alarm: Provides a clear audible warning.
- Compact Design: Measures approximately 4.7 x 3.14 x 1.4 inches (12 x 8 x 3.7 cm).
- Flexible Installation: Can be wall-mounted or used freestanding.
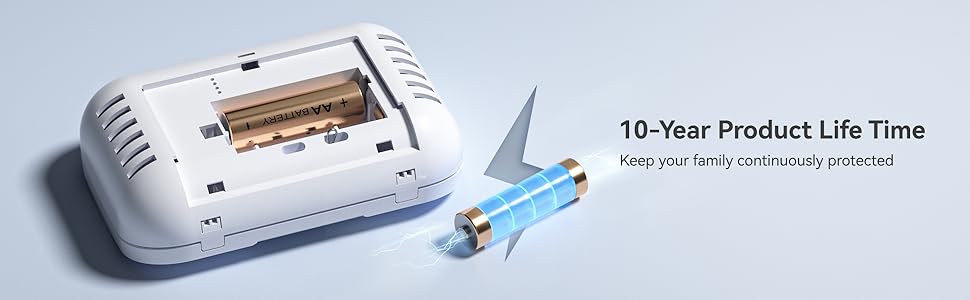
Image 2.1: Illustration of 10-year product life and replaceable battery feature.

Image 2.2: Exploded view of the detector highlighting the electrochemical sensor and other components.

Image 2.3: Diagram showing the compact dimensions of the CO detector.
3. Setup
3.1 Battery Installation
- Remove the battery compartment cover on the back of the detector.
- Insert two (2) AA alkaline batteries, ensuring correct polarity (+ and -).
- Close the battery compartment cover securely.
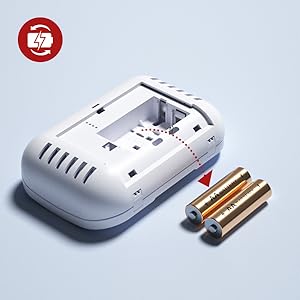
Image 3.1: Illustration of battery insertion into the detector.
3.2 Mounting the Detector
The detector can be wall-mounted or placed freestanding on a flat surface.
For Wall Mounting:
- Choose a suitable location (see placement guidelines below).
- Use the provided screws and anchors to secure the mounting bracket to the wall.
- Slide the detector onto the mounting bracket until it clicks into place.
Recommended Placement:
- Install at least one CO alarm on each level of your home, especially near sleeping areas.
- Place the detector at least 5 feet (1.5 meters) away from fuel-burning appliances.
- Avoid placing the detector in direct sunlight, near vents, fans, or in areas with high humidity.
- Mount on a wall at eye level or higher, but not directly on the ceiling.

Image 3.2: Examples of wall-mounted and freestanding installation.

Image 3.3: Recommended installation locations within a home.
3.3 Initial Test
After installing the batteries and mounting the detector, press the 'TEST/SILENCE' button to perform an initial test. The alarm will sound, and the LED indicators will flash, confirming proper operation.
4. Operating Instructions
4.1 LCD Digital Display
The LCD displays the current carbon monoxide concentration in PPM (parts per million). In normal operation, it may show '0 PPM' or a low background level. It also indicates battery status.

Image 4.1: Close-up of the LCD display showing CO concentration and battery status.
4.2 LED Indicators
The detector features three LED lights to indicate its status:
- Green LED (Power): Flashes periodically to indicate the unit is powered on and functioning correctly.
- Yellow LED (Fault): Flashes to indicate a fault or low battery condition. Refer to the Troubleshooting section.
- Red LED (Alarm): Flashes rapidly along with an audible alarm when carbon monoxide is detected at dangerous levels.

Image 4.2: Visual representation of the three LED indicators and their meanings.
4.3 Test/Silence Button
Press and hold the 'TEST/SILENCE' button to:
- Test the Alarm: Perform a weekly test to ensure the alarm is working. The alarm will sound, and LEDs will flash.
- Silence the Alarm: If the alarm sounds due to a CO event, pressing this button will temporarily silence the audible alarm for a short period (e.g., 5-10 minutes) while the unit continues to monitor CO levels. Do not silence an alarm without investigating the cause.

Image 4.3: User interacting with the Test/Silence button.
4.4 Carbon Monoxide Alarm Thresholds
The alarm will activate based on the following CO concentration levels and exposure times:
- 30 PPM: No alarm before 30 days.
- 70 PPM: Alarm between 60 to 240 minutes.
- 150 PPM: Alarm between 10 to 50 minutes.
- 400 PPM: Alarm between 4 to 15 minutes.

Image 4.4: Visual guide to CO concentration levels and alarm activation times.
5. Maintenance
5.1 Weekly Testing
Test your CO detector weekly by pressing and holding the 'TEST/SILENCE' button until the alarm sounds. This confirms the sensor, alarm, and electronics are working correctly.
5.2 Battery Replacement
When the batteries are low, the detector will typically emit a chirp and the yellow LED will flash, or the LCD will show a low battery icon. Replace both AA alkaline batteries immediately. Refer to Section 3.1 for battery installation steps.
Image 5.1: Illustration of battery replacement process.
5.3 Cleaning the Detector
Clean the exterior of the detector regularly with a soft, damp cloth. Do not use cleaning solvents or spray directly onto the unit. Avoid getting water into the sensor or electronic components.
5.4 End-of-Life Indication
After approximately 10 years of operation, the detector will indicate its end-of-life, typically with a specific fault signal (e.g., repeated chirps or a specific display message). When this occurs, the entire unit must be replaced.
6. Troubleshooting
If your Siterlink GS828C-D Carbon Monoxide Detector is not functioning as expected, refer to the following common issues and solutions:
| Problem | Possible Cause | Solution |
|---|---|---|
| Alarm sounds, Red LED flashes, high PPM reading | High CO concentration detected. | Immediately move to fresh air. Call emergency services (fire department) and do not re-enter the premises until it has been deemed safe. |
| Chirping sound, Yellow LED flashes, low battery icon on LCD | Low battery. | Replace both AA alkaline batteries immediately. |
| Chirping sound, Yellow LED flashes, no low battery icon | Unit fault or end-of-life. | Perform a test. If the fault persists, the unit may need to be replaced. |
| No display, no lights, no sound | No power or dead batteries. | Check battery installation. Replace batteries with new AA alkaline batteries. |
| False alarms | Interference from chemicals, high humidity, or improper placement. | Ensure proper placement away from sources of fumes or high humidity. Clean the detector. If persistent, consider relocating. |
What to do if the alarm sounds:
- Immediately move to fresh air outdoors or open all doors and windows to ventilate the area.
- Do a head count to check that all persons are accounted for.
- Do not re-enter the premises until the CO alarm has stopped sounding and the area has been aired out.
- Call your emergency services (fire department or 911) and your gas supplier from a fresh air location.
- Seek medical attention for anyone experiencing symptoms of CO poisoning (headache, nausea, dizziness).
7. Specifications
- Model: GS828C-D
- Power Source: 2 x 1.5V AA Alkaline Batteries (replaceable)
- Sensor Type: Electrochemical
- Alarm Loudness: 85 dB at 1 meter (3.3 feet)
- Product Life: 10 years
- Operating Temperature: 40°F (4.4°C) to 100°F (37.8°C)
- Operating Humidity: 10% to 95% RH (non-condensing)
- Dimensions: Approximately 4.7 x 3.14 x 1.4 inches (12 x 8 x 3.7 cm)
- Weight: Approximately 7 ounces (198 grams)
- Certification: UL2034
8. Warranty and Support
Siterlink provides a 36-month warranty for the GS828C-D Carbon Monoxide Detector from the date of purchase, covering defects in materials and workmanship under normal use. This warranty does not cover damage resulting from misuse, accident, or unauthorized modification.
For technical assistance, warranty claims, or customer service inquiries, please contact Siterlink customer support. We offer 24-hour customer service to assist you with any questions or concerns.
You can find more information and contact details on the official Siterlink store page: Visit the Siterlink Store