Important Safety Instructions
Please read these instructions carefully before installation and use. Keep this manual for future reference.
- Always disconnect power at the main circuit breaker before installation, maintenance, or bulb replacement.
- Installation should be performed by a qualified electrician or in accordance with local electrical codes.
- Ensure the mounting surface can support the weight of the fixture.
- Do not exceed the maximum wattage specified for the bulbs (3 x 60W E27).
- This product is designed for indoor use only (IP20 rating). Do not expose to moisture or water.
- Avoid touching bulbs directly with bare hands; use a clean cloth or gloves.
- If any damage is observed, discontinue use and contact customer support.
Product Overview
The Lindby Elamira pendant lamp is a modern lighting fixture designed for living rooms and dining areas. It features three black metal shades with a golden interior, providing a pleasant and comfortable downward-directed light. The design is minimalist yet harmonious, suitable for contemporary interiors. This lamp is dimmable, allowing you to adjust the light intensity to create the desired ambiance.

Image: The Lindby Elamira pendant lamp with three black and gold shades, illuminating a dining area.
Specifications
| Brand | Lindby |
| Model Name | Elamira |
| Model Number | 9627803 |
| Product Dimensions (L x W x H) | 133L x 31W x 150H centimeters |
| Item Weight | 2.23 Kilograms |
| Color | Black, Gold |
| Material | Aluminum, Alloy Steel |
| Style | Modern |
| Room Type | Living Room, Dining Room, Kitchen, Bathroom (as per product use) |
| Indoor/Outdoor Use | Indoor |
| Power Source | Corded Electric |
| Special Features | Dimmable |
| Control Method | Push Button (also compatible with slide, rotary, toggle switches) |
| Light Source | 3 x E27 bulbs (max 60W each) |
| Voltage | 230 Volts |
| Light Color | Warm White (depending on bulb) |
| Brightness | Up to 2400 Lumens (total, depending on bulbs) |
| Water Resistance Level | Not Water Resistant (IP20) |
| Mounting Type | Ceiling Mount, Hanger Fixture |
| Assembly Required | No (pre-assembled fixture, but installation required) |

Image: Detailed dimensions of the Lindby Elamira pendant lamp. The bar length is 1330mm, total height 1500mm, and shade diameter 310mm.
Package Contents
Ensure all components are present and undamaged before proceeding with installation.
- 1 x Lindby Elamira Pendant Lamp Fixture (with 3 shades)
- Mounting Material (screws, anchors, etc.)
- Instruction Manual
Note: Light bulbs are not included and must be purchased separately. This fixture requires 3 x E27 bulbs, max 60W each.
Setup & Installation
Follow these steps carefully for safe and correct installation.
1. Preparation
- Turn off power: Locate the circuit breaker for the room where you are installing the lamp and turn off the power. Verify power is off using a voltage tester.
- Unpack: Carefully remove all components from the packaging.
- Gather tools: You will need a screwdriver, wire strippers, pliers, a drill (if needed for anchors), and a ladder.
2. Mounting the Ceiling Plate
Attach the mounting bracket to the ceiling junction box. Ensure it is securely fastened.

Image: The metal mounting plate and internal wiring connections of the lamp's ceiling bar.
3. Wiring
Connect the lamp's wires to your household electrical wires. Follow standard wiring color codes:
- Live (L): Brown or Black wire from the lamp to the Live wire from the ceiling.
- Neutral (N): Blue wire from the lamp to the Neutral wire from the ceiling.
- Ground (E): Green/Yellow wire from the lamp to the Ground wire from the ceiling.
Secure all connections with wire nuts or terminal blocks provided. Ensure no bare wires are exposed.

Image: Underside of the lamp's ceiling bar, illustrating the internal wiring and connection points.
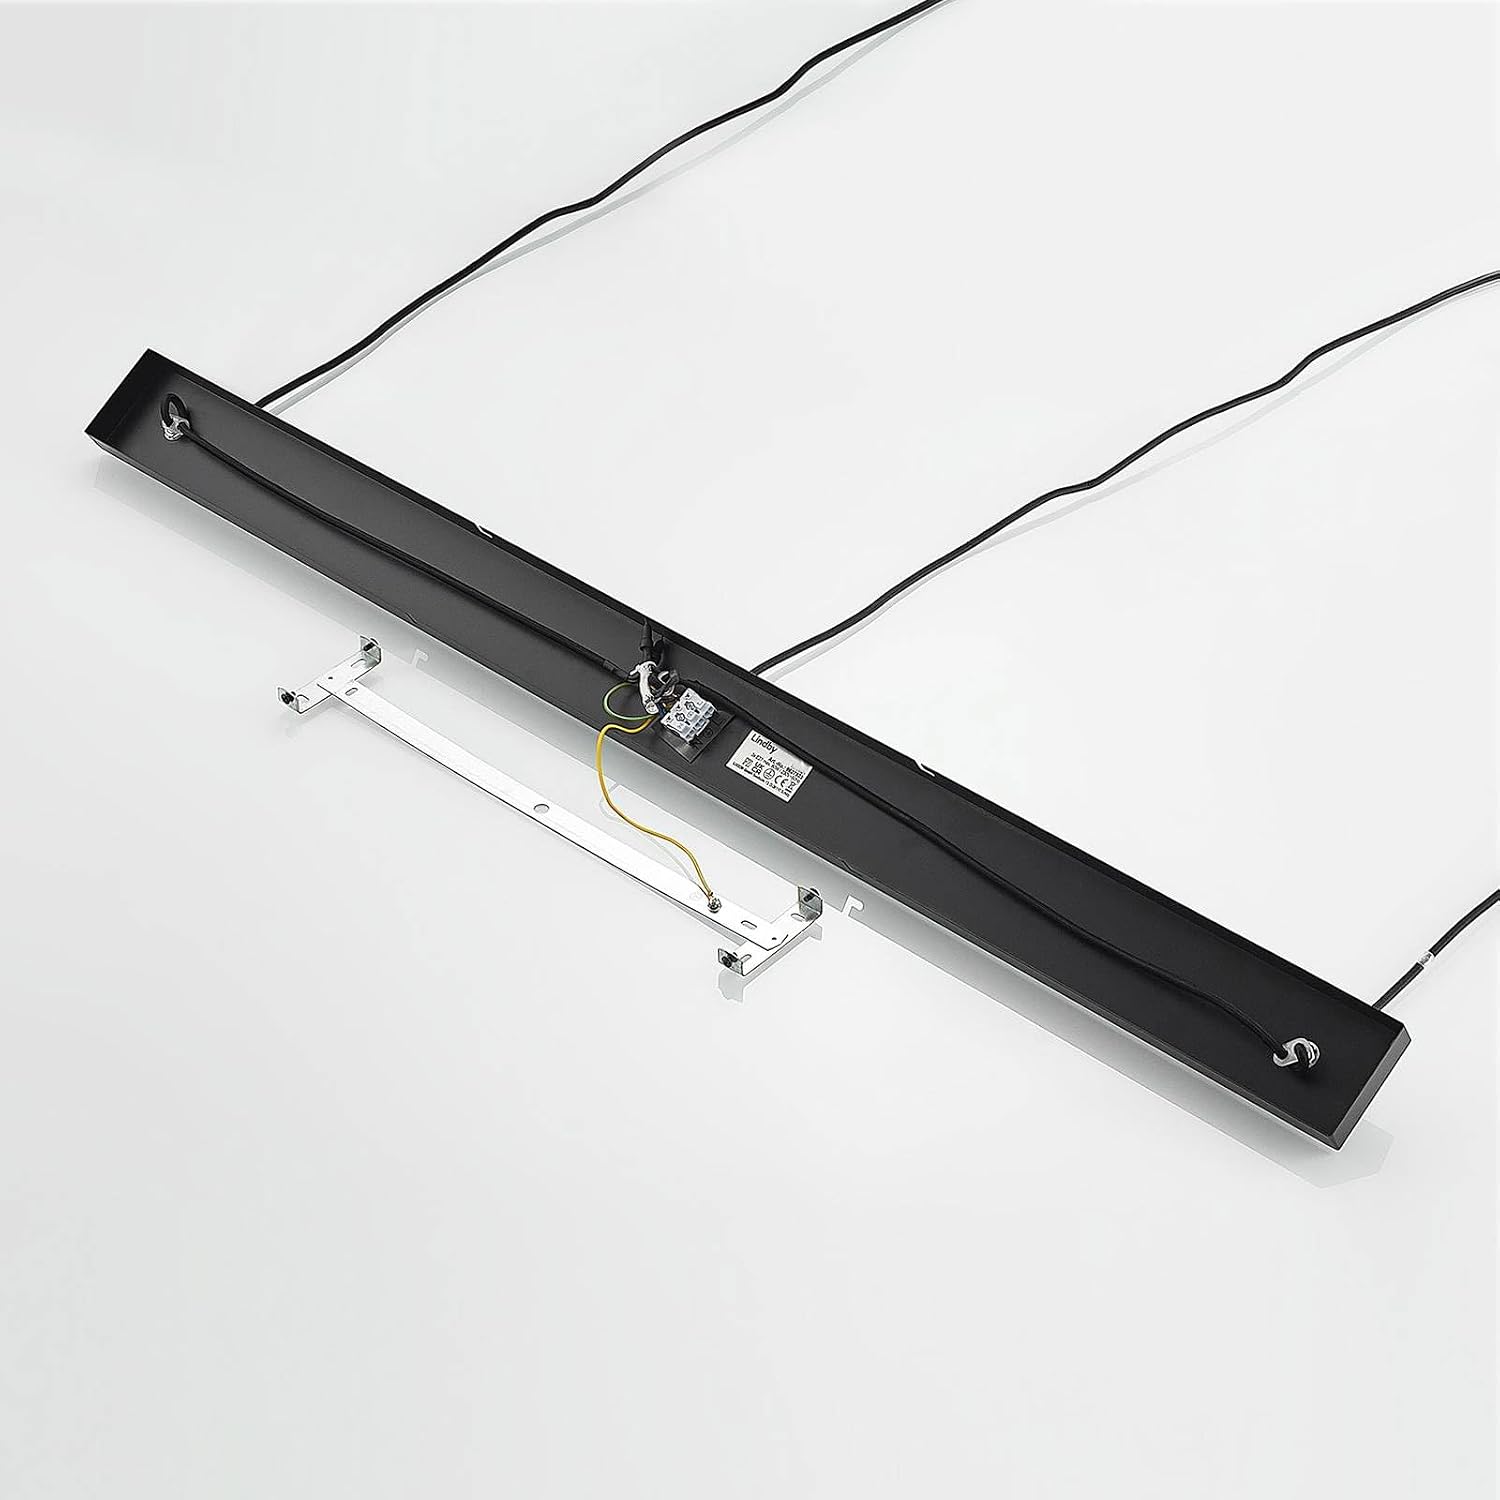
Image: Top view of the lamp's ceiling bar, showing the wiring paths and connection points for the pendant cables.
4. Attaching the Fixture to the Ceiling
Once wiring is complete, carefully align the lamp's ceiling bar with the mounting bracket and secure it with the provided screws. Ensure the fixture is flush against the ceiling.
Video: This video demonstrates the general installation process for a similar multi-light pendant lamp, including mounting and wiring. While not the exact model, the steps are broadly applicable.
5. Installing Light Bulbs
Screw three E27 base bulbs (max 60W each) into the sockets. For dimming functionality, ensure you use dimmable E27 LED bulbs.
Video: This video provides a closer look at an E27 Edison screw bulb, which is compatible with this fixture. It demonstrates the bulb type required.
Video: This video offers a detailed view of an E27 LED bulb, highlighting its features and design. This type of bulb is recommended for optimal performance and energy efficiency with your pendant lamp.
6. Restore Power
Once installation is complete and all connections are secure, restore power at the main circuit breaker. Test the lamp's functionality.
Operating Instructions
The Lindby Elamira pendant lamp operates via a standard wall switch. If connected to a compatible dimmer switch and equipped with dimmable E27 bulbs, you can adjust the light intensity.
- Turning On/Off: Use your existing wall switch to turn the lamp on or off.
- Dimming: If using a dimmer switch and dimmable bulbs, operate the dimmer switch according to its manufacturer's instructions to adjust brightness.

Image: The Lindby Elamira pendant lamp casting a warm, inviting glow on a wall, demonstrating its lighting effect.
Maintenance & Care
Regular maintenance ensures the longevity and optimal performance of your lamp.
- Cleaning: Disconnect power before cleaning. Wipe the lamp with a soft, dry cloth. Do not use abrasive cleaners, solvents, or polishes as they may damage the finish.
- Bulb Replacement: Ensure power is off and bulbs have cooled before replacing. Unscrew old bulbs and screw in new E27 bulbs (max 60W).
- Inspection: Periodically check for any loose connections or signs of wear.
Troubleshooting
If you encounter issues, refer to the following common problems and solutions:
| Problem | Possible Cause | Solution |
|---|---|---|
| Lamp does not light up. | No power, loose wiring, faulty bulb. | Check circuit breaker. Ensure all wires are securely connected. Replace bulb. |
| Lamp flickers. | Loose bulb, incompatible dimmer, faulty bulb. | Tighten bulbs. Ensure dimmable bulbs are used with a compatible dimmer. Replace bulb. |
| Dimming not working. | Non-dimmable bulbs, incompatible dimmer switch. | Install dimmable E27 LED bulbs. Ensure your dimmer switch is compatible with LED lighting. |
Warranty & Support
For warranty information or technical support, please refer to the purchase documentation or contact your retailer. Keep your proof of purchase for any warranty claims.
For further assistance, you may visit the Lindby website or contact their customer service directly. Contact details are typically found on the product packaging or the brand's official website.