1. Introduction
Thank you for choosing the Perlegear Tilting TV Wall Mount. This manual provides essential information for safe installation, operation, and maintenance of your new TV mount. Please read it thoroughly before installation and keep it for future reference.
This wall mount is designed to securely hold 13-42 inch LCD/LED/flat-screen TVs and monitors weighing up to 45kg (99 lbs). It features a slim profile and offers a tool-free tilt adjustment of ±15 degrees for optimal viewing angles.
2. Safety Information
WARNING: Improper installation may result in serious injury or damage to your equipment. If you do not understand these instructions or have doubts about the safety of the installation, please contact a qualified installer.
- Weight Capacity: Do not exceed the maximum weight capacity of 45kg (99 lbs). This mount is intended for use only with the maximum weights indicated.
- TV Size: Compatible with TVs from 13 to 42 inches.
- VESA Compatibility: Ensure your TV's VESA pattern (mounting holes on the back of the TV) is between 75x75mm and 300x300mm.
- Wall Type: This mount is suitable for concrete walls, brick walls, and solid wood stud walls. Do not install on drywall alone without proper stud support.
- Earthquake Resistance: When properly installed on a suitable wall, this mount provides enhanced stability, reducing the risk of TV tip-over from minor impacts or tremors.
- Always ensure all screws are securely tightened before use.
3. Package Contents
Please verify that all components are present and undamaged before installation. If any parts are missing or defective, contact Perlegear customer service.
- Wall Plate
- TV Brackets (2x)
- Mounting Hardware Kit (various screws, washers, spacers, anchors)
- Instruction Manual
4. Specifications
| Feature | Specification |
|---|---|
| Mounting Type | Wall Mount |
| Movement Type | Tilting |
| Brand | Perlegear |
| Material | Alloy Steel |
| Color | Black |
| Compatible Devices | Television |
| Maximum Tilt Angle | ±15 Degrees |
| Maximum Compatible Size | 42 Inches |
| Minimum Compatible Size | 13 Inches |
| Load Capacity | Up to 45kg (99 lbs) |
| VESA Compatibility | Min 75x75mm, Max 300x300mm |
| Wall Distance | 62mm |

Figure 1: Product Specifications Diagram
5. Installation Guide
Before starting, ensure you have the necessary tools (drill, level, screwdriver, stud finder) and have confirmed your TV's weight, size, and VESA pattern, as well as your wall type.

Figure 2: Pre-Installation Checklist
Step-by-Step Installation:
- Attach TV Brackets to TV: Secure the two TV brackets to the back of your television using the appropriate screws, washers, and spacers from the hardware kit. Ensure the brackets are level and firmly attached.
- Mount Wall Plate to Wall: Locate the desired mounting position on your wall. Use a stud finder for wood stud walls. Mark the drill holes for the wall plate. Drill pilot holes and secure the wall plate using the provided lag bolts and anchors (if applicable for concrete/brick). Ensure the wall plate is level.
- Hang TV on Wall Plate: Carefully lift the television and hook the TV brackets onto the wall plate. Ensure the TV is securely seated on the wall plate. Engage any safety locks or screws to prevent accidental dislodgement.

Figure 3: Easy Installation Steps
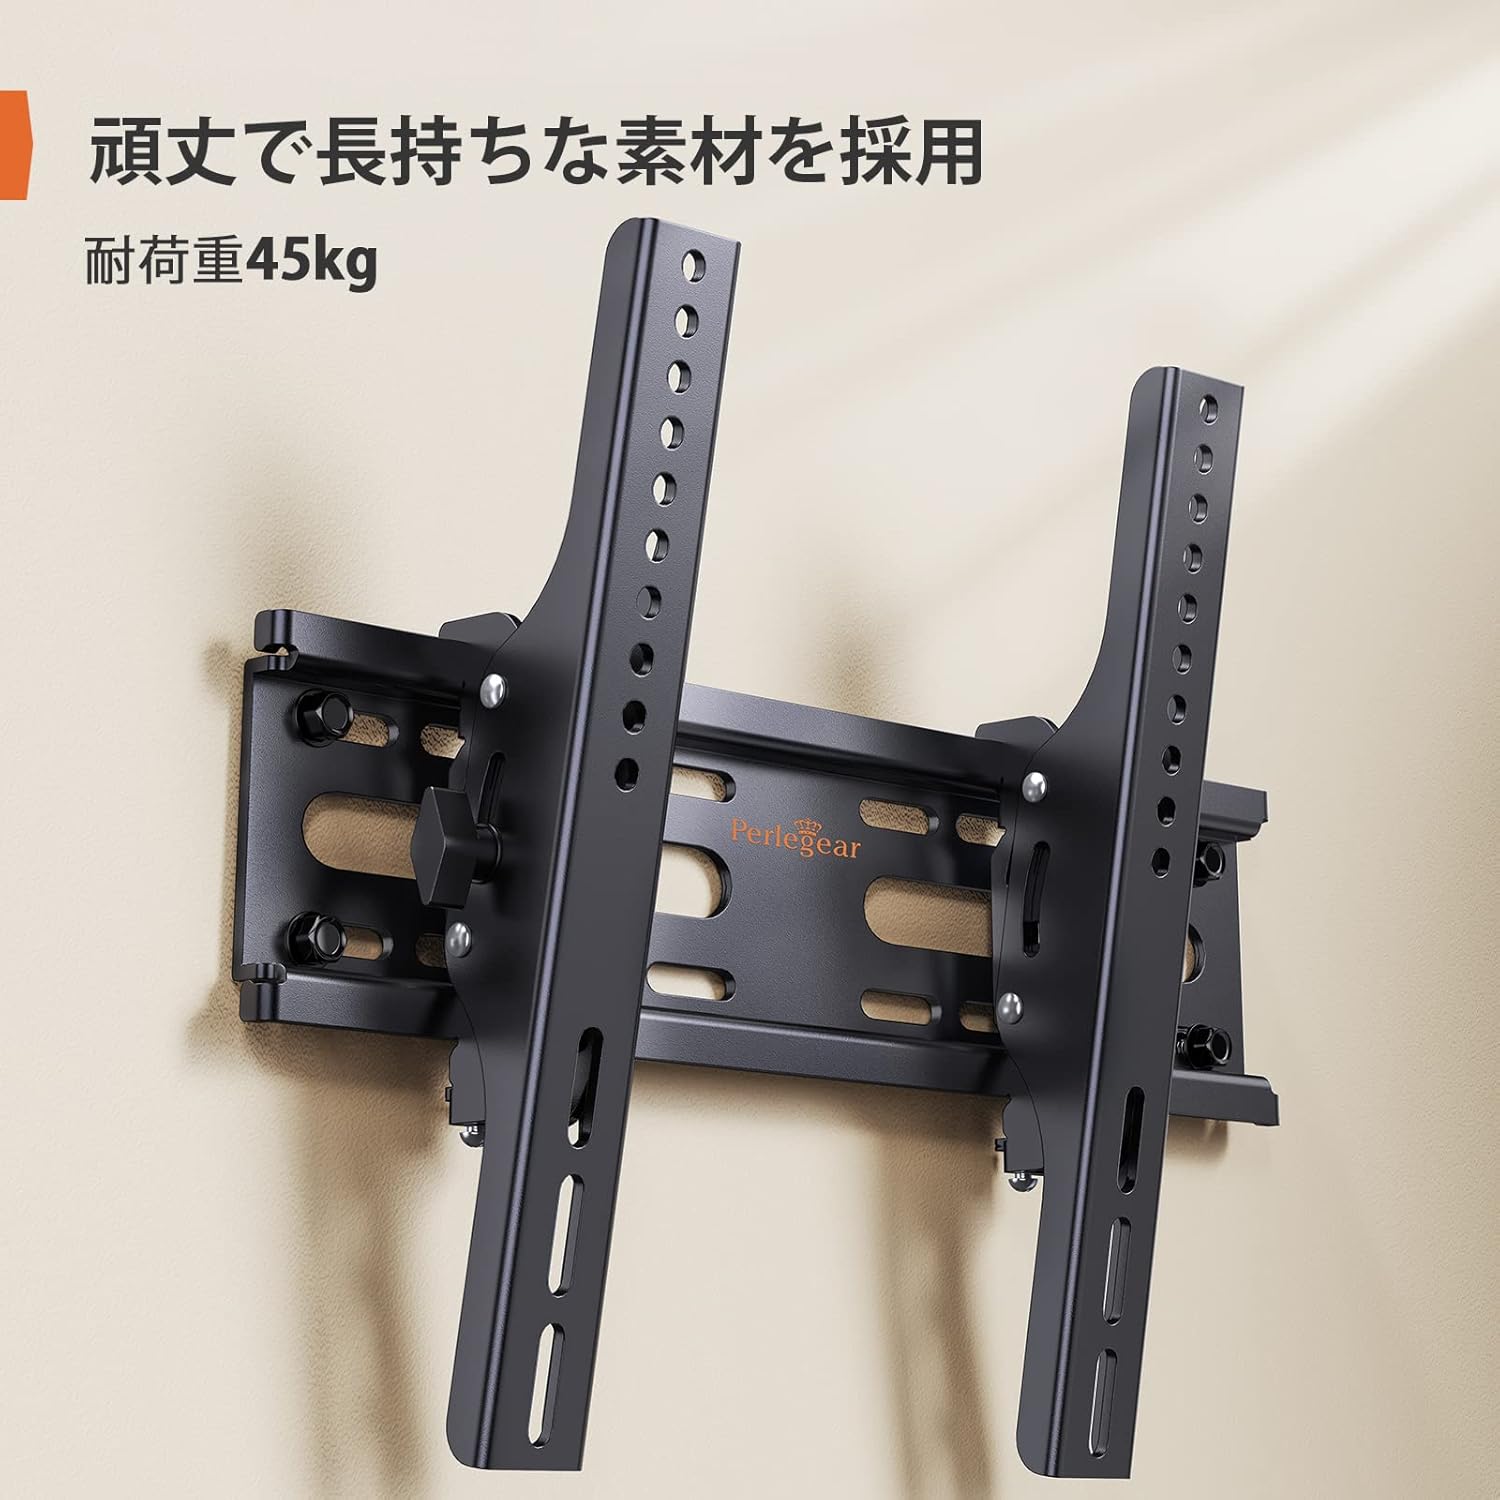
Figure 4: Installed Wall Mount

Figure 5: Slim Profile (62mm from wall)

Figure 6: Monitor Installation Example
6. Operating Instructions
This wall mount allows for easy vertical tilt adjustment to achieve the best viewing angle and reduce glare.
Tilt Adjustment:
The mount features a knob-style adjustment mechanism. Simply loosen the knobs on the side of the TV brackets to adjust the tilt angle up or down by up to 15 degrees. Once the desired angle is achieved, tighten the knobs firmly to secure the TV in place. No additional tools are required for this adjustment.

Figure 7: Tilt Adjustment Range

Figure 8: Tilt Mechanism and Security Features
Video 1: Product Features and Tilt Adjustment Demonstration. This video illustrates the slim design, tilt functionality, and how the mount helps save space in various room settings.
7. Maintenance
To ensure the longevity and safe operation of your TV wall mount, follow these maintenance guidelines:
- Cleaning: Wipe the mount with a soft, dry cloth. Avoid using abrasive cleaners or solvents that could damage the finish.
- Periodic Checks: Periodically check all screws and bolts to ensure they remain tight and secure. Over time, vibrations or movement can cause fasteners to loosen.
- Damage Inspection: Inspect the mount for any signs of damage or wear. If any damage is found, discontinue use and contact customer support.
8. Troubleshooting
If you encounter any issues during or after installation, refer to the following common problems and solutions:
- TV is not level: Ensure the wall plate was installed level. If the wall plate is level, check if the TV brackets are properly aligned and tightened on the TV. Some mounts allow for minor post-installation leveling adjustments.
- TV feels unstable: Double-check all mounting screws on both the TV and the wall plate. Ensure the wall type is appropriate and that anchors (if used) are correctly installed. The mount is designed for high load capacity and stability when correctly installed.
- Difficulty tilting: Loosen the tilt adjustment knobs slightly before attempting to adjust the angle. If the mechanism feels stiff, ensure no cables are obstructing movement.
- Missing parts: Refer to the package contents list. If any parts are missing, contact Perlegear customer support immediately.
9. Warranty and Support
The Perlegear Tilting TV Wall Mount (Model PGST1-J) comes with a 5-year manufacturer's warranty. This warranty covers defects in materials and workmanship under normal use.
For warranty claims, technical support, or any questions regarding your product, please contact Perlegear customer service through the retailer where you purchased the product or visit the official Perlegear website.