Yaheetech BY213-C03K
Yaheetech Kitchen Bakers Rack with Power Outlet (Model: BY213-C03K) Instruction Manual
Comprehensive guide for assembly, operation, and maintenance of your Yaheetech Kitchen Bakers Rack.
1. Important Safety Information
Please read and understand all instructions and safety warnings before assembling or using this product. Failure to follow these instructions may result in injury or product damage.
- Keep all packaging materials away from children.
- Ensure all parts are present and undamaged before assembly. Do not use if any parts are missing or broken.
- Assemble the unit on a soft, clean surface to prevent scratches.
- Do not overtighten screws during assembly to avoid damaging the material.
- Place the rack on a flat, stable surface. Use the adjustable footpads to ensure stability.
- Do not exceed the maximum weight capacities for each shelf as specified in the 'Specifications' section.
- For electrical safety, ensure the power outlet is properly grounded. Do not overload the outlets.
- Keep liquids away from the power outlets to prevent electrical hazards.
- Do not allow children to climb on or play with the rack.
2. Package Contents
Verify that all components listed below are included in your package. If any parts are missing or damaged, please contact customer support.

Image 2.1: Overview of the Yaheetech Kitchen Bakers Rack. This image displays the complete assembled unit, highlighting its rustic brown shelves, black metal frame, integrated power outlet, wire basket, and wine rack.

Image 2.2: Detailed view of the rack's dimensions and components. This image provides a visual breakdown of the rack's structure, including the power cord, shelves, and various accessories, alongside key specifications.
Components:
- MDF Shelves (various sizes)
- Metal Frame Components
- Power Outlet Unit with 6.5ft Cord
- Wire Basket
- Wine Rack
- S-Hooks (10 pieces)
- Adjustable Footpads
- Assembly Hardware (screws, bolts, Allen wrench)
3. Setup and Assembly Instructions
Follow these steps carefully to assemble your Yaheetech Kitchen Bakers Rack. It is recommended to have two people for assembly.
- Unpack and Identify Parts: Carefully unpack all components and lay them out on a clean, soft surface. Refer to the parts list to ensure all pieces are present.
- Assemble the Main Frame: Begin by connecting the vertical metal frame components using the provided screws and Allen wrench. Ensure all connections are secure but do not fully tighten yet.
- Attach Lower Shelves: Secure the bottom MDF shelves to the metal frame. Pay attention to the orientation of the shelves.
- Install Middle and Top Shelves: Continue by attaching the middle and top MDF shelves to the frame.
- Integrate Power Outlet Shelf: Attach the shelf with the integrated power outlet to the upper part of the frame. Route the power cord as intended, using the hook and loop fastener for cable management.
- Attach Wire Basket and Wine Rack: Install the wire basket and wine rack into their designated positions on the side frame.
- Secure S-Hooks: Place the 10 S-hooks onto the side rails for hanging utensils or mugs.
- Final Tightening and Stability Check: Once all components are in place, gently tighten all screws. Place the assembled rack in its desired location and adjust the footpads at the bottom to ensure the unit is level and stable on uneven floors.

Image 3.1: Visual guide for dimensions and weight limits. This image provides critical measurements and maximum load capacities for each section of the rack, essential for safe assembly and use.

Image 3.2: Close-up of the adjustable footpads. These footpads allow for fine-tuning the rack's stability on uneven surfaces and protect your flooring.
4. Operating Instructions
Your Yaheetech Kitchen Bakers Rack is designed for versatile storage and convenient power access.
4.1. Using the Power Outlets
- Plug the rack's 6.5ft power cord into a standard wall outlet.
- The ETL-listed power strip features two AC outlets. These are suitable for powering kitchen appliances such as coffee makers, toasters, or blenders.
- Do not exceed the maximum electrical load capacity of the outlets. Refer to the product specifications for details.
- Use the integrated hook and loop fastener to manage the power cord, keeping it tidy and preventing tripping hazards.

Image 4.1: Close-up of the ETL-listed power outlets. This image shows the two AC outlets and the power cord management system.
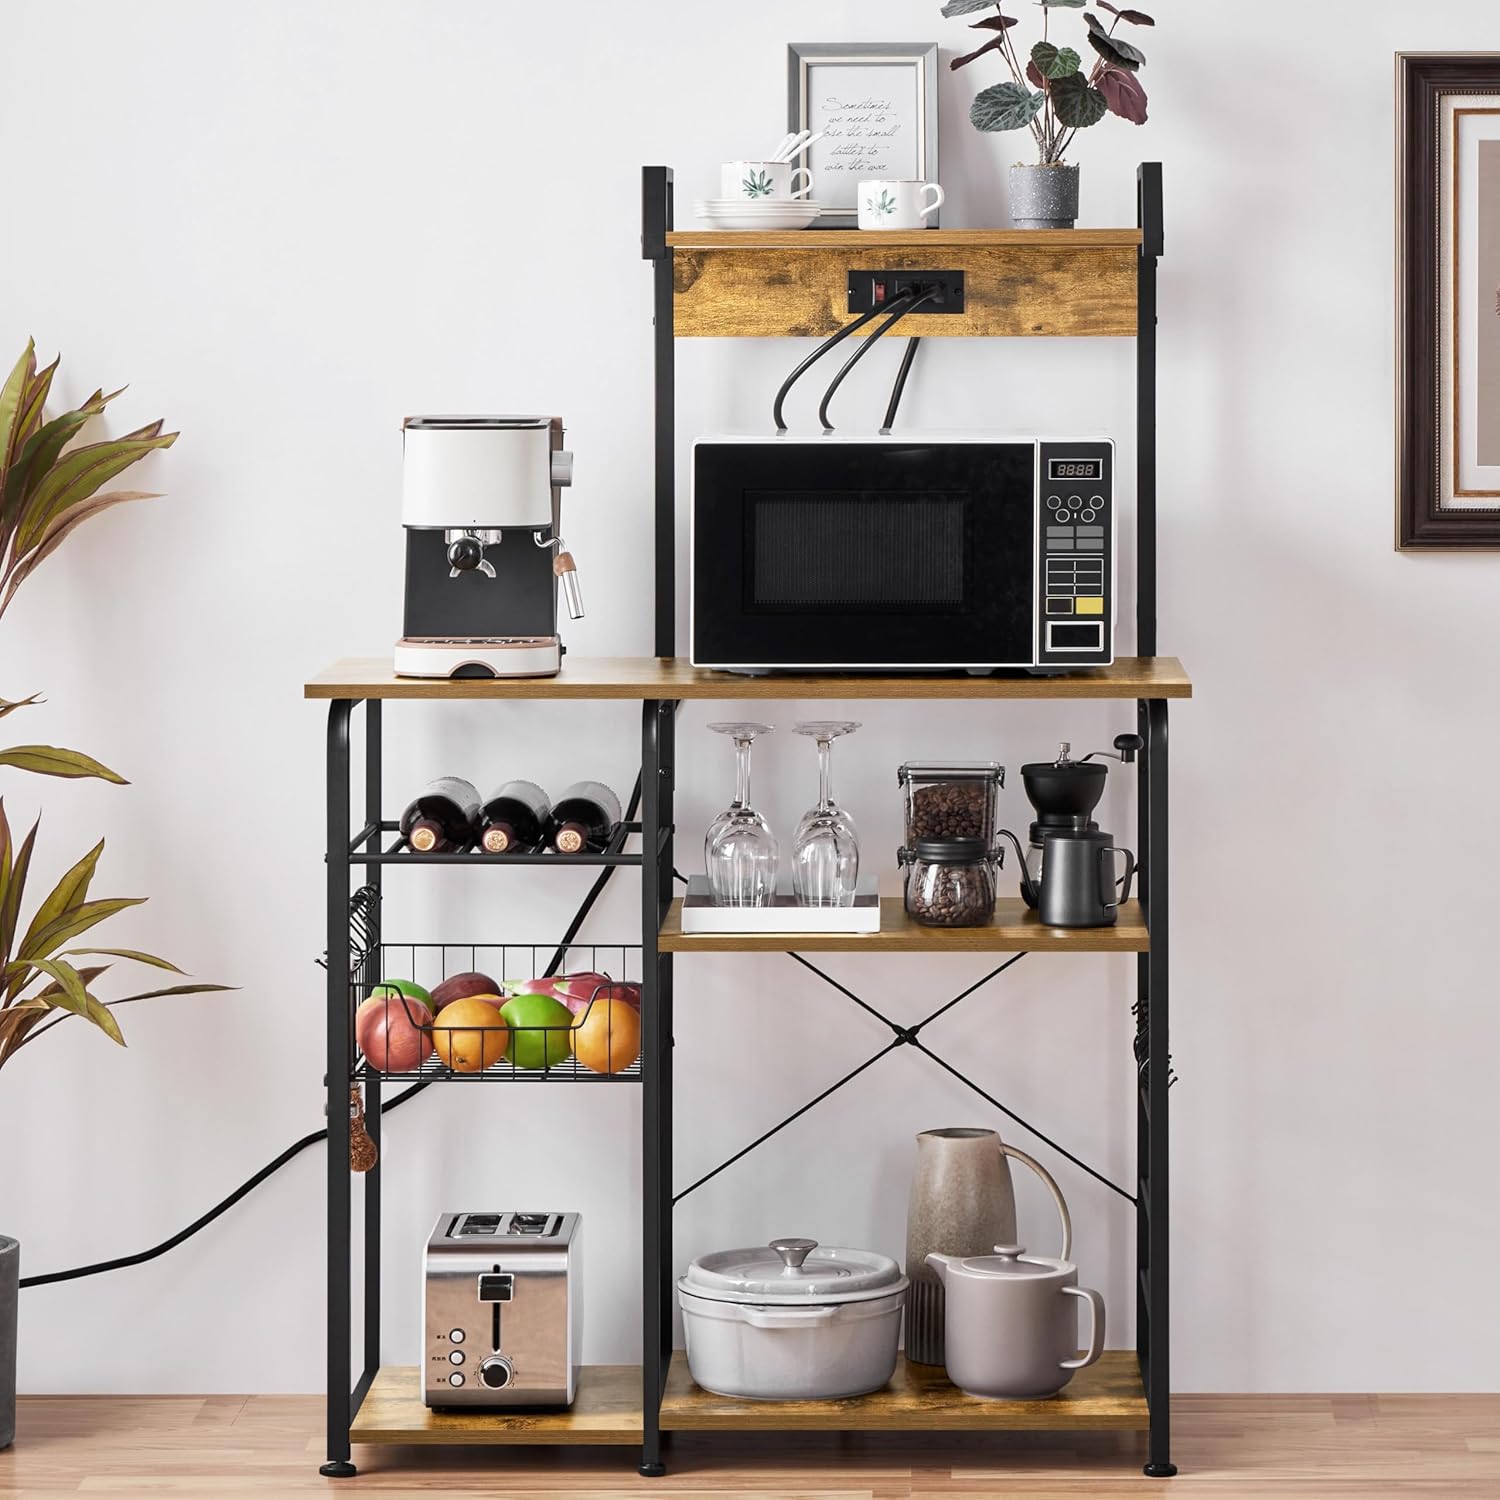
Image 4.2: The bakers rack in a kitchen setting, demonstrating the use of the power outlets for a coffee maker and microwave.
4.2. Storage Features
- Top Shelf: Ideal for frequently used spice bottles or decorative items.
- Desktop/Main Shelf: Provides ample space for small appliances like microwaves, coffee makers, or blenders.
- Lower Shelves: Suitable for storing tableware, kitchenware, cookbooks, or other items.
- Wine Rack: Designed to hold wine bottles securely.
- Wire Basket: Convenient for storing fruits, vegetables, or other small kitchen essentials.
- S-Hooks: Use the included 10 S-hooks to hang potholders, mugs, dishcloths, or kitchen utensils on the side rails.

Image 4.3: Visual breakdown of the rack's storage features, including the top shelf, ample tabletop, wine rack, wire basket, and S-shaped hooks.

Image 4.4: Close-up view of the integrated wine rack, designed to hold bottles securely.
5. Maintenance and Care
Proper care will ensure the longevity and appearance of your bakers rack.
- Cleaning: Wipe surfaces with a soft, damp cloth. Avoid harsh chemicals or abrasive cleaners, which can damage the finish.
- Spills: Clean up spills immediately to prevent staining, especially on the engineered wood surfaces.
- Stability Check: Periodically check all screws and connections to ensure they remain tight. Re-tighten if necessary.
- Electrical Components: Keep the power outlets clean and dry. Do not attempt to disassemble or repair the electrical unit yourself.
- Weight Distribution: Distribute weight evenly across shelves and avoid placing excessively heavy items on any single point.
6. Troubleshooting
If you encounter any issues with your bakers rack, refer to the following common solutions:
- Rack is Unstable/Wobbly:
- Ensure all assembly screws are fully tightened.
- Adjust the footpads at the bottom of the legs to level the rack on uneven floors.
- Verify that the rack is placed on a flat, stable surface.
- Power Outlets Not Working:
- Check if the main power cord is securely plugged into a functioning wall outlet.
- Ensure the power switch on the outlet unit (if present) is in the "ON" position.
- Avoid overloading the outlets. Unplug some devices and try again.
- Check your home's circuit breaker if multiple outlets are not working.
- Missing or Damaged Parts:
- Review the package contents list.
- Contact Yaheetech customer support for replacement parts.
7. Specifications
| Model Number | BY213-C03K |
| Color | Rustic Brown |
| Material | Engineered Wood (MDF, melamine veneer), Iron |
| Overall Dimensions (L x W x H) | 35.5"D x 15"W x 55"H (90cm x 38cm x 140cm approx.) |
| Number of Shelves | 4 |
| Special Feature | Integrated Power Outlet (ETL-listed, 2 AC outlets) |
| Power Cord Length | 6.5 ft (2 meters approx.) |
| Maximum Load Capacity: | |
| - Top Shelf | 11 lb (5 kg) |
| - Desktop/Main Shelf | 88 lb (40 kg) |
| - Big Shelf (Lower) | 40 lb (18 kg) |
| - Small Shelf (Lower) | 29 lb (13 kg) |
| - Hook & Tray | 7 lb (3 kg) |
| Item Weight | 38.4 lbs (17.4 kg) |
| Assembly Required | Yes |
| Included Components | Hardware |
8. Warranty and Support
For warranty information, product support, or to order replacement parts, please contact Yaheetech customer service. Refer to your purchase documentation for specific warranty terms and contact details.
You can also visit the official Yaheetech store for more information: Yaheetech Store on Amazon
Ask a question about this manual
Ask about setup, troubleshooting, compatibility, parts, safety, or missing instructions. Manuals+ will review the question and use this page’s manual context to help answer it.