Introduction
This manual provides detailed instructions for the MEBUS Digital Alarm Clock Model 25738. This digital alarm clock features an extra-large display for enhanced readability, showing time, date, day of the week, and indoor temperature. It includes an alarm with snooze function and a unique sound-activated backlight. Please read this manual thoroughly before operating the device to ensure proper use and longevity.
Product Features
- Extra-Large Display: XXL screen for maximum readability from various distances.
- Multi-Function Display: Shows time (12/24 hour format), date, day of the week, and indoor temperature (°C/°F).
- Alarm with Snooze: Features a loud alarm sound and a snooze function for temporary alarm deactivation.
- Sound-Activated Backlight: Display illumination can be activated by pressing a button or by an acoustic signal (e.g., clapping, whistling).
- Integrated Calendar: Displays the current date and abbreviated day of the week.
- Indoor Thermometer: Monitors ambient temperature in Celsius or Fahrenheit.
- Quartz Movement: Ensures accurate timekeeping.

Image: The MEBUS Digital Alarm Clock highlighting its large XXL display, snooze function, and sound-activated backlight feature.

Image: Overview of additional functions: indoor temperature display, adjustable snooze (1-60 min), date/calendar, 12/24 hour display, selectable alarm tones (7 melodies, 2 beeps), and acoustic signal activated display light.
Setup
1. Battery Installation
The MEBUS Digital Alarm Clock requires 3x AAA batteries (not included). To install:
- Locate the battery compartment cover on the back of the alarm clock.
- Remove the cover by sliding or lifting it.
- Insert 3x AAA batteries, ensuring correct polarity (+ and -).
- Replace the battery compartment cover securely.

Image: Rear view of the alarm clock indicating the battery compartment and overall dimensions (14x10 cm, 160g weight, requires 3x AAA batteries).
2. Initial Power On
After battery installation, the display will light up, and the clock will be ready for initial settings. If the display does not light up, check battery polarity or replace with new batteries.
Operating Instructions
The alarm clock features several buttons on the back for setting and control. Refer to the diagram below for button identification (if available on product, otherwise general description).
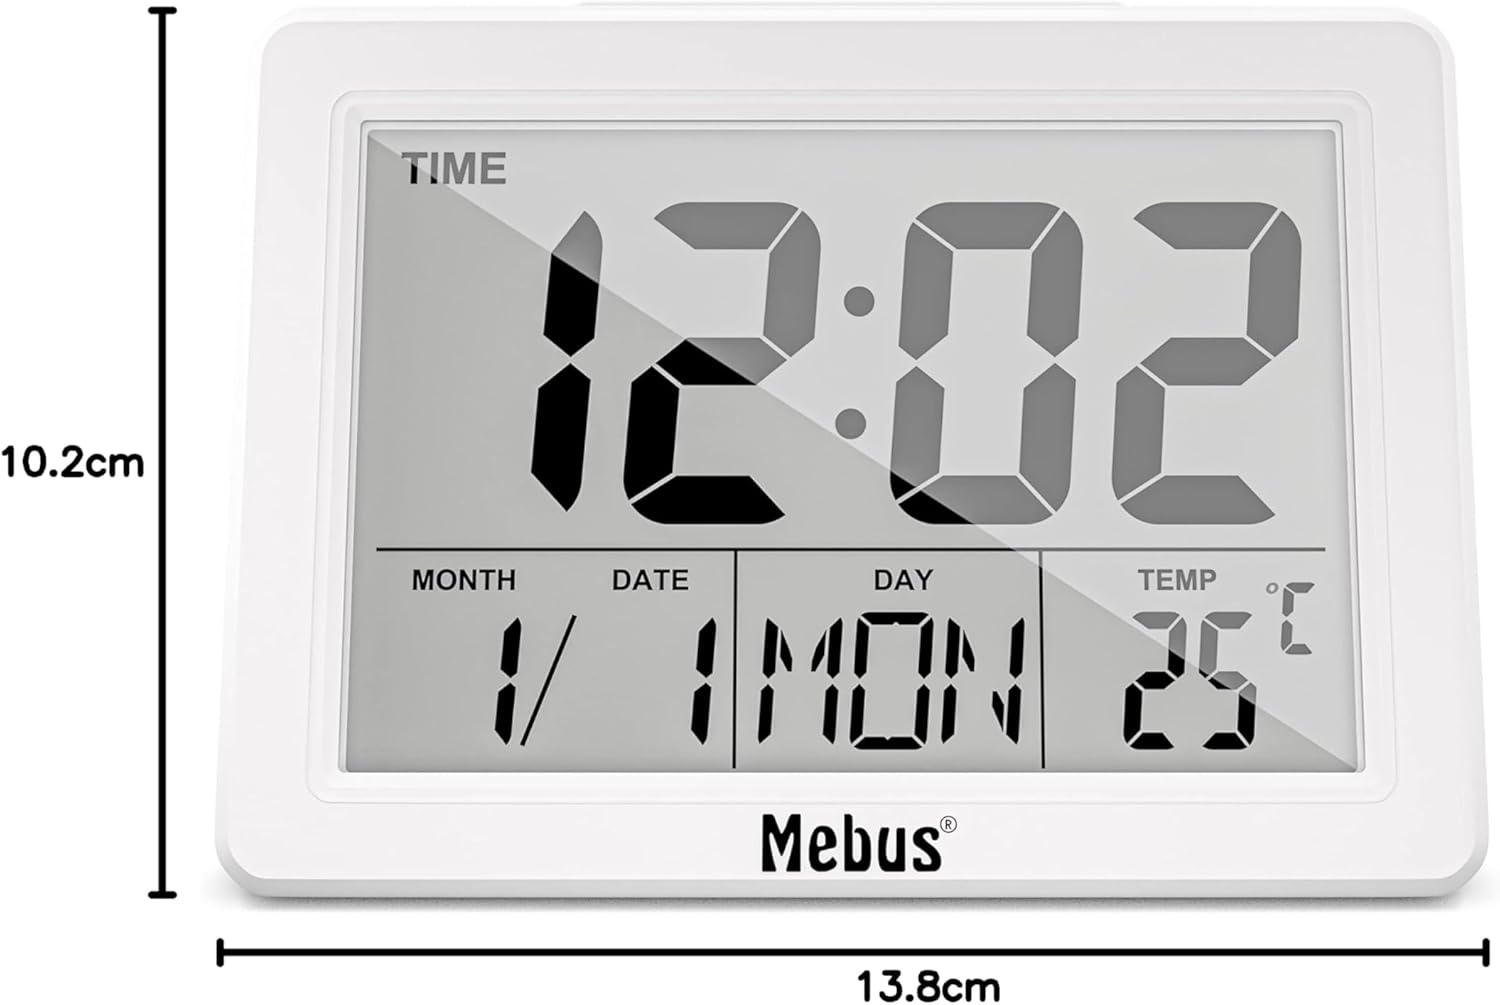
Image: Rear view of the MEBUS Digital Alarm Clock, illustrating the control buttons for settings.
1. Setting Time and Date
- Press the MODE button to cycle through Time, Alarm, and Date display modes.
- In Time display mode, press and hold the SET button to enter time setting. The hour digits will flash.
- Use the UP or DOWN buttons to adjust the hour.
- Press SET again to move to minute setting, then adjust with UP/DOWN.
- Continue pressing SET to set the year, month, and day in the same manner.
- Press MODE to exit setting mode.
2. 12/24 Hour Format
In Time display mode, press the UP button to switch between 12-hour (AM/PM) and 24-hour formats.
3. Setting Alarm
- Press the MODE button until the alarm time is displayed.
- Press and hold the SET button to enter alarm setting. The alarm hour digits will flash.
- Use the UP or DOWN buttons to adjust the alarm hour.
- Press SET again to move to alarm minute setting, then adjust with UP/DOWN.
- Press SET to confirm.
- To activate/deactivate the alarm, press the ALARM ON/OFF button. An alarm icon will appear/disappear on the display.
4. Snooze Function
When the alarm sounds, press the large LIGHT/SNOOZE button on the top of the clock. The alarm will pause and sound again after a few minutes (default snooze interval). To stop the alarm completely, press any other button on the back of the clock.
5. Display Backlight
The display backlight can be activated in two ways:
- Button Activation: Press the large LIGHT/SNOOZE button on the top. The backlight will illuminate for approximately 5 seconds.
- Sound Activation: The backlight can also be activated by an acoustic signal, such as a clap or a whistle. This allows for hands-free illumination in the dark.

Image: The alarm clock displaying its illuminated screen in a dark environment, demonstrating its night-time visibility and acoustic signal activation.
6. Temperature Display
The clock continuously displays the indoor temperature. To switch between Celsius (°C) and Fahrenheit (°F), press the °C/°F button on the back of the unit.
Maintenance
1. Cleaning
Wipe the clock with a soft, dry cloth. Do not use abrasive cleaners or solvents, as they may damage the display or casing.
2. Battery Replacement
When the display dims or functions become erratic, it is time to replace the batteries. Follow the battery installation steps in the Setup section.
Troubleshooting
| Problem | Possible Cause | Solution |
|---|---|---|
| Display is blank or dim. | Low or incorrectly installed batteries. | Replace batteries with new 3x AAA batteries, ensuring correct polarity. |
| Alarm does not sound. | Alarm is not activated. | Ensure the alarm icon is visible on the display. Press the ALARM ON/OFF button to activate. |
| Backlight does not activate with sound. | Insufficient sound level or distance. | Ensure sound is loud enough and close to the device. |
| Incorrect time/date. | Time/date not set correctly. | Follow the "Setting Time and Date" instructions to reset. |
Specifications
- Model Number: 25738
- Dimensions (WxHxD): 13.8 x 10.2 x 4.4 cm (5.43 x 4.02 x 1.73 inches)
- Weight: 170 grams (0.37 lbs)
- Material: Acrylonitrile Butadiene Styrene (ABS) Plastic
- Color: White
- Display Type: Digital
- Power Source: 3x AAA Batteries (not included)
- Movement Type: Quartz
- Special Features: Large Display, Temperature Display, Calendar Display, Alarm, Snooze, Sound-Activated Backlight

Image: Diagram illustrating the dimensions of the MEBUS Digital Alarm Clock: 13.8cm width and 10.2cm height.

Image: Information detailing the advantages of a quartz movement, including accuracy, low maintenance, durability, and compact design.
Warranty and Support
For warranty information or technical support, please refer to the documentation provided with your purchase or contact MEBUS customer service directly. Keep your proof of purchase for any warranty claims.