1. Introduction
Thank you for choosing the Eaglerich 9-inch Touchscreen Car Radio. This device integrates advanced features such as CarPlay, Android Auto, Bluetooth, GPS navigation, and FM radio, designed to enhance your driving experience. This manual provides detailed instructions for installation, operation, and maintenance to ensure optimal performance and longevity of your car radio.
Package Contents
Please verify that all items listed below are included in your package. If any items are missing or damaged, please contact customer support.
- 1 x Eaglerich 9-inch Car Radio Unit
- 1 x GPS Antenna
- 1 x New Style Power Harness
- 1 x Old Style Power Harness
- 1 x CANBUS Case
- 1 x Radio Antenna Adapter
- 2 x USB Adapters
- 1 x Camera Input Cable
- 1 x RCA Input/Output Cable
- 1 x 4LED Camera (optional, if included in your purchase)
- 1 x User Manual (this document)

Figure 1.1: Included Components
2. Safety Information
Read all instructions carefully before installation and operation. Failure to follow these instructions may result in damage to the device, vehicle, or personal injury.
- Professional Installation Recommended: Due to the complexity of car electrical systems, professional installation is highly recommended.
- Power Supply: Ensure the car radio is connected to a 12V DC power supply with negative grounding.
- Wiring: Do not short-circuit any wires. Insulate all connections properly.
- Driving Safety: Do not operate the device in a way that distracts you from driving. Always prioritize road safety.
- Temperature: Avoid exposing the unit to extreme temperatures or direct sunlight for prolonged periods.
- Cleaning: Use a soft, dry cloth for cleaning. Do not use abrasive cleaners or solvents.
3. Installation
This section outlines the general installation process. Specific vehicle models may require additional steps or adapters. Refer to your vehicle's service manual for detailed dashboard disassembly instructions.
3.1 Pre-Installation Checks
- Disconnect the vehicle's battery to prevent electrical shorts.
- Ensure the car radio is compatible with your vehicle's dashboard opening (2-DIN standard).
- Identify the vehicle's wiring harness and compare it with the provided power harnesses.
3.2 Wiring Connections
Connect the appropriate power harness (new or old style) to your vehicle's wiring. Ensure all connections are secure.
- Power (Yellow): Constant 12V (Battery)
- ACC (Red): Switched 12V (Ignition)
- Ground (Black): Vehicle Chassis Ground
- Speaker Wires: Connect to corresponding vehicle speaker wires (e.g., Front Left +, Front Left -).
- CANBUS: Connect the CANBUS case if your vehicle requires it for steering wheel controls or other vehicle data integration.
- GPS Antenna: Connect the GPS antenna and mount it in a location with a clear view of the sky (e.g., dashboard, under the windshield).
- USB Cables: Route the USB extension cables to an accessible location (e.g., glove compartment).
- Radio Antenna: Connect the radio antenna adapter to your vehicle's antenna cable.
3.3 Rear View Camera Installation (Optional)
If your package includes the 4LED camera, follow these steps:
- Mount the camera at the rear of your vehicle, typically near the license plate light.
- Connect the camera's power wire to the vehicle's reverse light power source (12V). This ensures the camera powers on when reverse gear is engaged.
- Connect the camera's video output cable to the "Camera Input" port on the car radio.
- Ensure the reverse trigger wire (usually pink or brown) from the car radio's harness is connected to the vehicle's reverse light signal.

Figure 3.1: Rear View Camera Display
3.4 Final Assembly
- Carefully slide the car radio into the dashboard opening.
- Secure the unit using the mounting brackets.
- Reassemble the dashboard trim panels.
- Reconnect the vehicle's battery.
4. Operation
This section details the basic functions and features of your Eaglerich car radio.

Figure 4.1: Main Interface Overview
4.1 Power On/Off
- Power On: Turn the vehicle's ignition key to the ACC or ON position. The unit will power on automatically.
- Power Off: Turn the vehicle's ignition key to the OFF position. The unit will power off.
- Standby: Press and hold the power button on the unit (if available) or on the screen to enter standby mode. Press again to resume.
4.2 Touchscreen Controls
The 9-inch capacitive touchscreen allows for intuitive control. Tap, swipe, and drag gestures are supported for navigating menus and applications.
4.3 CarPlay & Android Auto
Connect your iPhone or Android smartphone via a USB cable to activate CarPlay or Android Auto. This allows you to access phone functions, navigation, messages, and music directly from the car radio's screen.
- iPhone: Connect your iPhone using a certified USB cable. CarPlay will launch automatically. You can use Siri for voice commands.
- Android Phone: Ensure the Android Auto app is installed on your phone. Connect your Android phone via a USB cable. Android Auto will launch automatically.

Figure 4.2: Android Auto Interface
4.4 GPS Navigation
The unit features a built-in GPS receiver compatible with various navigation applications like Waze, Navfree, and Google Maps. Connect to Wi-Fi to download maps and receive real-time traffic updates.
- Online Navigation: Connect the unit to a Wi-Fi hotspot (e.g., from your smartphone) to use online navigation services and download maps.
- Offline Maps: Some navigation apps allow downloading maps for offline use.

Figure 4.3: Online Navigation Display
4.5 Bluetooth
The integrated Bluetooth 4.0 module supports hands-free calling and audio streaming.
- Pairing: Go to the Bluetooth settings on the car radio and your smartphone. Search for available devices and select the car radio (usually named "CarBT" or similar). Enter the PIN (default is 0000 or 1234) if prompted.
- Hands-Free Calling: Once paired, you can make and receive calls directly from the car radio's interface.
- Audio Streaming: Play music from your smartphone through the car's speakers via Bluetooth.
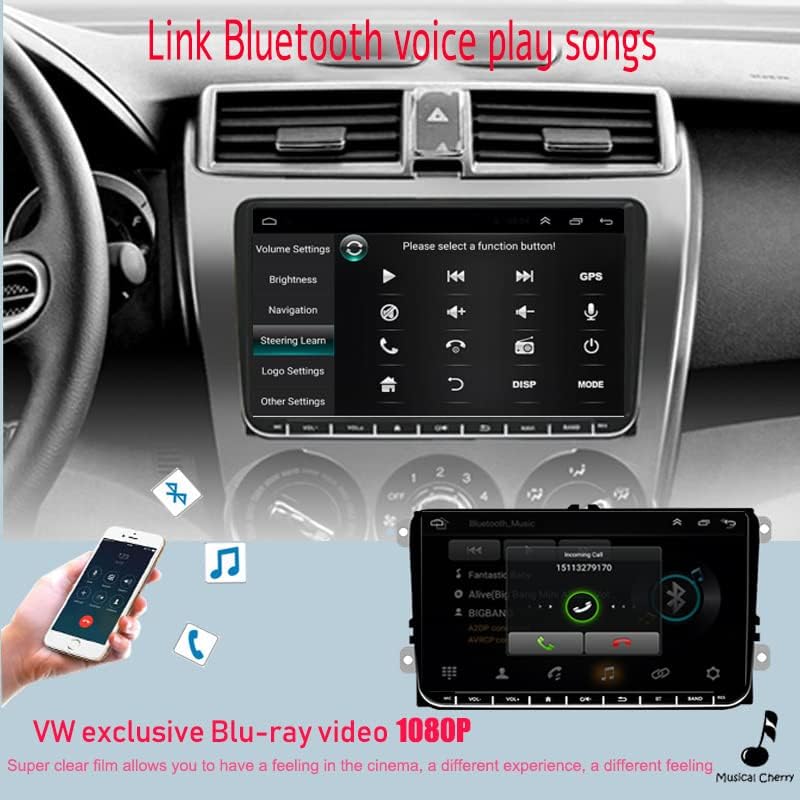
Figure 4.4: Bluetooth Interface
4.6 FM Radio
Access the FM radio function to listen to local radio stations.
- Auto Scan: Use the auto scan feature to automatically search and save available stations.
- Manual Tuning: Manually tune to specific frequencies.
- Presets: Save your favorite stations to preset buttons for quick access.
4.7 Mirror Link
The Mirror Link function allows you to display your smartphone's screen content directly on the car radio's display. This feature is supported for both Android and iOS phones.
- Connection: Connect your smartphone via USB. Follow the on-screen prompts on both the car radio and your phone to establish the mirror link connection.
4.8 USB Playback
Connect USB storage devices (e.g., USB flash drives) to the USB ports to play audio and video files.
- Supported Formats: The unit supports various audio and video formats. Refer to the specifications for a complete list.
- File Browsing: Use the touchscreen to navigate through folders and select files for playback.
4.9 Steering Wheel Control
If your vehicle has steering wheel controls and the CANBUS is correctly connected, you can configure the unit to respond to these controls.
- Configuration: Navigate to the "Steering Wheel Learn" or "SWC Settings" menu in the unit's settings. Follow the on-screen instructions to map your vehicle's steering wheel buttons to the corresponding functions on the car radio.
5. Settings
Access the settings menu to customize various aspects of your car radio.
5.1 System Settings
These settings control the core Android operating system functions.
- Wi-Fi: Connect to available Wi-Fi networks.
- Bluetooth: Manage Bluetooth connections and pairing.
- Date & Time: Set the correct date and time.
- Language: Select the system language.
- About Device: View system information, including Android version and software updates.
5.2 Audio Settings
Adjust audio output to your preference.
- Equalizer (EQ): Customize sound profiles with various preset EQ modes or manual adjustments for bass, treble, and mid-range frequencies.
- Volume Control: Adjust master volume, fader (front/rear balance), and balance (left/right).
5.3 Display Settings
Configure screen brightness and other display options.
- Brightness: Adjust screen brightness for optimal visibility.
- Wallpaper: Change the background wallpaper.
6. Maintenance
Proper maintenance ensures the longevity and optimal performance of your car radio.
- Screen Cleaning: Use a soft, lint-free cloth to gently wipe the touchscreen. For stubborn smudges, slightly dampen the cloth with water or a screen-safe cleaner. Avoid harsh chemicals.
- Software Updates: Periodically check for available software updates in the system settings to ensure you have the latest features and bug fixes. Connect to Wi-Fi to download updates.
- Avoid Liquids: Do not spill liquids on the unit. If liquid enters the unit, disconnect power immediately and seek professional service.
7. Troubleshooting
This section addresses common issues you might encounter. If the problem persists, contact customer support.
| Problem | Possible Cause | Solution |
|---|---|---|
| Unit does not power on. | No power connection, blown fuse, incorrect wiring. | Check power harness connections (Yellow, Red, Black wires). Verify vehicle's fuse box. Ensure ignition is on. |
| No sound from speakers. | Speaker wires disconnected, volume too low, mute activated, incorrect audio settings. | Check speaker wire connections. Increase volume. Check if mute is active. Verify audio output settings. |
| GPS signal weak or not found. | GPS antenna improperly installed or obstructed. | Ensure GPS antenna is mounted in a clear location with an unobstructed view of the sky. Check antenna connection. |
| Bluetooth not connecting. | Device not in pairing mode, incorrect PIN, interference. | Ensure both devices are in pairing mode. Re-enter PIN. Try pairing in a different location. Restart both devices. |
| Rear camera not displaying. | Camera power issue, video cable disconnected, reverse trigger wire not connected. | Check camera power and video cable connections. Ensure the reverse trigger wire is correctly connected to the vehicle's reverse light signal. |
| Steering wheel controls not working. | CANBUS not connected, incorrect SWC settings. | Verify CANBUS connection. Reconfigure steering wheel controls in the unit's settings. |
8. Specifications
Key technical specifications of the Eaglerich 9-inch Touchscreen Car Radio.
- Operating System: Android 9.1
- Processor: Quad Core 1.2GHz
- RAM: 1GB DDR3
- Internal Storage: 16GB Flash Memory
- Screen Size: 9 Inches
- Display Resolution: 1024 x 600 pixels
- Touch Screen Type: Capacitive
- Bluetooth: Version 4.0 (with A2DP / Handsfree / Phone Book support)
- Wi-Fi: Built-in
- GPS: Built-in receiver, compatible with Waze / Navfree / Google Map
- Radio: AM/FM with predefined auto/scan memory store
- USB Input: 2 x Rear USB ports
- Output Power: 4 x 45W
- RCA Outputs: 2 Channels
- RCA Inputs: 2 Channels (Rear Audio Input), 2 Channels (Rear Video Input)
- Compatibility: VW Passat MK5, Golf MK6, Jetta T5, EOS, Touran, POLO, Seat Sharan (with CANBUS support)
Dimensions

Figure 8.1: Product Dimensions
9. Warranty and Support
Eaglerich products are manufactured to high-quality standards. This product comes with a standard manufacturer's warranty against defects in materials and workmanship.
- Warranty Period: Please refer to your purchase documentation or contact your retailer for specific warranty duration.
- Warranty Claims: In case of a defect, please contact the seller or Eaglerich customer support with your proof of purchase.
- Exclusions: The warranty does not cover damage caused by improper installation, misuse, accidents, unauthorized repairs, or normal wear and tear.
Customer Support
For technical assistance, troubleshooting, or warranty inquiries, please contact your point of purchase or visit the official Eaglerich website for support contact information.