miracle digital 7 inch IPS Digital Photo Frame
Miracle Digital 7 inch IPS Digital Photo Frame User Manual
Model: 7 inch IPS Digital Photo Frame
Introduction
This manual provides comprehensive instructions for the setup, operation, and maintenance of your Miracle Digital 7 inch IPS Digital Photo Frame. Please read this manual thoroughly before using the device to ensure proper function and longevity.
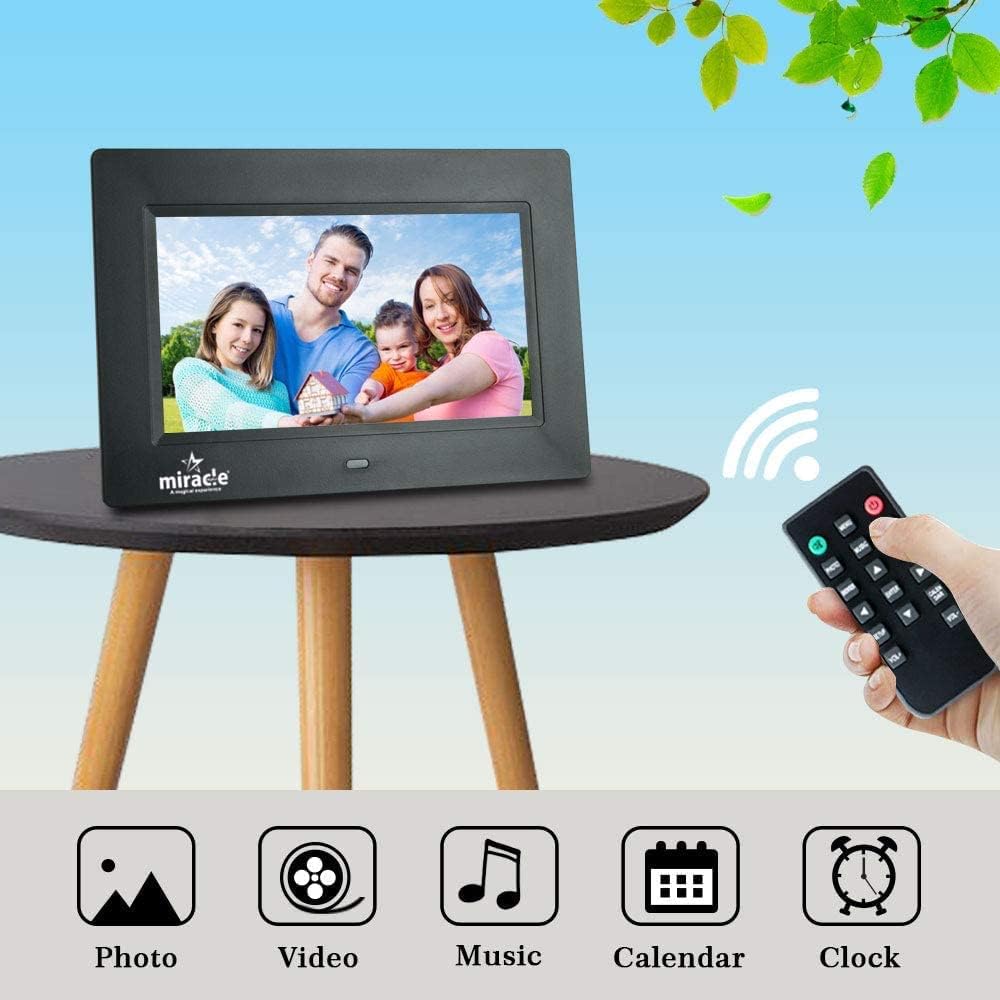
The Miracle Digital Photo Frame is designed to display your cherished photos, videos, and play music with a high-definition IPS screen. It supports various media formats and offers convenient features for managing your digital memories.
Safety Information
- Do not expose the device to rain, moisture, or extreme temperatures.
- Avoid placing the device near heat sources or in direct sunlight.
- Use only the provided power adapter.
- Keep the device away from strong magnetic fields.
- Do not attempt to disassemble or repair the device yourself. Refer all servicing to qualified personnel.
- Ensure proper ventilation around the device during operation.
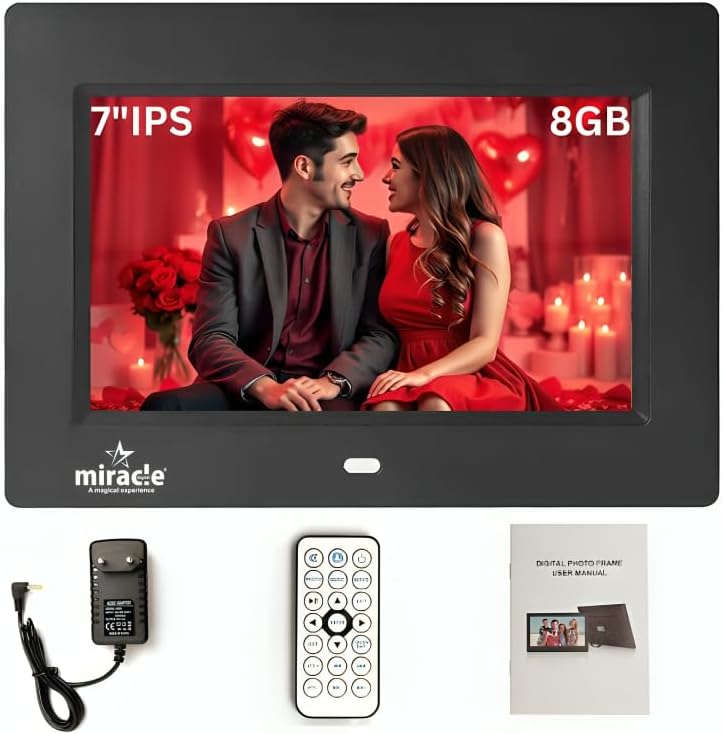
Package Contents
Please check the package for the following items:
- Miracle Digital 7 inch IPS Digital Photo Frame
- Power Adapter
- Remote Control
- User Manual (this document)

Product Overview
Familiarize yourself with the components and controls of your digital photo frame.

Key Components:
- Display Screen: 7-inch IPS panel for high-definition media display.
- Control Buttons: Located on the rear for navigation and settings.
- Memory Card Slot: Supports SD cards up to 32GB.
- USB Port: For connecting USB flash drives.
- Mini USB Port: For connecting to a computer (if supported for file transfer).
- Power Input: For connecting the power adapter.
- Built-in Speakers: For audio playback.
- Stand: Detachable stand for tabletop placement.
- Wall Mount Holes: For optional wall mounting.
Setup
1. Installing the Stand
The photo frame can be placed on a flat surface using the included stand or mounted on a wall. To install the stand:
- Locate the stand attachment point on the rear of the frame.
- Insert the stand firmly into the designated slot until it clicks into place.
- Adjust the stand to achieve the desired viewing angle.
2. Power Connection
- Connect the power adapter to the DC IN port on the back of the photo frame.
- Plug the power adapter into a standard electrical outlet.
- The frame will automatically power on or enter standby mode.
3. Initial Setup
Upon first power-on, you may be prompted to set basic preferences:
- Language: Select your preferred language using the navigation buttons on the frame or remote, then confirm.
- Time and Date: Set the current time and date.
Operating Instructions
1. Inserting Storage Devices
The frame supports SD cards (up to 32GB) and USB flash drives.
- SD Card: Insert the SD card into the designated slot on the side of the frame with the metal contacts facing down until it clicks.
- USB Drive: Plug your USB flash drive into the USB port on the side of the frame.
The frame will automatically detect the inserted device and may prompt you to view its contents.
2. Navigating the Menu
Use the control buttons on the back of the frame or the remote control to navigate the menu.
- Up/Down/Left/Right: Navigate through menu options.
- OK/Enter: Confirm selection.
- Menu: Access the main menu or return to the previous screen.
- Power: Turn the frame on/off or enter standby.

3. Playing Photos
From the main menu, select "Photo" to view images. The frame supports JPEG/JPG and BMP formats.
- The frame will automatically start a slideshow of photos from the selected storage device.
- Use the remote or buttons to pause, skip, or adjust slideshow settings.
- The IPS screen provides a 180° wide viewing angle for clear visibility from various positions.

4. Playing Videos
Select "Video" from the main menu. The frame supports 3gp, avi, mp4, and other formats, including 720p and 1080p video files.
- Navigate to your desired video file and press OK/Enter to play.
- Use the remote for playback controls (play, pause, fast forward, rewind).
5. Playing Music
Select "Music" from the main menu. Supported audio formats include MP3, WMA, AC3, AAC.
- Navigate to your desired audio file and press OK/Enter to play.
- Music can be played as background audio during photo slideshows.
6. Internal Memory and File Management
The frame has 8GB of built-in memory and 2GB RAM. You can copy files to the internal memory from an SD card or USB drive using the "Auto Copy" smart gesture feature (refer to on-screen prompts or specific menu options for this function).
7. Settings
Access the "Settings" menu to customize various aspects of your photo frame:
- Display Settings: Adjust brightness, contrast, and aspect ratio.
- Slideshow Settings: Configure transition effects, display time per photo, and background music.
- Sound Settings: Adjust volume.
- Time & Date: Set or adjust the current time and date.
- Alarm/Calendar: Utilize the built-in alarm and calendar functions.
Maintenance
Cleaning the Frame
- Ensure the device is powered off and unplugged before cleaning.
- Use a soft, dry, lint-free cloth to gently wipe the screen and frame.
- For stubborn marks on the screen, lightly dampen the cloth with water or a screen-cleaning solution (do not spray directly onto the screen).
- Avoid using abrasive cleaners, solvents, or aerosol sprays.
Storage
When not in use for extended periods, store the photo frame in a cool, dry place, away from direct sunlight and extreme temperatures.
Troubleshooting
| Problem | Possible Cause | Solution |
|---|---|---|
| Frame does not power on. | Power adapter not connected or faulty. | Ensure the power adapter is securely connected to the frame and a working power outlet. Try a different outlet. |
| No image/video displayed. | No storage device inserted or files not supported. | Insert an SD card or USB drive with supported media files. Check file formats (JPEG/JPG, BMP for photos; 3gp, avi, mp4 for videos). |
| Images appear distorted or low quality. | Low resolution source files. | Ensure your photos have a resolution of at least 1280x720 pixels for optimal display on the 1024x600 screen. |
| No sound from videos/music. | Volume is too low or muted. Audio format not supported. | Increase the volume using the remote or frame buttons. Check if the audio file format (MP3, WMA, AC3, AAC) is supported. |
| Remote control not working. | Batteries are dead or incorrectly inserted. Obstruction between remote and frame. | Replace remote batteries. Ensure there is a clear line of sight to the frame's IR receiver. |
Specifications
| Model Number | 7 inch IPS Digital Photo Frame |
| Screen Size | 7 Inches |
| Display Type | IPS LED Panel |
| Resolution | 1024x600 (supports 720p and 1080p video playback) |
| Aspect Ratio | 16:9 |
| Internal Memory | 8GB |
| RAM | 2GB |
| Expandable Storage | SD Card (up to 32GB) |
| Connectivity | USB, Mini USB |
| Power Source | Corded Electric (DC5V - 2000mA) |
| Human Interface Input | Buttons, Remote Control |
| Supported Photo Formats | JPEG/JPG, BMP (Ideal resolution: 1280x720 pixels) |
| Supported Audio Formats | MP3, WMA, AC3, AAC |
| Supported Video Formats | 3gp, avi, mp4, etc. (All 720p and 1080p video files) |
| Product Dimensions | 10 x 10 x 2.5 cm |
| Weight | 500 g |
| Frame Material | Plastic |
| Color | Black |
Warranty and Support
Warranty Information
The Miracle Digital 7 inch IPS Digital Photo Frame comes with a 1-year complete Onsite Warranty provided directly by the manufacturer, Miracle Digital. This warranty covers manufacturing defects and ensures repair or replacement services.
Even after the one-year warranty period, technical support, repair services, and part replacement options are available across India. Please retain your proof of purchase for warranty claims.
Customer Support
For technical assistance, warranty claims, or any inquiries regarding your Miracle Digital Photo Frame, please contact Miracle Digital customer support. Refer to the contact information provided on the product packaging or the official Miracle Digital website.
Ask a question about this manual
Ask about setup, troubleshooting, compatibility, parts, safety, or missing instructions. Manuals+ will review the question and use this page’s manual context to help answer it.