Homsido LM-A02
Homsido Infrared Home Sauna Room User Manual
Model: LM-A02
1. Introduction
This user manual provides detailed instructions for the safe and effective operation, assembly, and maintenance of your Homsido Infrared Home Sauna Room. Please read this manual thoroughly before initial use and retain it for future reference.

Figure 1: Homsido Infrared Home Sauna Room (Model LM-A02) in use. This image shows the compact design and interior space of the sauna, featuring the wooden construction and infrared heating panels.
2. Safety Information
WARNING: Failure to follow these safety instructions may result in electric shock, fire, serious injury, or death.
- Electrical Safety: Ensure the sauna is connected to a properly grounded 110V/1200W power outlet. Do not use extension cords. Keep all electrical components dry.
- Health Precautions: Consult a physician before using the sauna if you have any medical conditions, are pregnant, or are taking medication. Discontinue use immediately if you feel dizzy, nauseous, or unwell.
- Temperature and Time: Do not exceed recommended sauna session times or temperatures. Start with shorter sessions at lower temperatures and gradually increase as tolerated.
- Children and Pets: Keep children and pets away from the sauna, especially during operation.
- Flammable Materials: Do not place flammable materials inside or near the sauna.
- Ventilation: Ensure adequate ventilation around the sauna.
3. Components List
Before assembly, verify that all components are present and undamaged. If any parts are missing or damaged, contact customer support immediately.
- Front Panel with Door and Glass
- Back Panel with Heating Elements
- Left Side Panel with Heating Elements
- Right Side Panel with Heating Elements
- Floor Panel with Foot Heating Elements
- Roof Panel with Control Unit and Lighting
- Bench Seat
- Control Panel (LCD)
- Power Cord
- Assembly Hardware (screws, latches)
- Towel Rack (optional accessory)
- Cup Holder (optional accessory)
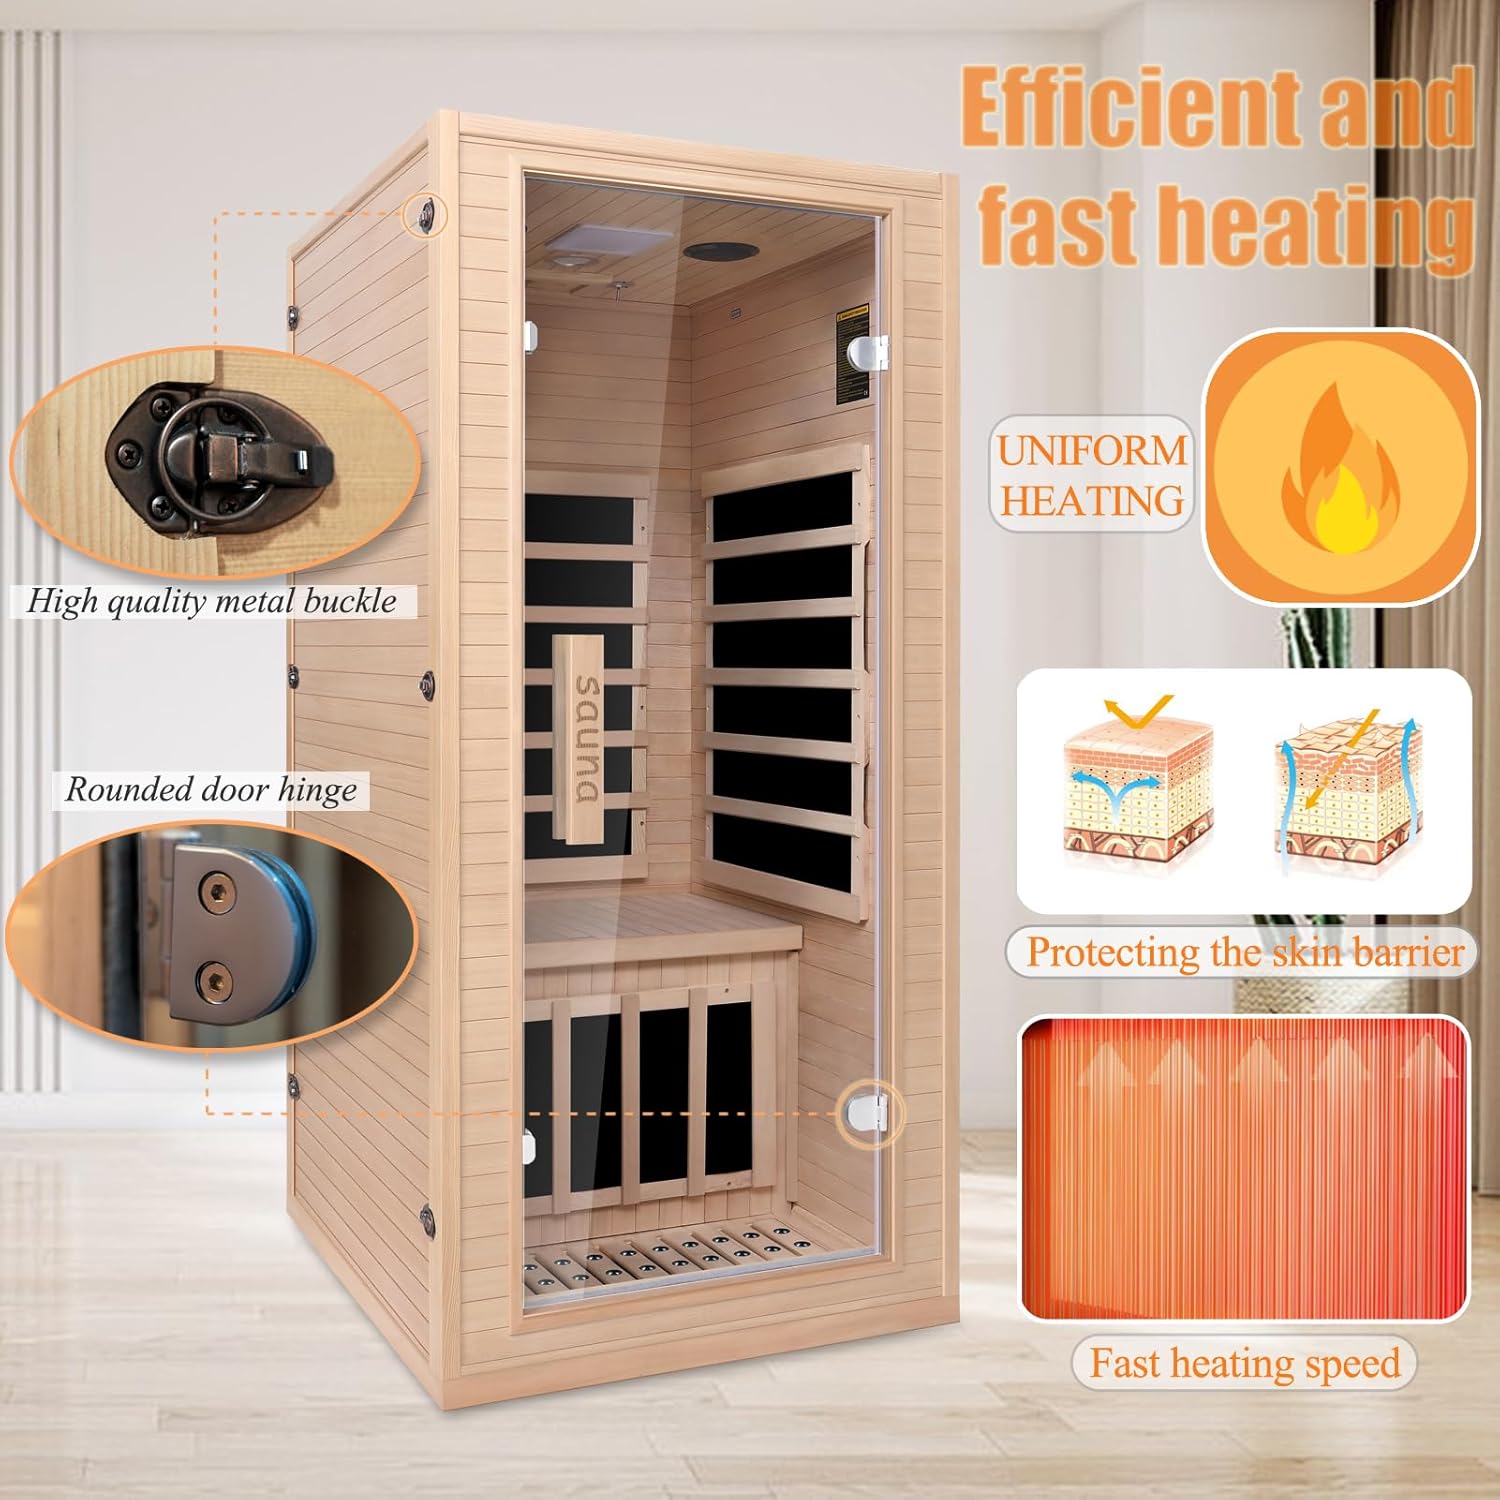
Figure 2: Key structural components and features, including the high-quality metal buckle and rounded door hinge, ensuring secure and durable assembly.
4. Assembly Instructions
The Homsido Infrared Home Sauna is designed for modular assembly with a tongue-and-groove system, allowing for quick and easy setup. Two people are recommended for assembly.
- Prepare the Area: Choose a flat, dry, and well-ventilated indoor location with access to a dedicated 110V power outlet. Ensure sufficient space around the sauna for assembly and ventilation.
- Unpack Components: Carefully unpack all components from the two shipping packages. Place them on a protective surface to prevent scratches.
- Assemble Base: Position the Floor Panel in the desired location.
- Attach Side Panels: Connect the Back Panel to the Floor Panel. Then, attach the Left and Right Side Panels to the Back Panel and Floor Panel using the tongue-and-groove system and secure with latches.
- Install Front Panel: Carefully attach the Front Panel (with the pre-installed door) to the side panels, ensuring all connections are secure.
- Install Bench Seat: Place the Bench Seat securely inside the sauna.
- Install Roof Panel: Carefully lower the Roof Panel onto the assembled walls, aligning it properly. Ensure all electrical connections for the control unit, lighting, and speakers are properly connected before securing the roof.
- Secure Connections: Fasten any remaining screws or latches as indicated in the included diagram.
- Install Accessories: Attach the towel rack and cup holder if desired.
Note: The components are shipped in two packages. Refer to the included assembly diagram for specific latch and screw locations.
5. Operating Instructions
Your Homsido Infrared Home Sauna features an intuitive LCD control panel for easy operation.

Figure 3: The LCD control panel, showing options for time, temperature, and media controls (Bluetooth, FM, MP3 via USB).
- Power On: Plug the sauna into a grounded power outlet. Press the power button on the LCD control panel to turn on the unit.
- Set Temperature: Use the temperature adjustment buttons (usually '+' and '-') to set your desired sauna temperature. The sauna features 1200W/110V heaters for efficient heating.
- Set Time: Use the time adjustment buttons to set your desired session duration (0-90 minutes).
- Pre-Warm Up: Allow approximately 10 minutes for the sauna to pre-warm to your set temperature. You can enter the sauna once it reaches a comfortable temperature.
- Audio Features:
- Bluetooth: Activate Bluetooth on your mobile device and pair with the sauna's Bluetooth speakers to stream audio.
- FM Radio: Use the FM button to access the built-in radio.
- MP3 Playback: Insert a USB drive with MP3 files into the USB input port for direct playback.
- Lighting: Use the light control button to adjust the vision protection LED reading light or activate the 7-color treatment lamp for ambiance.
- Negative Ion Oxygen Bar: The integrated negative ion oxygen bar will automatically operate to ensure oxygen content in the air during your session.
- Ending Session: The sauna will automatically shut off after the set time. You can also manually turn it off by pressing the power button.

Figure 4: Illustration of the 7-color treatment lamp and the integrated LED reading light, enhancing the user experience.

Figure 5: Visual representation of the Far Infrared Technology, showing how the 5 heating panels and bottom foot care elements provide direct heat absorption for therapeutic benefits.
6. Maintenance
Regular maintenance will ensure the longevity and optimal performance of your sauna.
- Cleaning:
- Wipe down the interior wood surfaces with a clean, damp cloth after each use to remove sweat and moisture.
- For deeper cleaning, use a mild, non-abrasive wood cleaner. Avoid harsh chemicals or abrasive pads.
- Clean the glass door with a standard glass cleaner.
- Wood Care: The sauna is made of natural hemlock wood. Avoid excessive moisture or direct sunlight to prevent warping or cracking. Do not paint or stain the interior wood.
- Electrical Components: Ensure all electrical connections remain dry and free of dust. Do not attempt to service electrical components yourself.
- Ventilation: Keep the sauna's ventilation openings clear of obstructions.
7. Troubleshooting
Refer to this section for common issues and their solutions. If the problem persists, contact customer support.
| Problem | Possible Cause | Solution |
|---|---|---|
| Sauna does not power on. | Power cord not plugged in; circuit breaker tripped; faulty power outlet. | Ensure power cord is securely plugged in. Check household circuit breaker. Test outlet with another device. |
| Sauna not heating. | Temperature not set; heating elements malfunction; loose connection. | Verify temperature setting on control panel. Ensure all panels are securely connected. Contact support if heating elements are suspected faulty. |
| Control panel unresponsive. | Loose connection to control panel; power issue. | Check connections to the control panel (refer to assembly diagram). Power cycle the sauna by unplugging and re-plugging. |
| Bluetooth not connecting. | Device not in pairing mode; interference; incorrect pairing procedure. | Ensure Bluetooth is enabled on your device and the sauna. Move device closer to the sauna. Refer to your device's Bluetooth pairing instructions. |
8. Specifications
| Feature | Detail |
|---|---|
| Product Dimensions | 34 x 32 x 67 inches (L x W x H) |
| Item Weight | 155.7 pounds |
| Model Number | LM-A02 |
| Power Requirements | 1200W / 110V |
| Heating Technology | Far Infrared (5 heating panels) |
| Material | Canadian Hemlock Wood, Tempered Glass |
| Control Panel | LCD Digital Control Panel |
| Audio Features | Bluetooth Speakers, FM Radio, USB Input (MP3) |
| Lighting | Vision Protection LED Reading Light, 7-Color Treatment Lamp |
| Additional Features | Negative Ion Oxygen Bar, 10-minute Pre-Warm up, Time and Temp Pre-Set |

Figure 6: Detailed product size information, illustrating the dimensions of the sauna.
9. Warranty and Customer Support
Homsido is committed to providing high-quality products and excellent customer service.
- Warranty: This product comes with a 1-year after-sales service, including free replacement of accessories for one year from the date of purchase.
- 30-Day Free Trial: Enjoy a 30-day free trial period to ensure your satisfaction.
- Customer Support: Should you have any questions, concerns, or require assistance with your sauna, please do not hesitate to contact our dedicated customer service team.

Figure 7: Overview of Homsido's after-sales service, highlighting the 30-day free trial and 1-year free accessory replacement policy.
10. Additional Information
The thermal energy released by the sauna can help relax the human body, delay tension, reduce stress, accelerate blood circulation, and eliminate body impurities. It is designed to provide a soothing and beneficial experience.

Figure 8: Illustrates various conditions that may benefit from sauna use, such as body soreness, insomnia, and stress.
No official seller videos were found in the provided data to embed in this manual.
Related Documents - LM-A02
 |
FINSAUNA Fiera IR200 Infrared Sauna User Manual and Installation Guide Comprehensive user manual and installation guide for the FINSAUNA Fiera IR200 Infrared Sauna, covering assembly, electrical requirements, operation, maintenance, and troubleshooting. |
 |
LG LM-2430H2L Air Conditioner Owner's Manual & Service Guide This document provides both an owner's manual and a service manual for LG Multi Type Room Air Conditioners, focusing on the LM-2430H2L model and other related models (LM-1830C2L/M/N, LM-1830H2L/M/N, LM-2430C2L/M/N, LM-2430H2L/M, L2-C243AL1). It details functions, specifications, installation, operation, troubleshooting, and parts. |
 |
LightMap SEA Station User Manual and Setup Guide Comprehensive user manual for the LightMap SEA Station, covering setup, connection, features, and maintenance of this marine weather display. Includes detailed explanations of data interpretation for wind, waves, tides, and more. |
 |
Zumtobel LM-xPx Replacement Kit Installation Guide Comprehensive installation guide for the Zumtobel LM-xPx Replacement Kit, detailing technical specifications, safety precautions, and step-by-step replacement procedures for lighting control touch panels. |
 |
LARMACE Bed Assembly Instructions for Models LM-02-E0031/0032/0151/0152/0161/0162/0071/0072/0081/0082 Detailed assembly instructions for LARMACE beds, including model numbers LM-02-E0031 through LM-02-0082. This guide provides step-by-step instructions, hardware lists, and important notices for safe and correct assembly. |
 |
Cloud LM-2 Series Remote Mic/Line Mixer/Control Modules Installation Guide Comprehensive installation guide for the Cloud LM-2 Series remote mic/line mixer and control modules, covering setup, connections, configuration, and priority operation for Z4MK3, Z8MK3, Z4MK4, Z8MK4, 46-120, and 46-120MEDIA systems. |
Ask a question about this manual
Ask about setup, troubleshooting, compatibility, parts, safety, or missing instructions. Manuals+ will review the question and use this page’s manual context to help answer it.