MOUNTUP MU2005
MOUNTUP MU2005 Gas Spring Single Monitor Wall Mount
Instruction Manual
1. Introduction
This manual provides instructions for the installation, operation, and maintenance of your MOUNTUP MU2005 Gas Spring Single Monitor Wall Mount. This mount is designed to securely hold computer screens and televisions, offering adjustable positioning for an ergonomic viewing experience. Please read these instructions carefully before installation to ensure safe and correct usage.
2. Safety Information
WARNING: Improper installation may result in serious personal injury and property damage. If you do not understand these instructions or have doubts about the safety of the installation, please contact a qualified installer.
- Do not install on drywall alone. This mount is designed for installation on wood studs, solid concrete walls, or brick walls.
- Ensure the mounting surface can safely support the combined weight of the mount and the display.
- Do not exceed the maximum weight capacity of 26.5 lbs (12 kg).
- Use only the provided hardware. If any parts are missing or defective, contact MOUNTUP customer service.
- Keep children and pets away during installation.
- Periodically check that the mount is secure and all fasteners are tight.
3. Package Contents
Verify that all components are present and undamaged before proceeding with installation.
- Monitor Wall Mount Arm (MU2005)
- VESA Plate
- VESA Extension Kit (for larger VESA patterns)
- Mounting Hardware (screws, anchors, washers)
- Hex Keys for Adjustment
- Instruction Manual

Image: Main components of the MOUNTUP MU2005 monitor wall mount, including the gas spring arm, VESA mounting plate, and VESA extension brackets.
4. Specifications
| Feature | Specification |
|---|---|
| Model Number | MU2005 |
| Screen Size Compatibility | 22-35 inches |
| Weight Capacity | 4.4 - 26.5 lbs (2 - 12 kg) |
| VESA Compatibility | 75x75mm, 100x100mm, 100x200mm, 200x100mm, 200x200mm |
| Mounting Type | Wall Mount (Wood Stud, Concrete Wall, Brick Wall) |
| Movement Type | Tilt, Rotate, Swivel, Height Adjust, Full Motion |
| Tilt Angle | Up 90° / Down 45° |
| Swivel Angle | 180° (at wall plate), 360° (at arm joint), 180° (at VESA plate) |
| Rotation | 360° (Portrait/Landscape) |
| Height Adjustment | Up to 11 inches |
| Minimum Distance to Wall | 3.9 inches (9.9 cm) |
| Maximum Extension from Wall | 20.5 inches |
| Material | Aluminum, Metal |

Image: Detailed diagram illustrating the mount's dimensions, VESA compatibility (75x75, 100x100, 100x200, 200x100, 200x200), weight capacity (4.4-26.5 lbs), and supported screen sizes (22-35 inches).
5. Setup and Installation
Before beginning, ensure you have all necessary tools and that your wall type is compatible. This mount is suitable for wood studs, concrete walls, and brick walls. It is NOT for drywall alone.
5.1 Compatibility Check
Confirm your monitor meets the following criteria:
- Monitor Size: 22-35 inches
- Monitor Weight: 4.4-26.5 lbs
- VESA Pattern: 75x75mm, 100x100mm, 100x200mm, 200x100mm, 200x200mm
- Wall Type: Wood Stud, Brick Wall, or Concrete Wall

Image: A visual guide to checking monitor compatibility with the mount, covering screen size, weight, VESA pattern, and suitable wall types.
5.2 Installation Steps
- Install the Arm to the Wall: Securely attach the wall plate of the monitor arm to a wood stud, concrete wall, or brick wall using the appropriate hardware. Ensure it is level and firmly anchored.
- Attach VESA Plate to Monitor Back: Fasten the VESA plate to the back of your monitor using the screws that fit your monitor's VESA holes. Use the VESA extension kit if your monitor requires a larger VESA pattern.
- Attach Monitor onto the Arm: Carefully slide the monitor (with the attached VESA plate) onto the arm's mounting head. Ensure it clicks into place securely.
- Adjust Gas Spring to Proper Tension: This is crucial for the arm to hold your monitor at the desired height. Refer to the 'Operating' section for detailed adjustment instructions.

Image: Illustration of mounting the arm's wall plate to the wall.

Image: Illustration of attaching the VESA plate to the monitor's rear.
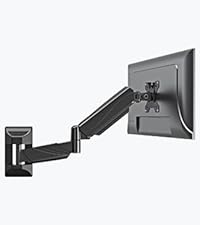
Image: Illustration of sliding the monitor onto the arm's VESA head.

Image: Illustration of adjusting the gas spring tension on the arm.
5.3 Cable Management
Route your cables through the integrated cable management channels on the arm to maintain a clean and organized workspace.
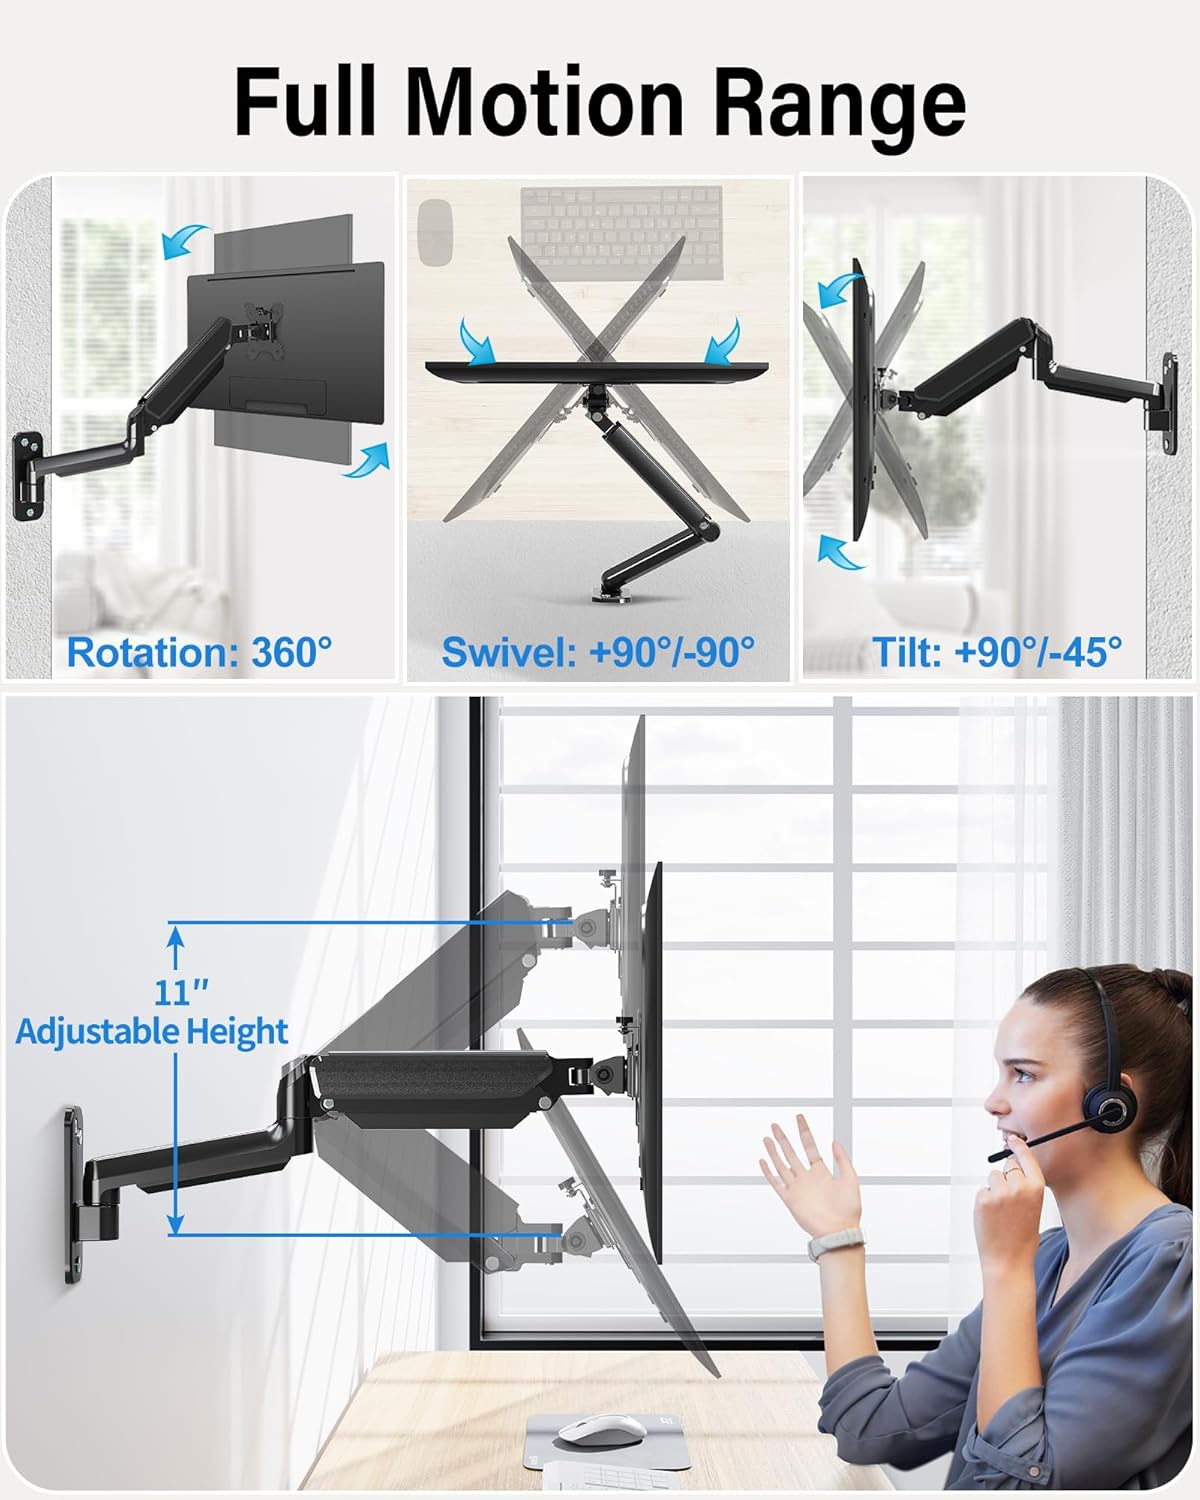
Image: The monitor arm demonstrating its full range of motion, including 360° rotation, 90°/-90° swivel, 90°/-45° tilt, and 11 inches of adjustable height.
6. Operating the Monitor Arm
The MOUNTUP MU2005 offers extensive adjustability to achieve optimal viewing angles and ergonomic positioning.
6.1 Gas Spring Adjustment (Monitor Height)
The gas spring allows for effortless height adjustment. If your monitor does not stay at the desired height, adjust the tension:
- Monitor raises up (too light): Turn the screw clockwise ("-" direction) to reduce tension.
- Monitor drops down (too heavy): Turn the screw counter-clockwise ("+" direction) to increase tension.
Note: Hold the arm in a horizontal position during adjustment. Refer to the table below for approximate turns based on monitor weight.
| Monitor Weight | Circles (AT LEAST) |
|---|---|
| 4.4 lbs (2 kg) | Min |
| 6.6 lbs (3 kg) | 2 |
| 11 lbs (5 kg) | 6 |
| 17.6 lbs (8 kg) | 10 |
| 19.8 lbs (9 kg) | 11 |
| 22 lbs (10 kg) | 12 |
| 26.4 lbs (12 kg) | Max |

Image: Comprehensive guide for adjusting gas spring tension and tilt angle, including a table correlating monitor weight with the number of turns for adjustment.
6.2 Tilt Angle Adjustment
If your monitor faces down or up unintentionally, adjust the tilt tension:
- Loosen the tilting bolt (Turn to "-" direction).
- Adjust the monitor to your desired angle.
- Retighten the tilting bolt (Turn to "+" direction).

Image: Visual instructions for adjusting the gas spring tension and the monitor's tilt angle using a hex key.
6.3 Swivel and Rotation
- The arm can swivel 180° at the wall plate and 360° at the arm joint.
- The VESA plate allows for 180° swivel and 360° rotation, enabling easy switching between portrait and landscape orientations.
Image: The monitor arm demonstrating its full range of motion, including 360° rotation, 90°/-90° swivel, 90°/-45° tilt, and 11 inches of adjustable height.
Video: This video demonstrates the various movements and space-saving capabilities of the MOUNTUP Ultrawide Single Monitor Wall Mount, showcasing its full motion range and how it can optimize your workspace.
7. Maintenance
Regular maintenance ensures the longevity and safe operation of your monitor mount.
- Cleaning: Wipe the mount with a soft, damp cloth. Avoid abrasive cleaners.
- Check Connections: Periodically inspect all screws and bolts to ensure they are tight. Retighten if necessary.
- Gas Spring Function: If the gas spring's performance changes over time, re-adjust the tension as described in the 'Operating' section.
8. Troubleshooting
If you encounter issues with your MOUNTUP monitor arm, refer to the following common problems and solutions:
8.1 Arm Does Not Stay at Desired Height
- Problem: Monitor arm falls down.
- Solution: The gas spring tension is too low for the monitor's weight. Increase tension by turning the adjustment screw counter-clockwise ("+" direction).
- Problem: Monitor arm rises up.
- Solution: The gas spring tension is too high for the monitor's weight. Decrease tension by turning the adjustment screw clockwise ("-" direction).
Refer to the 'Gas Spring Adjustment' section for detailed instructions and the weight-to-turns table.
8.2 Monitor Tilts Down Unintentionally
- Problem: The monitor head cannot maintain its tilt angle.
- Solution: The tilting bolt is loose. Loosen the tilting bolt, adjust the monitor to the desired angle, and then retighten the tilting bolt firmly.
Video: This video provides troubleshooting steps for common issues with MOUNTUP monitor wall mounts, such as adjusting the gas spring tension if the arm falls or rises, and tightening the tilt mechanism if the monitor sags.
9. Warranty and Support
MOUNTUP provides a 3-year support for this product. If you have any questions regarding pre-purchase compatibility, installation, or require assistance with any issues, please do not hesitate to contact MOUNTUP customer service. Our team is available to provide friendly and helpful support.
Related Documents - MU2005
 |
MOUNTUP Dual Monitor Desk Mount Instruction Manual (MS-02N-US3.0) Installation manual for the MOUNTUP Dual Monitor Desk Mount (Model MS-02N-US3.0). Includes assembly steps, VESA compatibility, and safety instructions for 13-32 inch screens. |
 |
MOUNTUP YZ2231 Monitor Wall Mount Installation Guide Detailed installation instructions for the MOUNTUP YZ2231 single monitor wall mount, featuring a gas spring arm, VESA compatibility, and secure wall mounting for wood studs or concrete walls. Includes product dimensions, safety precautions, parts list, and step-by-step assembly. |
 |
MOUNTUP Monitor Wall Mount Instruction Manual - Installation Guide Detailed instruction manual for the MOUNTUP Monitor Wall Mount (Model MU2005, 80002-MA02-112WA-US1.0). Learn how to install and use your monitor arm with VESA compatibility, weight capacity, and adjustment features. |
 |
MOUNTUP Dual Monitor Desk Mount Instruction Manual Comprehensive instruction manual for the MOUNTUP Dual Monitor Desk Mount, detailing assembly, installation options (clamp and grommet), monitor attachment, adjustments, and maintenance for VESA-compatible monitors. |
 |
Premium Single Monitor Stand Instruction Manual - MOUNTUP Y100-US2.0 Detailed instruction manual for the MOUNTUP Premium Single Monitor Stand (Model Y100-US2.0), covering safety, package contents, assembly steps, adjustments, and dimensions. Supports VESA 75x75mm and 100x100mm, with a weight capacity of 4.4-33 lbs. |
 |
MOUNTUP MU2003 Single Monitor Wall Mount Installation Guide Step-by-step installation instructions for the MOUNTUP MU2003 single monitor wall mount, featuring a gas spring arm. Includes safety warnings, parts list, tools, and adjustment guides. |
Ask a question about this manual
Ask about setup, troubleshooting, compatibility, parts, safety, or missing instructions. Manuals+ will review the question and use this page’s manual context to help answer it.