1. Introduction
This manual provides instructions for the proper installation, maintenance, and safe operation of the Technology Parts Store Auger Drive Belt, part number 754-0430. This belt is designed as a replacement for MTD Snow Thrower Model E660G and other compatible models using OEM part numbers 754-0430, 954-0430, 754-0430B, and 954-0430C.
The auger drive belt is a critical component that transmits power from the engine to the auger assembly, causing the auger to rotate and clear snow. Regular inspection and timely replacement are essential for optimal snow thrower performance.
2. Safety Information
WARNING: Failure to follow these safety instructions may result in serious injury or property damage.
- Always wear appropriate personal protective equipment, such as work gloves and eye protection, when handling or installing this part.
- Ensure the snow thrower is turned off, the spark plug wire disconnected, and all moving parts have stopped completely before beginning any maintenance or installation.
- Allow the engine and exhaust system to cool down before working near them to prevent burns.
- Refer to your snow thrower's original owner's manual for specific safety procedures and detailed instructions related to your equipment model.
- Keep children and bystanders away from the work area.
3. Product Overview
The Technology Parts Store Auger Drive Belt is a durable replacement part designed to meet or exceed the specifications of the original equipment manufacturer (OEM) belt. It is constructed from high-quality rubber with internal cords for enhanced strength and flexibility, ensuring reliable power transmission even in cold weather conditions.
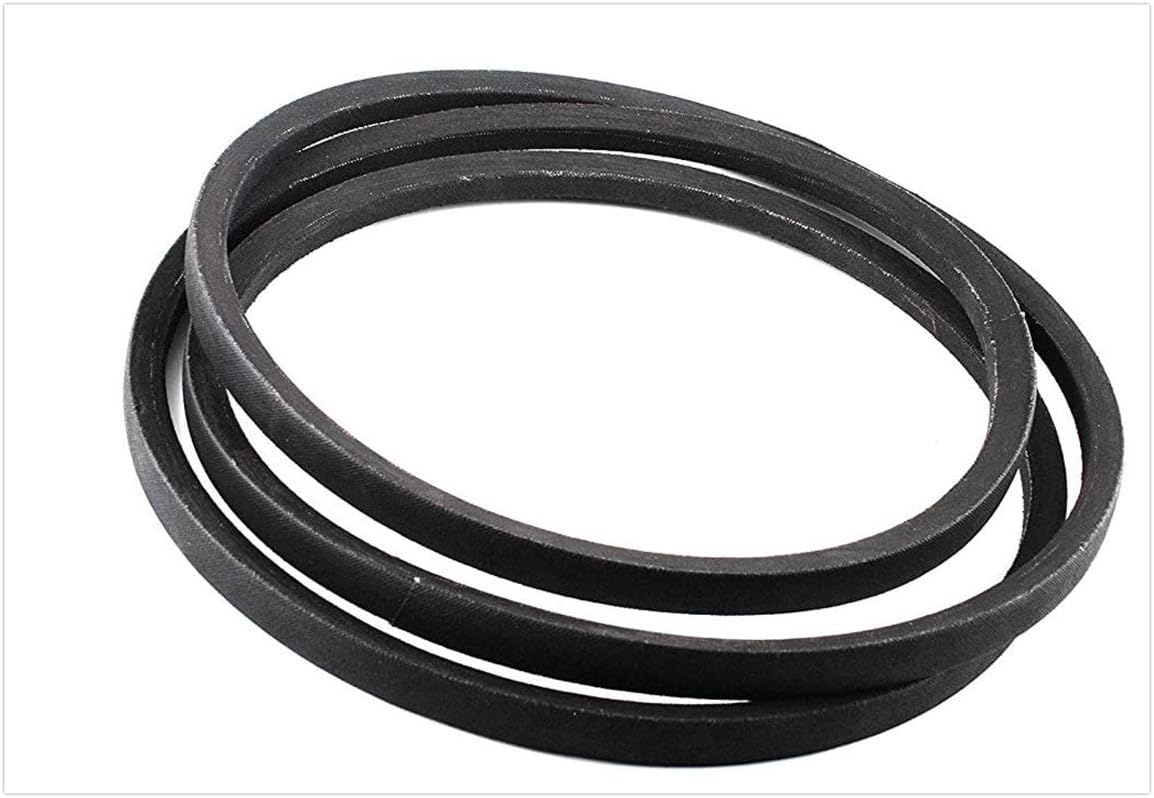
Image 3.1: The Technology Parts Store Auger Drive Belt, a replacement component for snow throwers.

Image 3.2: A close-up view of the belt's textured surface, designed for optimal grip and durability.

Image 3.3: Diagram illustrating the internal construction of a drive belt, showing the rubber body and reinforcing cords.
4. Setup and Installation
Replacing the auger drive belt requires careful attention to detail. Always refer to your snow thrower's specific service manual for detailed diagrams and instructions, as procedures may vary slightly between models.
Tools Required:
- Wrenches (various sizes)
- Screwdrivers (Phillips and flathead)
- Work gloves
- Eye protection
- Possibly a pry bar or belt tension tool (consult your snow thrower's manual)
Installation Steps:
- Preparation: Ensure the snow thrower is turned off, the spark plug wire is disconnected, and the engine is cool. Place the snow thrower on a stable, level surface.
- Access the Belt: Locate and remove any covers, shields, or panels that obstruct access to the auger drive belt and pulleys. This typically involves removing bolts, screws, or clips. Keep track of all fasteners for reassembly.
- Relieve Tension: Identify the belt tensioning mechanism, which often involves an idler pulley or a spring-loaded arm. Relieve tension on the old belt to allow for its removal. You may need to hold the tensioner in an open position.
- Remove Old Belt: Carefully remove the old belt from the engine pulley and the auger pulley. Pay close attention to the exact routing path of the belt around all pulleys and guides. It is helpful to take a photo before removal.
- Install New Belt: Route the new Technology Parts Store auger drive belt around the pulleys, following the exact path observed during removal. Ensure the belt is seated correctly within all pulley grooves.
- Apply Tension: Re-engage the belt tensioning mechanism. Verify that the belt has the correct tension according to your snow thrower's manual. The belt should be snug but not overly tight.
- Reassemble: Reinstall all covers, shields, and panels removed in step 2. Ensure all fasteners are securely tightened.
- Final Check: Reconnect the spark plug wire. Briefly run the snow thrower (without snow) to ensure the belt operates smoothly and the auger engages correctly. Listen for any unusual noises or vibrations. If issues arise, turn off the snow thrower immediately and re-inspect the installation.
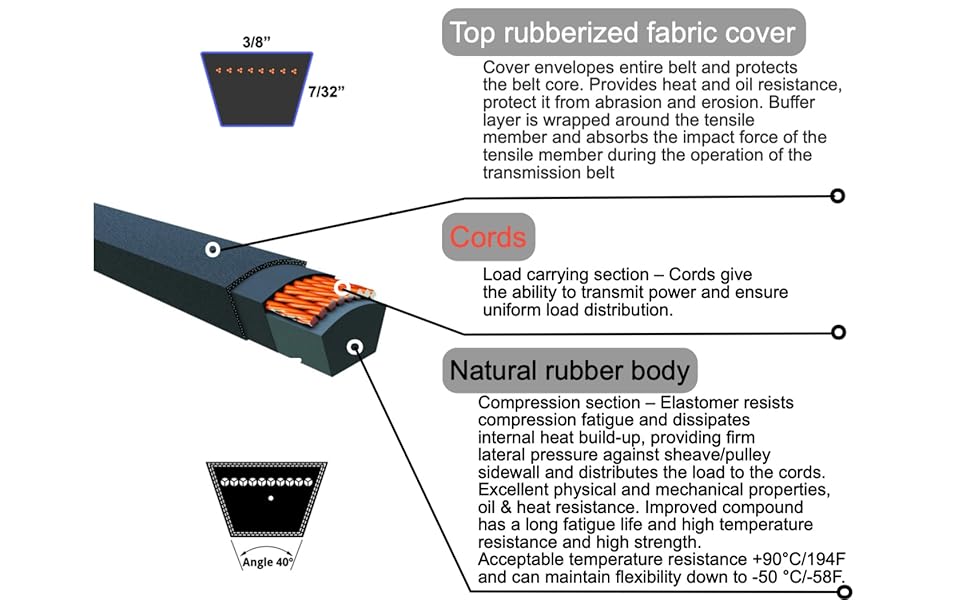
Image 4.1: An exploded diagram showing the various components of a snow thrower's drive system, including pulleys and belts. Refer to your specific model's manual for exact part identification.

Image 4.2: Diagram illustrating typical belt dimensions and cross-section profile, important for proper fit.
5. Operating Instructions
This auger drive belt functions as part of your snow thrower's drive system. For proper operation and to maximize the life of the belt, always ensure the snow thrower is used according to its manufacturer's instructions.
- Avoid forcing the snow thrower through excessively deep or heavy snow, as this can put undue strain on the belt and other components.
- Clear any debris or foreign objects from the auger housing before operation to prevent damage to the belt and auger.
- Engage and disengage the auger clutch smoothly to prevent sudden shocks to the belt.
6. Maintenance
Regular maintenance helps extend the life of your auger drive belt and ensures consistent snow thrower performance.
- Regular Inspection: Periodically inspect the auger drive belt for signs of wear, cracking, fraying, glazing (a shiny, hardened surface), or stretching. Replace the belt if any damage or excessive wear is observed.
- Proper Storage: When the snow thrower is not in use for extended periods, store it in a dry, cool environment, away from direct sunlight and extreme temperatures. Ensure the belt is not under excessive tension during storage.
- Cleanliness: Keep the belt and pulleys free from dirt, ice, snow, and debris, which can cause premature wear and slippage.
- Belt Tension: Periodically check and adjust belt tension according to your snow thrower's manual. Incorrect tension can lead to slippage or excessive wear.
7. Troubleshooting
If you experience issues with your snow thrower's auger system, the belt may be a contributing factor. Here are some common troubleshooting steps:
- Auger Not Engaging or Spinning Slowly:
- Check if the auger drive belt is broken, severely worn, or has slipped off the pulleys.
- Verify that the belt tension is correct. A loose belt will slip.
- Inspect pulleys for damage, excessive wear, or obstruction.
- Ensure the auger clutch mechanism is functioning properly.
- Squealing Noise During Operation:
- Often indicates a slipping belt. Check for proper tension or signs of wear/glazing on the belt.
- Ensure pulleys are clean and free of debris or rust.
- Excessive Vibration:
- Could indicate a damaged, improperly installed, or unbalanced belt. Inspect the belt and pulleys for any irregularities.
8. Specifications
| Specification | Detail |
|---|---|
| Part Number | 754-0430 |
| Replaces OEM Part Numbers | 954-0430, 754-0430B, 954-0430C |
| Belt Size | 3/8 inch x 35 inches (3L350) |
| Material | Rubber |
| Compatibility | MTD Snow Thrower Model E660G and other compatible models |
9. Warranty Information
For specific warranty information regarding this replacement auger drive belt, please contact the Technology Parts Store directly or refer to your purchase documentation. Warranty terms and conditions are provided by the seller at the time of purchase.
10. Support
If you require further assistance with installation, troubleshooting, or have questions about this product, please contact Technology Parts Store customer support. For detailed service procedures specific to your snow thrower model, consult your snow thrower's original manufacturer's service manual.

Image 10.1: Icon representing customer support services.