AZ4U MER8674AW0, MER8700DS1, MER8674AS0, MER8775AB0, MER8680BS0, MER8775AS0, MER8674AB0, MER8880AS0, MER8680BW0, MER8700DE1,
AZ4U Range Oven Bake Element Replacement Instruction Manual
For Maytag, Whirlpool, KitchenAid, and Jenn-Air Ovens
Introduction
This manual provides comprehensive instructions for the installation, operation, maintenance, and troubleshooting of your AZ4U Range Oven Bake Element. This replacement part is designed to restore proper baking function and even heat distribution to your oven. Please read these instructions carefully before proceeding with installation or use.
Compatibility
The AZ4U Range Oven Bake Element is an aftermarket replacement part compatible with a wide range of models from various brands. Please verify your oven's model number against the list below to ensure proper fit.
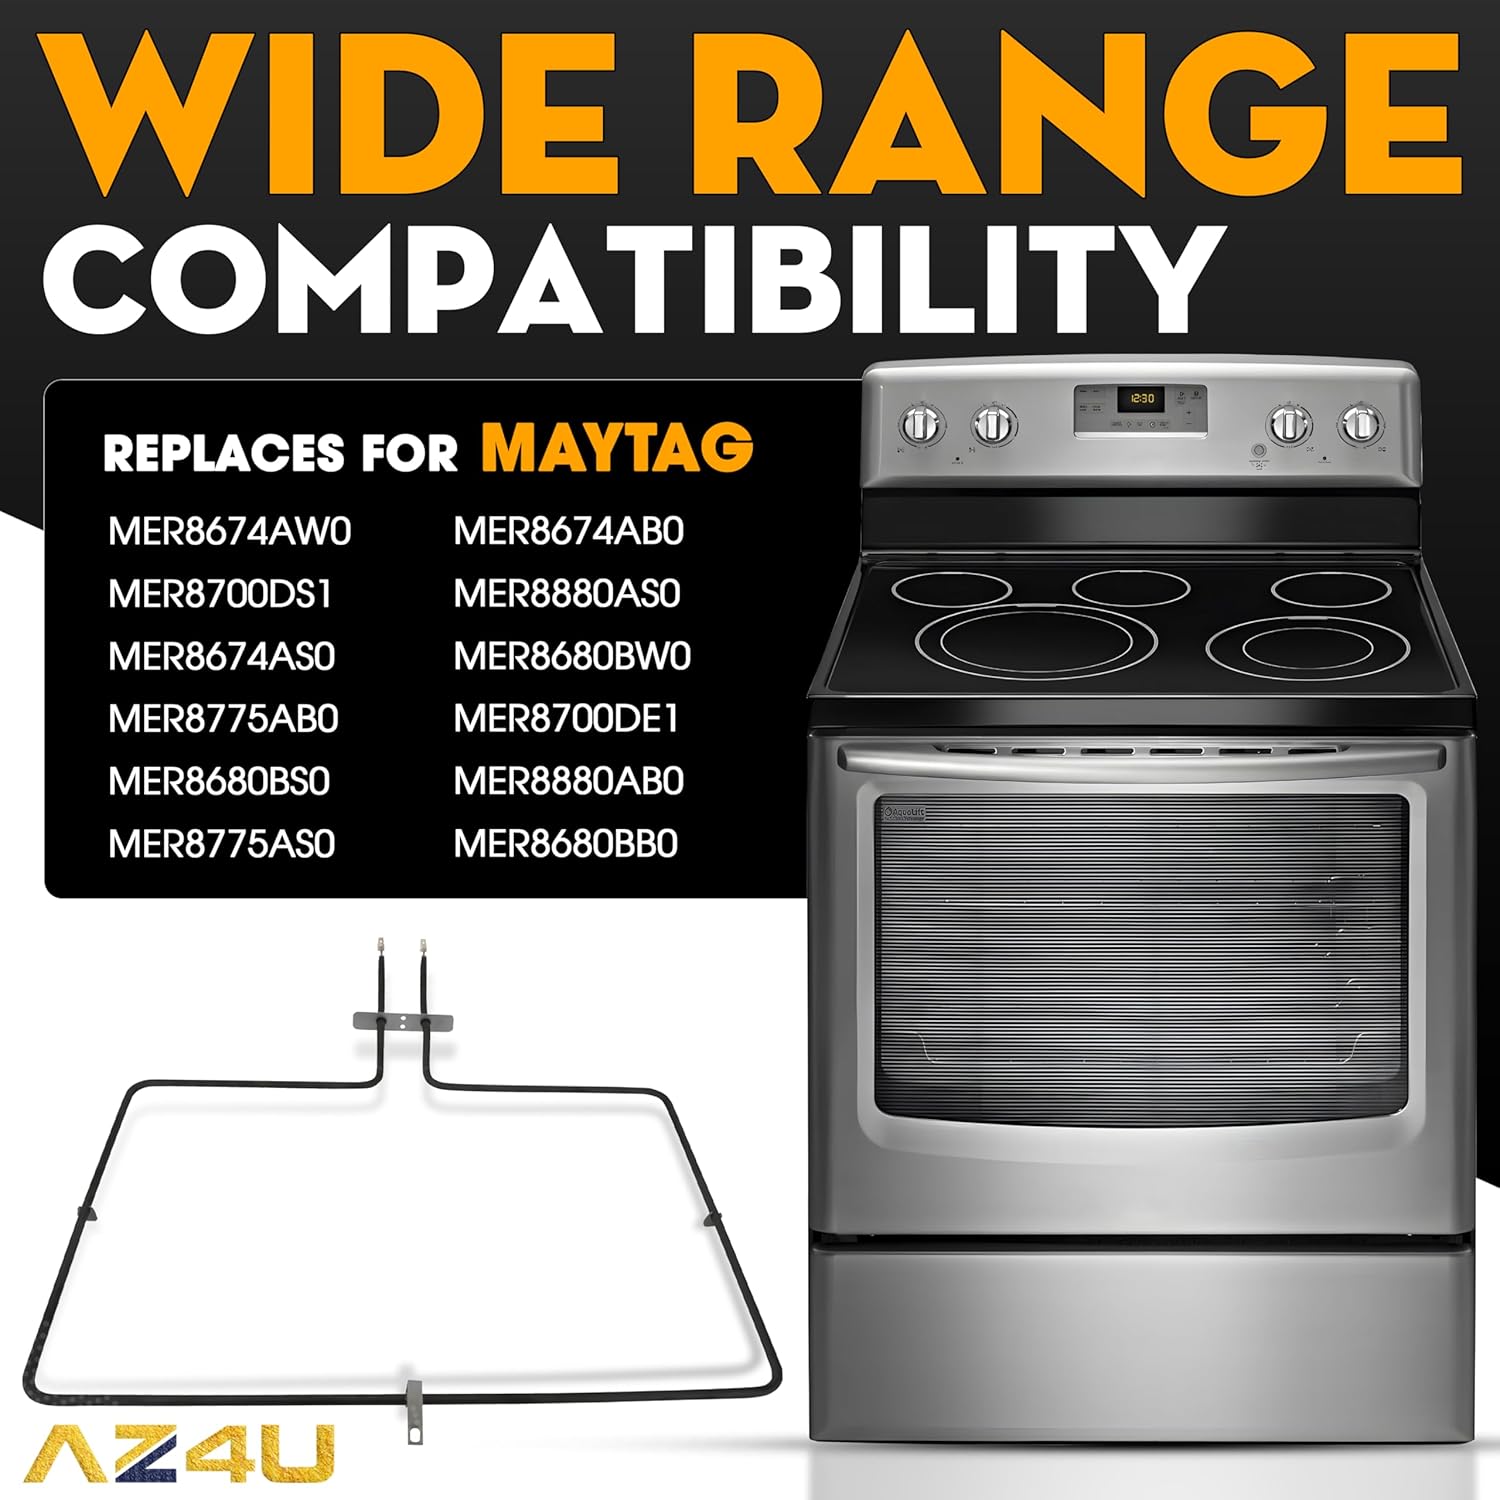
Image: The bake element shown with a list of compatible Maytag oven models, highlighting its wide range compatibility.
Compatible Maytag Models:
- MER8600DE0, MER8600DH0, MER8600DS0, MER8650ES0, MER8650FZ0, MER8650FZ1, MER8670AB0, MER8670AS0, MER8670AW0, MER8674AB0, MER8674AS0, MER8674AW0, MER8680BB0, MER8680BS0, MER8680BW0, MER8700DB0, MER8700DB1, MER8700DE0, MER8700DH0, MER8700DH1, MER8700DS0, MER8700DS1, MER8700DS2, MER8700DW0, MER8700DW1, MER8775AB0, MER8775AS0, MER8775AW0, MER8800DE0, MER8800DE1, MER8800DH0, MER8800DH1, MER8800DS0, MER8800DS1, MER8800FB0, MER8800FB1, MER8800FW0, MER8800FW1, MER8800FZ0, MER8800FZ1, MER8800FZ2, MER8800HK0, MER8850DS0, MER8850DS1, MER8880AB0, MER8880AS0, MER8880AW0, MES8800FZ1, MES8800FZ2
Compatible Whirlpool Models:
- KERS303BBL1, KERS303BSS1, KERS303BWH1, KERS306BSS1, KFEG500EBL0, KFEG500ESS0, KFEG500ESS1, KFEG500EWH0, KFES530ESS0, KSDB900ESS0, KSDB900ESS1, KSDG950ESS0, KSDG950ESS1, KSEB900EBL0, KSEB900ESS0, KSEB900ESS1, KSEB900EWH0, KSEG700EBL0, KSEG700EBL1, KSEG700EBS0, KSEG700ESS0, KSEG700ESS1, KSEG700EWH0, KSEG700EWH1, KSEG950ESS0, KSEG950ESS1, KSIB900ESS0, KSIB900ESS1, WEC530H0DB0, WEC530H0DS0, WEC530H0DW0, WEE730H0DB0, WEE730H0DS0, WEE730H0DW0, WEE745H0FE0, WEE745H0FE1, WEE745H0FE2, WEE745H0FH0, WEE745H0FH1, WEE745H0FH2, WEE745H0FS0, WEE745H0FS1, WEE745H0FS2, WEE750H0HB0, WEE750H0HB1, WEE750H0HV0, WEE750H0HV1, WEE750H0HW0, WEE750H0HW1, WEE750H0HZ0, WEE750H0HZ1, WEE760H0DE0, WEE760H0DH0, WEE760H0DS0, WEEA25H0HN0, WFE540H0EE0, WFE540H0EH0, WFE540H0ES0, WFE540H0ES1, WFE540H0EW0, WFE710H0AB0, WFE710H0AS0, WFE710H0AW0, WFE710H0BB0, WFE710H0BB1, WFE710H0BE1, WFE710H0BH0, WFE710H0BH1, WFE710H0BS0, WFE710H0BS1, WFE710H0BW0, WFE710H0BW1, WFE710H0DE0, WFE710H0DH0, WFE710H0DS0, WFE715H0EE0, WFE715H0EH0, WFE715H0ES0, WFE745H0FE0, WFE745H0FE1, WFE745H0FH0, WFE745H0FH1, WFE745H0FH2, WFE745H0FS0, WFE745H0FS1, WFE770H0FZ0, WFE775H0HB0, WFE775H0HV0, WFE775H0HW0, WFE775H0HZ0, WFE975H0HV0, WFE975H0HZ0, WFI910H0AS0, WFI910H0AS1
Compatible KitchenAid Models:
- KERS202BBL0, KERS202BSS0, KERS202BSS1, KERS202BWH0, KERS303BBL0, KERS303BSS0, KERS303BWH0, KERS306BSS0, KFEG500EBL2, KFEG500EBL3, KFEG500EBS2, KFEG500EBS3, KFEG500ESS2, KFEG500ESS3, KFEG500EWH2, KFEG500EWH3, KFES530ESS2, KIRS608BSS0, KIRS608BSS1, KSDB900ESS2, KSDB900ESS3, KSEB900ESS2, KSEB900ESS3, KSEG700EBS2, KSEG700EBS3, KSEG700ESS2, KSEG950ESS2, KSIB900ESS2, YKERS202BSS0, YKERS202BWH0, YKERS303BBL0, YKERS303BSS0, YKERS303BWH0, YKERS306BSS0, YKFEG500EBL2, YKFEG500EBS2, YKFEG500ESS2, YKFEG500EWH2, YKFES530ESS2, YKIRS608BSS0, YKSDB900ESS3, YKSEB900ESS2, YKSEB900EWH2, YKSEG700EBS2, YKSEG700ESS2
Compatible Jenn-Air Models:
- JDS1450CDP0, JDS1450CDP1, JDS1450CDS0, JDS1450CDS1, JDS1450DP0, JDS1450DS0, JDS1450DS1, JDS1750CEP0, JDS1750CES0, JDS1750EB0, JDS1750EB1, JDS1750EP0, JDS1750ES0, JDS1750ES1, JIS1450CDP0, JIS1450CDS0, JIS1450DP0, JIS1450DS0, JIS1450DS1, JDS1450CFP0, JDS1450CFS0, JDS1450DP1, JDS1450FP0, JDS1450FS0, JDS1750EP1, JDS1750FB0, JDS1750FP0, JDS1750FS0, JES1450CDB0, JES1450CDB1, JES1450CDS0, JES1450CDS1, JES1450CFB0, JES1450CFB1, JES1450CFS1, JES1450CFS2, JES1450DB0, JES1450DS0, JES1450DS1, JES1450FB1, JES1450FS0, JES1450FS1, JES1450FS2, JES1750CEB0, JES1750CES0, JES1750EB0, JES1750EB1, JES1750ES0, JES1750ES1, JES1750FB1, JES1750FS0, JES1750FS1, JIS1450DP1, JIS1450DP2
Compatible Kenmore/Sears Models:
- 61472, 61572, 664.4278371, 664.4279371, 664.42793711, 664.9512361, 664.95123611, 664.95123612, 664.9522371, 664.95223711, 664.95223712, 664.C95123610, 664.C95123611, 665.4278371
Specifications

Image: Visual representation of the bake element's specifications and features.
- Package Includes: 1x Range Oven Bake Element
- Type: Oven Bake Element, located at the bottom of the oven.
- Material: High temperature resistant nickel stainless steel alloy.
- Rated Power: 3600 Watts
- Rated Voltage: 240 Volts
- Dimensions: Approximately 21 x 20 x 3 inches (overall product dimensions), with element dimensions of 20.5 inches wide and 14 inches deep.
- Bracket: Features two mounting holes in the center.
- Terminal: Inserted horizontally.
- Design: Square/omega structure for even heat distribution.

Image: Detailed diagram illustrating the dimensions of the bake element.

Image: Visual highlighting the powerful heating capabilities of the element (240V, 3600W).
Installation Instructions
Safety Precautions:
- Always unplug the oven or turn off the circuit breaker to the oven before attempting any repairs or installation.
- Wear appropriate personal protective equipment, such as work gloves, to prevent injury.
- Ensure the oven is completely cool before starting the installation.
Step-by-Step Installation:
- Disconnect Power: Unplug the oven from its power source or turn off the corresponding circuit breaker.
- Access Rear Panel (if necessary): Use a Phillips-head screwdriver to unthread the screws securing the lower rear access panel of the oven.
- Remove Oven Racks: Pull out and remove all oven racks to provide clear access to the bake element.
- Disconnect Wires: Carefully disconnect the wires from the old bake element. If the wires pull back into the oven wall, you may need to access them from the rear panel.
- Remove Old Element: Pull the old element free from its mounting points.
- Install New Element: Insert the new AZ4U bake element into the oven, ensuring it is properly seated in the mounting holes.
- Reconnect Wires: Reconnect the wires to the terminals of the new bake element. Ensure connections are secure.
- Reassemble: Reinstall the oven racks and the rear access panel (if removed).
- Test Functionality: Restore power to the oven and test by turning it on for a few minutes to ensure the element heats up correctly.

Image: Visual guide for the easy installation process of the bake element.
Video: An official video demonstrating the installation process for an AZ4U bake element in Whirlpool ovens.
Video: An official video demonstrating the replacement of a range oven bake element for Whirlpool, Maytag, and other compatible brands.
Operation
The bake element is crucial for the oven's baking function, providing heat from the bottom of the oven cavity. Once correctly installed, the element will heat up when the oven is set to a baking temperature, ensuring consistent and powerful heat for cooking. The square/omega structure of this element is designed to distribute heat evenly across the baking tray, contributing to optimal cooking results.

Image: The bake element shown glowing red, indicating it is actively heating the oven.

Image: Highlighting the safe and heat-resistant properties of the element, ensuring reliable operation.

Image: Illustrating the even heat distribution provided by the element's design, crucial for consistent baking.
Maintenance
Proper maintenance ensures the longevity and efficient performance of your bake element. The element is constructed from high-quality, durable materials designed for continuous high temperatures.

Image: Details on the high-quality components and cleaning recommendations for the bake element.
Cleaning Instructions:
- Ensure the oven is completely cool and unplugged before cleaning.
- The bake element can be cleaned using only a soft sponge or cloth.
- Use warm water with a mild soap solution.
- Wipe the element dry thoroughly after cleaning.
- Avoid using abrasive cleaners, harsh chemicals, or metal scouring pads, as these can damage the element's surface.
Troubleshooting
If your oven is experiencing issues related to heating, the bake element may be the cause. Replacing a damaged element can often resolve these problems and restore your oven to proper working condition.

Image: Visual representation of common oven problems that a new bake element can resolve.
Common Symptoms of a Faulty Bake Element:
- The element will not heat up at all.
- Little to no heat is produced when baking.
- The oven is not heating evenly, leading to inconsistent cooking results.
- The element appears visibly worn, corroded, or has broken sections.
If you observe any of these symptoms, replacing the bake element according to the installation instructions may resolve the issue.
Warranty Information
This AZ4U Range Oven Bake Element comes with a 2-month warranty from the date of purchase. This warranty covers defects in materials and workmanship under normal use. Please retain your proof of purchase for warranty claims. For detailed information on warranty terms and conditions, or to initiate a claim, please refer to your purchase documentation or contact AZ4U customer support.
Customer Support
For further assistance, technical support, or any questions regarding your AZ4U Range Oven Bake Element, please do not hesitate to contact us. You can find more information and contact options by visiting the official AZ4U Store:
Ask a question about this manual
Ask about setup, troubleshooting, compatibility, parts, safety, or missing instructions. Manuals+ will review the question and use this page’s manual context to help answer it.