1. Introduction
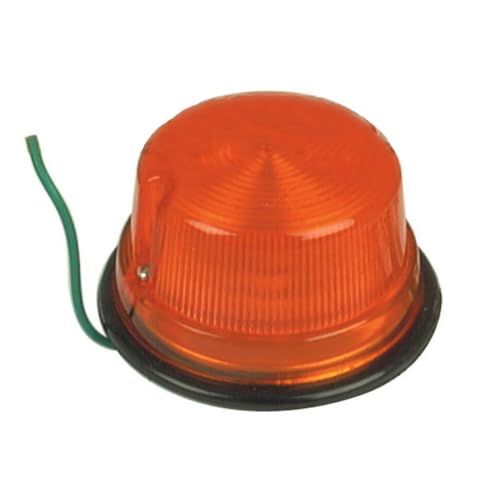
This manual provides essential instructions for the installation, operation, and maintenance of your All States Amber Rear Light, model 164815. This 12-volt amber light is designed for rear visibility on various agricultural and construction machinery. Proper installation and maintenance are crucial for optimal performance and safety.
Compatibility:
- Hinomoto Tractor(s): E14 (D), E15, E16, E18, E21, E23, E25
- Iseki Tractor(s): TS1610, TS1910, TS2205, TS2210, TS3110
- Kubota Tractor(s): L175, L225, L1500, L2000
- Yanmar Tractor(s): YM195, YM240, YM250, YM1500, YM1600, YM1700, YM1900
Replaces OEM Part Numbers:
- Hinomoto: 8232-3004-00, 82323-004-00
- Iseki: 1421-600-0590-0, 1421-0600-0590-0
- Kubota: 34150-34204
2. Safety Information
Read all instructions carefully before installation and use. Failure to follow these instructions may result in property damage or injury.
- Always disconnect the vehicle's battery before performing any electrical work to prevent electrical shock or short circuits.
- Ensure the light is securely mounted to prevent detachment during operation.
- Verify that the light's voltage (12V) matches the vehicle's electrical system.
- Do not modify the light or its wiring.
- Keep wiring away from hot or moving parts.
- Consult a qualified technician if you are unsure about any installation steps.
3. Package Contents
Verify that all components are present before beginning installation:
- 1 x All States Amber Rear Light (Model 164815)
- (Mounting hardware may vary or be sold separately, please check your specific purchase.)
4. Setup and Installation
Tools Required: Basic hand tools (e.g., screwdriver, wire strippers, crimpers, wrench), electrical tape or heat shrink tubing.
- Disconnect Power: Before starting, disconnect the negative terminal of the vehicle's battery to prevent accidental electrical shorts.
- Identify Mounting Location: Choose a suitable location on the rear of the vehicle that provides clear visibility and allows for secure mounting. Ensure there is enough space for the light and its wiring.
- Mount the Light: Secure the light using appropriate hardware (not always included). Ensure it is firmly attached and will not vibrate loose during operation.
- Wiring Connection:
- The light typically has a single green wire for power. Connect this wire to a 12-volt switched power source on your vehicle. This source should activate when the vehicle's lights are turned on or when a dedicated switch is engaged.
- The light grounds through its mounting base. Ensure the mounting surface is clean and provides a good electrical ground connection. If a separate ground wire is present (not typical for this model based on image), connect it to a suitable chassis ground.
- Use appropriate connectors (crimp connectors, solder) and insulate all connections with electrical tape or heat shrink tubing to protect against moisture and corrosion.
- Test Functionality: Reconnect the vehicle's battery. Turn on the vehicle's lights or the relevant switch to verify that the amber rear light illuminates correctly.
- Final Check: Ensure all connections are secure and all tools are removed from the work area.
5. Operating Instructions
Once properly installed and wired, the All States Amber Rear Light operates in conjunction with your vehicle's electrical system. Activate the light by turning on the vehicle's main lighting system or by engaging the dedicated switch to which the light is connected. The light will provide continuous amber illumination for enhanced rear visibility.
6. Maintenance
- Cleaning: Periodically clean the lens with a soft, damp cloth to remove dirt and debris that may obstruct light output. Avoid abrasive cleaners.
- Wiring Inspection: Regularly inspect the wiring and connections for any signs of wear, corrosion, or damage. Repair or replace damaged wiring immediately.
- Bulb Replacement: If the light stops illuminating, the bulb may need replacement.
- Carefully remove the amber lens, typically by unscrewing or prying it gently.
- Remove the old bulb and replace it with a new 12-volt bulb of the correct type and wattage.
- Reattach the lens securely.
7. Troubleshooting
| Problem | Possible Cause | Solution |
|---|---|---|
| Light does not illuminate. | No power to the light. Faulty bulb. Poor ground connection. Damaged wiring. | Check power connection and fuse. Replace bulb. Ensure secure and clean ground connection. Inspect and repair wiring. |
| Light flickers. | Loose connection. Intermittent power supply. | Check all wiring connections for tightness. Inspect power source for stability. |
8. Specifications
| Feature | Detail |
|---|---|
| Model Number | 164815 |
| Brand | All States |
| Color | Amber (Light), Black (Base) |
| Voltage | 12 Volts |
| Item Weight | 1 pound |
| Manufacturer | All States |
| UPC | 657819281917 |
| Assembly Required | No (Refers to the light itself, installation is required) |
9. Warranty and Support
For information regarding warranty coverage or technical support, please refer to the documentation provided at the point of purchase or contact your retailer. Keep your purchase receipt for warranty claims.