Introduction
This manual provides detailed instructions for the installation, operation, and maintenance of your EZFIX Wired Security Camera System. This system includes 4 PCS 2MP/1080P HD outdoor security cameras, an 8-channel DVR with a 1TB hard drive, full-color night vision, IP66 waterproofing, motion alerts, and remote access features. Please read this manual thoroughly before use to ensure proper setup and functionality.
What's in the Box
Verify that all components are present in your package:
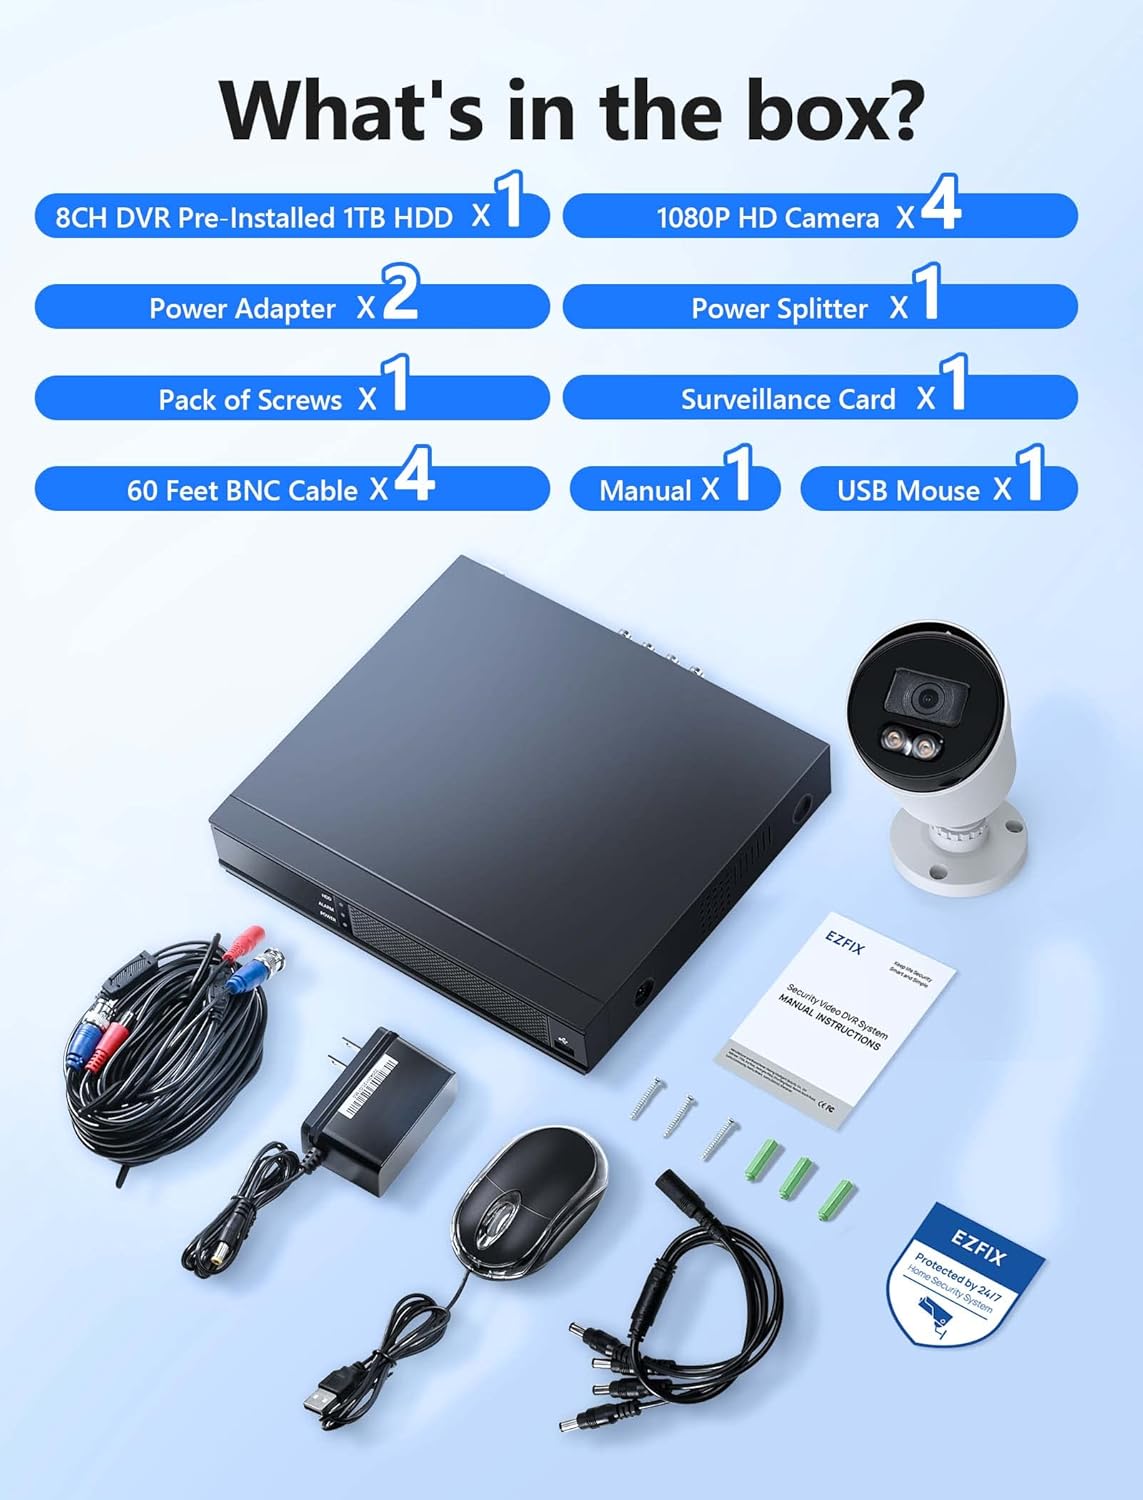
Image description: A clear layout of all items included in the EZFIX security camera system package. This includes the 8-channel DVR, four 1080P HD cameras, two power adapters, one power splitter, a pack of screws, a surveillance card, four 60-foot BNC cables, a user manual, and a USB mouse.
- 8CH DVR Pre-installed 1TB HDD x 1
- 1080P HD Camera x 4
- Power Adapter x 2
- Power Splitter x 1
- Pack of Screws x 1
- Surveillance Card x 1
- 60 Feet BNC Cable x 4
- Manual x 1
- USB Mouse x 1
Specifications
| Brand | EZFIX |
| Model Number | EF-D08E4B2-1L |
| Connectivity Technology | Wired |
| Number of Channels | 8 |
| Memory Storage Capacity | 1 TB |
| Color | White |
| Product Dimensions (L x W x H) | 14.76 x 11.61 x 11.82 inches |
| Item Weight | 10.21 pounds |
| Manufacturer | Relong Intelligent Security Technology (Shenzhen) Co., Ltd. |
| Date First Available | December 8, 2022 |
Setup
System Connection Diagram

Image description: A diagram illustrating the connection process for the EZFIX security system. The DVR is connected to a router via an Ethernet cable, and cameras are connected to the DVR. A monitor is shown connected to the DVR, displaying live feeds from multiple cameras.
Installation Steps
Connect Cameras to DVR: Connect each camera to the DVR using the provided BNC cables. Ensure connections are secure.
Connect DVR to Power: Use the power adapter to connect the DVR to an electrical outlet.
Connect Cameras to Power: Use the power adapters and splitter to power the cameras. Ensure all cameras receive power.
Connect DVR to Monitor: Connect the DVR to a monitor using an HDMI or VGA cable (not included) to view the camera feeds and configure settings.
Connect DVR to Network (Optional for Remote Access): Connect the DVR to your router using an Ethernet cable for remote viewing capabilities.
Initial Setup: Follow the on-screen prompts on the connected monitor to complete the initial DVR setup, including setting date/time, password, and recording preferences.
Operating Instructions
24/7 Recording

Image description: A monitor displaying a 4-way split screen of live camera feeds from different locations (warehouse, office, outdoor patio, open-plan office). Below the monitor is the DVR unit. Text indicates "24/7 Recording - No Monthly Fee -" and icons for HD, 1TB HDD, Record, and Playback.
The system is designed for continuous 24/7 recording to the pre-installed 1TB hard drive. This ensures that all activity is captured without interruption. You can configure recording schedules and modes (continuous, motion-triggered) through the DVR's interface.
Full-Color Night Vision

Image description: A close-up of a white bullet-style security camera with two bright LED lights illuminated, positioned above a street scene at night. The street and houses are visible in full color, demonstrating the camera's full-color night vision capability.
The cameras feature full-color night vision, providing clear and detailed images even in low-light conditions. The integrated lights on the cameras activate automatically to illuminate the area, enabling color capture at night.
Motion Detection and Alerts

Image description: A security camera mounted on a wall, shining a light beam onto a person attempting to break into a window at night. A smartphone screen displays a "Motion Alert" notification from the "Rview Pro" app, indicating detection from EZFIX. Icons for Email, Push notifications, Motion Detection, and Full-Color Night Vision are also shown.
The system supports motion detection. When motion is detected, the system can trigger alerts via email or push notifications to your mobile device. Configure motion detection zones and sensitivity settings in the DVR menu to minimize false alarms.
Remote Access

Image description: A hand holding a smartphone displaying a live feed from a security camera, showing a person in a mask carrying a box near a red door. Below the phone, icons for "Download App Store" and "Get it on Google Play" are visible, indicating mobile app availability for remote access.
Access your camera feeds remotely from anywhere using the dedicated mobile application (available on App Store and Google Play). Ensure your DVR is connected to the internet for this feature to function.
Maintenance
Regular Cleaning: Periodically clean the camera lenses with a soft, damp cloth to ensure clear image quality. Avoid abrasive cleaners.
Cable Inspection: Check all cables for wear, damage, or loose connections. Replace damaged cables promptly.
DVR Ventilation: Ensure the DVR unit has adequate ventilation to prevent overheating. Do not block air vents.
Software Updates: Check the manufacturer's website periodically for firmware updates for your DVR to ensure optimal performance and security.
Data Backup: Regularly back up important footage from the DVR to an external storage device if needed.
Troubleshooting
No Video Display
Check Power: Ensure the DVR and cameras are properly powered on.
Cable Connections: Verify all BNC and video output cables (HDMI/VGA) are securely connected.
Monitor Input: Confirm your monitor is set to the correct input source (HDMI/VGA).
No Recording
Hard Drive Status: Check the DVR's hard drive status in the system settings. Ensure it is detected and functioning correctly.
Recording Schedule: Verify that the recording schedule is properly configured.
Disk Space: Ensure there is sufficient space on the hard drive. The system typically overwrites older footage, but check settings.
Remote Access Not Working
Network Connection: Confirm the DVR is connected to your router and has internet access.
App Configuration: Re-check the mobile app settings and ensure the DVR is correctly added and online.
Router Settings: Ensure no firewall or router settings are blocking the DVR's access to the internet or the app's connection.
Poor Night Vision
Lens Cleanliness: Clean the camera lens to remove any dirt or obstructions.
Obstructions: Ensure there are no objects directly in front of the camera or its infrared/white light illuminators.
Power Supply: Verify cameras are receiving adequate power, as insufficient power can affect night vision performance.
Warranty and Support
For technical assistance or warranty inquiries, please refer to the contact information provided in the included manual or visit the EZFIX official website.
The manufacturer provides a 12-month replacement warranty and lifetime technical support.

Image description: A graphic illustrating customer support commitments: "24 Hours Quick reply within 24 hours", "12 Months Replacement available within 12 month", and "Lifetime Lifetime service and technical support".