1. Introduction
This manual provides essential instructions for the DWEII WT32-SC01 Plus ESP32 LCD Display Screen. It covers product features, setup, operation, and technical specifications to help users effectively utilize this development board.
The WT32-SC01 Plus is an ESP32 development board featuring a 3.5-inch 320x480 capacitive multi-touch screen. It integrates an ESP32-WROVER-B module with Wi-Fi and Bluetooth capabilities, designed for various applications including home automation, smart control panels, and embedded systems development.
2. Safety Information
- Handle the device with care to avoid physical damage to the screen or components.
- Ensure proper power supply (DC 5V/2A or 5V/1A) to prevent electrical damage.
- Avoid exposure to extreme temperatures outside the specified operating range (-20 to +85 °C).
- Do not attempt to disassemble or modify the device beyond its intended use, as this may void any warranty.
- Keep the device away from liquids and excessive moisture.
3. Package Contents
Verify that all items are present in the package:
- 1x DWEII WT32-SC01 Plus ESP32 Development Board with 3.5-inch LCD Touch Screen
- 1x USB Type-A to Micro-USB Cable (for power and data)
- Other accessories as specified by the manufacturer.

Image 1: DWEII WT32-SC01 Plus development board alongside its USB power/data cable.
4. Product Features
- Highly integrated ESP32-WROVER-B module with low power consumption.
- 3.5-inch 320x480 capacitive 2-point multi-touch screen for intuitive interactions.
- Supports graphical drag-and-drop programming for easy development (with compatible GUI firmware).
- Wireless connectivity: Wi-Fi (802.11 b/g/n 2.4GHz) and Bluetooth v4.2 (BR/EDR and BLE).
- Customizable functions via expansion interfaces for button operation, voice control, and camera operation.
- Equipped with 4MB SPI Flash and 8MB PSRAM for ample storage and memory.
5. Setup
5.1 Power Connection
- Connect the provided USB cable to the Type-C port on the WT32-SC01 Plus board.
- Connect the other end of the USB cable to a compatible 5V/1A or 5V/2A power source (e.g., computer USB port, USB wall adapter).
- The device should power on, and the LCD screen will illuminate, indicating successful power-up.
5.2 Initializing the Development Environment
For development, refer to the official documentation and community resources for ESP32 and the WT32-SC01 Plus. This typically involves:
- Installing the Arduino IDE or ESP-IDF development framework.
- Adding ESP32 board support to your chosen IDE.
- Installing necessary libraries for the display and touch functionality (e.g., LVGL).
- Connecting the board to your computer via the USB cable for programming and serial communication.

Image 2: Rear view of the WT32-SC01 Plus board, highlighting the ESP32-WROVER-B module, SD card slot, and various connectors.
6. Operating Instructions
6.1 Touch Screen Interaction
The 3.5-inch capacitive touch screen supports 2-point multi-touch. Interact with the graphical user interface (GUI) by tapping, swiping, and pinching as defined by the loaded firmware. The responsiveness allows for intuitive control of applications.
6.2 Wireless Connectivity
The integrated ESP32 module provides Wi-Fi and Bluetooth capabilities. These can be utilized for network communication, data transfer, and connecting to other Bluetooth-enabled devices, depending on the firmware loaded onto the board. Refer to your specific application's documentation for details on configuring wireless connections.

Image 3: The WT32-SC01 Plus displaying a sample graphical user interface with Wi-Fi, Bluetooth, thermostat, and light controls.
7. Maintenance
- Keep the screen clean using a soft, lint-free cloth. Avoid abrasive materials, harsh chemicals, or excessive pressure on the screen.
- Store the device in a dry, dust-free environment when not in use to prevent component degradation.
- Regularly check for firmware updates from the manufacturer or community to ensure optimal performance, security, and access to new features.
8. Troubleshooting
8.1 Device Not Powering On
- Ensure the USB cable is securely connected to both the board's Type-C port and the power source.
- Verify that the power source provides sufficient 5V/1A or 5V/2A output.
- Try a different USB cable or power adapter to rule out faulty accessories.
8.2 Touch Screen Unresponsive
- Check if the device is powered on correctly and the display is active.
- Ensure the firmware loaded supports touch input and that the touch driver is correctly initialized in your code.
- Clean the screen surface for any obstructions or debris that might interfere with touch detection.
8.3 Connectivity Issues (Wi-Fi/Bluetooth)
- Verify that the Wi-Fi or Bluetooth functionality is enabled and correctly configured in your firmware.
- Ensure there are no conflicting GPIO pin assignments in your code if using external peripherals that might interfere with wireless modules.
- Check the signal strength and proximity to the access point or Bluetooth device.
9. Specifications
| Feature | Specification |
|---|---|
| SoC | ESP32-WROVER-B module |
| CPU | Dual-core Xtensa® 32-bit LX6 MCU |
| Connectivity | 802.11 b/g/n 2.4GHz Wi-Fi, Bluetooth v4.2 BR/EDR and Bluetooth LE |
| Display | 3.5 inch, LCD @320x480, Capacitive 2-point multitouch |
| Memory | 4MB SPI Flash, 8MB PSRAM |
| Power Supply | DC 5V/2A, 5V/1A |
| Operating Temperature | -20 to +85 °C |
| Support Interfaces | TP/LCM/2LDO/RST/Type-C/UART, RS485, USB, Speaker Interface, SD Card, Extended IO port |
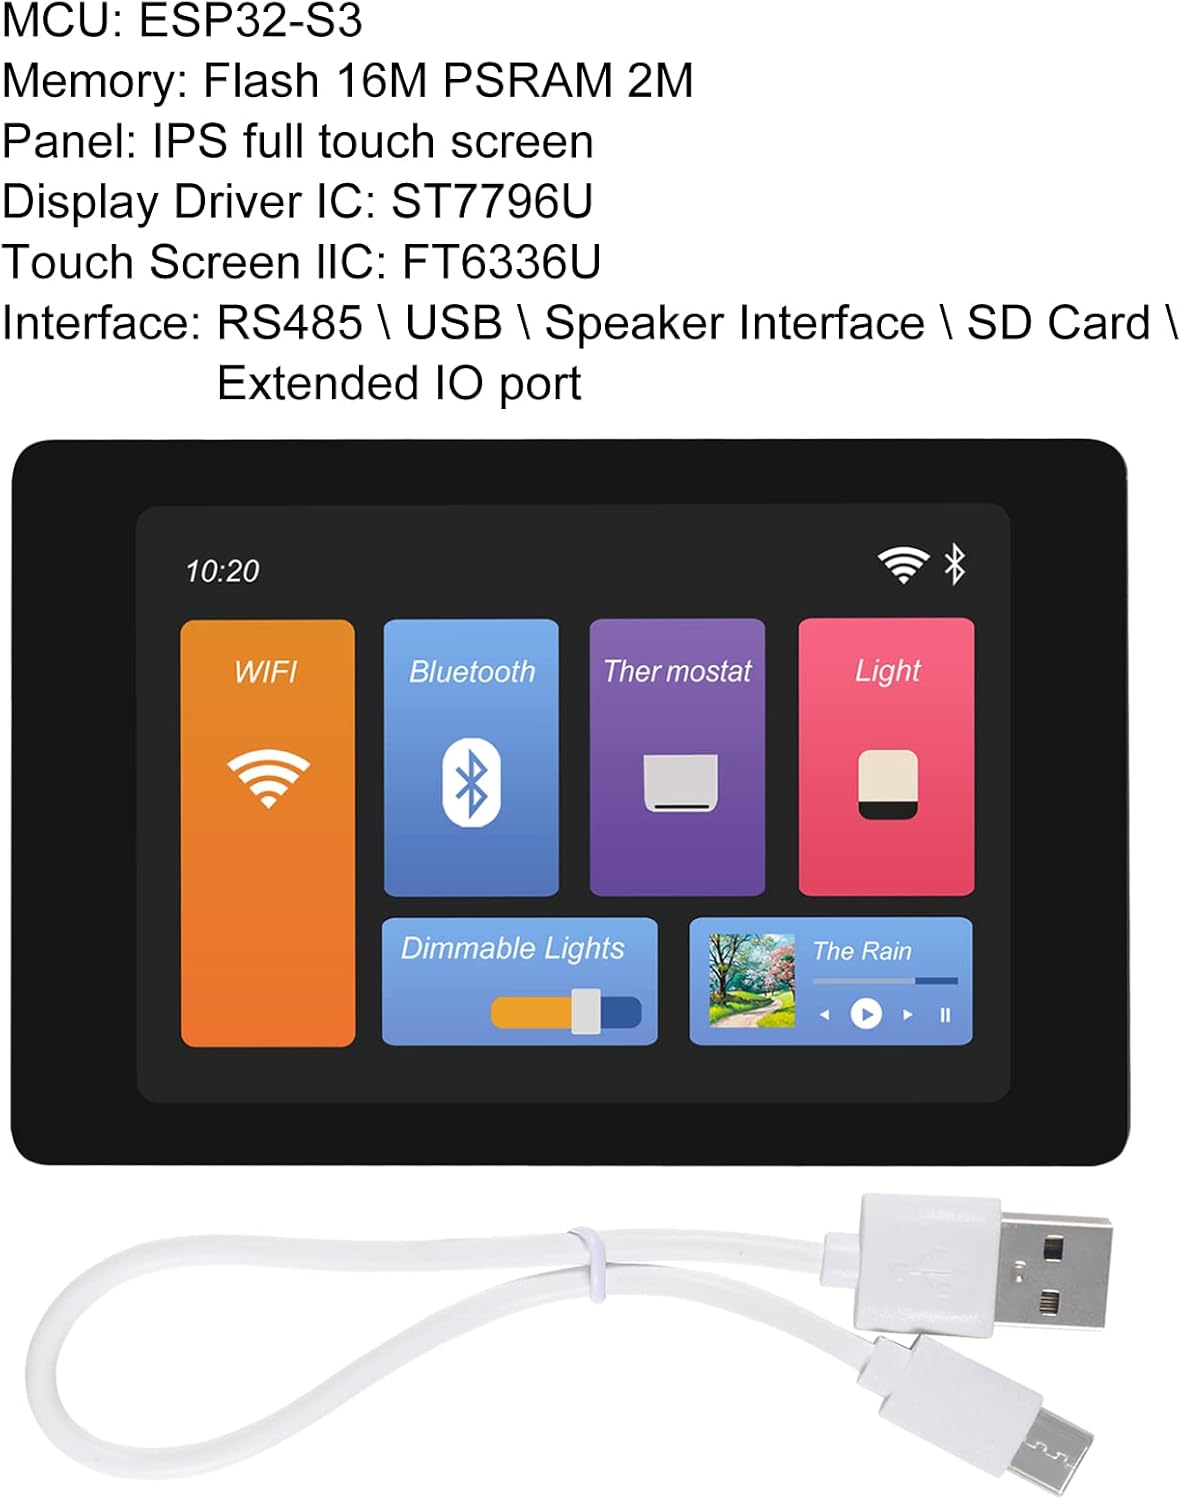
Image 4: Dimensions of the WT32-SC01 Plus board, showing approximate measurements of 92mm by 60mm.
10. Warranty and Support
For warranty information and technical support, please refer to the official DWEII website or contact your retailer. Keep your purchase receipt for any warranty claims or support inquiries. Community forums and online resources for ESP32 development are also valuable sources of information and assistance.