1. Introduction
Thank you for choosing the NovelLife Mini Precision Benchtop Drill Press. This manual provides essential information for the safe and efficient operation, setup, and maintenance of your new tool. Please read this manual thoroughly before initial use and retain it for future reference.
2. Safety Information
WARNING: Failure to follow these safety instructions may result in serious injury or property damage.
- Always wear appropriate personal protective equipment, including safety glasses, during operation.
- Ensure the drill press is placed on a stable, level surface to prevent tipping.
- Keep the work area clean and well-lit. Cluttered or dark areas invite accidents.
- Do not operate the drill press in damp or wet conditions.
- Keep children and bystanders away while operating the tool.
- Securely clamp your workpiece before drilling to prevent movement and potential injury.
- Disconnect power before changing drill bits, performing maintenance, or when the tool is not in use.
- Use only drill bits appropriate for the material being drilled and within the chuck's capacity (0.6-6mm).
- Avoid forcing the drill. Allow the tool to work at its own pace.
- Do not wear loose clothing, gloves, or jewelry that could get caught in moving parts.
3. Product Overview and Components
Familiarize yourself with the parts of your NovelLife Mini Precision Benchtop Drill Press:

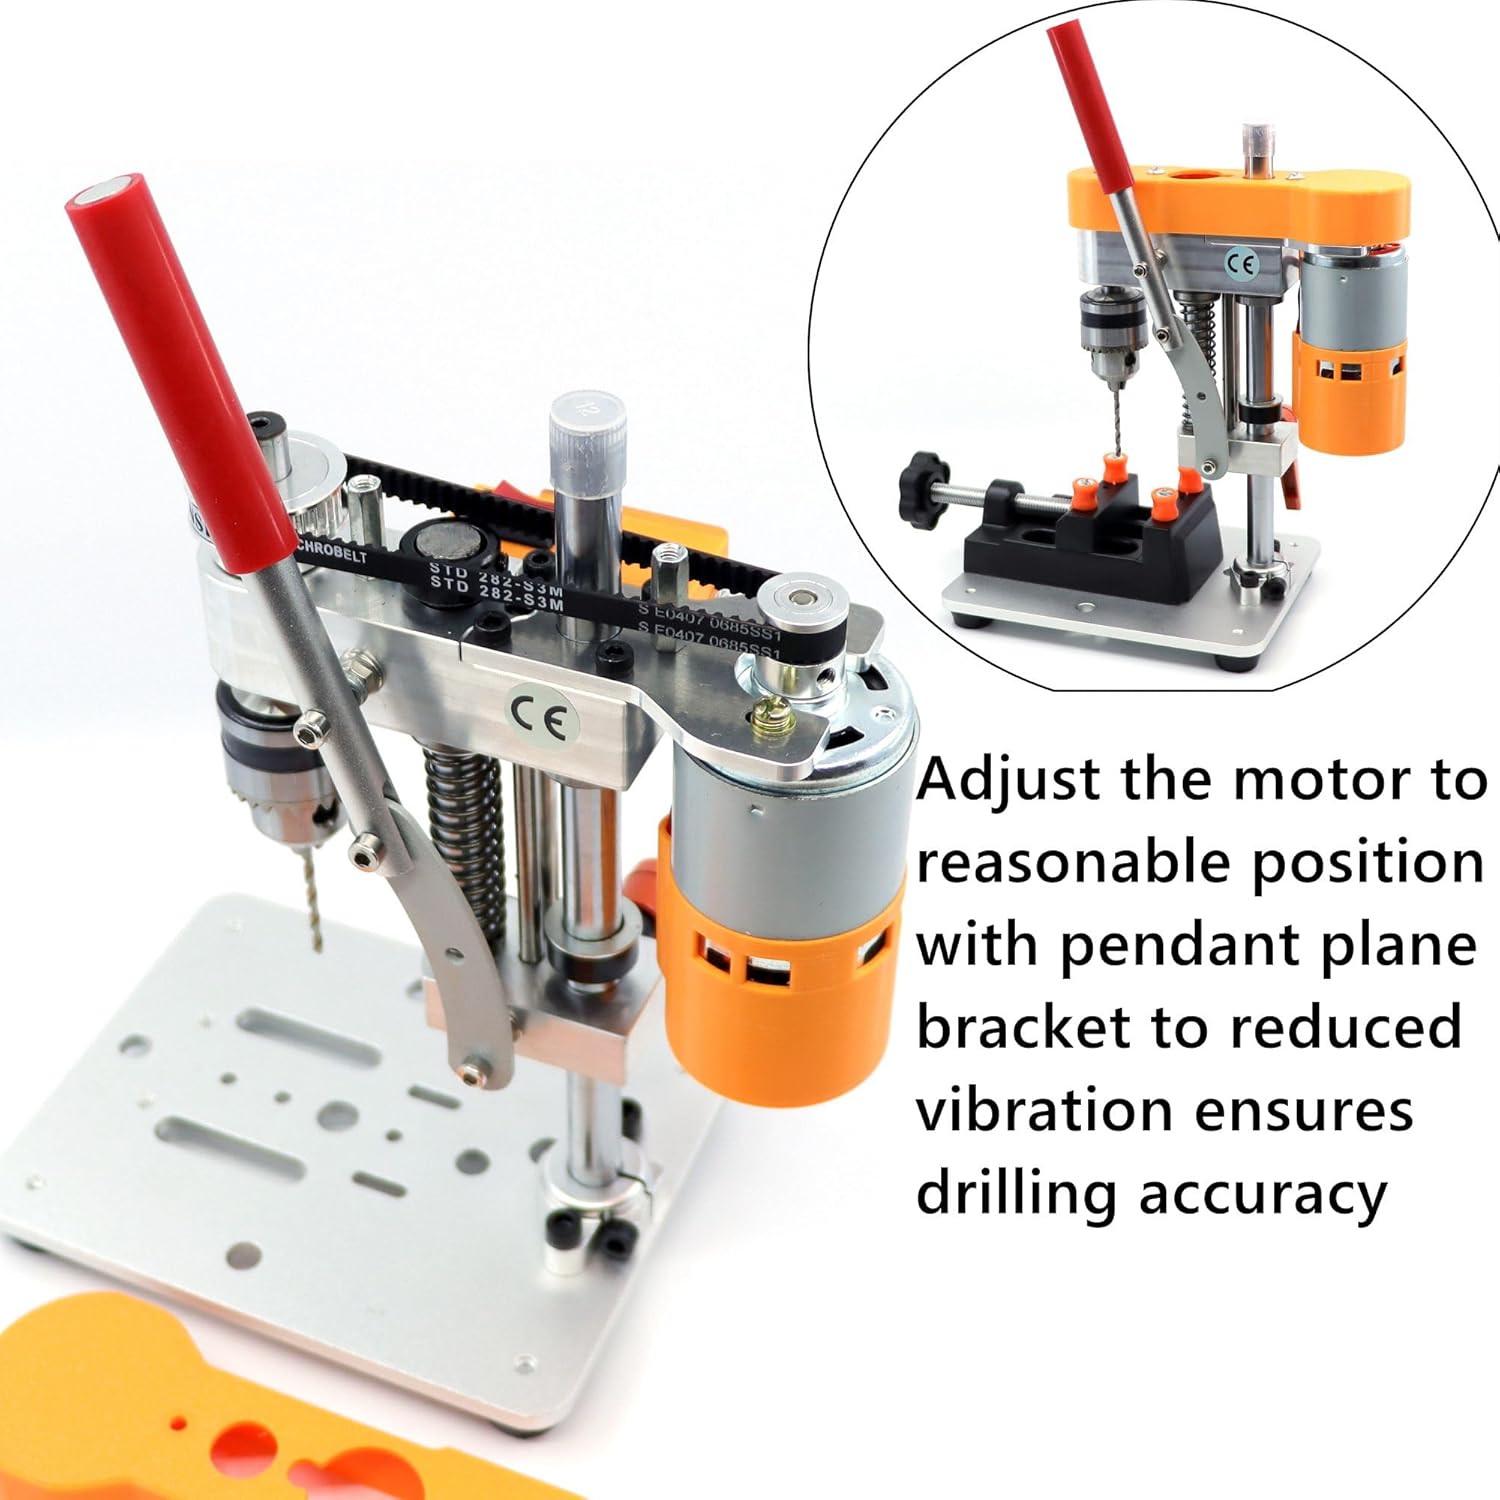
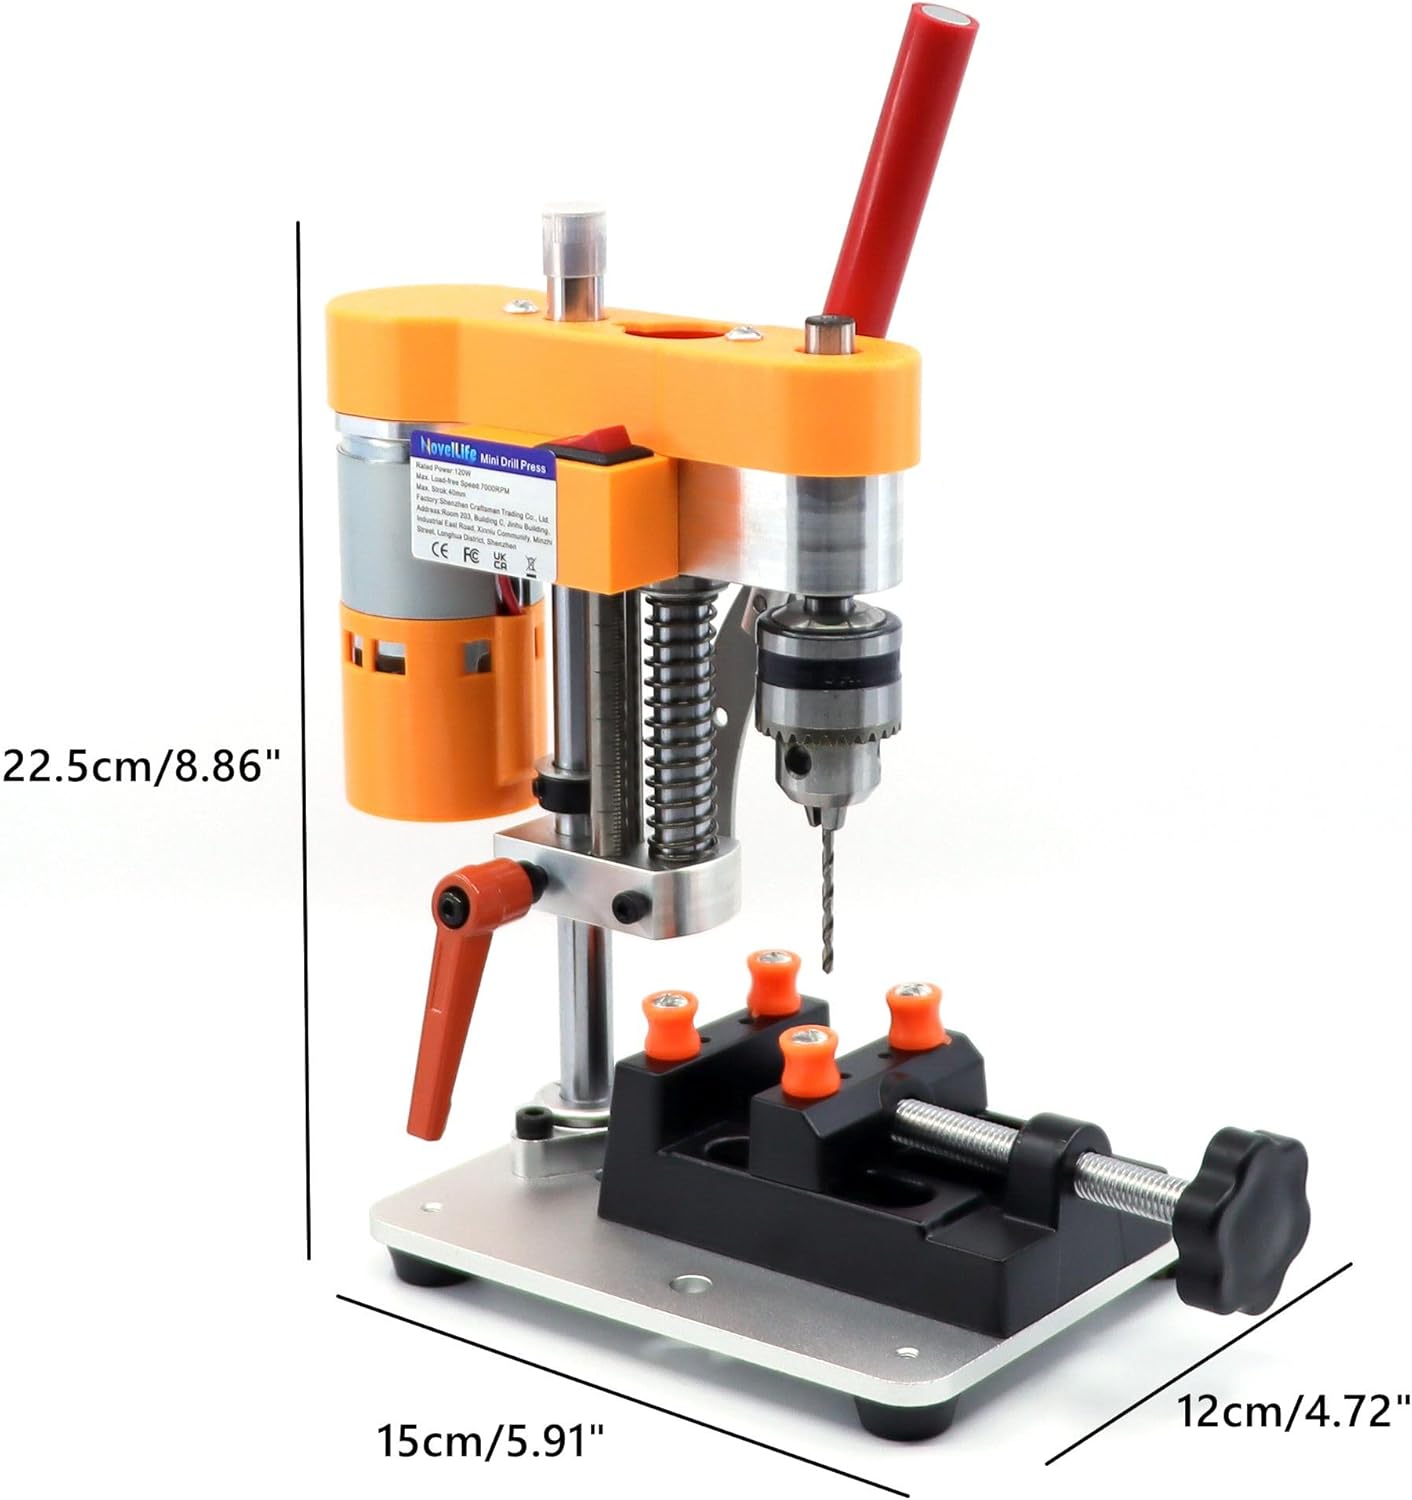
The drill press features a solid metal structure with 3 metal axes and 2 linear bearings for enhanced drilling accuracy. The motor is positioned to reduce vibration.

4. Setup
4.1 Unpacking and Inspection
Carefully remove all components from the packaging. Inspect for any damage that may have occurred during shipping. If any parts are damaged or missing, contact NovelLife customer support.
4.2 Assembly
The NovelLife Mini Precision Benchtop Drill Press typically comes pre-assembled. Ensure all screws and fasteners are tight before use. The included Allen wrench set can be used for any minor adjustments.
4.3 Securing the Drill Press
Place the drill press on a sturdy, level workbench. The base is equipped with anti-slip rubber pads for stability. For additional security, the base features expansion slots (4x20mm and 5.5x40mm) that allow you to bolt the unit down or attach accessories like a CNC sliding table.

4.4 Power Connection
Connect the 24V adjustable power supply to the DC5.5*2.1 power port on the drill press. Plug the power supply into a standard electrical outlet. The power supply allows for speed regulation.

5. Operating Instructions
5.1 Installing a Drill Bit
- Ensure the drill press is unplugged.
- Loosen the B10 drill chuck jaws using the chuck key.
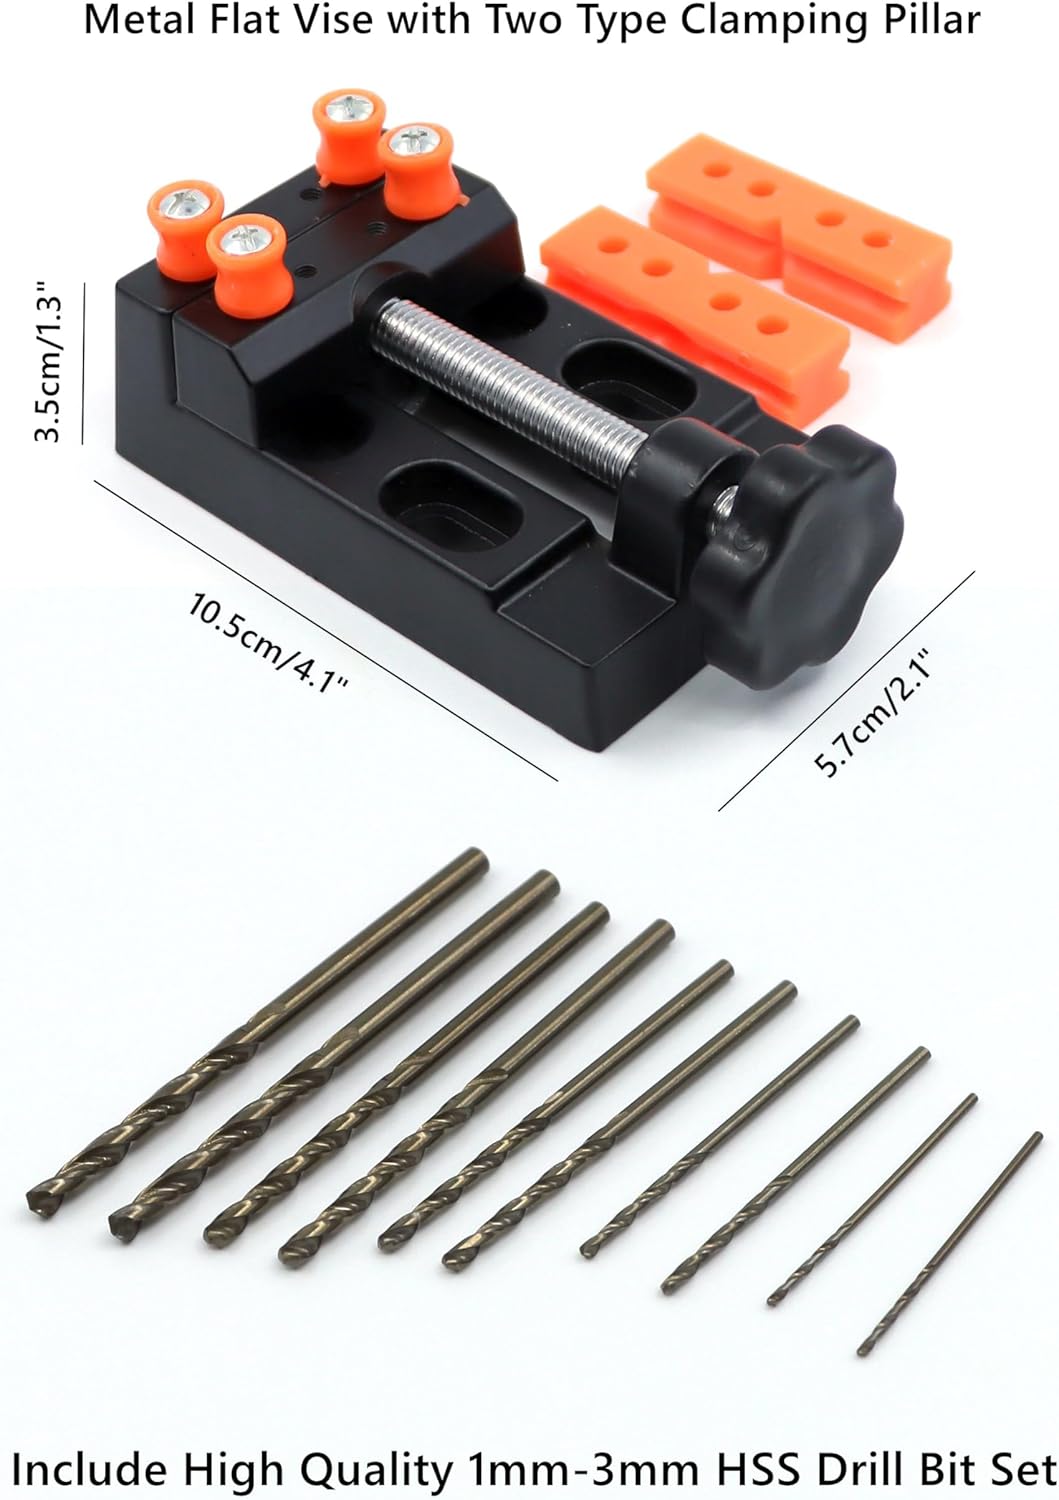
- Insert the desired HSS drill bit (compatible with 0.6-6mm) into the chuck, ensuring it is seated firmly and centered.
- Tighten the chuck jaws securely with the chuck key.
5.2 Adjusting Height and Depth
- Use the Height Adjustment Knob to raise or lower the drill head assembly to the desired working height. Tighten the knob to secure the position.
- The Press Depth Limit Ring can be set to control the maximum drilling depth. Adjust it to prevent drilling deeper than intended. The integrated press scale provides visual feedback on drilling depth.
5.3 Securing the Workpiece
Always secure your workpiece using the included metal flat vise or other appropriate clamping methods. The metal flat vise supports a maximum clamping width of 2 inches and includes two types of clamping pillars for versatility.
5.4 Adjusting Speed
The 24V adjustable power supply allows you to regulate the motor speed. Turn the knob on the power supply to increase or decrease the rotational speed of the drill bit, up to a maximum of 7000 RPM. Select a speed appropriate for the material and drill bit size.
5.5 Drilling Operation
- Ensure the workpiece is securely clamped and the drill bit is properly installed.
- Turn on the drill press using the Power Switch.
- Slowly lower the drill bit into the workpiece using the Press Lever. The metal handle supports pressing in two directions (front and back) for user comfort.
- Apply steady, even pressure. Do not force the drill.
- Once the desired depth is reached, retract the drill bit from the workpiece.
- Turn off the drill press.

6. Maintenance
6.1 Cleaning
- Always disconnect the power supply before cleaning.
- Regularly clean dust and debris from the drill press, especially around the chuck, motor, and moving parts. Use a brush or compressed air.
- Wipe down surfaces with a clean, dry cloth. Do not use harsh chemicals or solvents.
6.2 Lubrication
Periodically apply a light machine oil to the vertical shaft and other moving metal parts to ensure smooth operation and prevent rust.
6.3 Storage
Store the drill press in a clean, dry environment away from direct sunlight and extreme temperatures. Keep it out of reach of children.
7. Troubleshooting
- Drill Press does not turn on:
- Check if the power supply is properly connected to both the drill press and the electrical outlet.
- Ensure the power switch is in the 'ON' position.
- Verify the electrical outlet is functional.
- Excessive vibration or wobble:
- Ensure the drill bit is correctly installed and tightened in the chuck.
- Check if the drill bit is bent or damaged; replace if necessary.
- Verify that the drill press is on a stable surface and all assembly screws are tight.
- Drill bit not cutting effectively:
- Ensure the drill bit is sharp. Replace dull bits.
- Verify that the correct drill bit type is being used for the material.
- Adjust the speed setting on the power supply to match the material.
- Apply appropriate, steady pressure.
- Workpiece moves during drilling:
- Always ensure the workpiece is securely clamped using the metal flat vise or other clamping devices.
8. Specifications
| Feature | Specification |
|---|---|
| Brand | NovelLife |
| Model Number | B0BKZRD2P7 |
| Power Source | Corded Electric |
| Maximum Rotational Speed | 7000 RPM |
| Voltage | 24 Volts (DC) |
| Amperage | 5 Amps |
| Maximum Chuck Size | 6 Millimeters |
| Color | Silver |
| Included Components | 1X Mini Drill Press Machine, 1X Metal Flat Vise, 1X 24V Adjustable Power Supply, 1X HSS Drilling Bit, 1X Allen Wrench Set |
| Special Feature | Variable Speed |
| Product Dimensions | 5.9"L x 4.7"W x 8.7"H |
| Material | Metal |
| Item Weight | 2.2 Kilograms (4.84 pounds) |
| Maximum Power | 120 Watts |
| Drilling Capacity (Wood) | 6 Millimeters |
| Drilling Capacity (Metal) | 6 Millimeters |
| UPC | 618202894626 |
9. Customer Support
For any questions, technical assistance, or warranty inquiries regarding your NovelLife Mini Precision Benchtop Drill Press, please contact NovelLife customer support through the retailer where the product was purchased.
10. Product Videos
No official product videos from the seller were available for embedding based on the provided data. Please refer to the product listing page for any available video content.
