
Burly grill B0BKQ7FC7M
Instruction Manual for Burly Grill Cast Iron Grill Grates
Model: B0BKQ7FC7M
Introduction
Thank you for choosing Burly Grill Cast Iron Grill Grates. These heavy-duty cast iron grates are designed to provide superior heat retention and even cooking for your grilling needs. This manual provides essential information for the proper setup, operation, maintenance, and troubleshooting of your new grill grates to ensure long-lasting performance and an excellent grilling experience.

Image: Three individual cast iron grill grates, ready for installation.
Setup
Unpacking and Inspection
Carefully remove the grill grates from their packaging. Inspect each grate for any signs of damage during transit. If any damage is observed, please contact customer support before proceeding with installation.
Compatibility
These grill grates are designed as replacement parts for a variety of Char-Griller and King Griller models. Please verify your grill model against the list below to ensure proper fit.
- Char-Griller Models: 2121, 2123, 2222, 2828, 3001, 3008, 3030, 3072, 3232, 3725, 4000, 4001, 4008, 4208, 5050, 5072, 5252, 5650, 9020
- King Griller Models: 3008, 5252
Each grate measures approximately 19 3/4 inches by 6 3/4 inches. A set of three grates covers a total area of 19 3/4 inches by 20 1/4 inches.
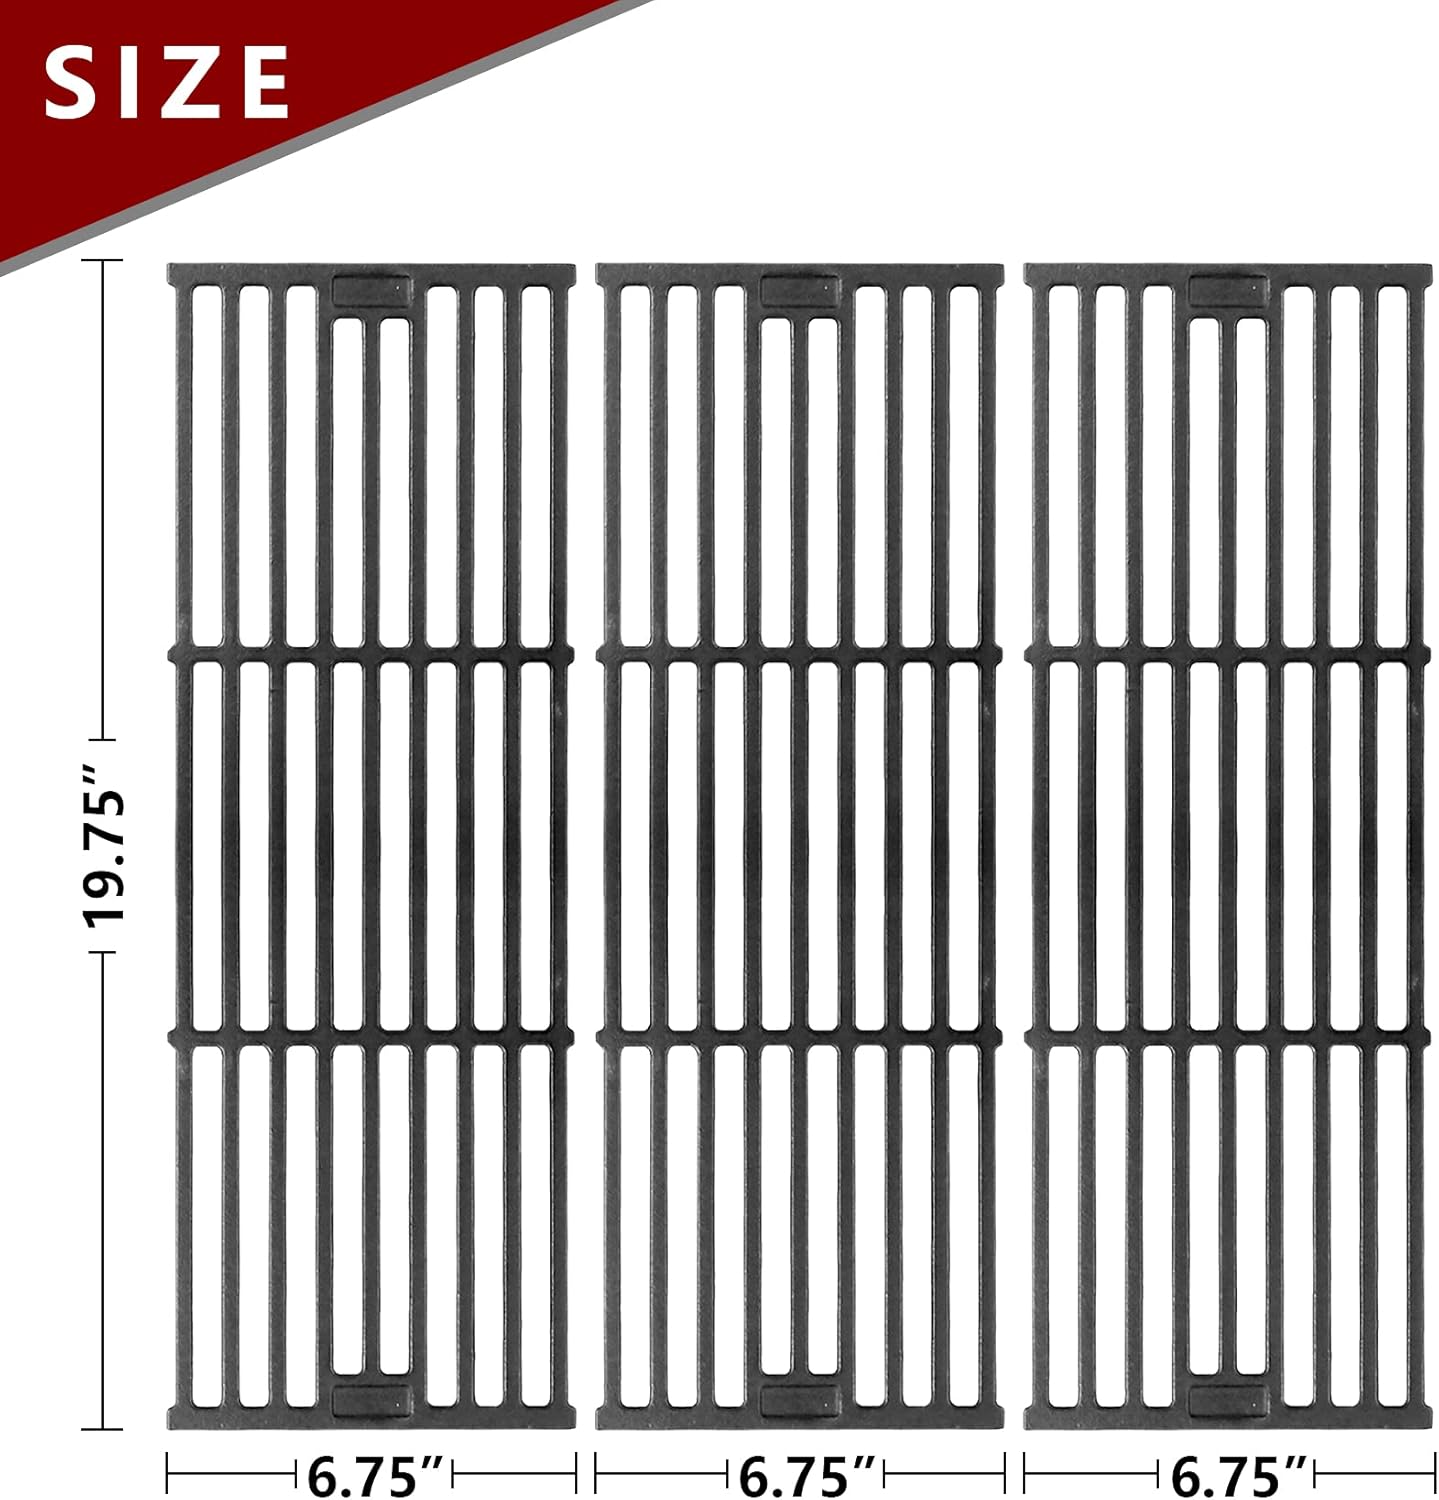
Image: A visual representation of the grill grates with their precise measurements (19.75" x 6.75" per piece).

Image: Examples of compatible grill models, illustrating the range of grills these grates can replace.
Initial Seasoning
Cast iron grates benefit from initial seasoning to create a non-stick surface and prevent rust.
- Clean the grates thoroughly with warm, soapy water and a stiff brush. Rinse completely and dry immediately to prevent rust.
- Apply a thin, even coat of high smoke point cooking oil (e.g., flaxseed, grapeseed, or vegetable oil) to all surfaces of the grates.
- Place the grates in your grill or oven. Heat to 350-400°F (175-200°C) for 1 hour.
- Turn off the heat and allow the grates to cool completely inside the grill/oven.
- Repeat steps 2-4 two to three times for optimal seasoning.

Image: A detailed view of the cast iron surface, highlighting its robust construction and texture.
Operating Instructions
Placement in Grill
Once seasoned, carefully place the grates onto the designated supports within your grill. Ensure they sit securely and evenly.

Image: The cast iron grill grates properly seated within a grill, ready for use.
Grilling Performance
Cast iron is renowned for its excellent heat retention and even heat distribution. This allows for consistent cooking temperatures and helps create desirable sear marks on your food.
- Preheating: Always preheat your grill with the cast iron grates in place for at least 10-15 minutes to allow them to reach optimal cooking temperature.
- Even Cooking: The uniform heat across the grates minimizes hot and cold spots, leading to more evenly cooked food.
- Sear Marks: The high heat retention of cast iron helps create professional-looking sear marks and locks in juices.

Image: A thick cut of meat cooking on the grill grates, demonstrating the excellent searing capabilities and heat retention.

Image: An assortment of foods, including sausages, chicken wings, and vegetables, being grilled on the grates, showcasing versatility.
Maintenance
Cleaning
Proper cleaning is crucial for maintaining your cast iron grill grates and preventing rust.
- After Each Use: While the grates are still warm (but not scorching hot), use a grill brush or scraper to remove any food residue.
- Deep Cleaning: For stubborn residue, allow the grates to cool. Use warm water and a stiff brush. Avoid harsh detergents as they can strip the seasoning.
- Drying: Immediately after cleaning, thoroughly dry the grates. Water left on cast iron will lead to rust. You can place them back on a warm grill for a few minutes to ensure complete drying.

Image: A hand demonstrating the ease of cleaning the grill grates with a cloth, emphasizing their non-stick properties.
Re-seasoning
If your grates start to lose their non-stick properties or show signs of rust, they may need re-seasoning. Follow the initial seasoning steps outlined in the "Setup" section.
Storage
Store clean and seasoned grates in a dry environment. If storing for extended periods, a light coat of cooking oil can provide extra protection against moisture.
Troubleshooting
| Problem | Possible Cause | Solution |
|---|---|---|
| Food sticking to grates | Insufficient seasoning; grates not hot enough; too little oil on food/grates. | Ensure grates are well-seasoned. Preheat grill thoroughly. Apply a light coat of oil to food or grates before cooking. |
| Rust appearing on grates | Improper drying after cleaning; lack of seasoning; exposure to moisture. | Thoroughly dry grates immediately after cleaning. Re-season the grates. Store in a dry place. |
| Grates do not fit grill | Incorrect grill model or grate dimensions. | Verify your grill model and compare its dimensions with the grate specifications provided in this manual. |
Specifications
| Feature | Detail |
|---|---|
| Product Type | Cast Iron Grill Grates (Replacement Parts) |
| Material | Heavy-Duty Cast Iron |
| Individual Grate Dimensions | 19 3/4" (L) x 6 3/4" (W) |
| Total Dimensions (3 PCS) | 19 3/4" (L) x 20 1/4" (W) |
| Item Weight (Total) | 9.43 pounds |
| Package Dimensions | 20.4 x 7.3 x 1.5 inches |
| Manufacturer | Burly grill |
| ASIN | B0BKQ7FC7M |
Warranty and Support
Burly Grill stands behind the quality of its products. For any questions, concerns, or support needs regarding your grill grates, please contact the manufacturer directly.
Manufacturer: Burly grill
Please refer to your purchase documentation or the seller's information on the platform where you purchased the product for specific warranty details and contact methods.
Ask a question about this manual
Ask about setup, troubleshooting, compatibility, parts, safety, or missing instructions. Manuals+ will review the question and use this page’s manual context to help answer it.