1. Product Overview
The KAWA Dash Cam Hardwire Kit (Model PT01) provides a continuous power supply to your compatible dash camera, enabling 24-hour parking surveillance and protecting your vehicle's battery from discharge. This kit is specifically designed for KAWA D6 and D5 2K dash cameras and other dash cameras utilizing a Micro USB connection.
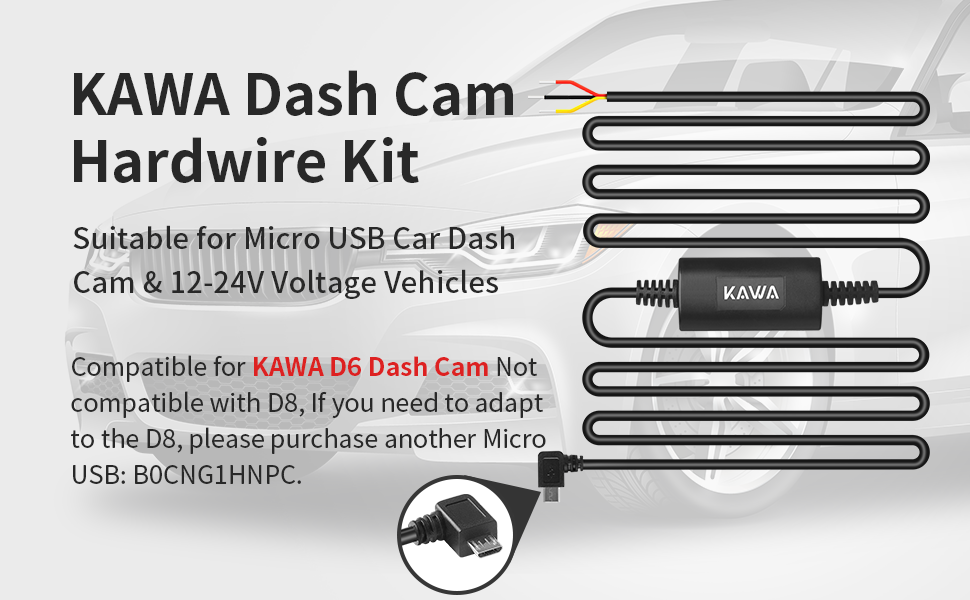
Image: The KAWA Hardwire Kit enables 24-hour parking monitoring for your dash cam, providing continuous surveillance day and night.
Key Features:
- Compatibility: Designed for KAWA D6 / D5 2K dash cams and most other dash cameras with a Micro USB port. Not compatible with D8 / D10 / MINI 3 models.
- 24/7 Parking Surveillance: Provides continuous power to your dash cam for 24-hour parking monitoring when connected to your car's battery or fuse box. Requires enabling time-lapse photography and parking monitor in the dash cam's app.
- Low Voltage Protection: Automatically cuts off power to the dash cam if your car battery voltage drops below 11.8V, ensuring sufficient power to start your vehicle.
- Easy Installation: Connects directly to your car's fuse box for a clean and integrated setup.
- Ample Cable Length: The 11ft (3.4M) cable length is suitable for installation in most 12-24V vehicles.
2. Package Contents
The KAWA Dash Cam Hardwire Kit includes:
- 1 x KAWA Dash Cam Hardwire Kit (Model PT01) with Micro USB connector

Image: The KAWA Hardwire Kit with its Micro USB connector, designed for compatible dash cams.
3. Installation Guide
Before beginning installation, ensure your vehicle's engine is off and the power supply is disconnected to prevent short circuits. The installation steps may vary slightly depending on your vehicle model. This guide provides general instructions.
3.1. Cable Routing
- Mount your dash cam in the desired location on your windshield.
- Plug the Micro USB connector of the hardwire kit into your dash cam.
- Carefully route the power cord along the side gap of the windshield and down the A-pillar to the fuse box area. Use a pry tool to tuck the cable neatly under the trim.

Image: Illustration of how to route the hardwire cable from the dash cam to the fuse box for a discreet installation.
3.2. Fuse Box Connection
The hardwire kit has three wires: yellow (VCC+), red (ACC), and black (GND-).

Image: Detailed wiring diagram of the hardwire kit, indicating the yellow VCC+ power cable, red ACC signal cable, and black ground cable.
- Identify Fuse Box: Locate your vehicle's fuse box, typically found under the dashboard or in the engine bay. Refer to your vehicle's manual for the exact location.
- Connect VCC+ (Yellow Wire):
- Use an electroprobe or multimeter to identify a fuse that provides a constant 12V or 24V power supply even when the car is turned off. This is your long-term electric fuse.
- Pull out the identified fuse. Connect the yellow VCC+ power wire to the fuse. Re-insert the fuse into its original position.

Image: Testing a fuse with an electroprobe to find a constant power source (VCC+).
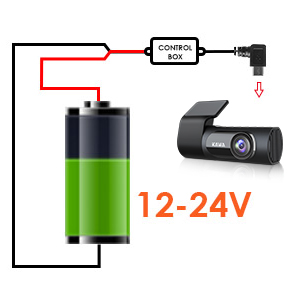
Image: The yellow VCC+ wire connected to a fuse, which is then re-inserted into the fuse box.
- Connect ACC (Red Wire):
- Identify a fuse that provides power only when the ignition is on (ACC power). Use your electroprobe or multimeter to confirm this.
- Pull out the identified fuse. Connect the red ACC signal wire to the fuse. Re-insert the fuse into its original position.
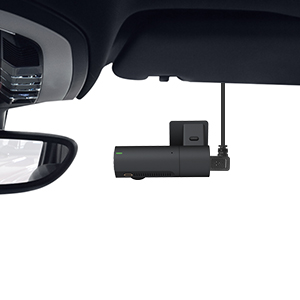
Image: Testing a fuse with an electroprobe to find an ACC power source.

Image: The red ACC wire connected to a fuse, which is then re-inserted into the fuse box.
- Connect GND- (Black Wire):
- Connect the black GND- wire to a metal screw or bolt on the car's chassis, ensuring a secure ground connection.

Image: The black GND- wire secured to a metal screw on the car's frame for proper grounding.
3.3. Video Installation Guide
For a visual guide on the installation process, please refer to the official video below. Note that specific vehicle wiring may differ.
Video: Official KAWA guide demonstrating the installation of the parking surveillance cable. This video provides a step-by-step visual walkthrough of the wiring process.
4. Operating Instructions
Once the hardwire kit is correctly installed, follow these steps to enable and utilize the parking surveillance features:
- Insert Memory Card: Ensure a compatible memory card is inserted into your dash cam. If the indicator light is red, it may indicate no memory card is inserted or an issue with the card.
- Power On: Turn on your vehicle's ignition to power on the dash cam.
- Connect via App: Connect your dash cam to the KAWA mobile application on your smartphone.
- Enable Parking Monitor: Within the dash cam's app settings, enable the "Time-Lapse Photography" and "Parking Monitor" functions. This allows the dash cam to record footage at a lower frame rate to cover a longer period of surveillance while parked.
- Emergency Recording: The system is designed to trigger emergency recording if an external collision reaches a certain threshold while the vehicle is parked.

Image: A KAWA dash cam discreetly mounted on the car's windshield, ready for operation.
5. Troubleshooting
- Dash Cam Not Powering On:
- Check all wire connections (VCC+, ACC, GND-) to ensure they are secure and correctly installed in the fuse box.
- Verify that the selected fuses for VCC+ and ACC are functional and providing power.
- Ensure the Micro USB connector is fully inserted into the dash cam.
- Parking Monitor Not Working:
- Confirm that the yellow VCC+ wire is connected to a constant power source (always on).
- Ensure "Time-Lapse Photography" and "Parking Monitor" are enabled in the dash cam's mobile application settings.
- Check if the car battery voltage is above 11.8V. The low voltage protection feature will cut power if the voltage is too low.
- Indicator Light is Red:
- A red indicator light typically signifies that no memory card is inserted or there is an issue with the inserted memory card. Insert a compatible memory card or try a different one.
- Dash Cam Not Compatible:
- This hardwire kit is designed for dash cams with a Micro USB port. It is not compatible with Type-C or Mini USB ports. Verify your dash cam's port type.
- Specifically, this kit is compatible with KAWA D6 and D5 models. It is not compatible with D8, D10, or MINI 3 models.

Image: Micro USB pin definition diagram, illustrating the various pins and their functions for compatibility verification.
6. Specifications
| Feature | Detail |
|---|---|
| Brand | KAWA |
| Model Name | PT01 |
| Connectivity Technology | USB (Micro USB) |
| Special Features | Low voltage automatic protection, Parking Monitor |
| Compatible Vehicle Type | Car (12-24V) |
| Control Method | App (for dash cam settings) |
| Cable Length | 11ft (3.4M) |
| Item Weight | 0.12 Kilograms |
| Item Dimensions (D x W x H) | 5"D x 2"W x 2"H |
7. Warranty and Support
This KAWA product comes with a 1-year manufacturer's warranty. Additionally, KAWA offers a 30-day money-back guarantee for your purchase.
For technical support, warranty claims, or any inquiries regarding your KAWA Dash Cam Hardwire Kit, please contact KAWA customer service. Refer to the product packaging or the official KAWA website for contact details.