
1. Introduction
The SYLVANIA 1 Amp Smart Charger is designed to charge and maintain 6V and 12V lead-acid, lithium-ion, GEL, EFB, AGM, and calcium batteries. This charger features a 9-stage automatic charging cycle and a float mode for long-term battery maintenance. It is suitable for motorcycles, lawnmowers, and small cars, including vehicles with Start/Stop functionality.

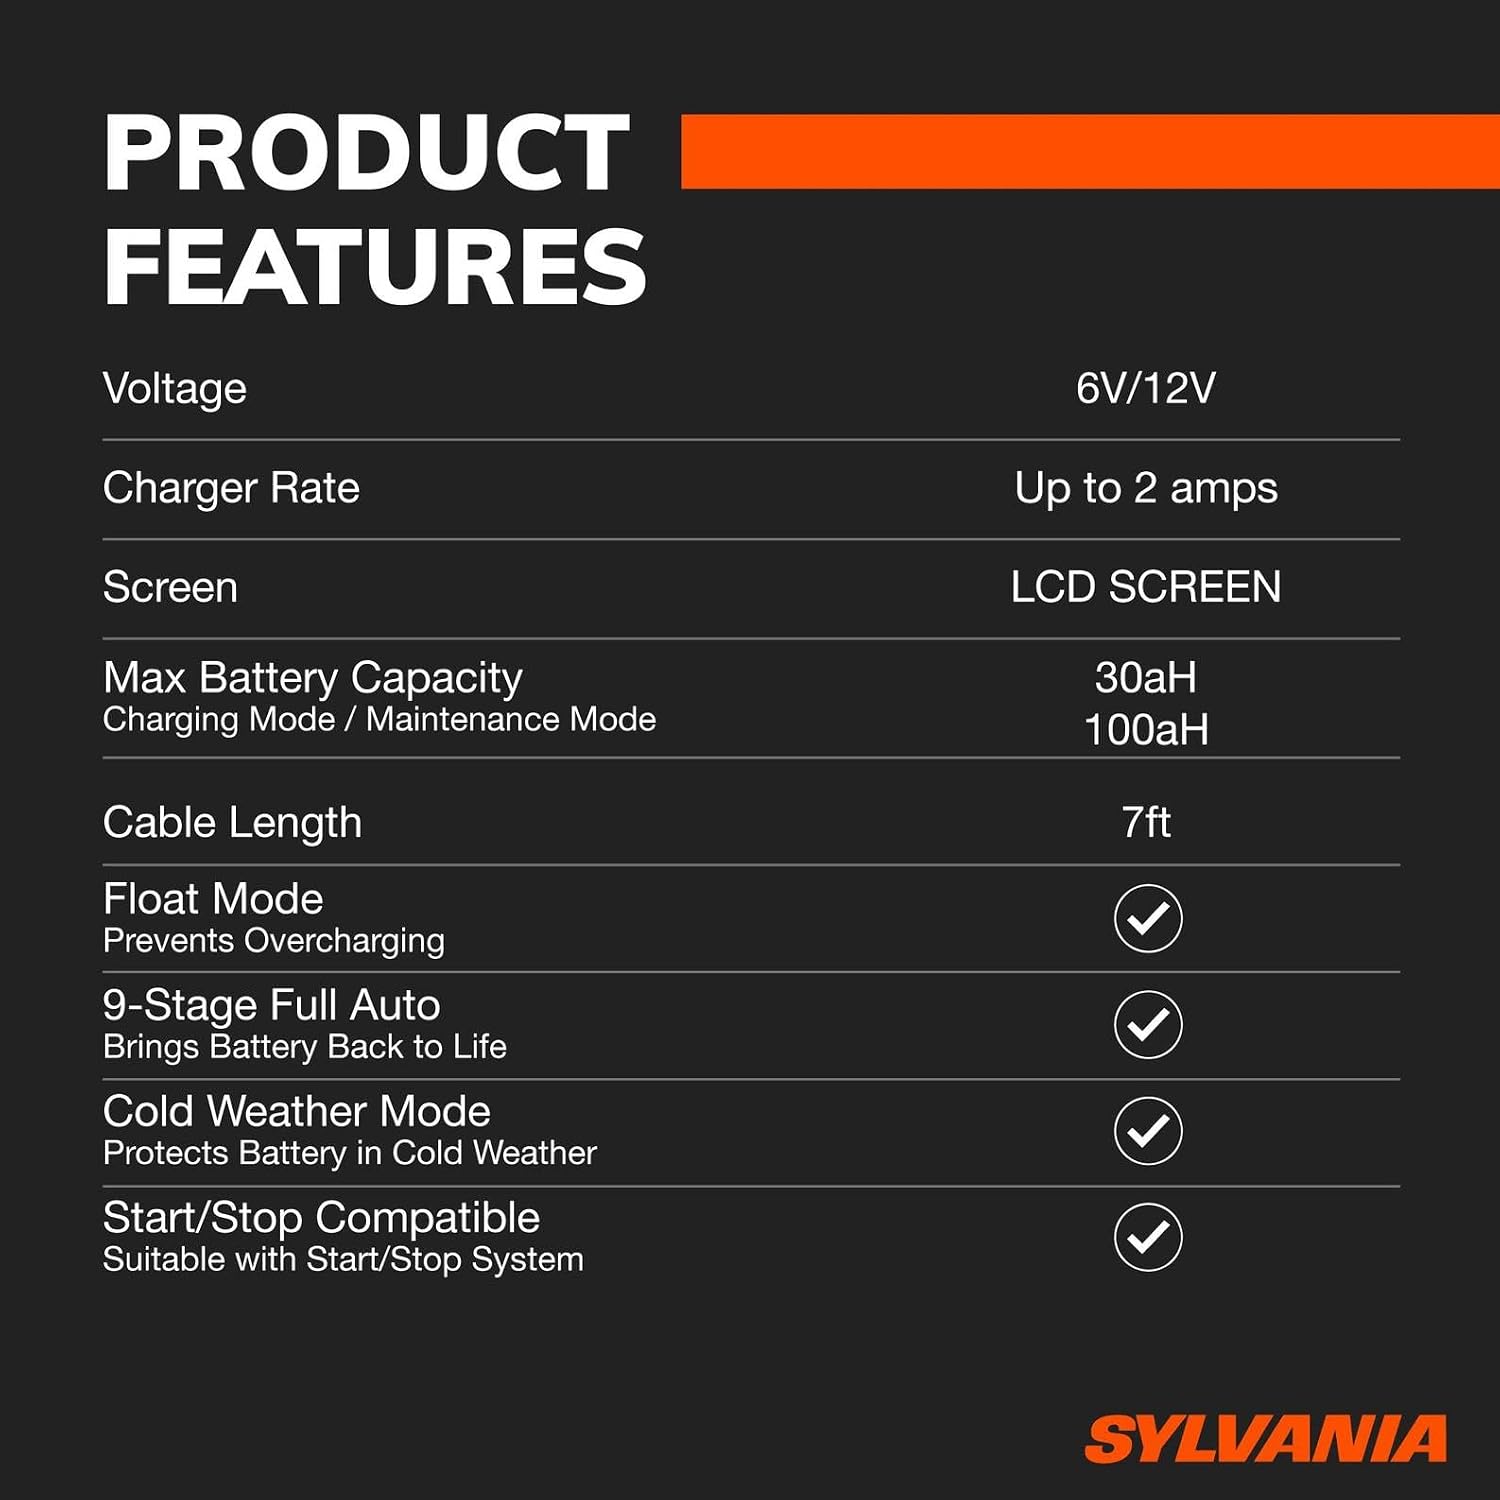
2. Product Features
- 9-Stage Full Auto Charging: Automatically charges the battery to 100% through a comprehensive 9-stage cycle.
- Digital Display: Features a backlit LCD display that shows voltage and charging progress, visible in low light conditions.
- Single-Button Operation: Simplifies mode selection for vehicle or motorcycle batteries.
- Float Mode: Automatically transitions to a long-term maintenance mode once the battery is fully charged, preventing overcharging.
- Cold Weather Charging Mode: Optimizes charging performance and protects batteries in cold temperatures.

3. Package Contents
Verify that all items are present in the package:
- SYLVANIA 1 Amp Smart Charger Unit
- Alligator Clips (for standard battery terminals)
- O-Ring Terminals (for semi-permanent connection or motorcycle batteries)
- User Manual

4. Setup and Connection
- Ensure the charger is unplugged from the AC power outlet before making any connections to the battery.
- Identify the positive (+) and negative (-) terminals on your battery. The positive terminal is usually marked with a plus sign and is larger than the negative terminal.
- Connect the red (+) alligator clip or O-ring terminal to the positive (+) battery terminal.
- Connect the black (-) alligator clip or O-ring terminal to the negative (-) battery terminal. For vehicles, if connecting to the chassis, ensure it is away from the battery and fuel lines.
- Once the battery connections are secure, plug the charger into a standard 120V AC power outlet.
- The charger will automatically begin its diagnostic and charging process.

5. Operating Instructions
5.1. Selecting Charging Mode
The charger features a single mode button to cycle through different charging programs. Press the 'MODE' button to select the appropriate program for your battery type and conditions.

Available modes typically include:
- 12V Car Mode: Standard charging for 12V vehicle batteries.
- 12V Cold Weather Mode: Optimized charging for 12V batteries in temperatures below 5°C (41°F).
- 12V LFP Mode: Specific charging profile for 12V Lithium Iron Phosphate batteries.
- 6V Motorcycle Mode: Standard charging for 6V motorcycle batteries.
- 6V Cold Weather Mode: Optimized charging for 6V batteries in cold temperatures.
- 6V LFP Mode: Specific charging profile for 6V Lithium Iron Phosphate batteries.
5.2. Charging Process
Once a mode is selected, the charger will initiate its 9-stage charging process. The backlit LCD display will show the current voltage and charging progress. When the battery reaches full charge, the charger will automatically switch to float mode to maintain the battery without overcharging.
Charging times vary based on battery size and discharge level. For example, a 1 Amp charger may take approximately 49 hours to fully charge a small car battery from 50% charge.

6. Maintenance
- Keep the charger clean and dry. Wipe with a soft, damp cloth. Do not use harsh chemicals or abrasive cleaners.
- Inspect cables and connectors regularly for any signs of damage, wear, or corrosion. Replace if necessary.
- Store the charger in a cool, dry place when not in use.
- Ensure battery terminals are clean and free of corrosion for optimal connection.
7. Troubleshooting
- Charger not turning on or displaying information:
- Ensure the charger is securely plugged into a working AC outlet. Check battery connections for proper polarity and secure contact. The battery may be too deeply discharged (below 1.5V) for the charger to initiate. Consult a professional if the issue persists.
- Battery not charging or charging slowly:
- Verify that the correct charging mode is selected for your battery type and voltage. Ensure all connections are clean and tight. A very large or deeply discharged battery will take a long time to charge with a 1 Amp charger. Consider the estimated charging times provided in the manual.
- Charger enters float mode too quickly:
- This may indicate a faulty battery that cannot hold a charge, or an incorrect mode selection. Have the battery tested by a professional.
8. Specifications
| Product Dimensions | 3.54 x 3.15 x 8.44 inches |
| Item Weight | 13.7 ounces |
| Input Voltage | 120 Volts AC |
| Output Voltage | 6 Volts DC / 12 Volts DC |
| Current Rating | 1 Amp |
| Max Battery Capacity (Charging) | 30Ah |
| Max Battery Capacity (Maintenance) | 100Ah |
| Cable Length | 7 ft |
| Screen Type | LCD Screen |
| ASIN | B0BKMLLTNN |
| GTIN | 04059089342651 |
9. Safety Information
Always follow these safety guidelines when operating the charger:
- Read all instructions before use.
- Use the charger in a well-ventilated area.
- Do not expose the charger to rain or excessive moisture.
- Avoid charging frozen batteries.
- Do not operate the charger if it has received a sharp blow, been dropped, or otherwise damaged.
- Keep out of reach of children.
- Always disconnect the AC power before disconnecting the battery leads.
10. Warranty and Support
For warranty information or technical support, please refer to the contact details provided in the product packaging or visit the official SYLVANIA website. Keep your purchase receipt as proof of purchase for warranty claims.