Introduction
Thank you for choosing the tectake Industrial Style TV Stand. This manual provides essential information for the safe and efficient assembly, operation, and maintenance of your new furniture. Please read these instructions carefully before beginning assembly and retain them for future reference.
Safety Information
- Ensure all parts are present and undamaged before assembly. Do not use damaged parts.
- Assemble the unit on a soft, clean surface to prevent scratches.
- Always follow the assembly steps in the order provided.
- Do not overtighten screws, as this may damage the material.
- Keep small parts away from children during assembly.
- This TV stand is designed for indoor use only.
- Do not exceed the maximum weight capacity of the top surface or shelves.
Package Contents
Before starting assembly, verify that all components listed below are present in your package.
| Component | Quantity | Description |
|---|---|---|
| Top Panel | 1 | Main surface for TV |
| Shelf Panels | 2 | Internal storage shelves |
| Side Panels | 2 | Left and right frame supports |
| Back Panel (Door) | 1 | Door for closed compartment |
| Metal Frame Components | Various | Powder-coated steel frame parts |
| Hardware Pack | 1 | Screws, bolts, magnetic catch, adjustable feet, handle |
| Assembly Instructions | 1 | This manual |
Setup and Assembly
Assembly is required for this product. Please follow the steps carefully. An additional person may be helpful for certain steps.
Tools Required:
- Screwdriver (not included, typically Phillips head)
- Allen wrench (usually included in hardware pack)
Assembly Steps:
- Unpack and Identify Parts: Carefully unpack all components and lay them out on a soft, clean surface. Refer to the parts list to ensure all pieces are present.
- Assemble the Metal Frame: Connect the vertical and horizontal metal frame components using the provided screws and Allen wrench. Ensure all connections are secure but do not fully tighten yet.
- Attach Shelf Panels: Insert the two shelf panels into the designated slots within the metal frame. Secure them with screws as indicated in the detailed diagram.
- Install the Top Panel: Place the top panel onto the assembled frame and secure it with screws.
- Attach the Door: Mount the door to the designated compartment using the hinges. Install the magnetic catch inside the compartment and the handle on the door.
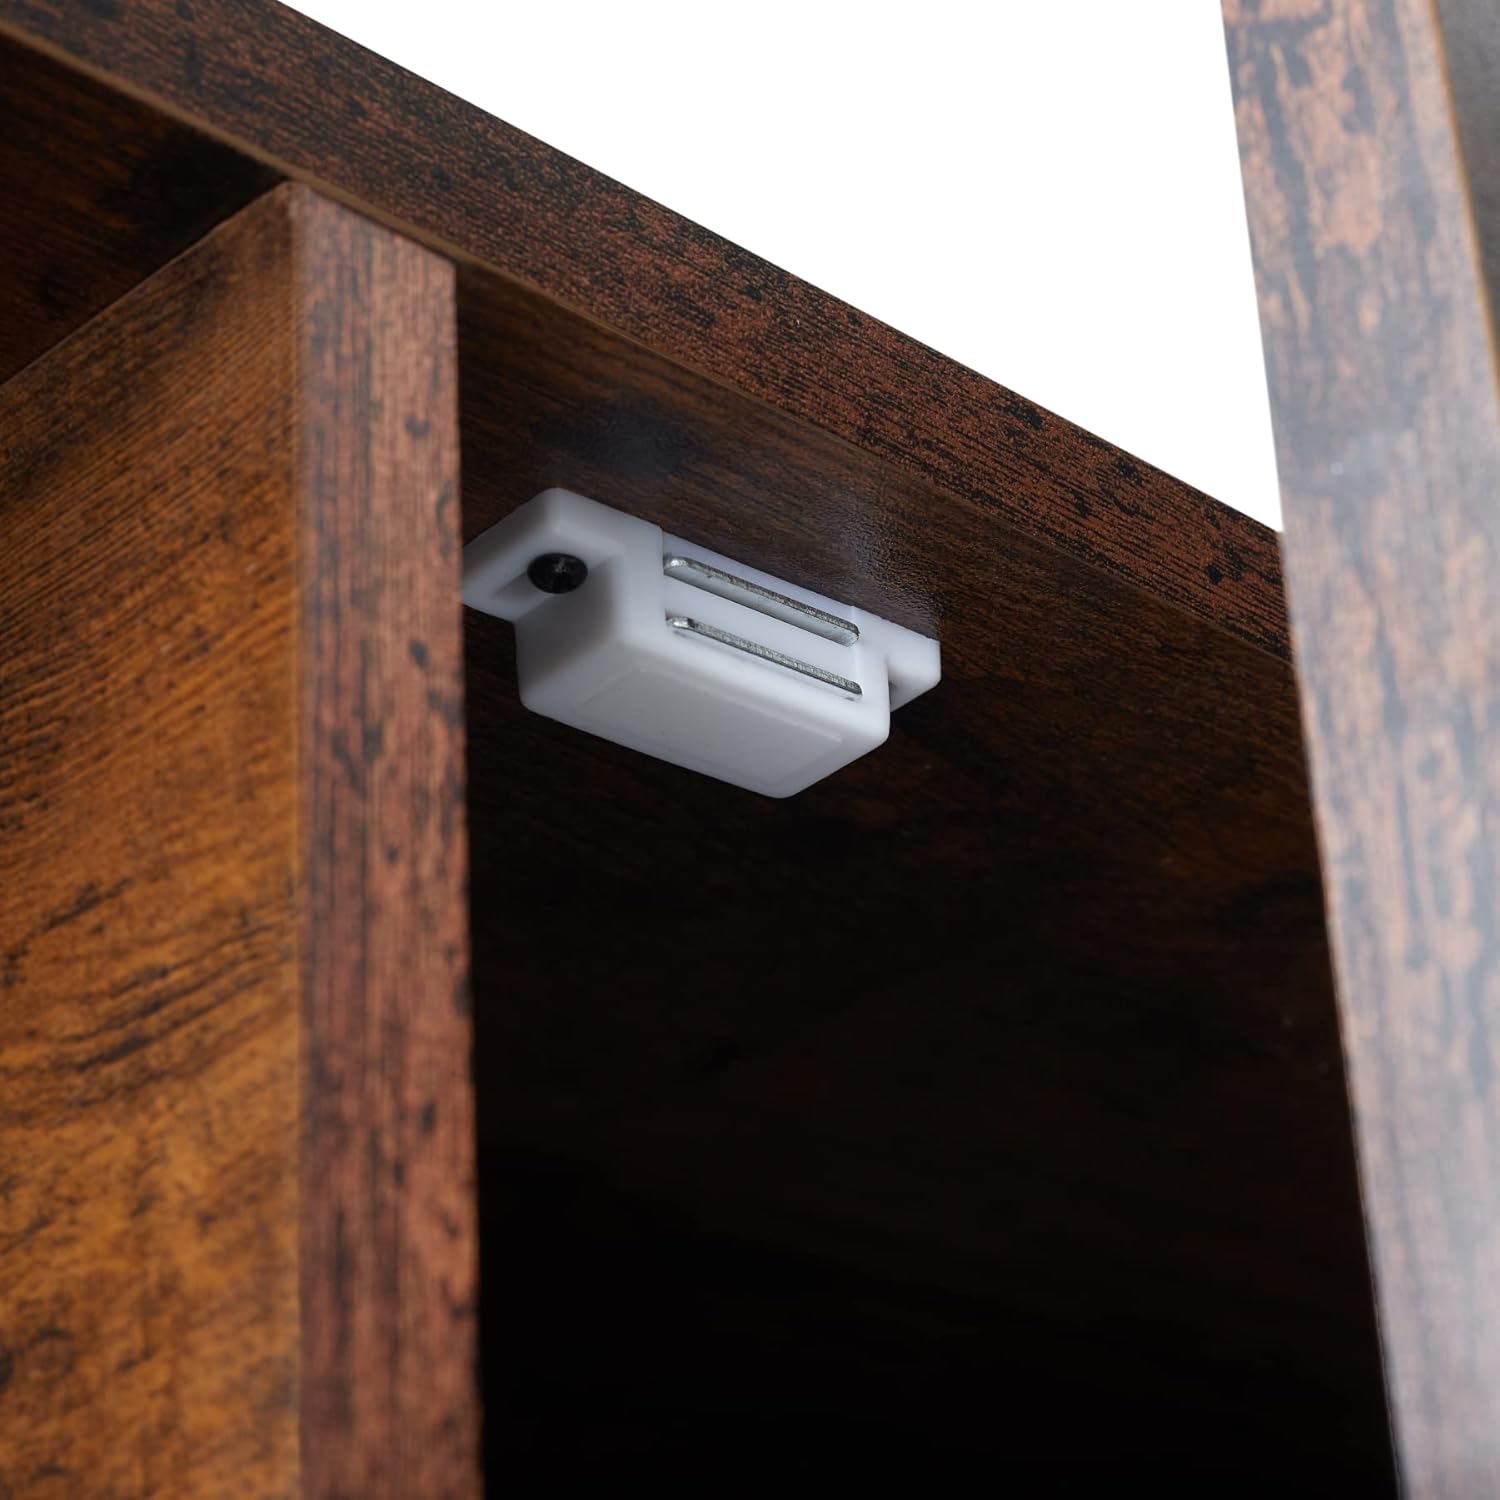
Image: Magnetic catch installation for the door.
- Install Adjustable Feet: Screw the adjustable feet into the bottom of the metal frame legs. These feet allow for minor leveling adjustments on uneven floors.

Image: Adjustable feet for leveling the TV stand.
- Final Tightening: Once all components are in place, carefully tighten all screws and bolts. Do not overtighten.
- Positioning: Place the assembled TV stand in its desired location. Adjust the feet as needed to ensure stability.
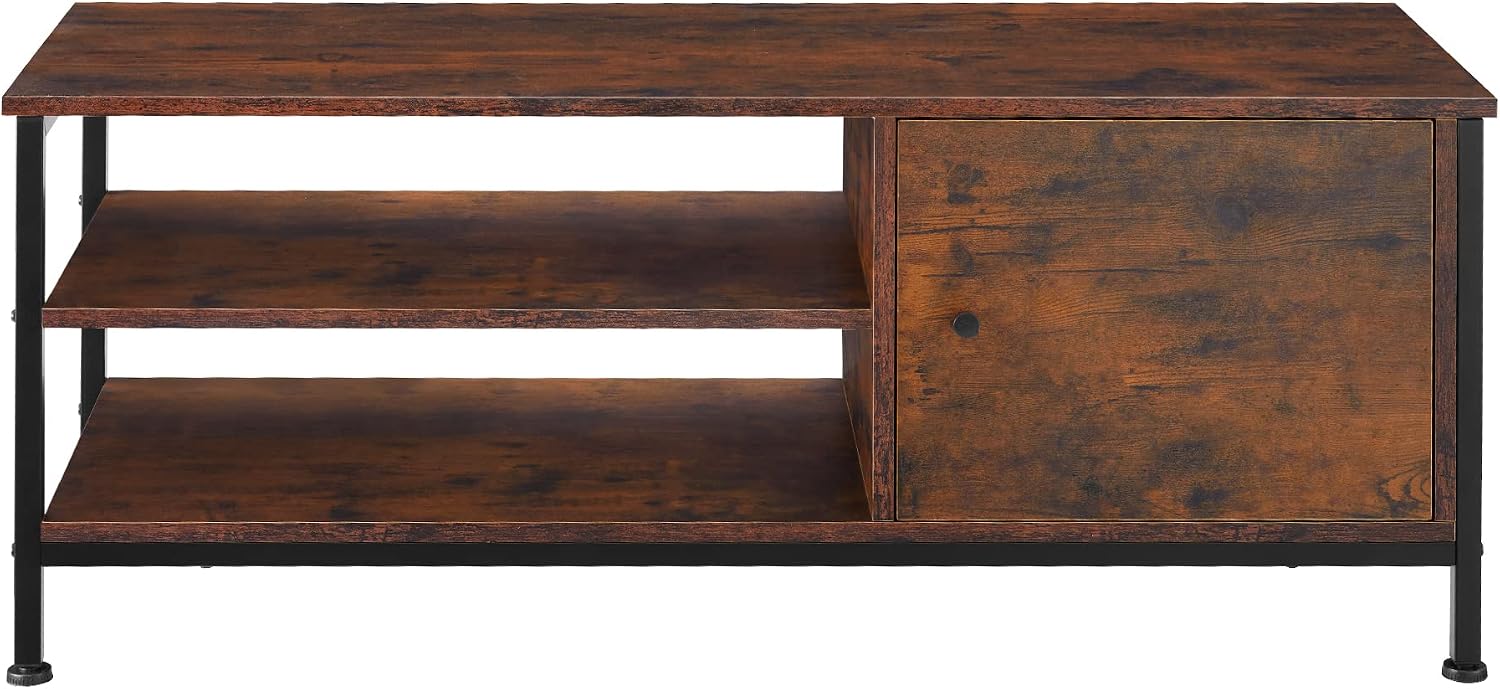
Image: Assembled TV Stand.
Operating Instructions
This TV stand is designed to support televisions and media devices. Follow these guidelines for optimal use:
- Placement: Place your television centrally on the top surface. Ensure the TV's base fits securely within the dimensions of the stand.
- Weight Capacity: Do not overload the top surface or shelves. Distribute weight evenly.
- Cable Management: Utilize the open shelves for media players, game consoles, and other electronic devices. Organize cables neatly to prevent tangles and tripping hazards.
- Closed Storage: Use the compartment with the door to store items you wish to keep out of sight, such as remote controls, DVDs, or small accessories.

Image: TV size compatibility with the stand.
Maintenance and Care
Proper care will extend the life and appearance of your TV stand.
- Cleaning: Wipe surfaces with a soft, dry, or slightly damp cloth. Avoid harsh chemicals, abrasive cleaners, or excessive moisture, as these can damage the melamine coating.
- Spills: Clean up spills immediately to prevent staining or damage to the wood-look finish.
- Inspection: Periodically check all screws and connections to ensure they remain tight. Retighten if necessary.
- Avoid Direct Sunlight: Prolonged exposure to direct sunlight may cause fading or discoloration.
- Heat Protection: Do not place hot items directly on the surface. Use coasters or protective pads.
Troubleshooting
| Problem | Possible Cause | Solution |
|---|---|---|
| Stand is wobbly or uneven. | Uneven floor or loose connections. | Adjust the leveling feet at the bottom of the legs. Ensure all screws are securely tightened. |
| Door does not close properly. | Hinges are misaligned or magnetic catch is not installed correctly. | Check hinge alignment and adjust if needed. Verify the magnetic catch is securely attached and aligned with the door. |
| Parts do not fit during assembly. | Incorrect orientation of parts or wrong parts used. | Review the assembly diagrams carefully. Ensure you are using the correct parts for each step and that they are oriented correctly. Do not force parts together. |
Specifications
| Feature | Detail |
|---|---|
| Model Number | 404640 |
| Dimensions (L x W x H) | 110 x 40 x 45.5 cm (43.3 x 15.7 x 17.9 inches) |
| Weight | 18.6 kg (41 lbs) |
| Material | Particle board with melamine coating (wood look), Powder-coated steel frame |
| Color | Dark Wood |
| Style | Industrial |
| Storage | 2 open shelves, 1 closed compartment with door |
| Assembly Required | Yes |
| Care Instructions | Clean with a dry or damp cloth |

Image: Product dimensions diagram.
Warranty and Support
For warranty information or technical support, please refer to the contact details provided with your purchase documentation or visit the official tectake website. Keep your proof of purchase for any warranty claims.
Manufacturer: tectake
Website: www.tectake.com (Example link, please verify official website)