Introduction
Thank you for choosing the Keweis Desktop Water Bottle Dispenser. This portable electric water pump is designed for convenience, offering smart quantitative pumping for various bottle sizes. Its compact and detachable design makes it ideal for home, office, and outdoor use. Please read this manual carefully before use to ensure proper operation and maintenance.

Image: The Keweis Desktop Water Bottle Dispenser, a sleek white unit with a vertical spout, is shown actively dispensing water into a clear glass. The base of the dispenser features control buttons and indicator lights.
Safety Information
- Do not immerse the main unit in water or other liquids.
- Keep out of reach of children.
- Use only the provided USB charging cable.
- Ensure the water bottle is placed lower than the dispenser to facilitate proper pumping.
- Do not use with liquids other than potable water.
- Avoid exposing the device to extreme temperatures or direct sunlight.
Package Contents
Please check the package contents upon opening to ensure all items are present:
- 1x Keweis Electric Drinking Water Pump (Main Unit)
- 1x Food Grade Silicone Water Hose (120 cm / 3.9 Feet)
- 1x USB Charger Cable
- 1x User Manual

Image: A clear view of the Keweis Desktop Water Bottle Dispenser's packaging and its contents laid out. The white dispenser unit, a coiled transparent silicone hose, a white USB charging cable, and a user manual are visible next to the product box.
Product Overview
Familiarize yourself with the main components of your Keweis Desktop Water Bottle Dispenser:
- Main Unit: The base of the dispenser containing the battery, controls, and water outlet.
- Water Outlet Spout: The part from which water is dispensed.
- Control Panel: Buttons for power, quantitative selection, and indicator lights.
- Water Inlet Port: Where the silicone hose connects to the main unit.
- USB Charging Port: For connecting the USB charging cable.
- Silicone Water Hose: The flexible hose that draws water from the bottle.

Image: A detailed view of the dispenser's control panel, highlighting the "Power on keypad / pumping water keypad" and "Adjust level of pumping water" buttons. Indicator lights for 100ml, 200ml, 300ml, 500ml, 700ml, and 1000ml are clearly visible, along with explanations for 7 levels of pumping and continuous water flow.

Image: A diagram showing the dimensions of the Keweis Smart Table Water Dispenser. Key measurements include a height of 22.5 cm (8.9 inches) for the spout, 16.3 cm (6.4 inches) for the water outlet, a base width of 13.7 cm (5.4 inches), and a base height of 3.3 cm (1.3 inches). Icons indicate features like large capacity battery, low noise working, USB charging, holding with tray, safety materials, and 7 levels of pumping options.
Setup
Follow these steps for the initial setup of your water dispenser:
- Align Water Outlet: Align the water outlet spout with the designated icon on the main unit. Press down and rotate to the left until it clicks into place.
- Install Water Tube: Insert the silicone water hose into the corresponding port at the bottom of the main unit.
- Prepare Water Bottle: Insert the other end of the silicone water hose into your water bottle (1-6 gallon universal bottles are compatible). Ensure the hose reaches the bottom of the bottle for optimal water drawing.
- Position Dispenser: Place the dispenser on a stable, flat surface. For best performance, ensure the water bottle is positioned lower than the dispenser.

Image: A four-step visual guide demonstrating the installation process. Step 1 shows aligning and rotating the water outlet. Step 2 illustrates inserting the water tube into the dispenser's base. Step 3 depicts inserting the hose into a large water bottle. Step 4 shows the fully assembled dispenser ready for use with a glass on its tray.

Image: An illustration showcasing different sizes of water bottles, from 1 gallon to 5 gallon, indicating the Keweis dispenser's compatibility with a wide range of universal water jugs.
Operating Instructions
The Keweis dispenser offers both continuous pumping and quantitative dispensing options.
Power On/Off
- To Power On: Long press the power button (labeled with a circle and a diagonal line) for a few seconds.
- To Power Off: Long press the power button again.
Continuous Pumping
- Ensure the device is powered on.
- Press the power button once to start continuous water flow.
- Press the power button again to stop the water flow.
Quantitative Pumping (7 Levels)
The dispenser allows you to select precise water volumes:
- Ensure the device is powered on.
- Press the quantitative selection button (labeled with 'mL') repeatedly to cycle through the available volumes: 100 ml, 200 ml, 300 ml, 500 ml, 700 ml, 1000 ml. The corresponding indicator light will illuminate.
- Once your desired volume is selected, press the power button once to start dispensing. The dispenser will automatically stop when the selected volume is reached.
- To stop pumping before the selected volume is reached, press the power button again.
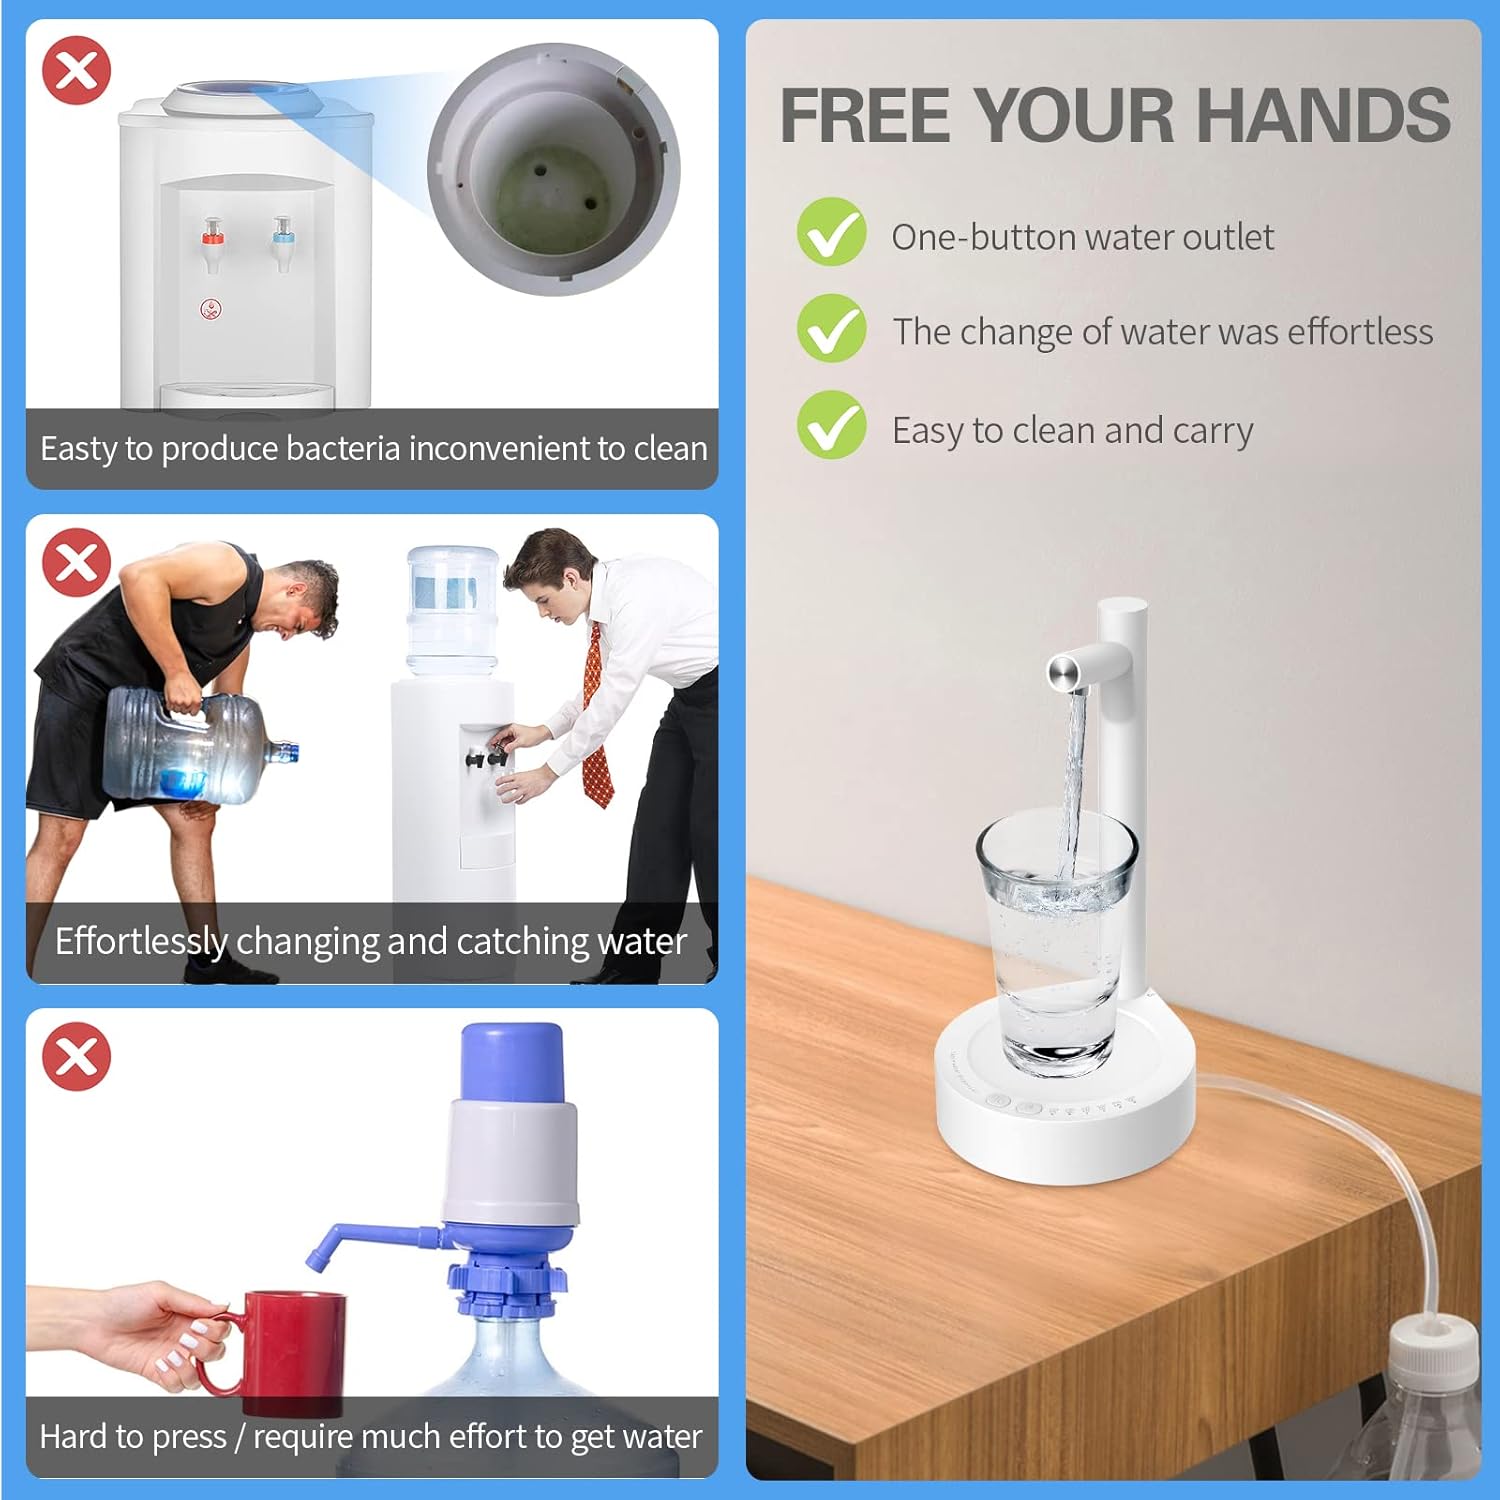
Image: A comparison graphic illustrating the benefits of the Keweis dispenser. It shows how traditional water coolers can be inconvenient to clean and prone to bacteria, and how manually lifting heavy water bottles or using hand pumps requires significant effort. In contrast, the Keweis dispenser offers one-button water outlet, effortless water changes, and is easy to clean and carry, freeing your hands.

Image: A visual guide indicating that the dispenser is suitable for cups with a height less than 6.4 inches (16.3 cm). It shows a tall pitcher marked with an 'X' and a standard mug with a checkmark, demonstrating the height limitation for containers placed on the dispenser's tray.
Charging
The Keweis water dispenser is equipped with a built-in 1800 mAh rechargeable battery.
- Connect the provided USB charger cable to the USB charging port on the side of the dispenser.
- Connect the other end of the USB cable to a power source such as a power bank, laptop power port, or a conventional adapter with a 5V output voltage.
- The indicator light will show the charging status (refer to the product's specific light indicators for full/low battery).
- A full charge provides long-lasting operation.

Image: A close-up shot of the Keweis water dispenser's USB charging port, showing a USB cable being plugged in. Icons above indicate compatibility with power banks, laptop power ports, and adapter head power supplies, emphasizing the 1800mAh large capacity battery.
Maintenance and Care
Regular cleaning ensures hygiene and extends the lifespan of your dispenser.
- Cleaning the Main Unit: Wipe the exterior of the main unit with a soft, damp cloth. Do not use abrasive cleaners or immerse the unit in water.
- Cleaning the Silicone Hose: Periodically rinse the silicone water hose with clean water. For deeper cleaning, you can soak it in warm soapy water and then rinse thoroughly.
- Drying: Ensure all components are completely dry before reassembly and storage.
- Storage: When not in use for extended periods, store the dispenser in a cool, dry place.
Troubleshooting
If you encounter issues with your Keweis water dispenser, refer to the following common problems and solutions:
| Problem | Possible Cause | Solution |
|---|---|---|
| Dispenser not turning on. | Battery is low or depleted. | Charge the dispenser using the provided USB cable. Ensure the charging light indicates activity. |
| No water dispensed or weak flow. |
|
|
| Water continues to flow after stopping. | Residual water in the spout. | A small amount of residual water may drip after stopping, which is normal. Ensure the cup is removed only after dripping ceases. |
| Dispenser is noisy during operation. | Normal pump operation. | A low noise during pumping is normal for the device. If the noise is excessive or unusual, check for blockages in the hose. |
Specifications
| Feature | Detail |
|---|---|
| Model Number | X115 |
| Brand | Keweis |
| Color | B-white |
| Material | ABS Plastic, 304 Stainless Steel, Silicone |
| Capacity Compatibility | 1, 2, 3, 4, 5, 6 Gallon Bottles & Universal Jugs |
| Battery Capacity | 1800 mAh |
| Power Source | Battery Powered (USB Charging) |
| Product Dimensions (L x W x H) | 1.3"D x 5.4"W x 8.9"H (Base: 13.7cm / 5.4in width, 3.3cm / 1.3in height; Spout height: 22.5cm / 8.9in) |
| Item Weight | 12.3 ounces |
| Quantitative Pumping Levels | 100ml, 200ml, 300ml, 500ml, 700ml, 1000ml, Continuous |
Warranty and Support
Keweis is committed to providing high-quality products. For any questions, concerns, or technical support regarding your Desktop Water Bottle Dispenser, please contact our customer service team. While specific warranty details are not provided in this manual, please retain your purchase receipt for any warranty claims.
For further assistance, please visit the official Keweis support page or contact your retailer.


