1. Introduction
This manual provides detailed instructions for the installation, operation, and maintenance of your Humpptom BY06 Ceiling Fan Wall Control Remote. This unit is designed to replace or upgrade existing ceiling fan wall controls, offering convenient access to fan speeds and light functions.
The wall control remote provides three fan speeds (High, Medium, Low) and a fan off function, along with a light control button that supports dimming for incandescent lights. An on/off toggle switch is also included for quick power control.
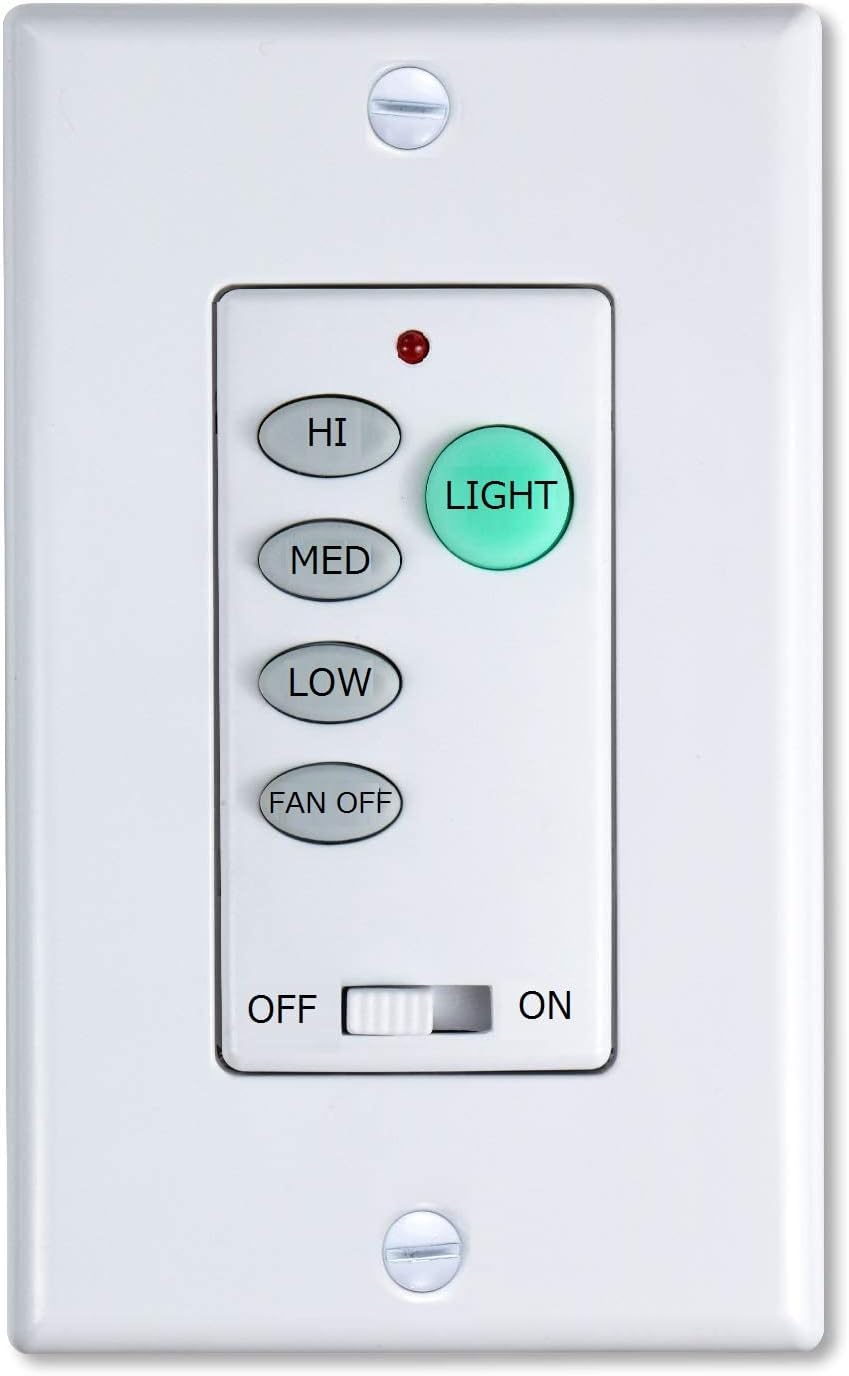
Figure 1: Front view of the Humpptom BY06 wall control remote, featuring buttons for fan speed (HI, MED, LOW, FAN OFF) and light control (LIGHT), along with an ON/OFF toggle switch at the bottom.
2. Compatibility
The Humpptom BY06 Wall Control Remote is a replacement for various ceiling fan remote models. To ensure compatibility, check the FCC ID/Model number on the back of your original remote or receiver. Compatible models include, but are not limited to:
- Hunter Westinghouse, Hampton Bay, and Harbor Breeze FAN-53T
- FAN-35T
- UC7078T Fan-HD CHQ7078T
- L3H2010FANHD
- L3HFAN35T, L3HFAN35T1
- FAN-HD5
- FAN-11T
- KUJCE9103
The light dimmer function controls the brightness of incandescent lights. If your light fixture uses LED bulbs, the remote will typically only control the LED's on/off function, not dimming, unless the LED bulbs are specifically dimmable and compatible with this type of dimmer.

Figure 2: The rear view of the wall control unit, illustrating the AC_IN_L, AC_OUT_L, and Ground wiring connections. It also lists compatible FCC ID/Model numbers for various ceiling fan remotes.
3. Installation and Setup
Important Safety Information:
- Always ensure power is turned off at the circuit breaker before beginning any electrical installation.
- If you are unsure about any part of the installation process, consult a qualified electrician.
3.1. Wiring the Receiver (if applicable)
The wall control remote communicates wirelessly with a receiver unit installed within your ceiling fan's canopy. Ensure the receiver is correctly wired according to the diagram below. This typically involves connecting the AC supply, fan motor wires, and light wires to the receiver.

Figure 3: A comprehensive wiring diagram showing how to connect the wall control to the AC supply, a receiver unit, and a ceiling fan with light. It details connections for AC IN L, AC IN N, OUT L, To Light L, To Motor L, To Motor N, and Ground.
3.2. Setting DIP Codes
Both the wall control remote and the receiver unit feature a series of 4 DIP (Dual In-line Package) switches. These switches must be set to the exact same pattern for the remote and receiver to communicate correctly.
- Locate the DIP switches inside the battery compartment of the wall control remote (after removing the battery cover).
- Locate the DIP switches on the receiver unit (typically found on the side of the receiver).
- Using a small tool (like a pen tip), slide the switches on the wall control to match the pattern of the switches on the receiver.
- If you have multiple ceiling fans in your home, ensure that each fan system (remote and receiver) has a unique DIP code setting to prevent interference.

Figure 4: This image demonstrates the importance of setting the DIP switches on both the wall control and the receiver unit to match. The DIP switches (1-4) are used to establish a unique communication code.
3.3. Mounting the Wall Control
Once the DIP codes are set and the receiver is wired, you can mount the wall control remote to your wall. It is designed to fit into a standard wall switch box.
Video 1: This video provides a visual guide to installing and operating a Humpptom ceiling fan remote and dimmer. It covers wiring the receiver into the fan canopy and demonstrating the remote's fan speed and light dimming capabilities.
Video 2: This video showcases the Humpptom BY06 wall control remote, emphasizing its convenience as a wall-mounted solution to prevent losing traditional handheld remotes. It demonstrates the fan speed and light controls, as well as the DIP switch settings for pairing.
4. Operating Instructions
The Humpptom BY06 Wall Control Remote offers intuitive control over your ceiling fan and light.
4.1. Fan Control
- HI: Press to set the fan speed to High.
- MED: Press to set the fan speed to Medium.
- LOW: Press to set the fan speed to Low.
- FAN OFF: Press to turn the fan off.
4.2. Light Control
- LIGHT Button: Press to turn the light on or off.
- Dimming: For incandescent lights, press and hold the LIGHT button to cycle through brightness levels. Release the button when the desired brightness is reached.
4.3. Main Power Switch
A physical ON/OFF toggle switch is located at the bottom of the remote. This switch provides a quick way to cut power to the entire fan and light system. When in the OFF position, all other buttons on the remote will be inactive.

Figure 5: This image highlights the key features of the Humpptom BY06 remote: 3-speed fan control and a light dimmer function. A red indicator light is visible at the top.
5. Maintenance
To ensure optimal performance and longevity of your Humpptom BY06 Wall Control Remote, follow these simple maintenance guidelines:
- Cleaning: Wipe the surface of the remote with a soft, dry cloth. Avoid using abrasive cleaners or solvents, as these can damage the finish or internal components.
- Battery Replacement: The remote uses a standard battery (type not specified in product data, typically A23 or AAA). Replace the battery when the indicator light no longer illuminates or the remote's response becomes inconsistent. Open the battery compartment on the back of the remote to replace.
- Environmental Conditions: Avoid exposing the remote to extreme temperatures, high humidity, or direct sunlight for extended periods.
6. Troubleshooting
If you experience issues with your Humpptom BY06 Wall Control Remote, refer to the following troubleshooting steps:
| Problem | Possible Cause | Solution |
|---|---|---|
| Remote not responding | Dead battery Incorrect DIP switch settings Power to fan is off | Replace battery Verify DIP switches on remote and receiver match (refer to Section 3.2) Ensure main power switch on remote is ON and circuit breaker is not tripped |
| Fan operates, but light does not | Light bulb faulty Incorrect wiring Light function not enabled on receiver | Replace light bulb Check light wiring to receiver (refer to Section 3.1) Consult fan/receiver manual for light function settings |
| Light does not dim | Non-dimmable LED bulbs Incorrect wiring | Use dimmable incandescent or compatible LED bulbs Check light wiring to receiver (refer to Section 3.1) |
| Interference with other fans | Duplicate DIP code settings | Change DIP switch settings on one of the fan systems to a unique pattern (refer to Section 3.2) |
7. Specifications
- Brand: Humpptom
- Model Number: BY06 Remote
- Item Weight: 5 ounces
- Package Dimensions: 5.94 x 4.09 x 2.44 inches
- Color: Black (Remote Only)
- Special Feature: Wall Control
- Max Number of Supported Devices: 1 (per remote/receiver pair)
- Compatible Devices: Fan
- Date First Available: October 26, 2022
8. What's in the Box
The Humpptom BY06 Remote Only package typically includes:
- 1 x Humpptom BY06 Wall Control Remote
Note: A compatible receiver unit is required for operation and is often sold separately or included with a ceiling fan kit.
9. Warranty and Support
For warranty information and customer support, please refer to the documentation provided with your original product purchase or contact Humpptom customer service directly. Keep your proof of purchase for warranty claims.