1. Introduction
Welcome to the world of astronomy with your new HOROX HX70x400 Refractor Telescope. This telescope is designed for both adults and children, offering a clear view of celestial objects like the Moon, as well as terrestrial observations such as bird watching and landscape viewing. With its 70mm aperture and 400mm focal length, it provides excellent image quality for beginners and enthusiasts alike. This manual will guide you through the setup, operation, and maintenance of your telescope to ensure a rewarding viewing experience.

Figure 1.1: Complete HOROX HX70x400 Telescope setup with accessories.
2. Safety Information
- Never look directly at the sun through the telescope or its finderscope without a professionally manufactured solar filter. Doing so can cause immediate and irreversible eye damage, including blindness.
- Do not leave the telescope unattended, especially when children are present.
- Handle optical components with care to avoid scratches or damage.
- Ensure the tripod is stable on a flat, firm surface before attaching the telescope.
- Keep the telescope away from extreme temperatures and moisture.
3. Package Contents
Verify that all components are present in your package:
- Telescope Optical Tube (70mm Aperture, 400mm Focal Length)
- Adjustable Aluminum Tripod
- K20mm Eyepiece (20x Magnification)
- K9mm Eyepiece (44x Magnification)
- 5x24 Finderscope with Reticle
- Smartphone Adapter
- Accessory Bag
- User Manual (this document)
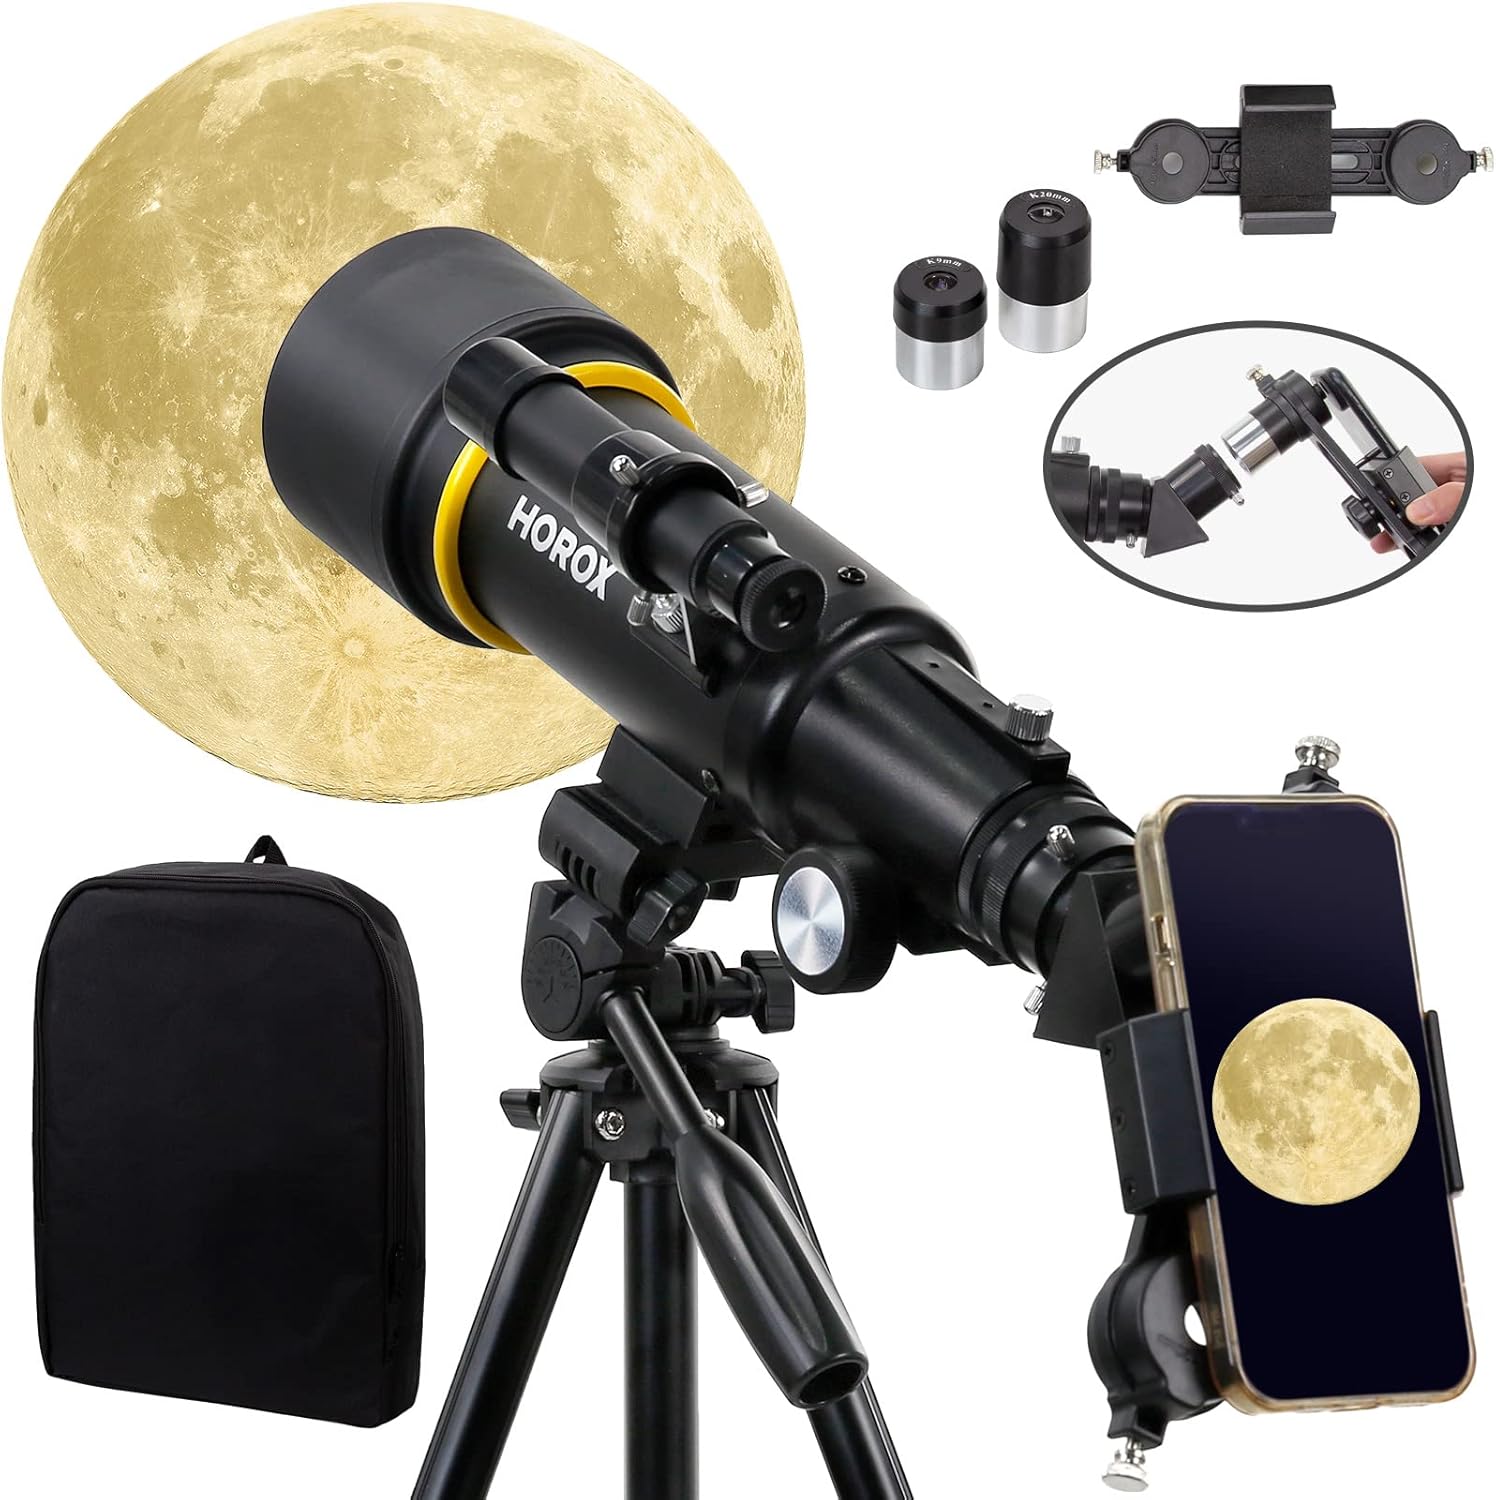
Figure 3.1: Included accessories: smartphone adapter, eyepieces, and carry bag.
4. Setup Guide
Follow these steps to assemble your HOROX telescope:
- Set up the Tripod:
Unfold the aluminum tripod legs and extend them to your desired height. Ensure the tripod is stable on a level surface. The tripod is adjustable from 20 to 54 inches (50.8 to 137.2 cm). For optimal stability and sharper images, especially at higher magnifications, it is recommended to keep the tripod at a lower height.

Figure 4.1: The professional aluminum tripod with adjustable legs.
- Attach the Telescope Optical Tube:
Locate the mounting screw on the tripod head. Align the telescope optical tube with the mounting plate on the tripod and secure it firmly with the screw. Ensure the tube is balanced and stable.
- Install the Finderscope:
Slide the 5x24 finderscope into its bracket on the main telescope tube. Tighten the small screws on the bracket to hold it in place. The finderscope helps in locating objects before viewing them through the main telescope.

Figure 4.2: Telescope structure highlighting components like the finderscope and eyepieces.
- Insert an Eyepiece:
Choose either the K20mm (lower magnification, wider field of view) or K9mm (higher magnification, narrower field of view) eyepiece. Insert it into the diagonal mirror or directly into the focuser tube and secure it with the thumbscrew.

Figure 4.3: Magnification comparison between the K20mm and K9mm eyepieces.
- Attach the Smartphone Adapter (Optional):
If you wish to use your smartphone for photography, attach the smartphone adapter to the eyepiece. Secure your phone in the adapter, ensuring the phone's camera lens is aligned with the eyepiece. This allows for capturing images and videos through the telescope.

Figure 4.4: The professional tripod and smartphone adapter for enhanced viewing and photography.
5. Operating Instructions
5.1 Aligning the Finderscope
Before observing, the finderscope must be aligned with the main telescope.
- Point the main telescope at a distant, stationary object (e.g., a tree top or a street light) during daylight hours.
- Center the object in the main telescope's eyepiece.
- Look through the finderscope and adjust its alignment screws until the same object is centered in the finderscope's crosshairs.
- Once aligned, the finderscope will help you quickly locate objects in the night sky.
5.2 Observing with the Telescope
- Start with the lower magnification K20mm eyepiece for a wider field of view, making it easier to locate objects.
- Use the finderscope to point the telescope towards your desired object.
- Look through the main telescope's eyepiece. Use the focus knob to bring the image into sharp focus.
- Once the object is centered and focused, you can switch to the higher magnification K9mm eyepiece for a more detailed view. Refocus as needed.
- The telescope is ideal for observing the Moon, bright planets, and terrestrial objects.

Figure 5.1: Example view of the Moon through the telescope.

Figure 5.2: Example view of a bird through the telescope for terrestrial observation.

Figure 5.3: Example view of flowers through the telescope for detailed observation.
5.3 Using the Smartphone Adapter
The smartphone adapter allows you to capture photos and videos through the telescope.
- Attach the adapter to the eyepiece you wish to use.
- Mount your smartphone securely in the adapter, ensuring the phone's primary camera lens is centered over the eyepiece.
- Open your phone's camera app. You will see the telescope's view on your phone screen.
- Adjust the telescope's focus knob for a sharp image on your phone. You may also use your phone's digital zoom for further magnification, though this can reduce image quality.
- For best results, use your phone's timer or a remote shutter to minimize vibrations when taking photos.
6. Maintenance and Care
- Cleaning Lenses: Use a soft, lint-free cloth specifically designed for optical lenses. Breathe lightly on the lens surface to fog it, then gently wipe in a circular motion from the center outwards. Avoid touching the lens surfaces with your fingers.
- Cleaning Body: Wipe the telescope body and tripod with a soft, damp cloth. Do not use abrasive cleaners or solvents.
- Storage: When not in use, store the telescope in a dry, dust-free environment. Use the provided accessory bag for eyepieces and smaller components. Keep dust caps on the objective lens and eyepiece openings.
- Transportation: When transporting the telescope, disassemble it and pack components securely in their original packaging or a padded carrying case to prevent damage.
7. Troubleshooting
| Problem | Possible Cause | Solution |
|---|---|---|
| Image is blurry or out of focus. | Incorrect focus setting. | Adjust the focus knob slowly until the image is sharp. |
| Cannot find objects. | Finderscope is not aligned. | Align the finderscope with the main telescope during daylight hours (refer to Section 5.1). |
| Image is dim or dark. | Using too high magnification for conditions; light pollution. | Switch to a lower magnification eyepiece (e.g., K20mm). Observe from a darker location away from city lights. |
| Image appears upside down or reversed. | This is normal for astronomical telescopes. | For terrestrial viewing, a correct-image diagonal (not included) can be used, but for astronomy, this orientation is standard and does not affect observation. |
| Telescope shakes excessively. | Tripod not stable; windy conditions. | Ensure tripod legs are fully extended and locked on a firm surface. Observe during calm conditions. Lowering the tripod height can increase stability. |
8. Specifications
| Feature | Detail |
|---|---|
| Brand | HOROX (Manufactured by EACONN) |
| Model Number | HX70x400 |
| Optical Design | Refractor |
| Objective Lens Diameter | 70 mm |
| Focal Length | 400 mm |
| Eyepieces Included | K20mm (20x), K9mm (44x) - Kellner type |
| Finderscope | 5x24 Standard with Reticle |
| Lens Coating | Fully Multi-Coated |
| Exit Pupil | 1.3 mm |
| Mount Type | Azimuthal Mount |
| Focus Type | Manual Focus |
| Tripod Material | Aluminum |
| Tripod Adjustable Height | 50.8 cm to 137.2 cm (20 to 54 inches) |
| Compatible Devices | Smartphone (with included adapter) |
| Product Dimensions (L x W x H) | 50.8 x 50.8 x 50.8 cm (assembled) |
| Product Weight | 2.61 kg |
| Power Source | Battery powered (for specific accessories, not main telescope) |
9. Warranty and Support
HOROX offers a free American lifetime warranty for this product upon registration. This warranty covers manufacturing defects and ensures long-term support for your telescope.
For product registration, technical assistance, or customer service, please visit the official HOROX website or contact our technical experts with over 20 years of industry experience.
Contact Information: Please refer to the contact details provided on the HOROX product packaging or official website for the most up-to-date support information.