Eyes.sys PS-327
Portable Scanner User Manual
Model: PS-327 | Brand: Eyes.sys
Product Overview
The Eyes.sys Portable Scanner (Model PS-327) is a compact and lightweight handheld device designed for scanning documents, photos, receipts, and pages. It supports scanning in JPG or PDF formats with adjustable resolutions, offering convenience for on-the-go digitization.

Image: The Eyes.sys Portable Scanner in action, demonstrating its use for scanning a magazine page. Its sleek design allows for easy handling.

Image: The scanner's compact size emphasizes its portability, making it suitable for use in various locations without requiring significant space.
Package Contents
Before using your scanner, please ensure all items listed below are present in the package:
- 1x Handheld Scanner
- 1x USB Cable
- 1x Cleaning Cloth
- 1x Carrying Bag
- 1x Software Disc
- 1x Calibration Card
- 1x Instructions Manual (this document)
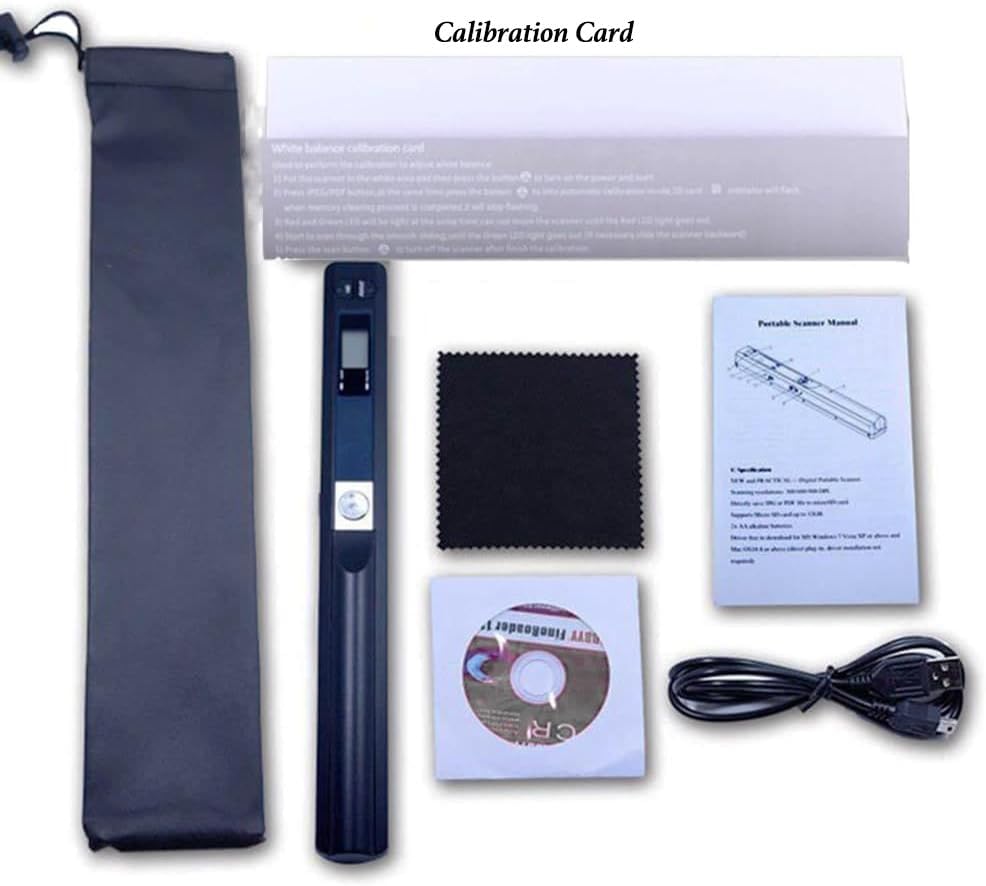
Image: A complete view of the package contents, including the scanner, USB cable, cleaning cloth, carrying bag, software disc, and calibration card.
Setup Guide
Follow these steps to prepare your scanner for first use:
1. Powering the Device
The scanner requires 2 AA batteries (not included). Open the battery compartment and insert the batteries, ensuring correct polarity.
2. Inserting and Formatting the Micro SD Card
A Micro SD card (up to 32GB, not included) is essential for storing scanned files. It must be formatted by the scanner before initial use.
- Insert the Micro SD card into the slot.
- Switch on the scanner by pressing and holding the Power/Scan button for 2 seconds.
- Press the "Format" button located next to the SD card slot. The LCD will display "F".
- Press the "Power/Scan" button again. The SD card icon on the LCD display will flash until formatting is complete.
3. Software Installation (Optional)
A software disc is included for editing documents. When installing, choose not to update the software to avoid activation code prompts.

Image: The included software disc, which can be used for editing scanned documents and converting formats.
4. Initial Calibration
Before scanning, use the included Calibration Card to adjust the white balance for optimal color accuracy.
Video: A demonstration of the initial setup process, including battery insertion, memory card installation, powering on, and basic operation of the scanner.
Operating Instructions
1. Power On/Off
Press and hold the "Power/Scan" button for 2 seconds to turn the scanner on or off.
2. Adjusting Scan Parameters
Use the "JPG/PDF" button to switch between JPEG and PDF output formats. Use the "DPI" button to select scanning resolution (300dpi, 600dpi, 900dpi).

Image: The scanner's flexibility in handling various document types, from quick guides to detailed articles, is demonstrated.
3. Performing a Scan
To scan, place the scanner over the document or image you wish to digitize. Press the "Power/Scan" button once to begin scanning. Move the scanner slowly and steadily across the surface. Press the button again to stop scanning.

Image: Illustration of the easy operation, showing the correct scanning movement for optimal results.

Image: An example of high-quality scanning, demonstrating the clear and accurate reproduction of images and text.
4. Transferring Files to Computer
Connect the scanner to your computer using the provided USB-C cable. The scanner will appear as a removable storage device, allowing you to access and transfer your scanned files.

Image: The scanner connected to a laptop via its upgraded Type-C port, illustrating convenient storage and sharing of scanned documents.
Maintenance
To ensure the longevity and optimal performance of your scanner, follow these maintenance guidelines:
- Use the provided cleaning cloth to gently wipe the scanning surface and exterior of the device.
- Avoid using abrasive cleaners or solvents, as these can damage the scanner's surface.
- Store the scanner in its carrying bag when not in use to protect it from dust and scratches.
- Remove batteries if the scanner will not be used for an extended period to prevent leakage.
Troubleshooting
If you encounter issues with your scanner, refer to the following common problems and solutions:
- SD Card Not Reading: If the scanner cannot read your SD card, ensure it is properly inserted. If the issue persists, format the SD card using the steps outlined in the "Setup Guide" section.
- Scanning Too Fast (Red Indicator): If the "red" indicator light illuminates during scanning, it means you are moving the scanner too quickly. Slow down your scanning movement for better results.
- Scanning Interrupted (Green Indicator Off): If the "green" indicator light turns off during scanning, the scan has been interrupted. Please restart your scanning process.
- Poor Scan Quality:
- Ensure the scanning surface is clean.
- Move the scanner slowly and as stably as possible.
- For higher resolution scans or complex content, a slower sliding speed is required.
- Perform white balance calibration using the Calibration Card.
- Software Activation Prompt: If the included software asks for an activation code, it is likely due to an attempted update. Reinstall the software and ensure you select the option to not update during installation.
Specifications
| Feature | Detail |
|---|---|
| Scanning Width | 225mm (ref. A4 sheet: 213mm) |
| Storage Format | JPEG or PDF |
| Scanning Resolution | 300dpi, 600dpi, 900dpi (low, mid, high) |
| Scanning Speed | 4s/page (300dpi); 6s/page (600dpi); 9s/page (900dpi) |
| Memory | Micro SD/TF (Not Included, up to 32GB) |
| USB Interface | USB-C |
| Power Supply | 2* AA Battery (Not Included) |
| Size | 10.04” x 1.18” x 1.30” (25.5cm x 3cm x 3.3cm) |
| Net Weight (N.W.) | approx. 0.33lbs (150g) |
Ask a question about this manual
Ask about setup, troubleshooting, compatibility, parts, safety, or missing instructions. Manuals+ will review the question and use this page’s manual context to help answer it.