Introduction
This manual provides detailed instructions for the installation, operation, and maintenance of your CELLSTAR CS-53FH Drive Recorder. Please read this manual thoroughly before using the product to ensure correct usage and optimal performance. The CS-53FH is a high-definition front-facing drive recorder capable of FullHD recording, featuring HDR, STARVIS technology for clear images, a 1.44-inch LCD, and GPS functionality. It also supports optional rear camera expansion and parking surveillance mode with additional accessories.

Image: Front view of the CELLSTAR CS-53FH Drive Recorder, showing the 1.44-inch display and control buttons.
Setup
1. Package Contents
Before proceeding with installation, ensure all components are present:
- CELLSTAR CS-53FH Drive Recorder unit
- Direct wiring cord
- Mounting bracket (adhesive type)
- microSD card (64GB)
- User Manual
- Warranty Card
- Optional accessories (e.g., rear camera GDO-28, parking mode cables GDO-10/GDO-41/GDO-24, cigar cord GDO-43) are sold separately.
2. microSD Card Insertion
- Locate the microSD card slot on the drive recorder.
- Insert the provided 64GB microSD card firmly until it clicks into place. Ensure the card is oriented correctly.
- To remove, gently push the card until it springs out.
3. Mounting the Drive Recorder
- Choose a mounting location on your windshield that does not obstruct your view of the road or interfere with airbags. The passenger side is often recommended.
- Clean the chosen area on the windshield thoroughly to ensure proper adhesion.
- Attach the adhesive mounting bracket to the drive recorder.
- Remove the protective film from the adhesive pad on the bracket.
- Firmly press the drive recorder with the attached bracket onto the cleaned windshield area for at least 30 seconds.
- Allow sufficient time for the adhesive to bond before driving (typically 24 hours).

Image: Front view of the CELLSTAR CS-53FH Drive Recorder, highlighting the camera lens and ventilation.
4. Power Connection
The CS-53FH includes a direct wiring cord. An optional cigar lighter power cord (GDO-43) is available if preferred.
- Connect the direct wiring cord to the power input port on the drive recorder.
- Route the cable neatly along the windshield and dashboard edges to avoid obstruction.
- Connect the other end of the direct wiring cord to your vehicle's fuse box or a suitable power source, following your vehicle's manual or consulting a professional for proper installation.
- If using the optional cigar lighter power cord, plug it into your vehicle's 12V accessory socket.
5. Optional Rear Camera Installation (GDO-28)
If you have purchased the optional GDO-28 rear camera:
- Mount the rear camera on the rear windshield, ensuring a clear view and no obstruction.
- Connect the rear camera cable to the designated input port on the main CS-53FH unit.
- Route the cable carefully to avoid interference with vehicle components.
Operation
1. Powering On/Off
- The drive recorder will automatically power on and begin recording when your vehicle's ignition is turned on.
- It will automatically power off when the ignition is turned off.
- To manually power on/off, press and hold the power button (if available) or refer to the specific button layout.
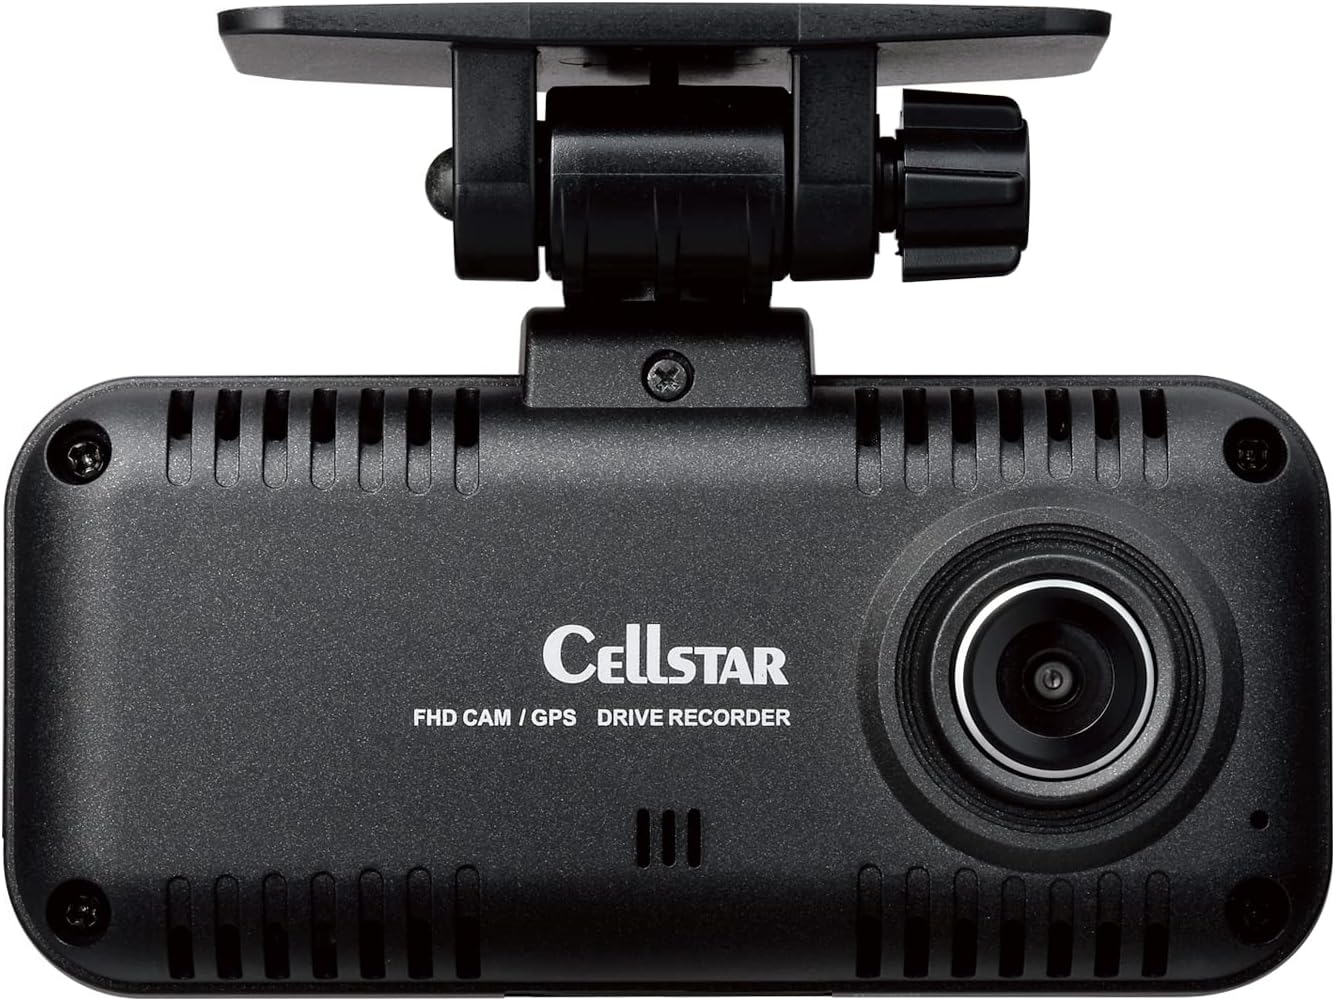
Image: Rear view of the CELLSTAR CS-53FH Drive Recorder, showing the screen and control buttons for menu navigation and mode selection.
2. Recording Modes
- Continuous Recording: The device records continuously when powered on. Older files are overwritten when the microSD card is full.
- Event Recording: In the event of a sudden impact or acceleration (detected by the G-sensor), the device automatically saves the current recording segment as an event file, protecting it from being overwritten.
- Manual Recording: Press the designated button (e.g., "クイック" or Quick button) to manually save a recording segment.
- Parking Surveillance Mode: With optional accessories (GDO-10, GDO-41, or GDO-24), the device can monitor your vehicle while parked. It can detect impacts or motion and record accordingly. This mode can be activated/deactivated with a one-touch operation.
3. Menu Navigation and Settings
- Use the "メニュー" (Menu) button to access the settings menu.
- Navigate through options using the up/down or arrow buttons.
- Press "ENT" (Enter) to select an option or confirm a setting.
- Common settings include:
- Video Resolution (FullHD 1080p)
- G-sensor Sensitivity
- Parking Mode Settings
- Date and Time
- GPS Information Display
- MicroSD Card Formatting
4. Viewing Recorded Footage
- On-Device Playback: Access the playback menu on the 1.44-inch LCD screen to review recorded videos.
- PC Playback: Remove the microSD card and insert it into a computer using a card reader. Use a compatible video player to view the files. CELLSTAR may provide dedicated software for advanced playback and GPS data viewing.
- Smartphone App (if applicable): While this model does not feature Wi-Fi, other CELLSTAR models do. For this specific model, direct connection to a smartphone for viewing is not supported.
Maintenance
1. microSD Card Formatting
Regular formatting of the microSD card is crucial for maintaining optimal recording performance and preventing data corruption. It is recommended to format the card at least once a month.
- Access the system settings menu on the drive recorder.
- Navigate to the "Format SD Card" or similar option.
- Confirm the formatting process. Warning: Formatting will erase all data on the card. Back up any important files before proceeding.
2. Cleaning the Lens and Unit
- Gently wipe the camera lens with a soft, lint-free cloth to remove dust or smudges. Avoid abrasive materials that could scratch the lens.
- Clean the main unit's exterior with a dry or slightly damp soft cloth. Do not use chemical cleaners or solvents.
3. Firmware Updates
Check the CELLSTAR official website periodically for firmware updates. Updates can improve performance, add features, or fix bugs. Follow the instructions provided with the firmware update carefully.
Troubleshooting
| Problem | Possible Cause | Solution |
|---|---|---|
| Device does not power on. |
|
|
| Recording stops or files are corrupted. |
|
|
| Poor video quality. |
|
|
| GPS not acquiring signal. |
|
|
Specifications
| Feature | Detail |
|---|---|
| Model Number | CS-53FH |
| Brand | CELLSTAR |
| Camera Type | Front (Optional rear camera GDO-28 available) |
| Video Resolution | FullHD (1080p) |
| Image Sensor | 2 Million Pixels, STARVIS compatible |
| HDR Support | Yes |
| Display | 1.44-inch LCD |
| Viewing Angle | 108 degrees (actual view angle) |
| GPS | Built-in GPS (GPS notification function with free data updates) |
| Parking Surveillance | Yes (Requires optional accessories GDO-10, GDO-41, or GDO-24) |
| MicroSD Card | 64GB included |
| Mounting Type | Adhesive type |
| Control Method | Touch |
| Dimensions (D x W x H) | 2.8 x 9.6 x 6.9 cm |
| Weight | 120 grams |
| Origin | Made in Japan |
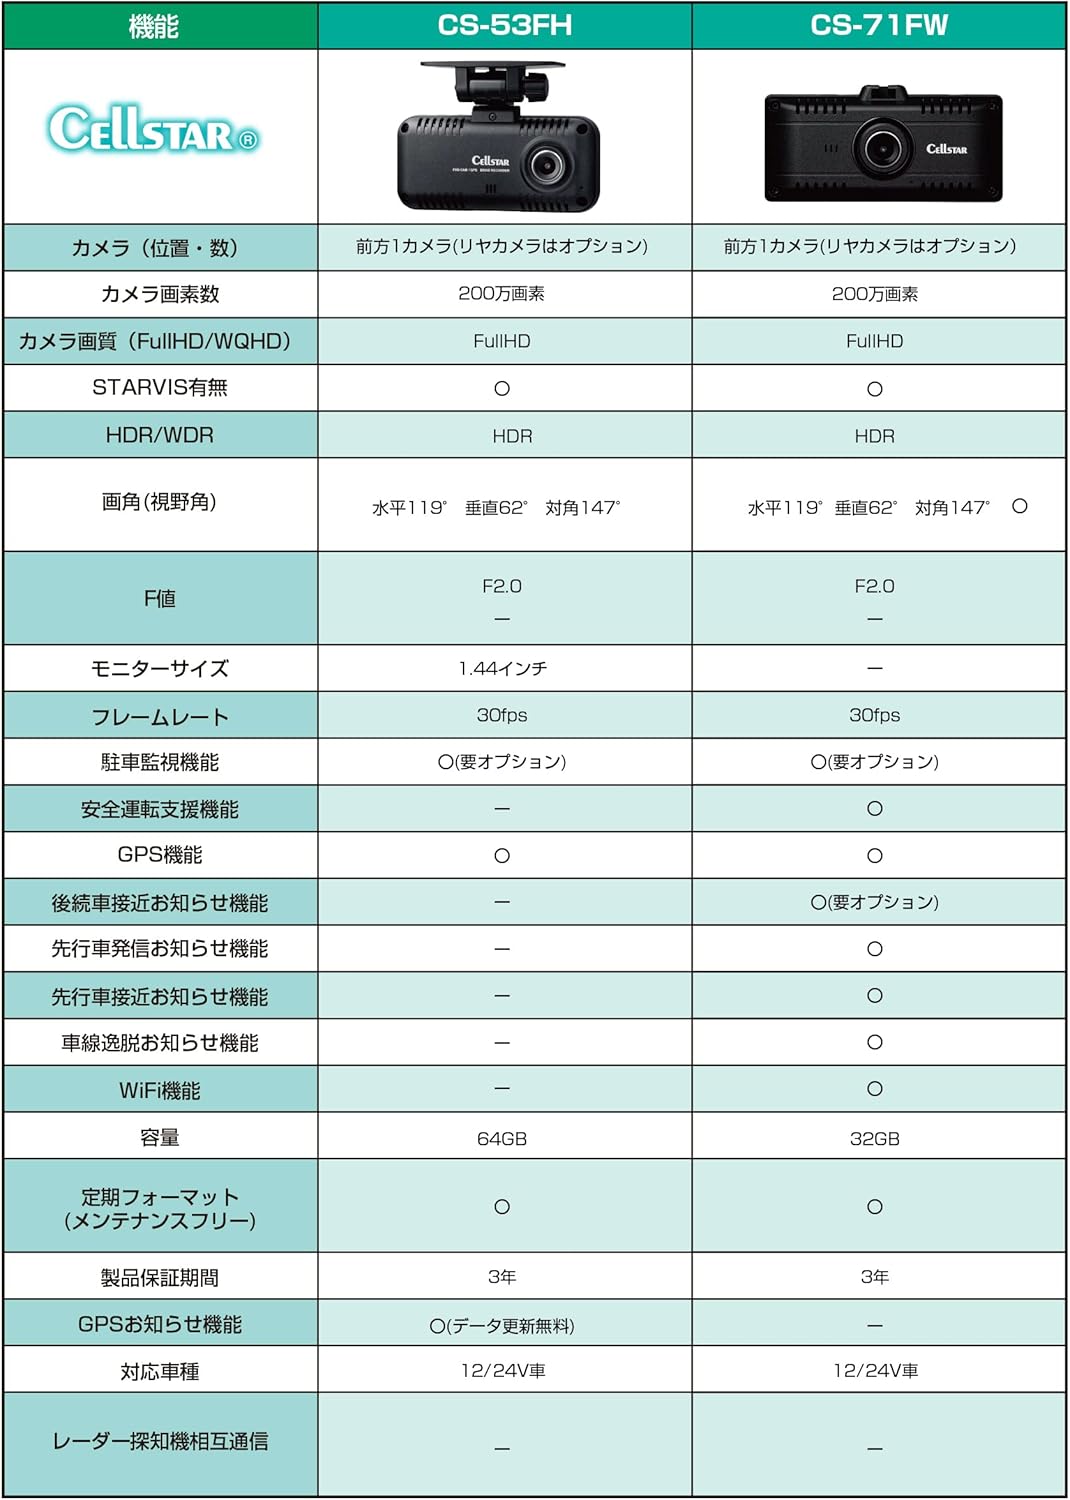
Image: A comparison table showing features of the CS-53FH and CS-71FW models, including camera type, resolution, display size, and GPS functionality.
Warranty & Support
Warranty Information
The CELLSTAR CS-53FH Drive Recorder comes with a 3-year manufacturer's warranty from the date of purchase. This warranty covers defects in materials and workmanship under normal use. Please retain your proof of purchase (receipt or invoice) and the warranty card for any warranty claims.
The warranty does not cover damages caused by:
- Improper installation or operation
- Accidents, abuse, or misuse
- Unauthorized repairs or modifications
- Natural disasters or external causes
- Normal wear and tear
Customer Support
For technical assistance, troubleshooting, or warranty inquiries, please contact CELLSTAR customer support. Refer to the contact information provided on the warranty card or visit the official CELLSTAR website for the most up-to-date support details.
Official CELLSTAR Website: www.cellstar.co.jp (Please note: This link is an example and may need to be verified for the specific region.)